Keyframe animation is an essential tool for creating professional-looking animations and motion graphics in After Effects. By setting keyframes, you can control the movement and appearance of your objects over time, creating smooth and seamless animations that will engage your audience.
With the ability to control properties like position, scale, and rotation, keyframes give you a high level of control over your animations and allow you to create highly detailed and complex animations with ease. This tutorial will help you get started with adding keyframes in After Effects.
2 Steps to Add a Keyframe in After Effects
Basically, keyframes are holding a starting and ending movement value of a shape or object to animate the shape or object. You can easily add keyframes in After Effects.
Here are two steps to add Keyframes in Adobe After Effects.
Step 1:
First, Open Adobe After Effects. Then you should see a home window panel where you can create your blank project. Click Create New, or you can go to File > New for the short key win [Ctrl + N] or Mac [Cmd + N].
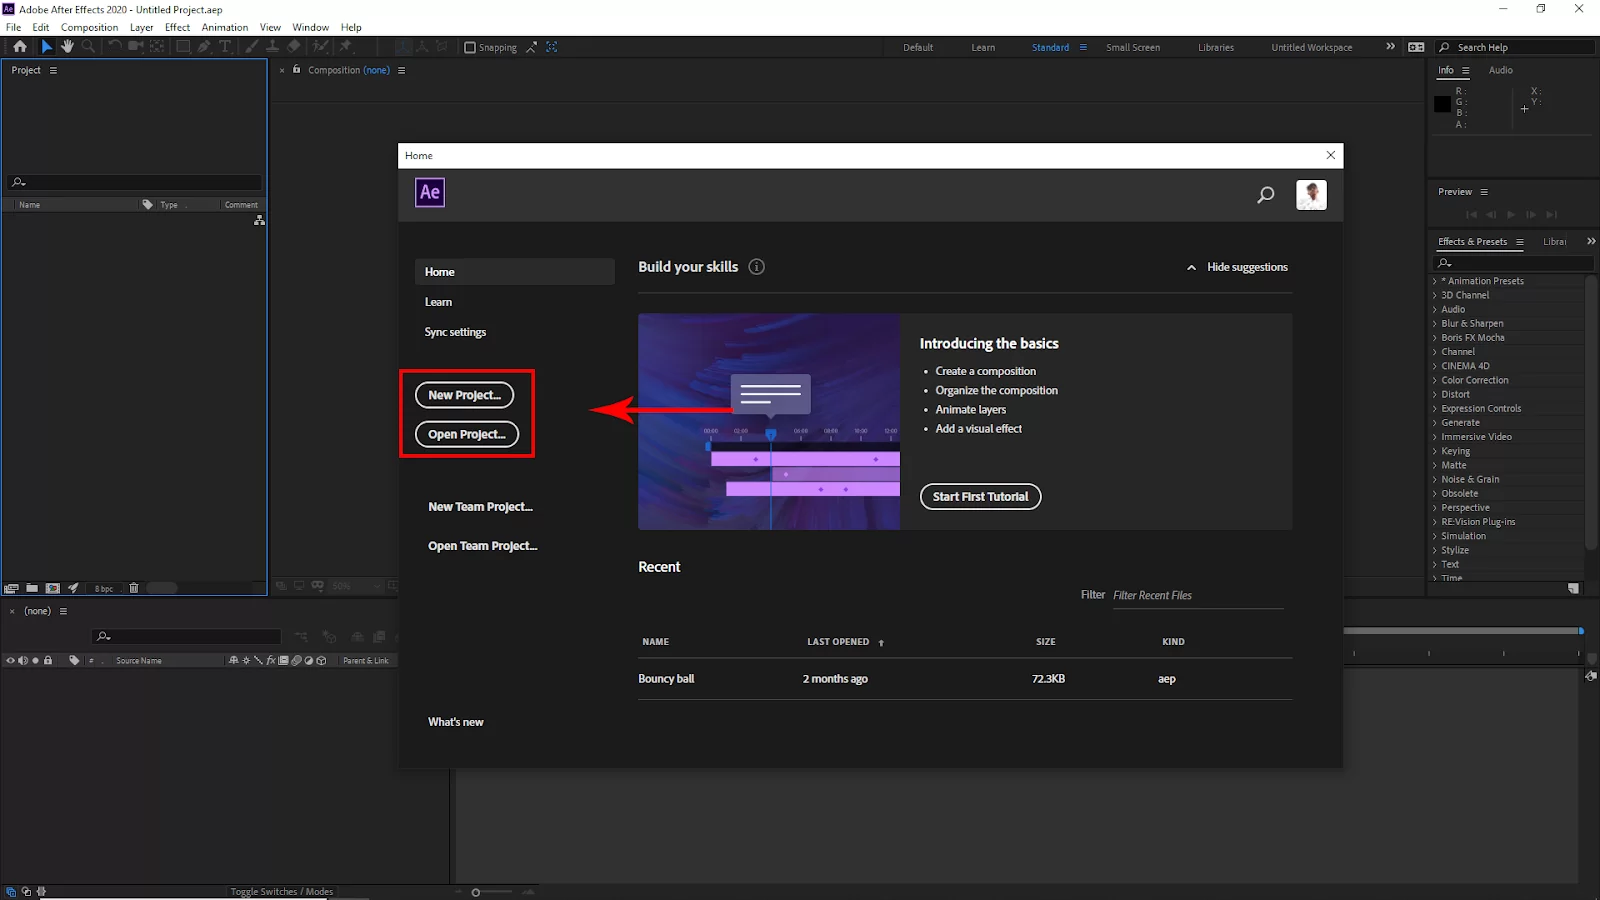
Or, if you have an existing file, you can open it from here just Click Open Project, select your project from the file, and click open.

Another way to open an existing file, go to File > open and select your File. Short Key windows [Ctrl + O] and Mac [Cmd + O].
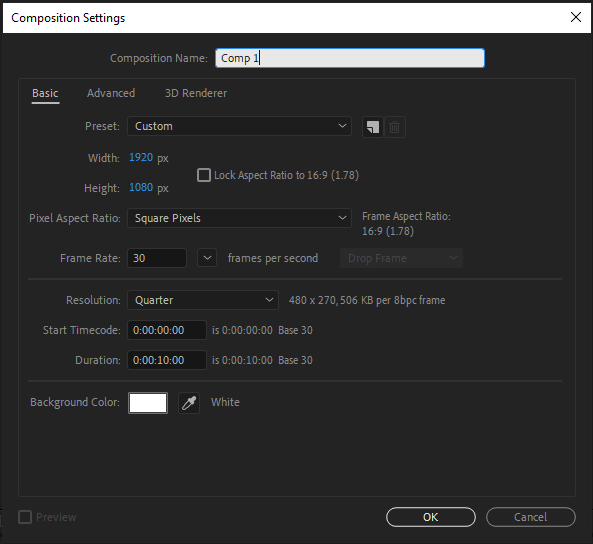
After clicking on Creating a new project, you should see the Composition Settings panel. Here you will set your project Width and Height and select your project background color. You can also set the Frame Rate. Then Click Ok.
Step 2:

You will find the Shape or Objects layer on the left side bottom of your workspace area.
Now every shape or any object layer has a dropdown arrow. Click the dropdown arrow, and you will find all the motion graphics options and all the effects options. Stopwatches icons to add a keyframe.

In this guide, I will use a Circle shape to animate from the left side to the right side. So I will use the Position under the Transform option.

To add keyframes click the Stopwatch icon, and you will see a blue diamond icon in your project timeline. Your first keyframe was created, the stopwatch will turn blue.

Now move the Current time indicator or playhead and select your shape or object and move it. And it will automatically create another keyframe. Keyframes will automatically create in your timeline whenever you move your shape or object. Make sure to move the Current Time Indicator or Playhead along with your shape or object movement. You can use the same method to add keyframes in other effects or options in the layer of your shapes or Objects.
You can also check out our detailed article on how to render in After Effects.
What are Keyframes
Keyframes are used to set parameters for motion, effects, audio, and many other features, usually adjusting them over time. A Keyframe will usually mark the point in time when one specifies a value for a layer property, such as spatial position, opacity, or audio volume. A keyframe designates the precise moment in time when you do so. Values between keyframes are Interpolated.
To produce a change over time using keyframes, you normally need at least two keyframes: one for the initial state and one for the final, new state.
When a property’s stopwatch is turned on, whenever you modify the property’s value, After Effects instantly creates or modifies a keyframe for the property at the current time. A property has no keyframes if the stopwatch is not running for the keyframes. If you modify a layer property’s value when the stopwatch is not running, the modified value is retained for the entire time the layer is active.
We aalso recommend our informative article on how to move anchor points in After Effects.
How To Select Keyframes
Unselected keyframes in layer bar mode are gray, while the selected ones are usually blue. There is also the option to apply different colors to the keyframes for easy identification.
A keyframe’s appearance in Graph Editor mode depends on whether it is selected, deselected, or partially selected. The keyframes that are chosen are solid yellow. Keyframes that are not selected keep the color of the relevant graph. Keyframes that are only partially selected are shown as hollow yellow boxes.
Step 1
Start by selecting a keyframe and selecting the keyframe icon.
Step 2
Next, shift-click the keyframes or drag a marquee around them to select several keyframes. Shift-clicking a keyframe deselects it if it is selected, and Shift-dragging to build a marquee around keyframes that are selected also deselects them. So whatever way you choose the deselect the keyframe is up to you.
Step 3
You may also need to select multiple keyframes with the same color. To do this, select the keyframe with the identified color>Right-click>Select Keyframe Label Group or Edit > Select Keyframe Label Group.
Step 4
If you want to select all keyframes for a layer property, then click a segment between two keyframes using the Graph editor. Alternatively, you can select the layer property name in the layer outline.
Step 5
If you want to select all keyframes for a layer property with the same value, then right-click and choose select equal keyframes.
Step 6
Finally, to select all keyframes that follow a chosen keyframe, then right-click a keyframe and select Select Previous Keyframes or Select Following Keyframes.
Check out our in-depth article on how to export video in After Effects.
Leave a Reply
You must be logged in to post a comment.