High-quality video content is important as the quality of a video forms the viewers’ first impression and opinion of your company or organization. High-quality content will contribute to your brand’s overall image, making you appear more professional and successful.
If you want to upload an Insta reel or TikTok video, or a video for your own youtube channel, then you will try to make your video in high quality. So we will learn how to improve the quality of video editing in a Capcut application.
How to get Good Quality on Capcut?
Import your video into Capcut. After editing. Click on 1080P in the top right.
After clicking, you will see your video’s resolution and frame rate. And your file size, right now it’s showing that it is 25MB.
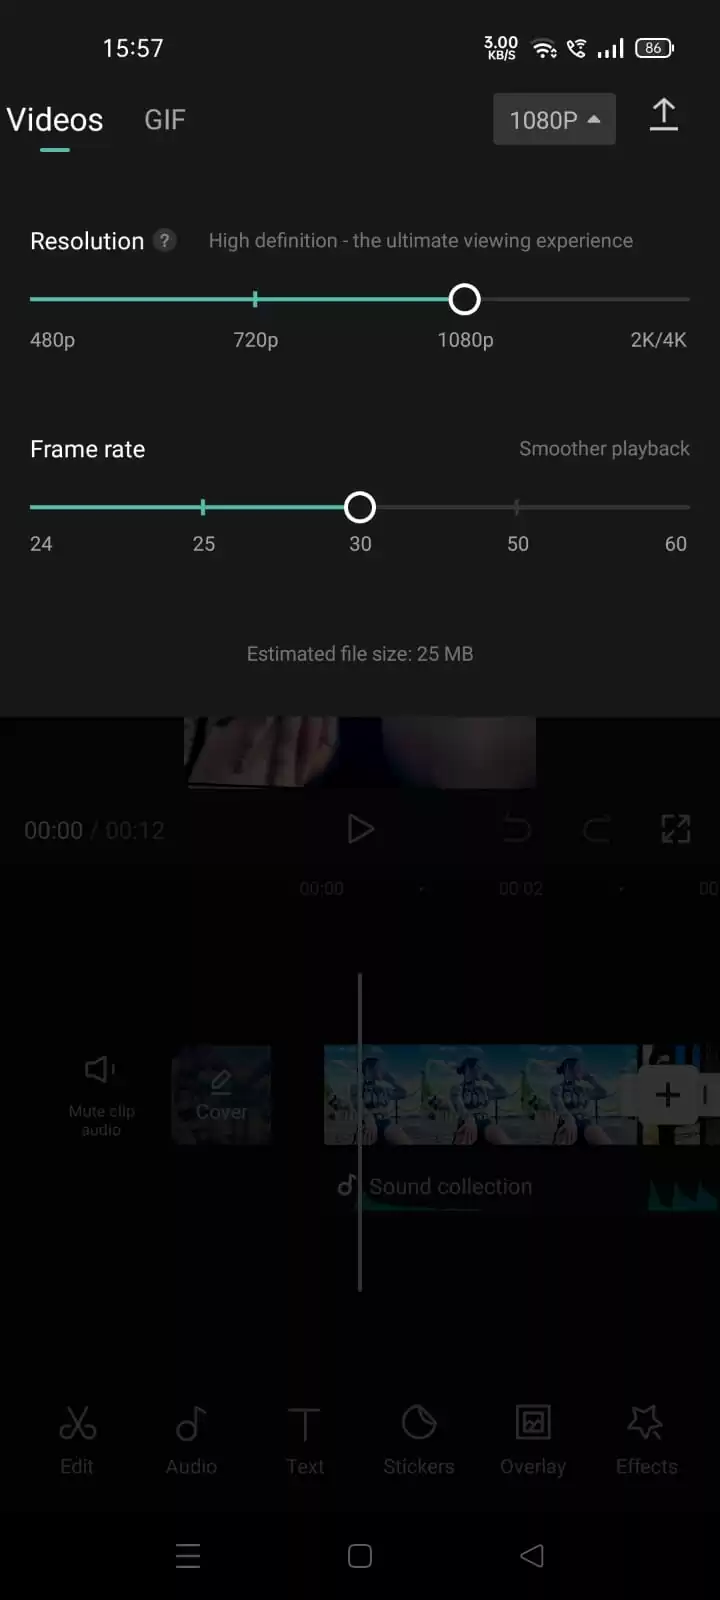
Increase the frame from 30 to 60. And resolution from 1080P to 2K/4K.
After increasing these two, your file size will become bigger, now it’s showing 47MB, around double, which means now the quality of a video has been increased and is ready to upload on various platforms.

Click on the above arrow to save your edits. Part of the edits that can be done is the dispersion effect. If you are not sure how to do it, then you are luck because I’ve written an article on how to use dispersion effect.

What is The Highest Quality Supported By CapCut
One of the best things about CapCut is the fact that it cannot provide its users with anything less in terms of functionality and optimization. So, why is CapCut so great? This is because CapCut is leveraging the strength of new technology, which can reproduce videos at an extremely high quality.
The CapCut program is tailored to enable video editing in 4K or 1080P format and CapCut ensures that those without prior experience may carry out the best editing for Instagram or any other platform.
Despite the great technological advancement all around us, there are still some videos that comes out really bad. You see, there are many factors that can contribute to the quality of a video being bad.
For example, when a shot is poorly focused, the quality of the video will be bad. Also, the device being used to shoot a video plays a role in how well the quality will turn out. If the device is bad, the video quality will also be bad. The scenarios described above often happen and they can be challenging to solve.
Attempting to solve these issues using conventional methods is time-consuming. Thankfully, there are many options available to traditional video editors to address these issues.
Because of these challenges, CapCut provides its users with an alternative that allows them to quickly edit films. To start, open your CapCut application, and then select the filters menu item. Once there, you will be greeted with a variety of options to edit the video. You only need to select the option you want, and CapCut will immediately carry out all necessary internal processes to apply the filter to your video.
Check out this information packed article on achieving Auto Velocity effect on CapCut.
How To Set CapCut Value To Sharpen an Image
The first step people take to enhance their photographs and videos on Instagram is to add filters. However, there is more to improving the quality of a video than just adding filters. The truth is that by carefully tweaking each variable, you will get a better, sharper, and more polished output. The many image parameters that you need to consider are as follows:
- Contrast and Exposition
When editing your video, contrast and exposition are important. If you want to give your image additional white highlights, then you should increase the difference between white and black tones by a factor of +25. Exposure is the amount of light that the camera used to record the video. This property’s value needs to be changed to +30.
- Brightness and Focus
Modifying the brightness of your photo or video is essential If you want to draw attention to the most significant areas of the image. For the best r results, set the value of the brightness at -12.
On the other hand, focus is the area that has to be highlighted and it is also the area that has the sharpest image. The value of focus should be set to +80.
- Bullet Point
A vignette is defined as the darkening of the image toward the edges. To make the quality of your video better, adjust the values of the bullet points to 50.
You will also like out our detailed article on adding the Thanos effect using CapCut.