Final Cut Pro is a professional video editing software used by film and video editors to create and edit movies, television shows, and other video content. It is popular among Mac users and is known for its powerful editing tools and intuitive interface. As a hobbyist video editor, I turn to Final Cut Pro for most of my video editing needs.
With Final Cut Pro, users can import and organize their media, make precise edits using the timeline, and add effects and transitions to enhance their videos. Additionally, Final Cut Pro allows users to create and customize titles, export projects in a variety of formats, and collaborate with other editors through its integration with Apple’s iCloud.
I’ll show you how I use Final Cut Pro to create stunning videos. From importing and organizing your media to adding effects and exporting your final product, we’ll cover everything you need to know to get started with this powerful software.
Final Cut Pro Tutorial for Beginners
There are so many ways to use Final Cut Pro to edit your videos but I’ll show you the quickest and easiest methods to get started.
Creating a Project and Import Media
First, I will show you how to create a new Project and Import Media with this method.
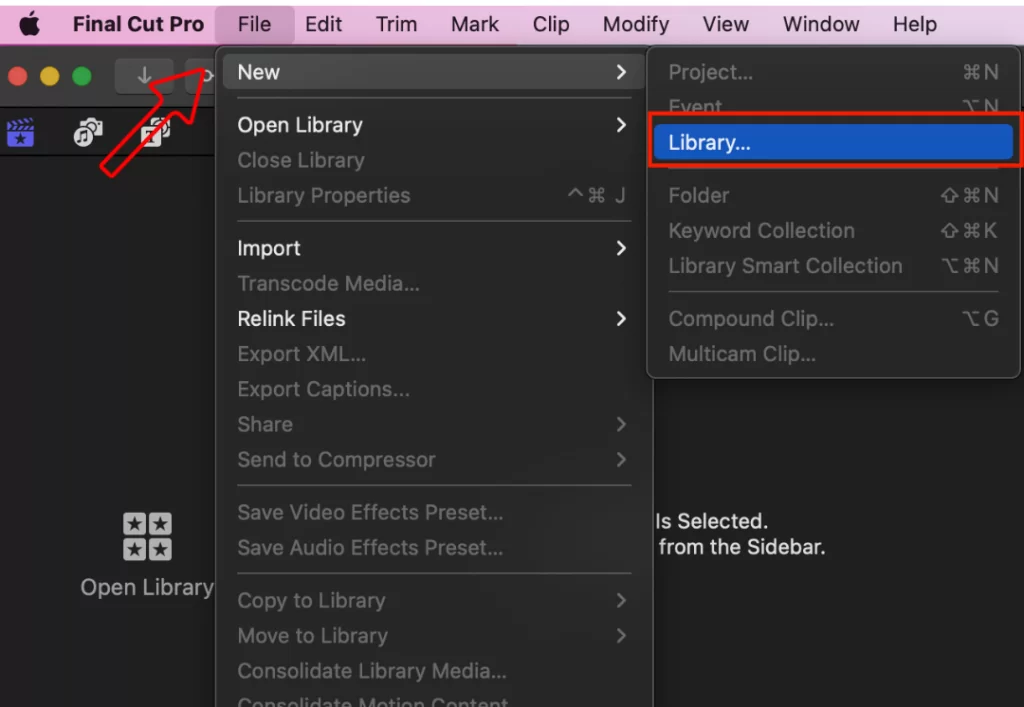
First, Open Final cut pro. Then navigate to the File menu, select New > Library Click to save after entering the library’s name.
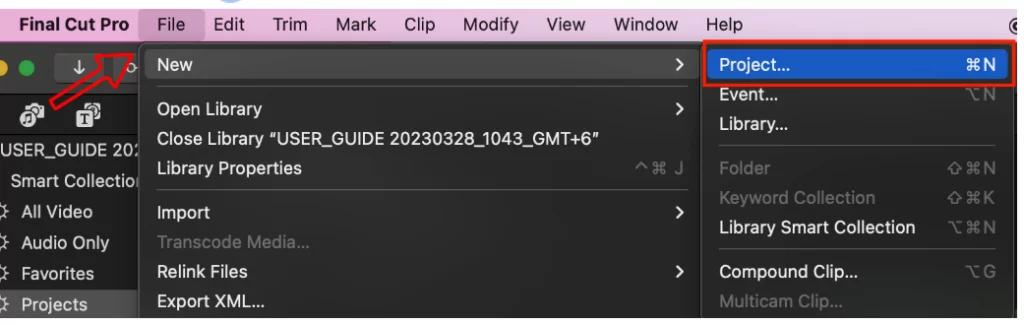
Next, navigate to the file menu again, select New > Project and click ok after entering the project’s name.
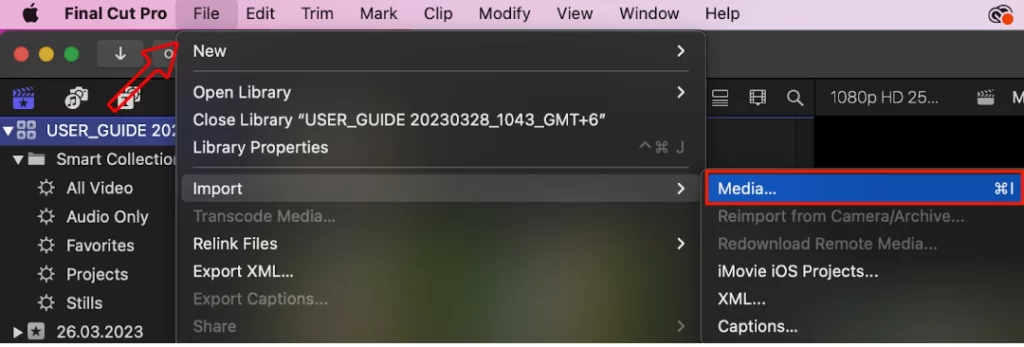
After this, go to File > Import and choose Media. Browse your file manager for the video file you want to work on.
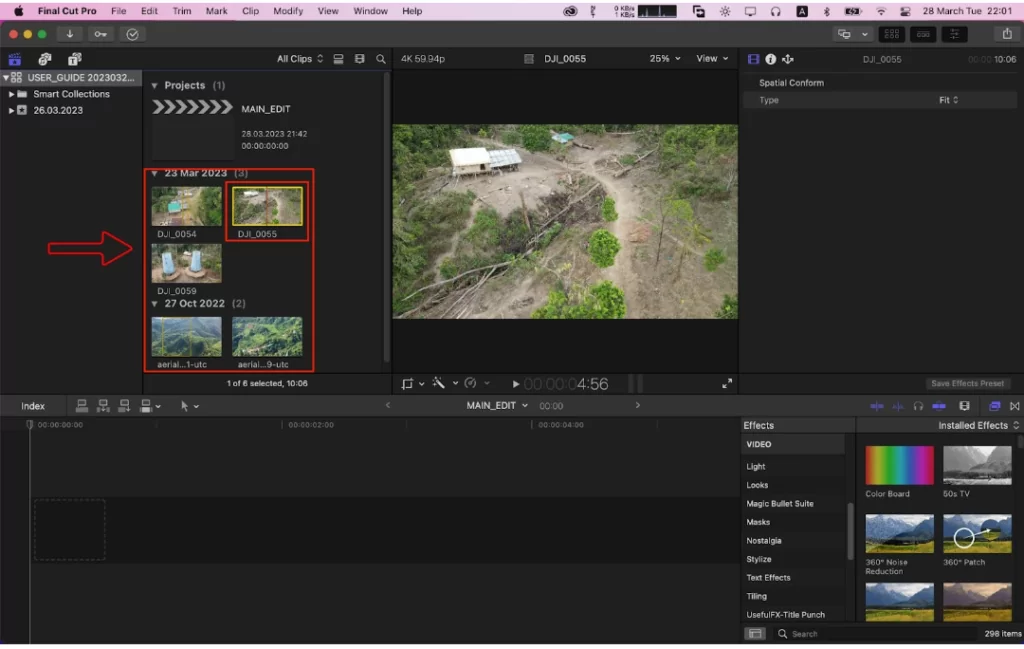
Once you have done the process, your video will appear in the Final cut pro Library. Now you can drag and drop to your timeline to edit it. You can also use this same method to import your music. Or you can use preinstalled final cut pro music.

Add Trimmed Clips to Timeline
To trim a video into a project panel, click and drag to the left side into your video. When you drag, you will see a yellow bar will appear with your dragging area. Drag until you get your desired cut in the video. After doing this proses for all the videos, click and drag them into the timeline.
Only the trimmed part of the video will add to the timeline. Now your trimmed clip is ready to edit into the timeline.

You can also check out our in-depth article on how to split a clip in Final Cut Pro.
Adding Text & Titles
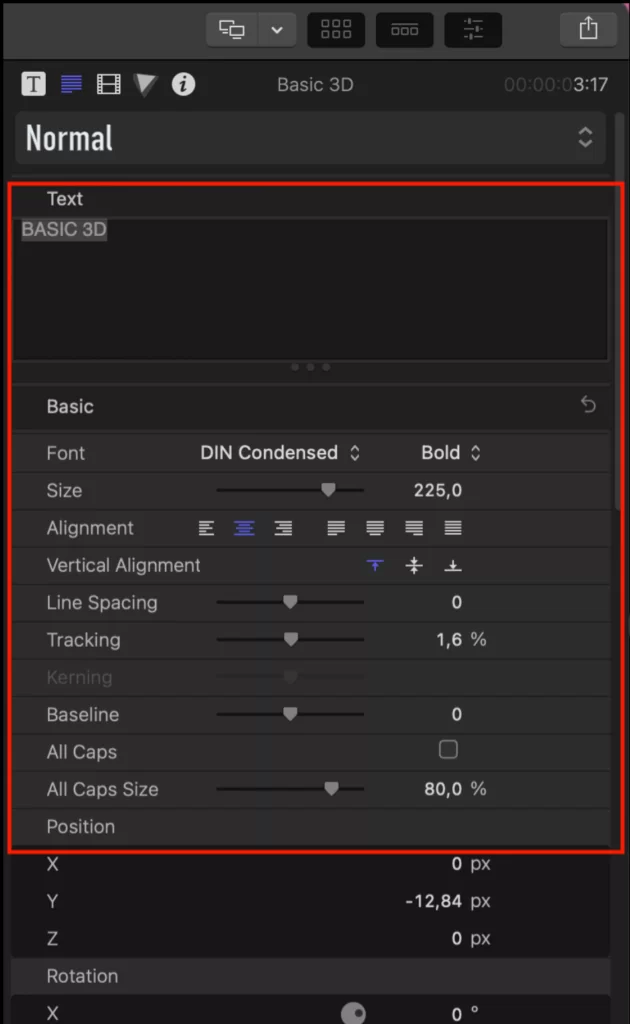
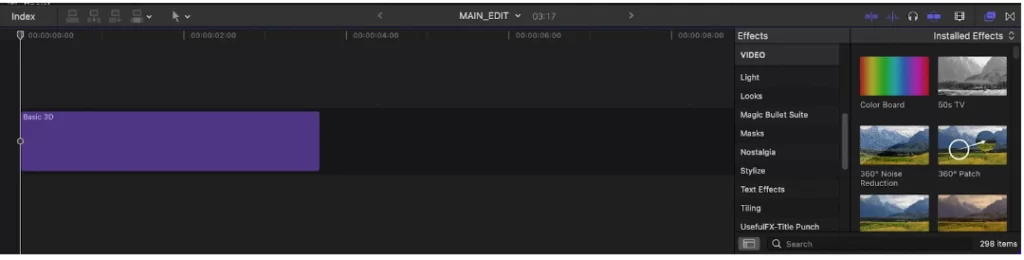
To add text, select Titles by clicking the T button in the top left corner of the workspace area of the Final cut Pro Screen. Drag a text type from the titles list onto the timeline below. Double-click the text for editing.

To change the text’s font color, click the Text teacher button in the top right corner of your workspace area.

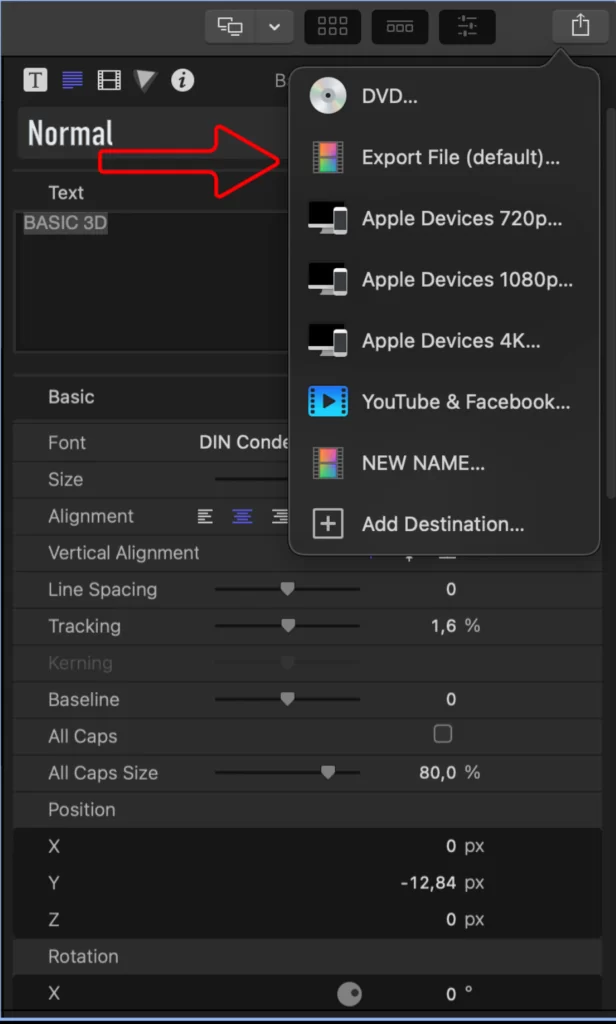
Make sure your video editing is accurate. Now you can press the export button and save the customized Final cut pro video files.
Method 4:
Add Title as Clip in Primary Storyline
Step 1:
If you want to add text as a title, there are two steps to do this in your final cut pro video.
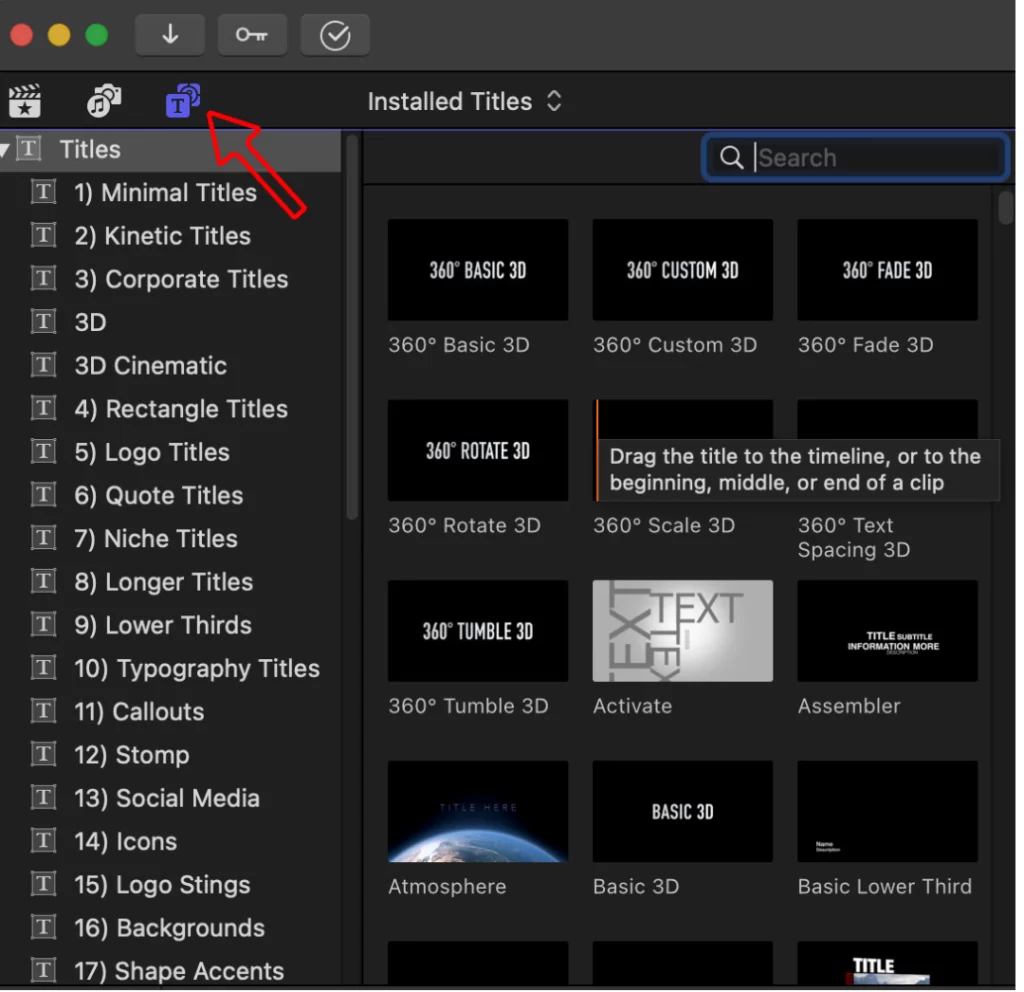
In the top left corner, click the Titles and Generators button. This will bring up the titles and generators sidebar with a list of titles and generator categories available.
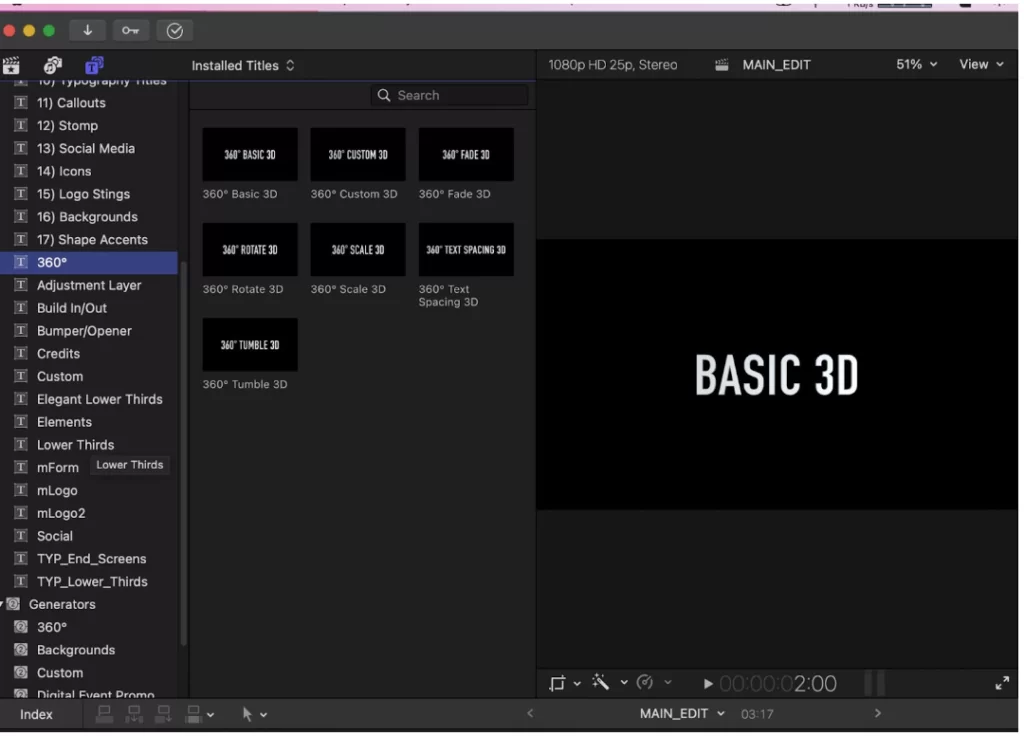
Select any of these categories by clicking it. You will see this will bring up options within that category. Now you can choose one of the following categories. To drag the title between two clips on the timeline, drag it. Use a title in place of an existing one from the title browser.
Step 2:
Choose a basic title clip in the timeline. Hover the mouse cursor over the chosen title clip. Double-click the title text and then enter the text for your title.
You can use this same method for as many text titles as you need. Enter your new text as needed.

Method 5:
Add Transitions
To add transitions, go to the left-side bottom corner, click the transition icon, and you will see the transition option will appear. There are many pre-install transitions in final cut pro.
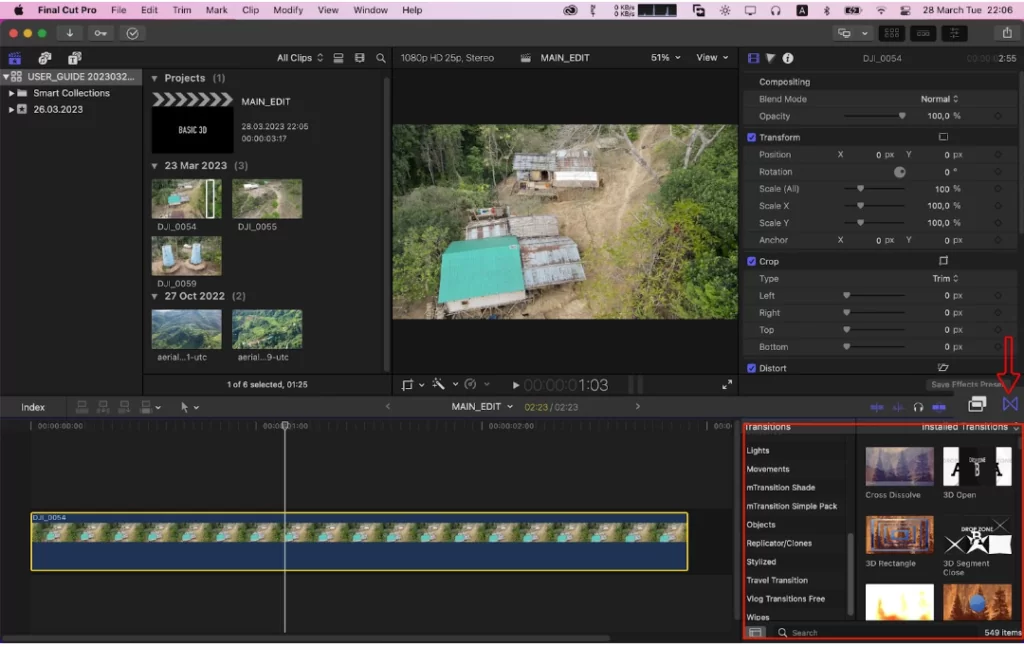
Click and drag any of this transition and place it between two clips, and your transition will be applied. And you will see the transitions area will turn yellow.
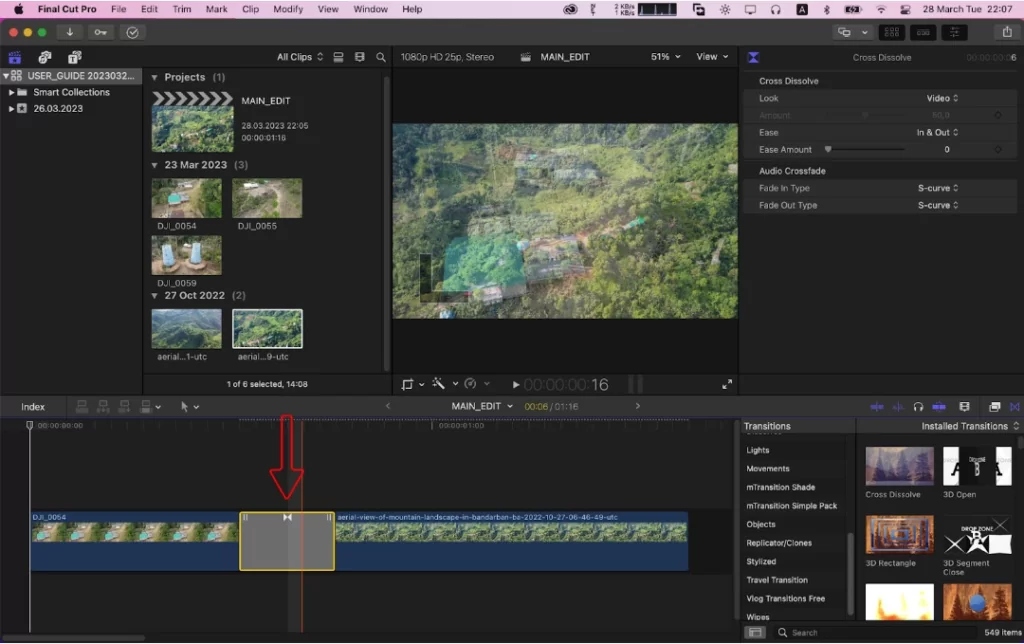
To increase the transition length, zoom in on the timeline, and the yellow box will expand. Now click and drag the rectangle transition box. If you increase the length of the yellow transition box, the transition will apply for a long time. If you decrease the length of the box, the transition will apply for a short time.
All About Color Grading in Final Cut Pro
Colors grading is one of the ways to edit a video using a final cut pro. If you are going to be color grading in final cut pro, many processes are involved, and below are some of them.
- Analyzing and Fixing
The Analyze and Fix pane is located in the Final Cut Pro X Import window. The ability to analyze video for color balance can be found here. You should ensure that your camera is correctly white-balanced.
White balancing shows how your camera perceives white things in various lighting situations and displays all other colors. A video that lacks proper white balancing may appear either coolly blue or overly orange.
- Color Balancing
After Importing your image, you can carry out the color balancing procedure clip-by-clip. Clicking on the enhancement button will display the Balance Color menu choice whether the clip is used on the Timeline or in the Browser. Depending on the desired alteration, the clip will immediately take on a new appearance. The quality of the basic lighting and the video will determine how well color balancing works.
You can disable the automatic balancing in the Inspector if you need clarification on the distinction. The Balance Color application will be listed in the Effects window, where it can be disabled or the Method changed. Playing around with these parameters can demonstrate how the image comes out.
- Color Matching
Match Color is yet another choice under the improvements menu. This function will attempt to mimic the appearance of one clip in another. Choose Match Color after selecting the clip you wish to edit, and then click on the clip with the desired appearance.
You can continue to use these options as quick cuts before making more precise modifications once you are more comfortable with manual grading. It’s important to know that effects can be placed on one another when color grading in Final Cut Pro X. One tool or setting will only sometimes solve an issue or produce the desired result. However, there are times when a combination of effects may be required. All of the layers you add to a clip may be toggled on and off inside the Inspector window, just like other visual effects in Final Cut Pro X.
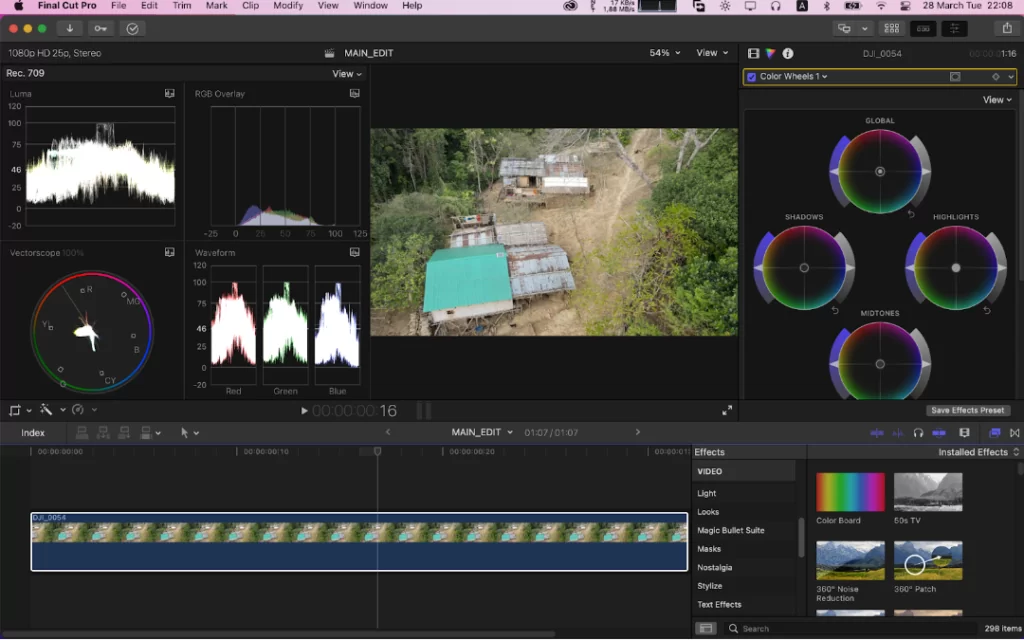
- Video Scopes
The View menu has a selection for showing video scopes. You can use waveform, Vectorscope, and Histogram monitors to visualize your data.
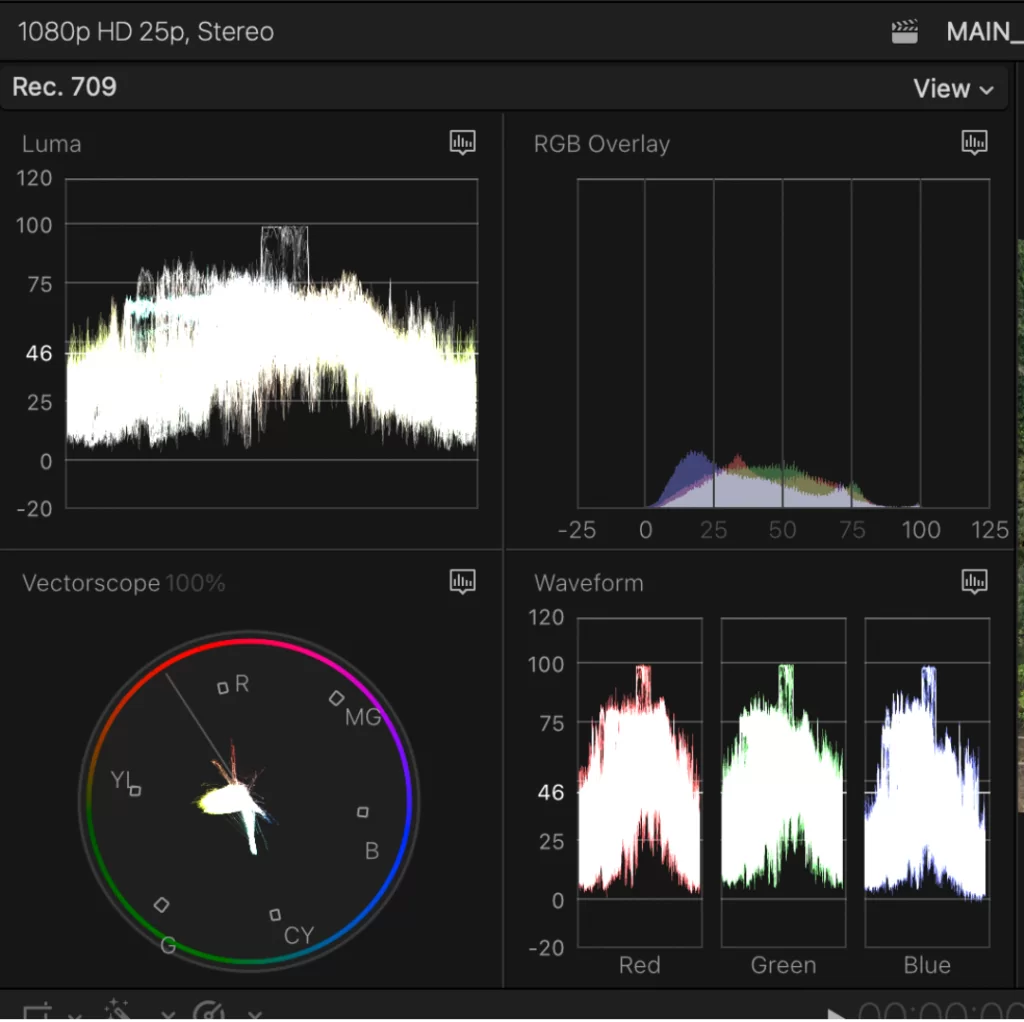
Also, real-time updates enable you to learn more about the scientific basis of color and how it is used in the grading process as you make corrections. Apart from adding visual effects to a video, Final Cut Pro is used to do a variety of editing such as rotating a video.