The deselect tool on Gimp is used to deactivate the currently selected tool. When working with Gimp, it is important to deactivate the currently selected tool to avoid unplanned changes in the image. You can deselect using the None selection tool.
Gimp offers you a wide array of tools to select parts of the image for various purposes. Some of the purposes include cropping images, cutting, and colonizing.
How to deselect a specific area in GIMP
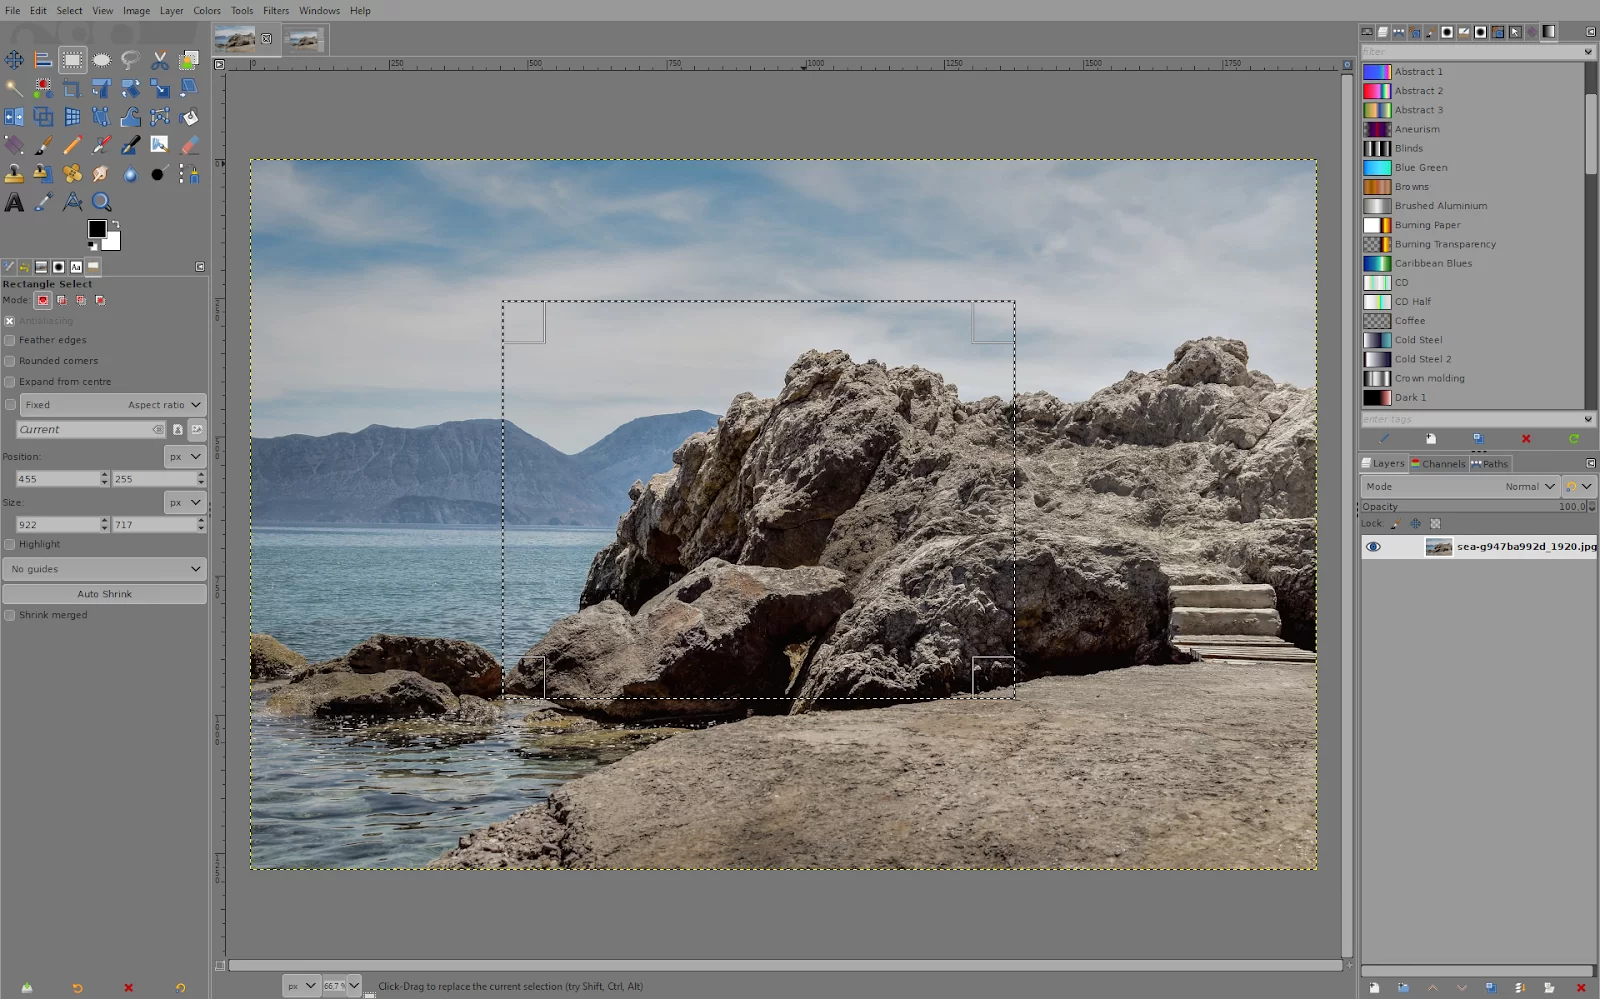
1. Open an image and choose a selection
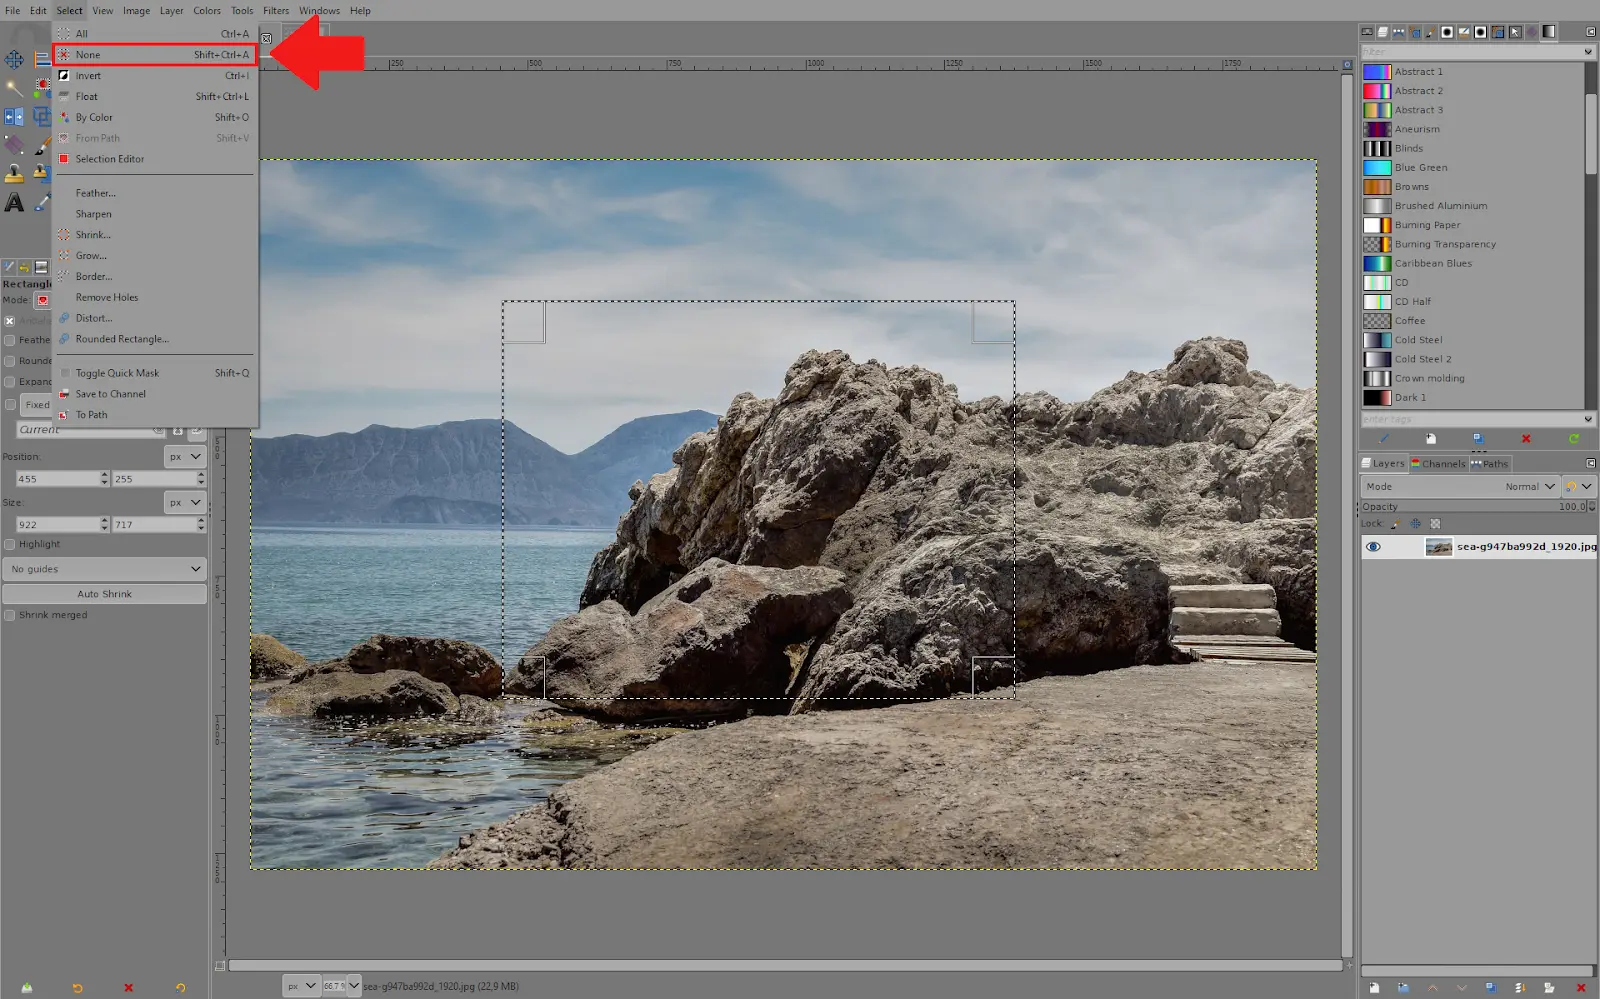
2. To deselect, go to Select – None. You can also do the same by pressing Shift + Ctrl + A (Win) or Command + Shift + A (Mac)
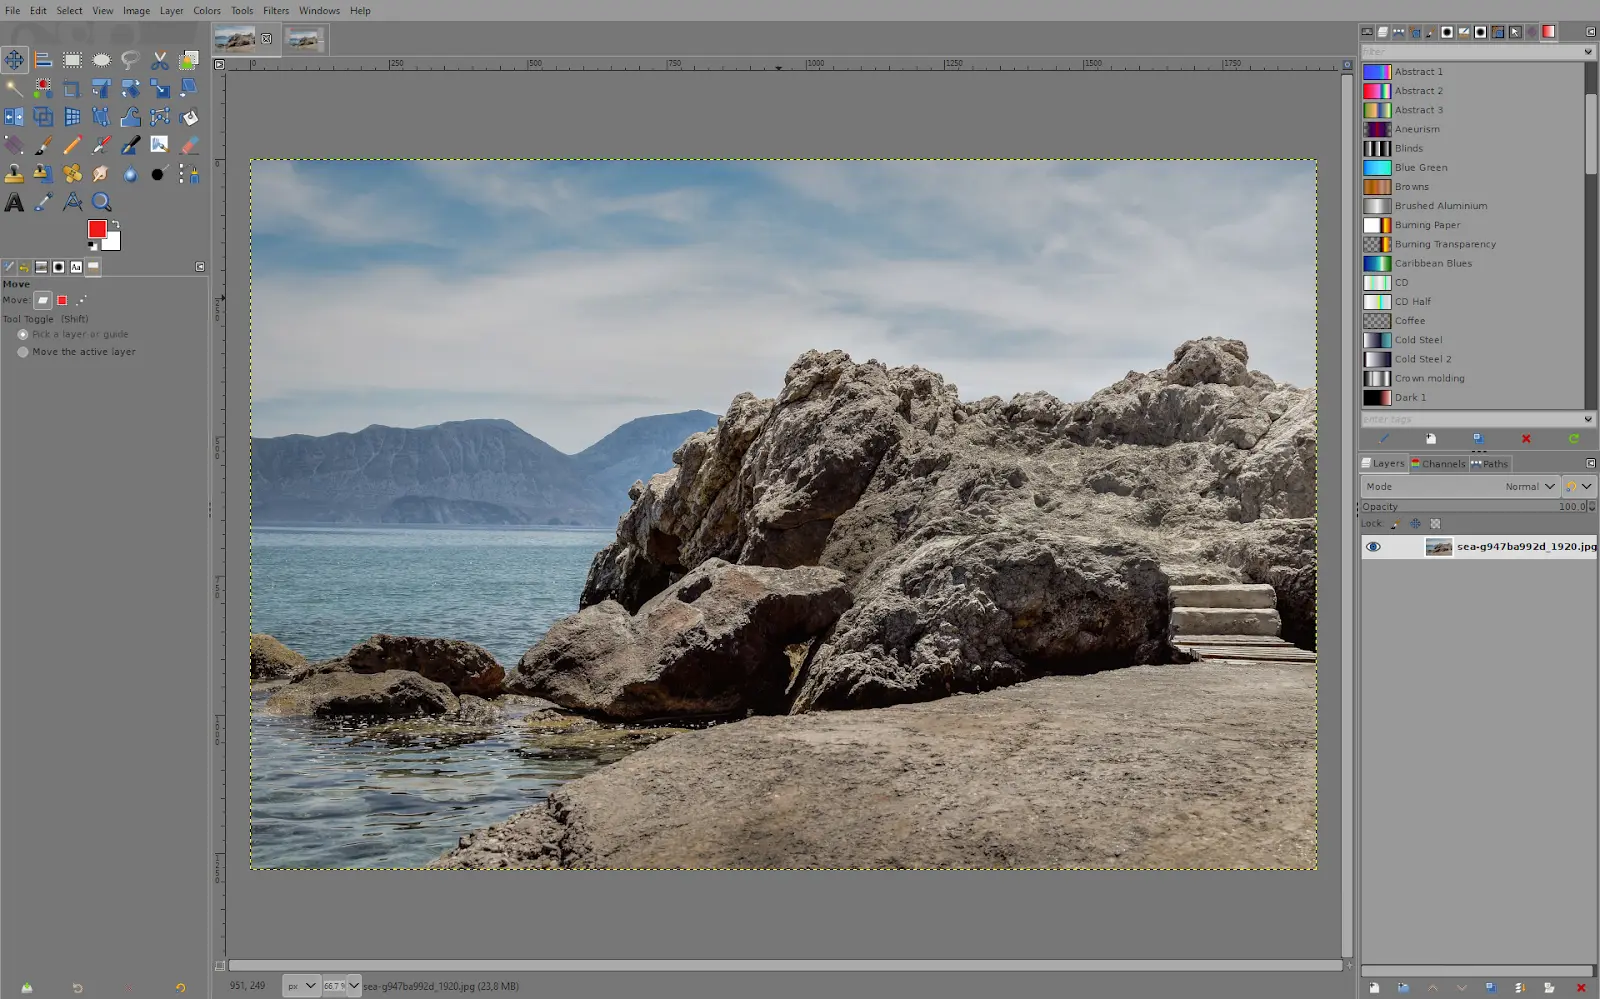
3. Once you have done that, the selection disappears
Layer Boundary Edges: Understanding How Layer Boundary Edges Affect Deselecting in Gimp
If your selection still won’t appear after you click on the Select None Command, then what you see isn’t a selection. Instead, you may see Gimp outlining the boundaries of the active layer.
Gimp seems to have a yellow and black selection marquee image border. However, that isn’t a selection, even though it does look like one. It’s a GIMP feature that displays the outline of the layer you’re working on. This effect is only helpful when working multiple layers with transparent backgrounds. Open the View menu and deselect Show Layer Boundary to turn off the layer boundary outline.
Gimp Selection Tools
GIMP provides various options for choosing a certain area of an image. You’ll see many selecting tools in the sidebar, which by default is on the left side of the screen. Alternatively, you may get to them by selecting “Selection Tools” from the “Tools” menu. Below are some of the most important Gimp selection tools.
- You can choose any rectangular region using the “Rectangle Select Tool.”
- You can create an elliptic selection using the “Ellipse Select Tool.” You can also draw a circle using the Ellipse selection tool.
- You can freely choose any area of the age with the “Free Select Tool,” sometimes referred to as the “Lasso Tool.”
- The “Fuzzy Select Tool,” also known as the “Magic Wand Tool,” creates a single region with a color close to the place in your chosen image. The Fuzzy Select (Magic Wand) tool can select portions of the current layer or picture based on color similarity. Choosing the appropriate beginning point when utilizing the fuzzy select tool is crucial. If you pick the incorrect location, you can get something opposite to what you want.
- A fuzzy select tool is effective for choosing items with pointed edges. Beginners frequently utilize it heavily since it is enjoyable and easy to use. The challenge of choosing exactly what you want, no more, no less, is likely to make you more frustrated the more you use it.
- Like the “Fuzzy Select Tool,” the “Select by Color Tool” selects all regions with matching colors rather than just the one you are aiming at. This tool is also used to make background transparent in Gimp.
- The “Scissors Choose Tool” is similar to Photoshop’s “Magnetic Lasso” in that it attempts to select an object using contrast.
Four Selection Modes You Should Know
Each of the selection tools I listed above has the same four selection modes, and they are;
- You can only have one active selection at a time, and “Replace the current selection” cancels all prior selections when you make a new one.
- The previous selection is expanded when you pick “Add to the current selection.” You don’t need to decide in advance for this mode.
- As long as there are overlaps, “Subtract from the current selection” removes your selected region from the previously picked region.
- The “Intersect with the current selection” check determines whether any portion of your selection crosses with the previous one. If so, only that component is left. Everything will be deselected otherwise.
Leave a Reply
You must be logged in to post a comment.