
One of the most awesome features of Procreate, an app on your iPad, is its ability to let you curve text to make it more visually appealing. However, if you have just gotten this app and have never used it before, there are several things you need to do to create curved text that doesn’t look wonky. This step-by-step guide will walk you through all the necessary steps so that your text looks professionally curved every time.
Choosing Your Font
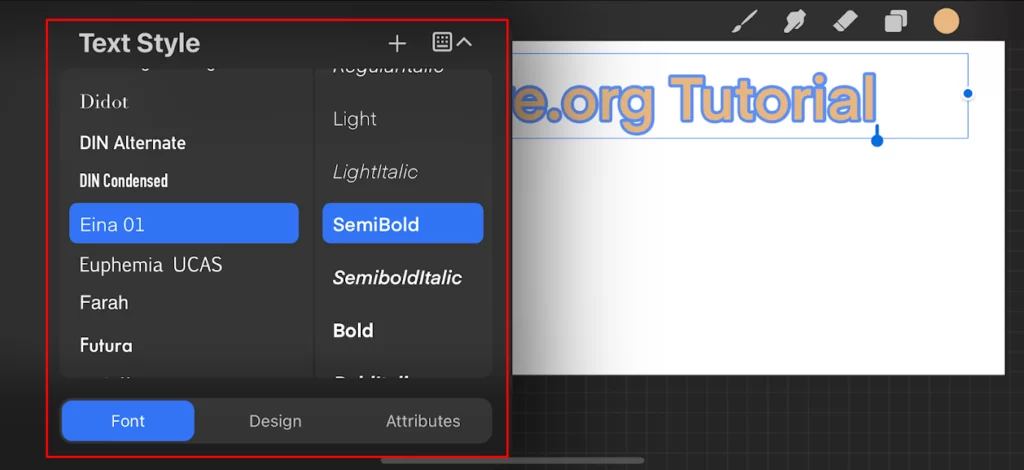
When it comes to curving text in Procreate, the first step is choosing the right font. Not all fonts are created equal when it comes to curving, so it’s important to pick one that will work well.
Some popular fonts include Avenir Next, Futura PT, and Helvetica Neue. With these different fonts, you can experiment with different weights (light, medium, heavy) to see which works best for your project.
SEE: How To Resize an Image in GIMP
Experimenting with different weights can be time-consuming if you’re not sure what weight you need, but it’s worth doing if you want great results!
Setting Up Your Layer Styles
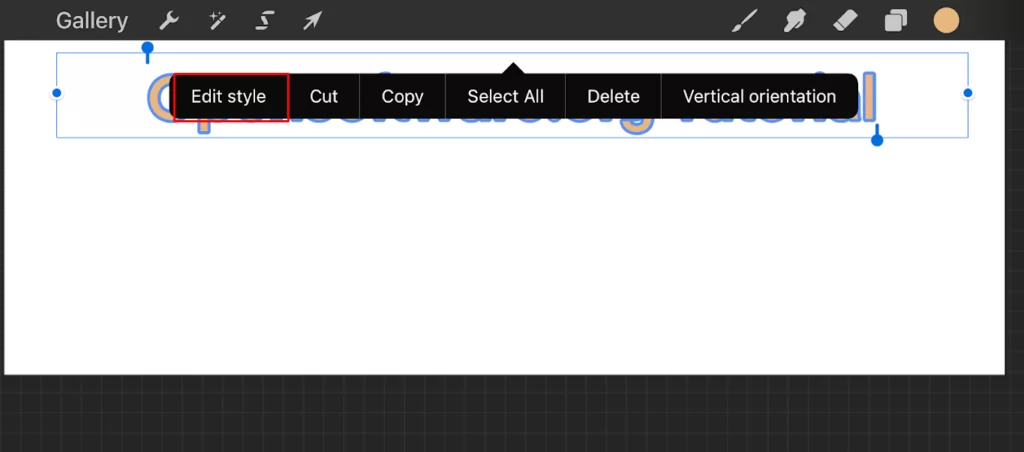
You’ll need to set up your layer styles to curve text in Procreate first. To do this, open the Layer menu and tap on the ‘i’ icon next to the layer you want to edit. Then, tap on the ‘Type’ tab and select the ‘Create Outline’ option. Next, use the Selection tool to select the entire text layer.
SEE: How To Flip a Layer in Photoshop
Then, go back to the Layer Menu and choose ‘Add New Fill.’ In the pop-up window that appears, choose ‘Fill Color.’ With the fill color selected, go back to the Layers Menu and click on Type. Choose ‘Stroke.’ Select a light grey color from the list of options at the top of the screen (or type in any other hex code). Adjust its opacity if desired by dragging it upwards or downwards until it matches your liking.
Your layer is now set!
Curving Your Text
If you want to curve text in Procreate, there are a few different ways to go about it. You can use the transformation and warp tools or create a custom brush. Each method has advantages and disadvantages, so choosing the right one for your project is important. To help you make that decision, we’ll discuss each option in detail below.
The Transformation Tool
To use this feature, first, open up an existing document on your iPad using any font you’d like (serifs work best). Select some words of copy that need some attention, then tap Transform at the top of the screen to bring up all available editing tools. Select Skew from the list, which will allow you to easily change the angle of your text by dragging the handlebars left or right. Once everything is lined up how you want it, click Done.
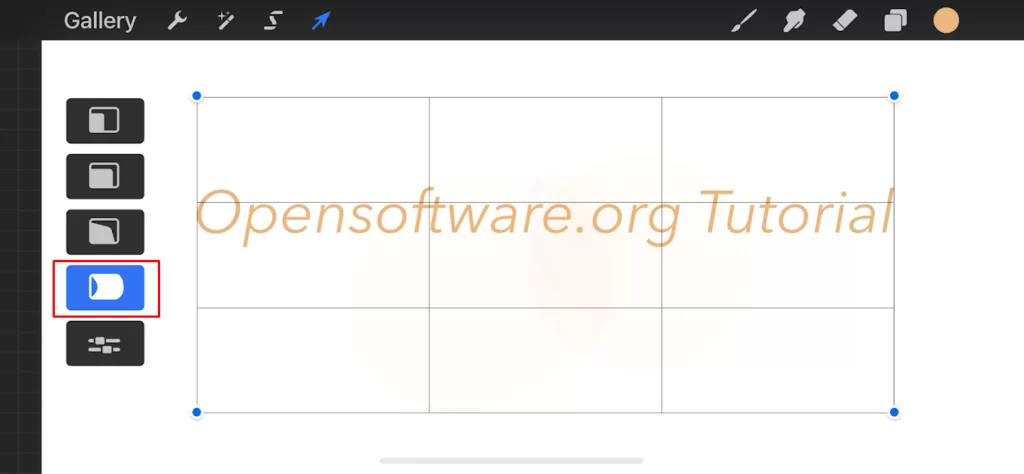
The Warp Tool
This is a great choice if you have more than one word that needs adjustment and doesn’t want to select them with your finger individually. Highlight as many letters as necessary with either pen or your finger and drag them where they need to be until they line up properly with the rest of your paragraph.
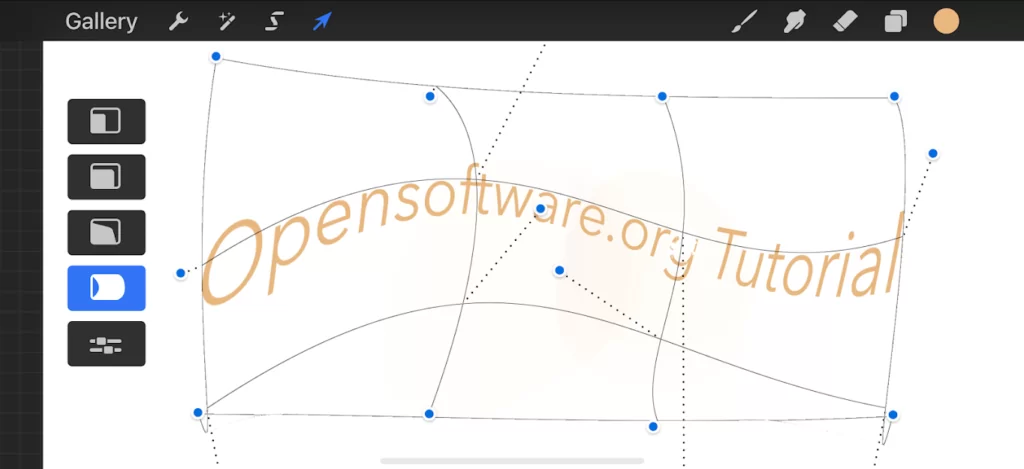
The Warp Tool in Procreate is located in the Transform menu. To access it, tap the icon in the top right corner of the screen that looks like a box with an arrow coming out of it. Then, select Warp from the menu that appears.
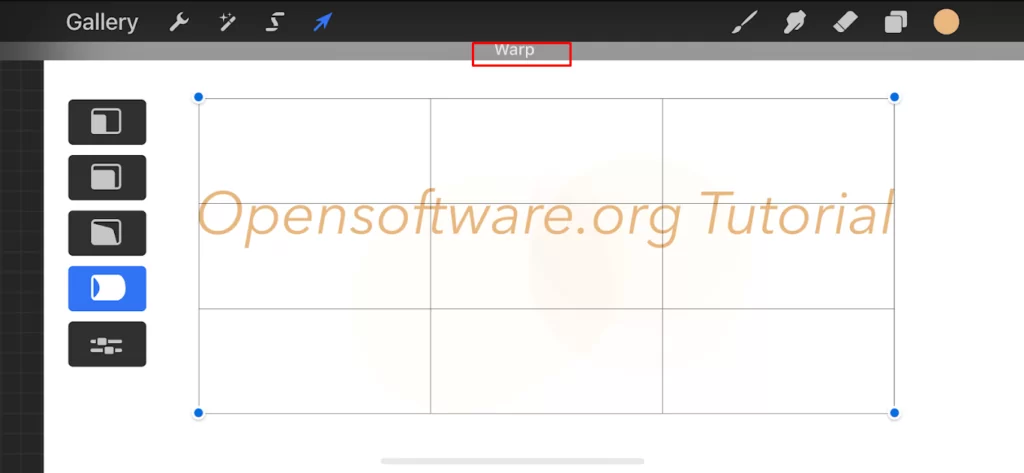
You can choose whether to curve or bend your text by selecting either Curve or Bend. If you want to curve your text, enter a value into the control at the bottom left of the screen and set your cursor to where you want to start curving.
Tap and hold on to the first point until it becomes red, release and move your finger over to create another point (the second point).
Tap and hold again until it becomes red and release – this should create a curved shape between those two points!
You can also adjust the size of the curve by changing how far apart you place your fingers when making each point. For smaller curves, make the points closer together; for larger curves, make them farther apart.
Lastly, remember that you can always undo your changes if things don’t look right. So, get creative and see what fits best for your needs! No matter how you curve your text, know that the possibilities are endless. Whether you’re working on a hand-drawn masterpiece or need to adjust the curvature of some sentences before sending off an email, procreate can handle anything you throw at it.
Creating a Custom Brush
The third option is to create a custom brush. Start by selecting the words you want to curve and creating a new document. Next, sketch your desired shape or effect using the drawing tool. After drawing, copy the design and paste it into your new document while adjusting stroke size accordingly. Now, go back to that original document and hit Save Selection as New Brush. When asked, save the new brush under whatever name you want.
All done? Finally, head back to your other document and find the Pencil Tool. Press the gear icon in the upper left corner of the screen to access settings and select Preset Brushes from the dropdown menu. From here, scroll down until you find your newly created brush under My Brushes, then tap on it to apply it!
SEE: How To Trace In Procreate
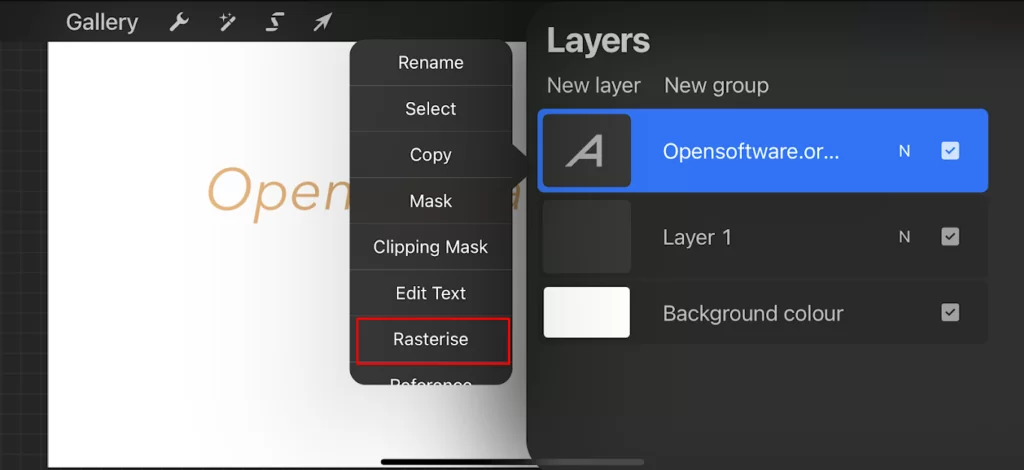
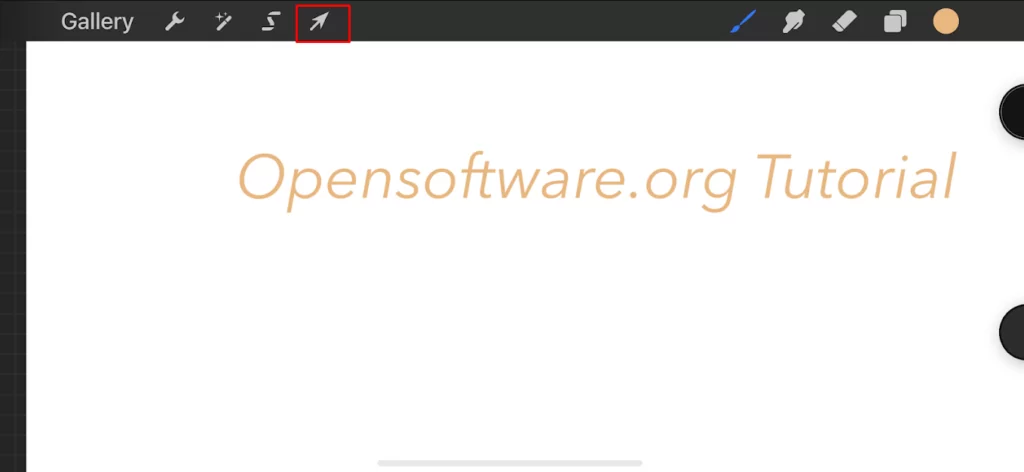
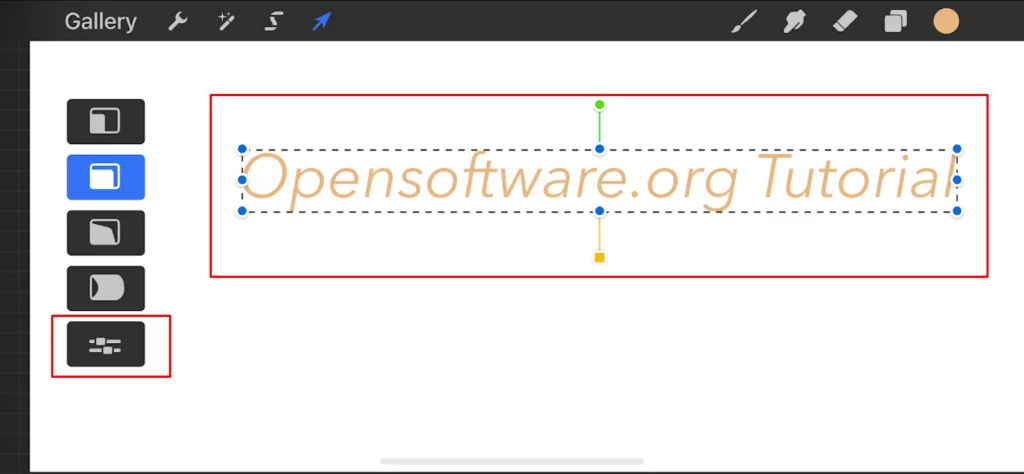
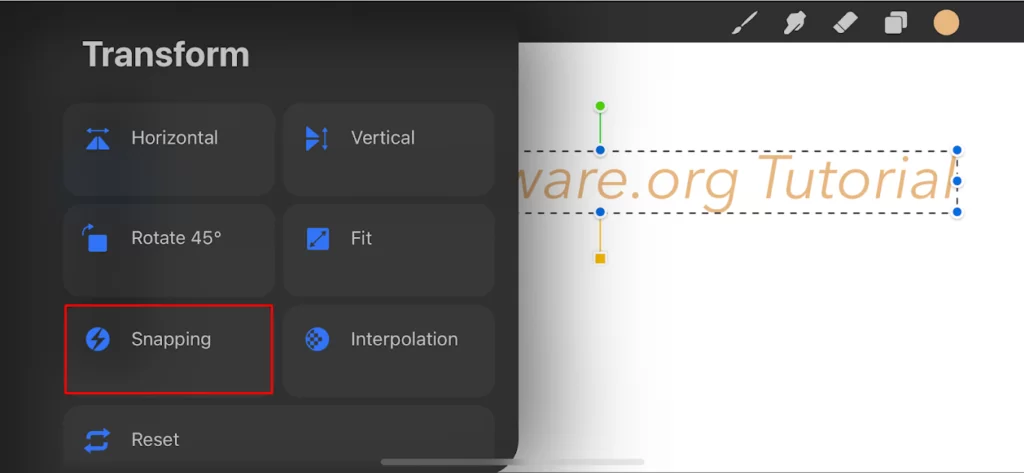
Pictorial Guide:


Why You’ll Need to Curve Texts
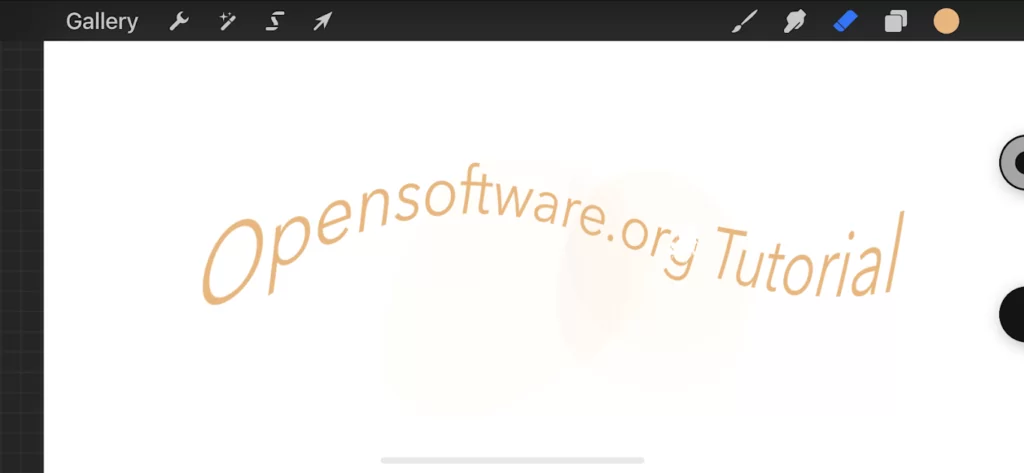
There are many reasons you might need to curve text in Procreate. Maybe you want to create a circular logo, or perhaps you’re trying to make a banner that follows the contours of a photo. Whatever the reason, curving text is a great way to add interest and dimension to your designs. It’s important to note that this technique works best with thicker fonts, as they are more conducive to rounded edges.
Conclusion
Adding curved text to your Procreate designs is a great way to add a unique touch. Plus, it’s easy to do! Follow the steps outlined in this blog post, and you’ll be adding beautiful, curved text to your designs in no time. Now that you know how to create curly text in Procreate, go out there and start creating some of your designs with uniquely-curved words!
Leave a Reply
You must be logged in to post a comment.