GNU Image Manipulation Program (GIMP) is a free, open-source raster graphics software that allows you to manipulate and enhance your images. One of the many features that GIMP offers is the ability to curve text. Curving text adds a creative and visually appealing element to your design.
Gimp users can curve texts using the tools available on Gimp. However, working with text on Gimp can be quite tricky. But, with the right knowledge, you will learn how to curve your texts even if you just got out of bed.
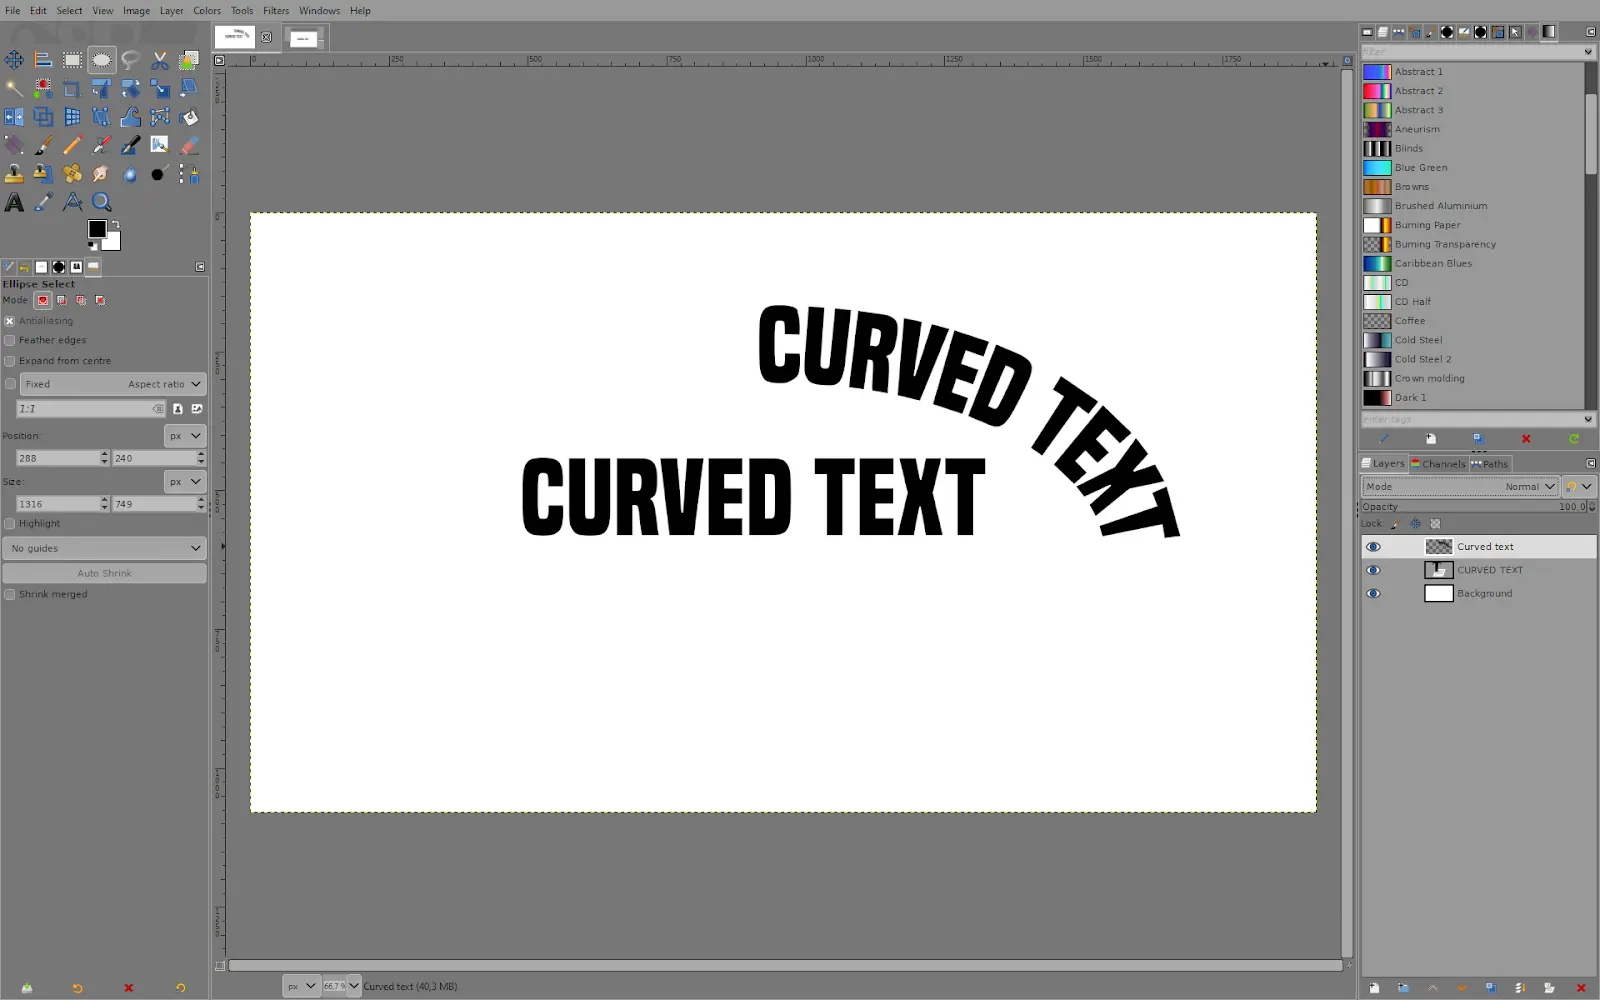
How to Curve Text in GIMP
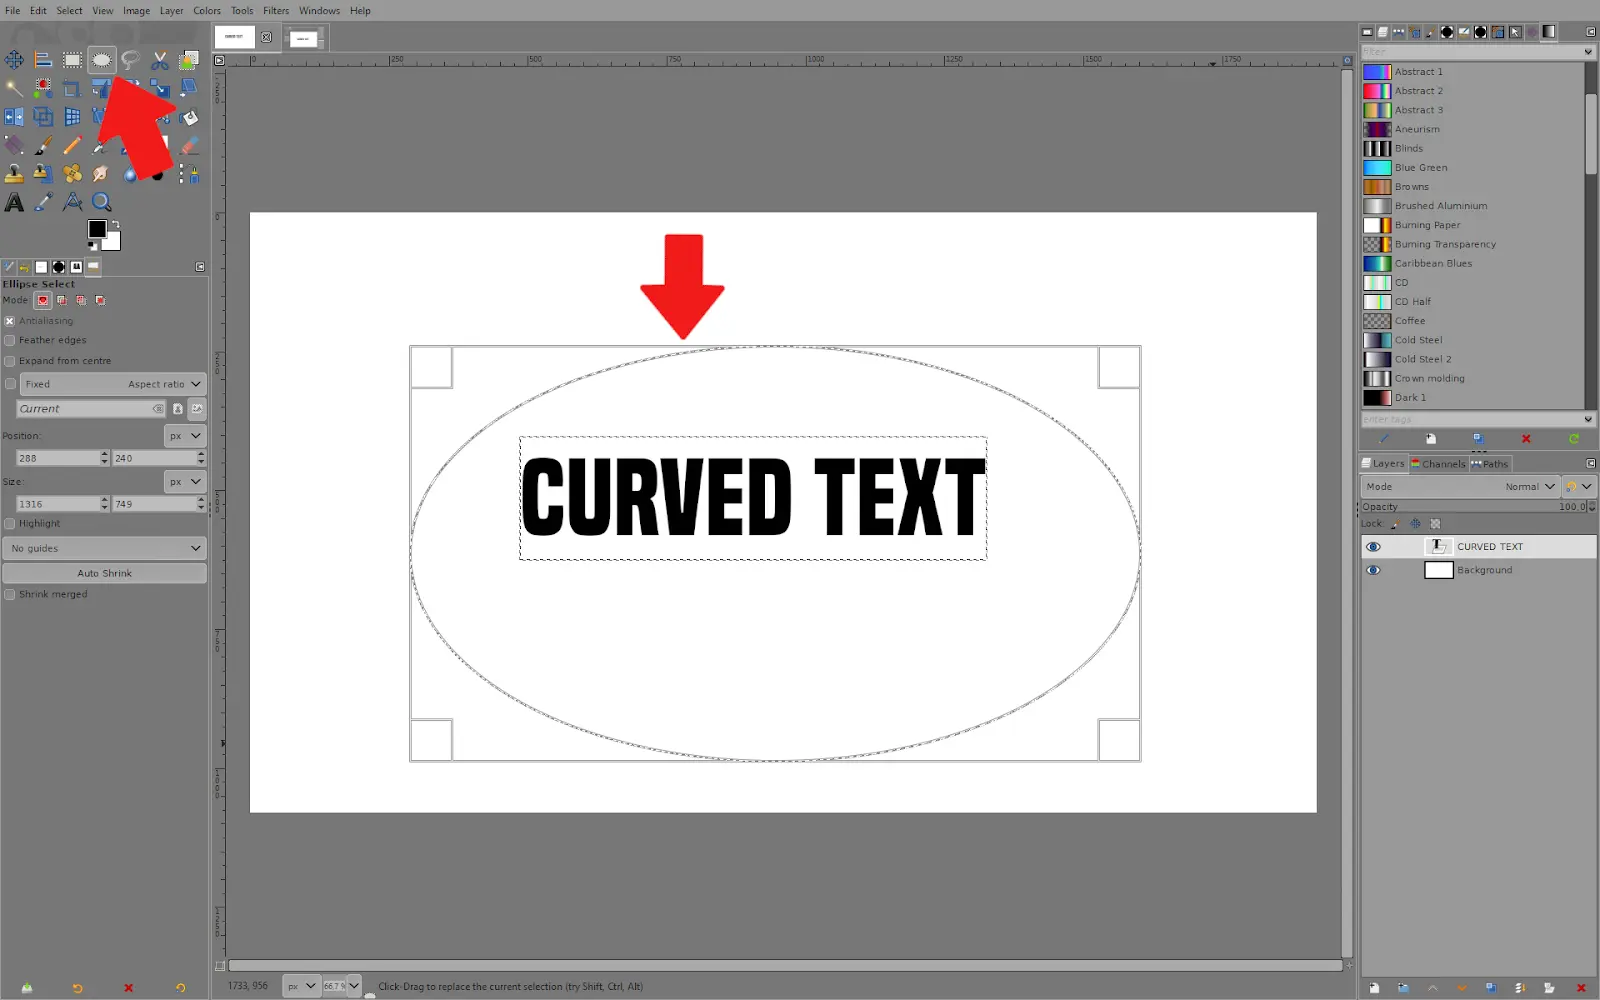
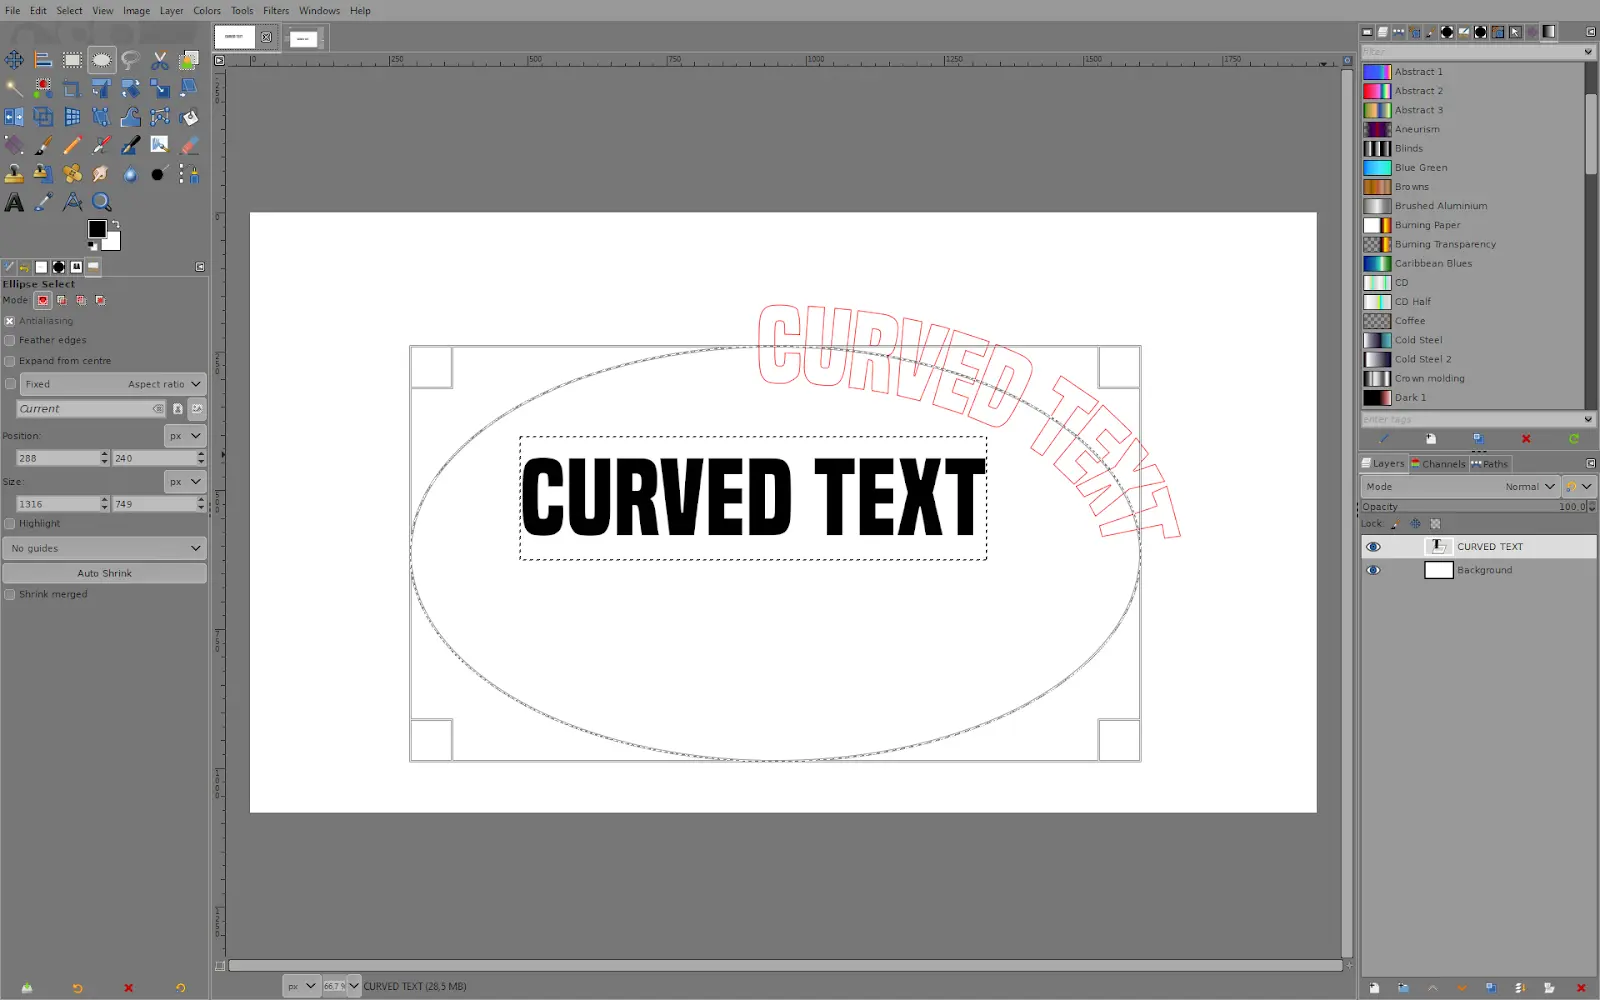
1. When you have your text ready, choose the ”Ellipse Select Tool.” Then draw the circle you want to bend your text around.
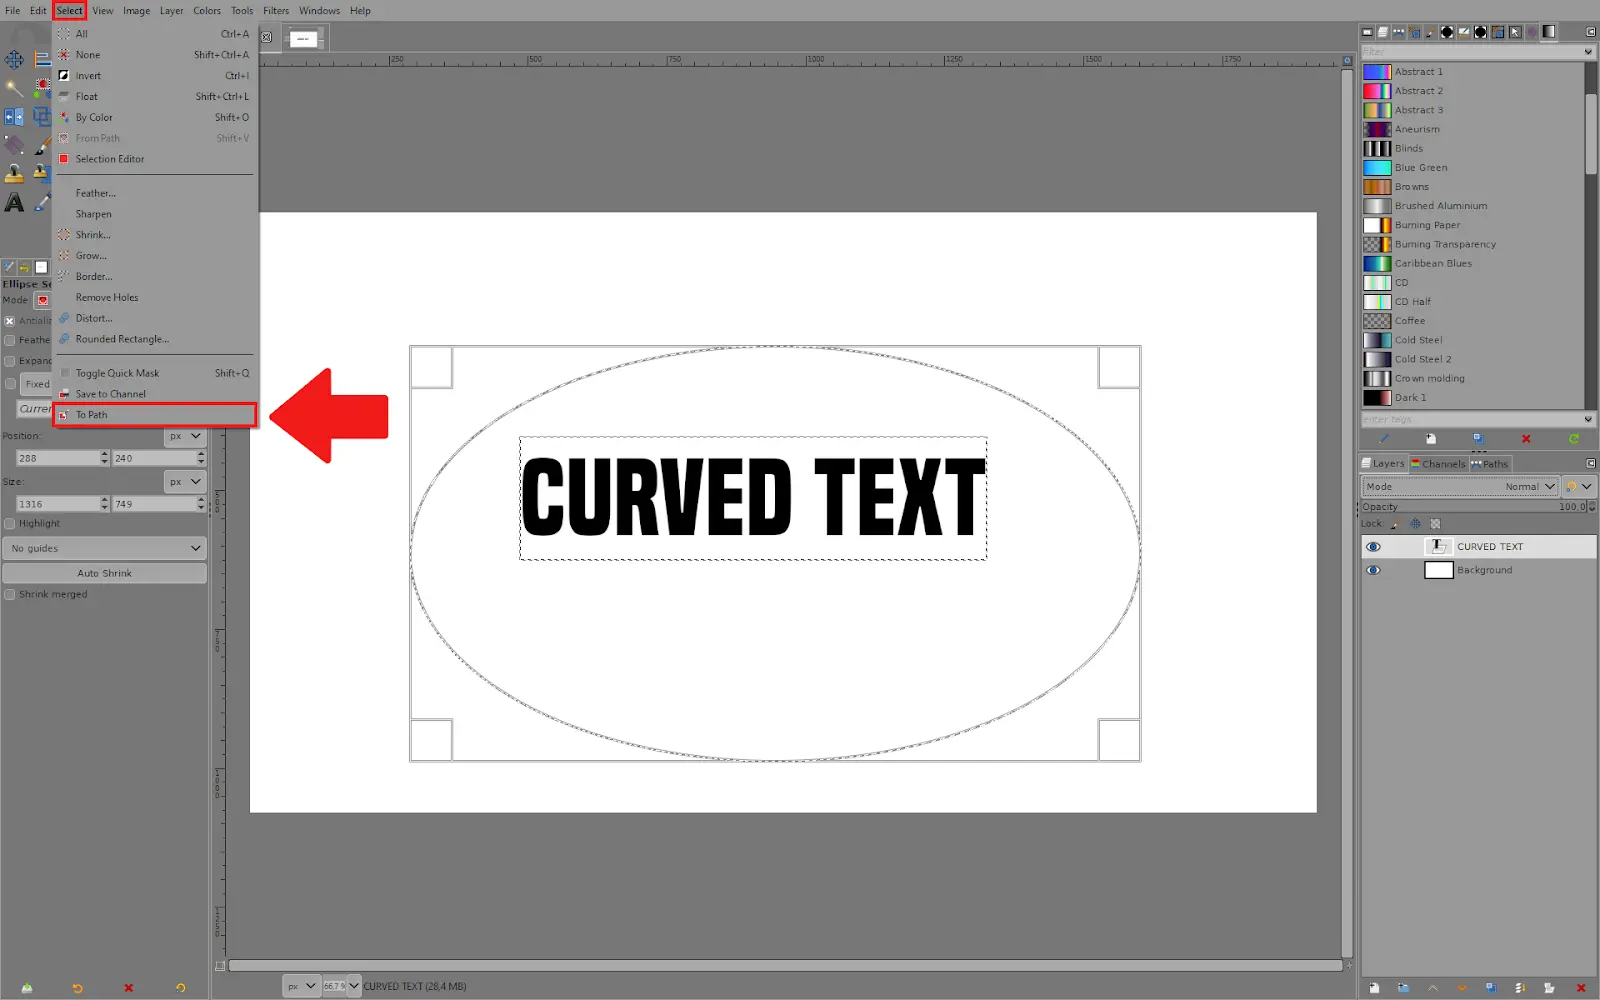
2. After drawing the circle, go to Select >> To Path.
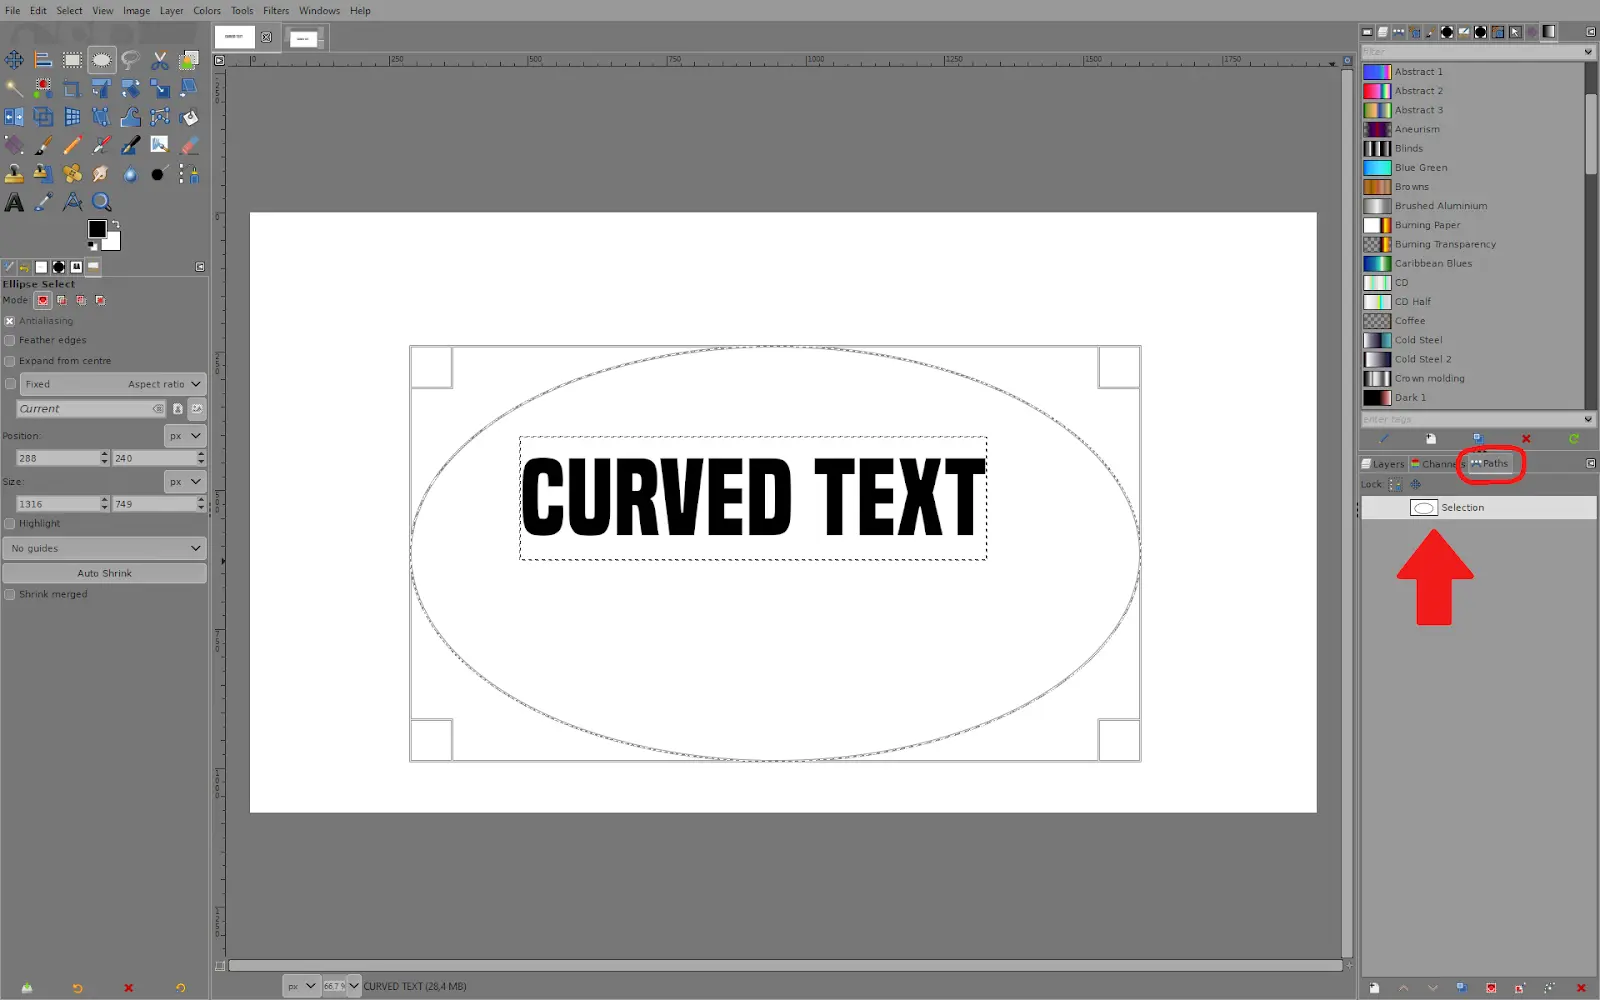
3. It creates a path for your circle. You can find it in the ”Paths” menu.
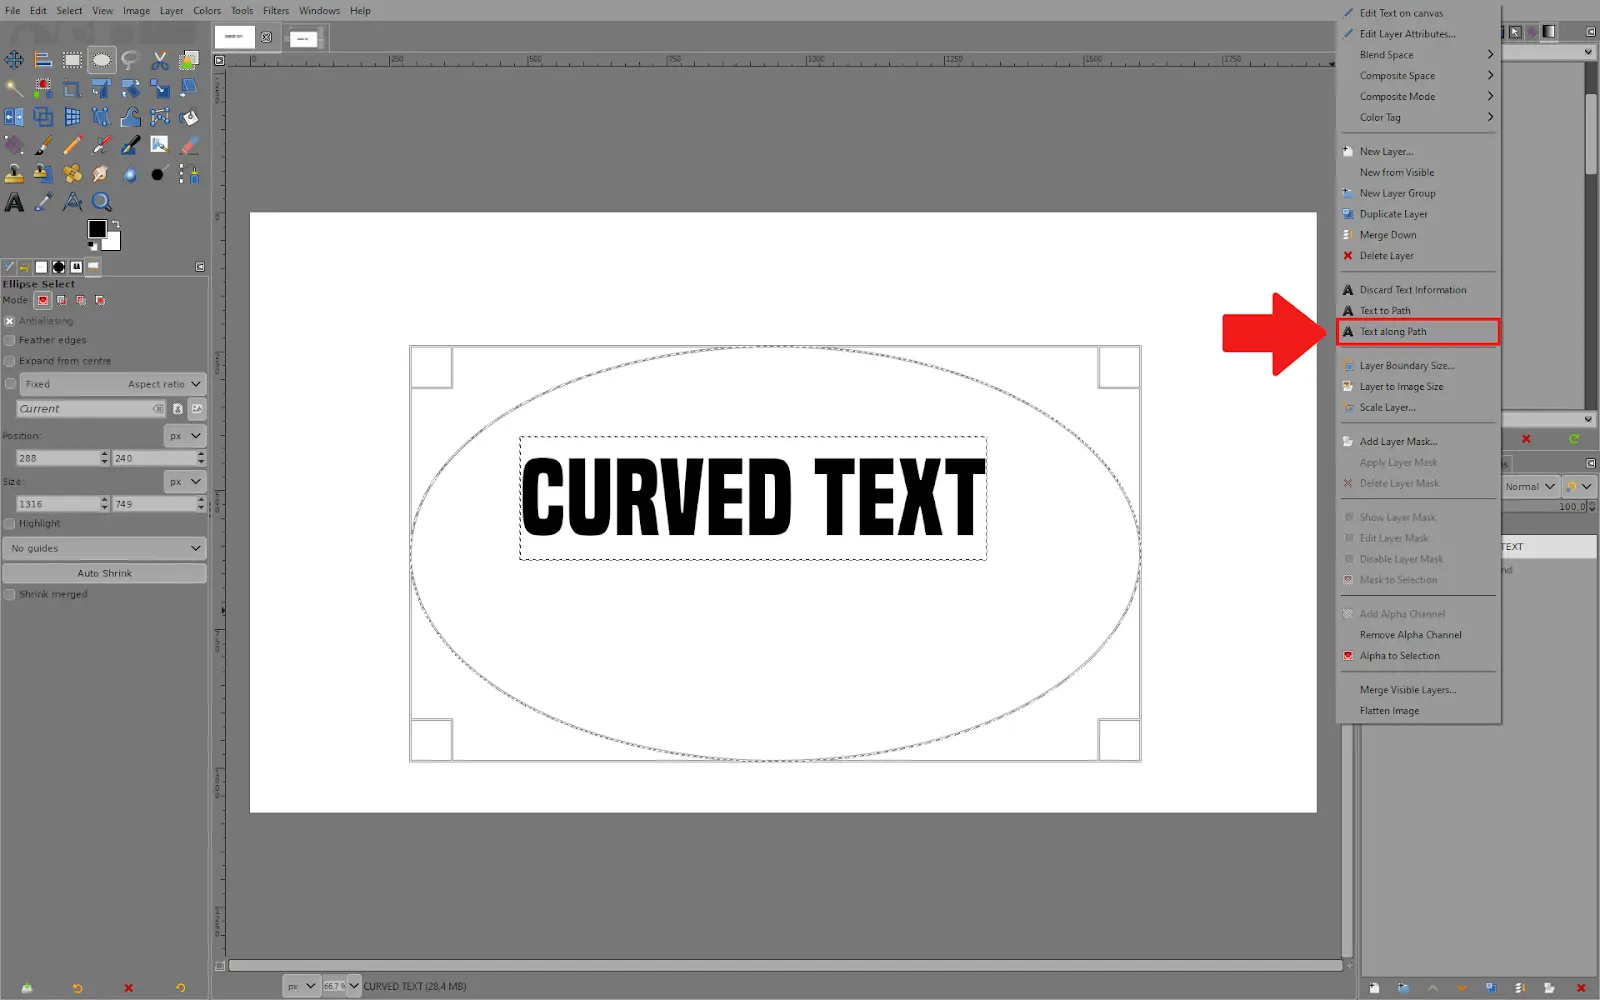
4. Go back to the layers menu and right-click on your text layer. Then choose ”Text along Path.”
5. That will create a path for your text around the circle.
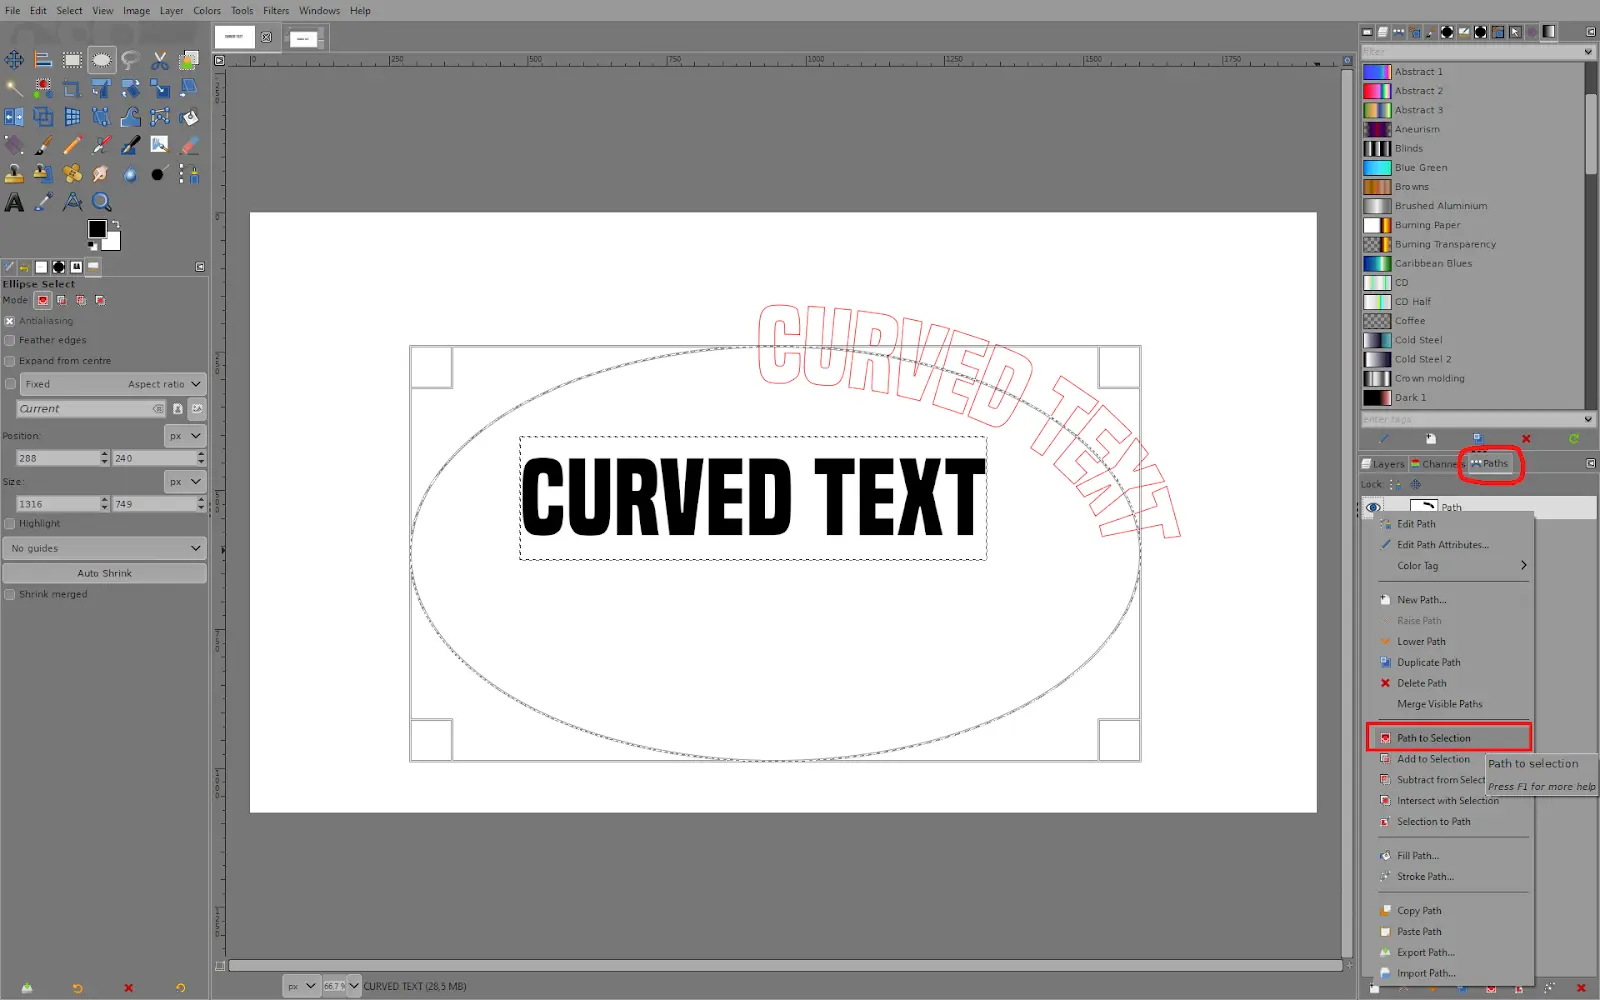
6. Go to the ”Paths” menu, right-click on the new curved text path, and choose ”path to selection.”
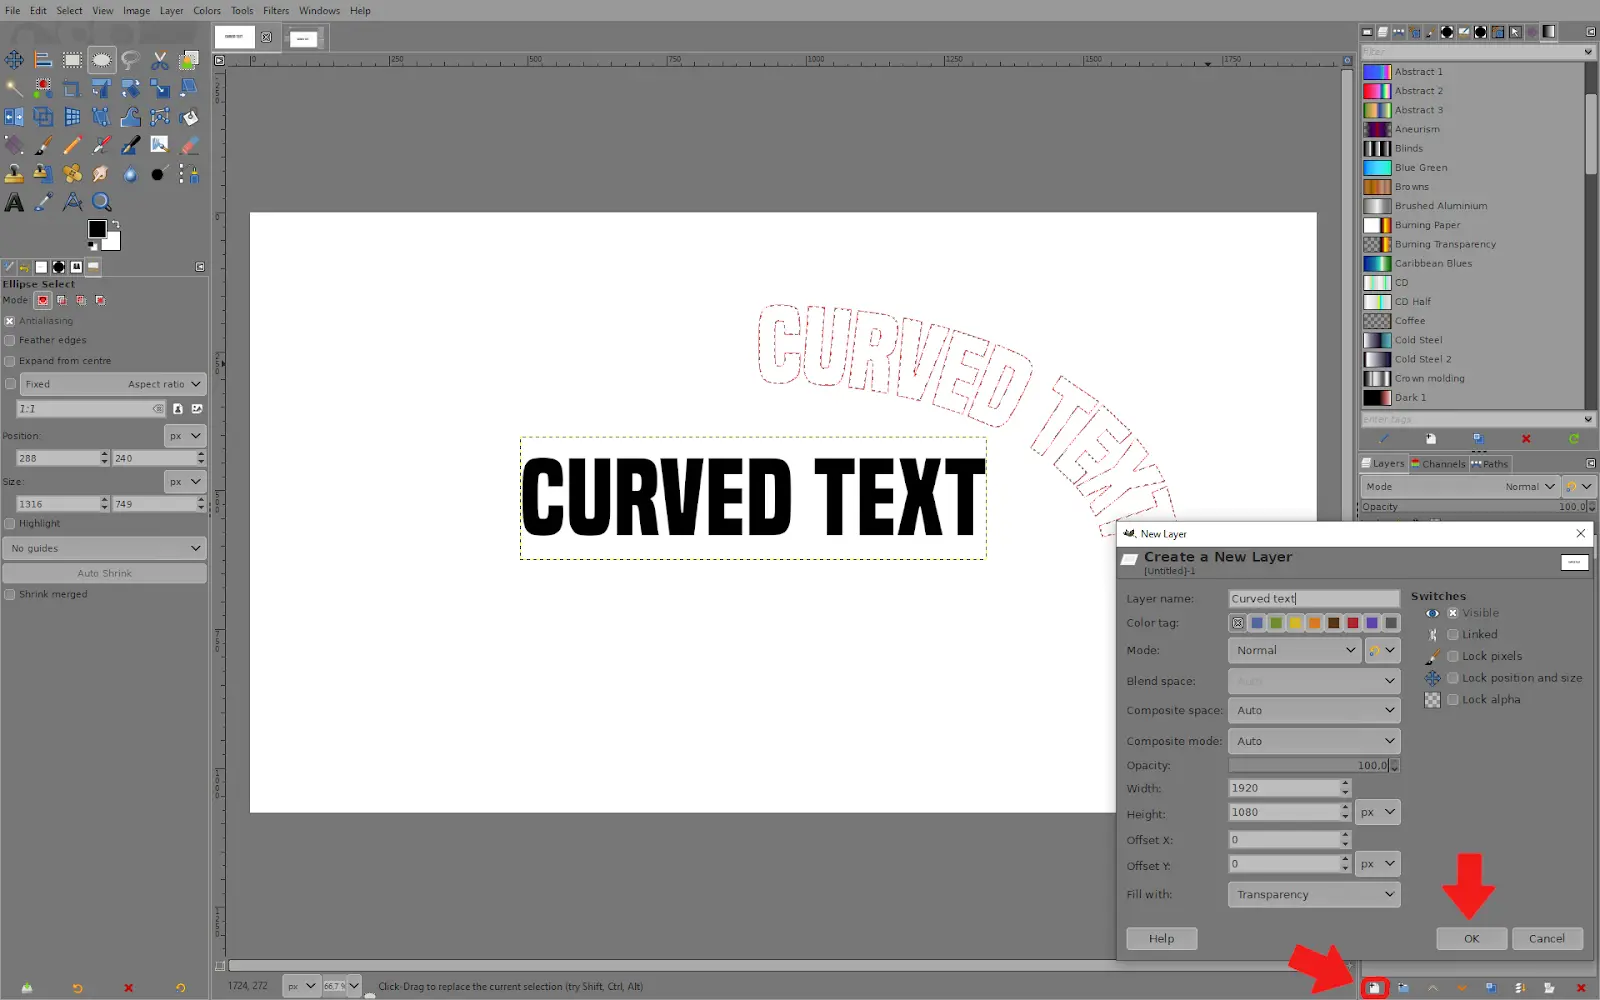
7. Then go back to the layers menu, and click the icon at the bottom to create a new layer for the curved text. You don’t have to change the settings, just name the layer at the top.
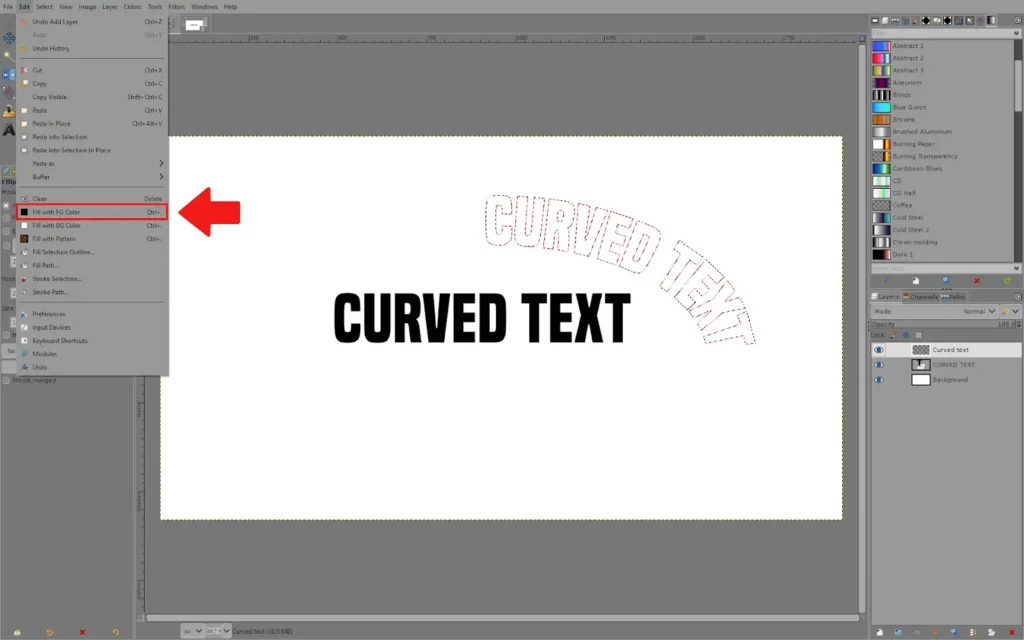
8. After making the layer, go to Edit – Fill with FG color. This will fill the current selection with whatever color you have selected.
9. Now you have curved the text.
How to Fix Curved Text that is Upside Down
The path’s direction is to blame for your text appearing inverted in GIMP. You can use the Flip tool to change the path’s direction, which will also change the text’s orientation.
The text isn’t displayed upside down when placed along a path; rather, it’s just going in the same direction as the path because of how it was made. You can use the Flip tool to change the path’s direction if you want your text to flow down the opposing side of the path. Theoretically, this will make the text that is upside down seem right side up.
If you know how to draw a circle using Gimp, then you will easily understand what I’m about show you. You can opt to wrap your text around the inside or outside of your circle by using the Flip tool to specify the direction of the path. Follow the steps below to change your text’s direction on the path.
Step 1
Start by making the path visible. Choose the path you want your text to flow along by clicking the eye next to it on the Paths tab. The path tab is next to the Layers tab. A red line representing the path on the canvas should now be discernible.
Step 2
The next step is to grab the fill tool. You may access the Flip tool by clicking on its icon in the toolbox or pressing Shift + F on your keyboard. In the tool’s parameters, look for “Transform:” and set it to Paths.
Step 3
Click the path to change its orientation when using the Flip tool. Whether it is set vertically or horizontally, it will function the same. Check to see if your text-along path is still upside-down at this point. Please be aware that after you’ve changed the path’s direction, you’ll need to flow the text along it. Your previously written text won’t be affected by it.
If you enjoyed reading this article, you can also check out our in-depth article on how to move text using Gimp.
Leave a Reply
You must be logged in to post a comment.