Adobe Acrobat Pro DC offers tools and features to help users enhance the appearance of their PDFs, including the ability to change the fill color of various elements within the document. You can modify the color of a form field, highlight text or add color to a drawing, the process is straightforward and can be accomplished quite easily. In this tutorial, we will guide you through the process of changing the fill color in Adobe Acrobat Pro DC.
2 Methods to Change Fill Color in Acrobat
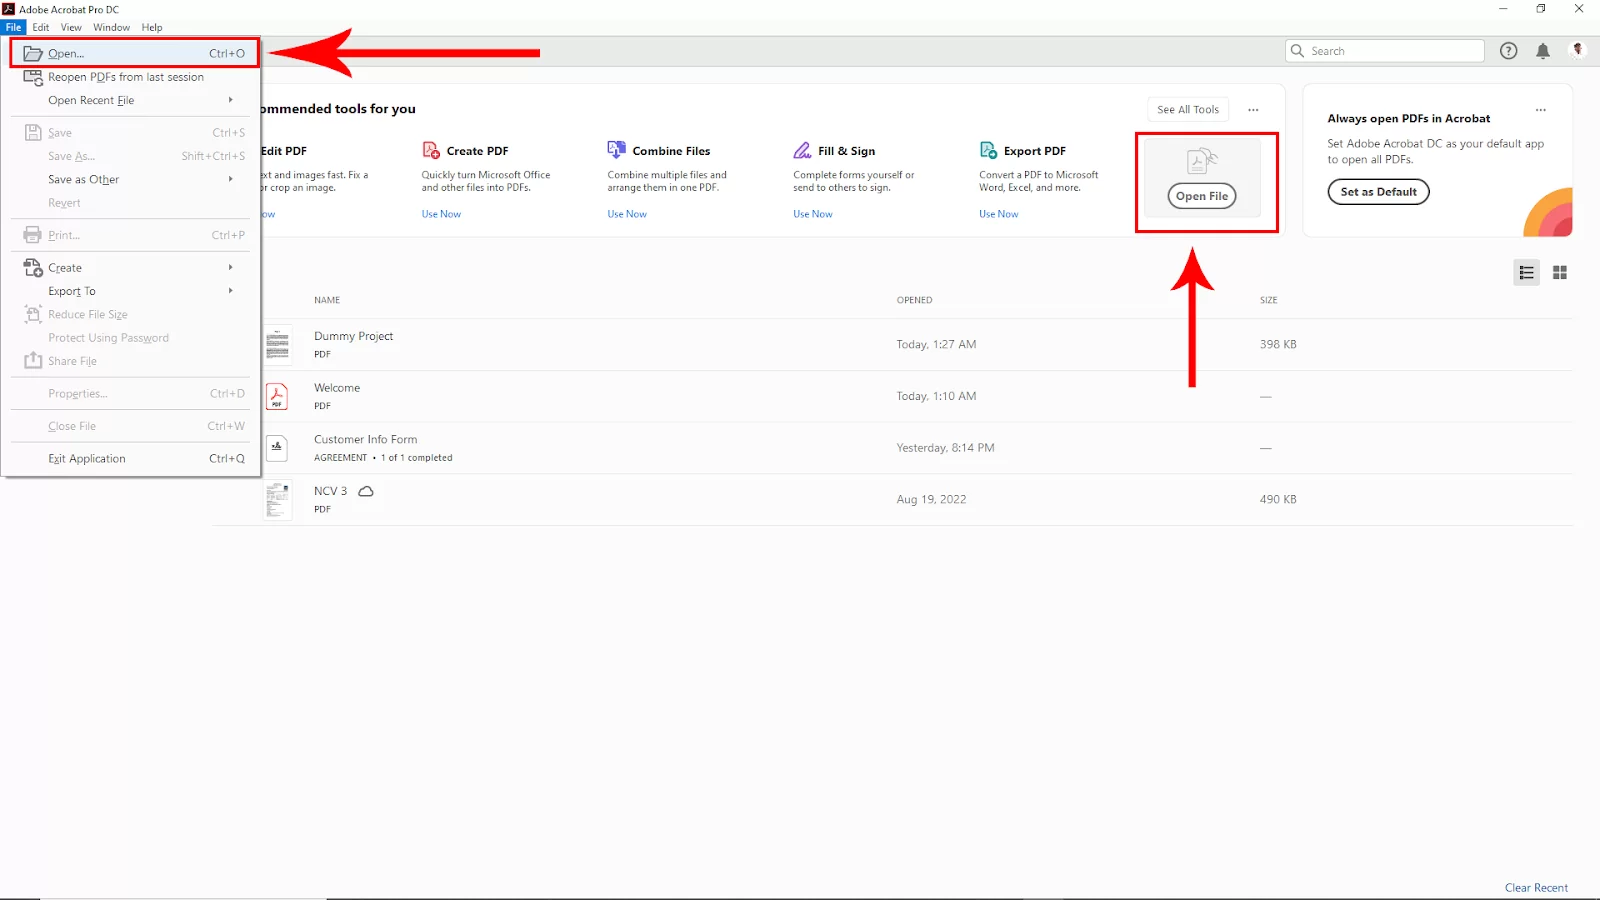
First, Open Adobe Acrobat software and then open your pdf file. To open a file, go to File > Open and then select your pdf file from your file manager. You can use short in Win [ Ctrl + O ] or Mac [ Cmd + O ]. You can click directly to Open file on the right corner and then open your File.

Method 1:
Changing Shape fill color
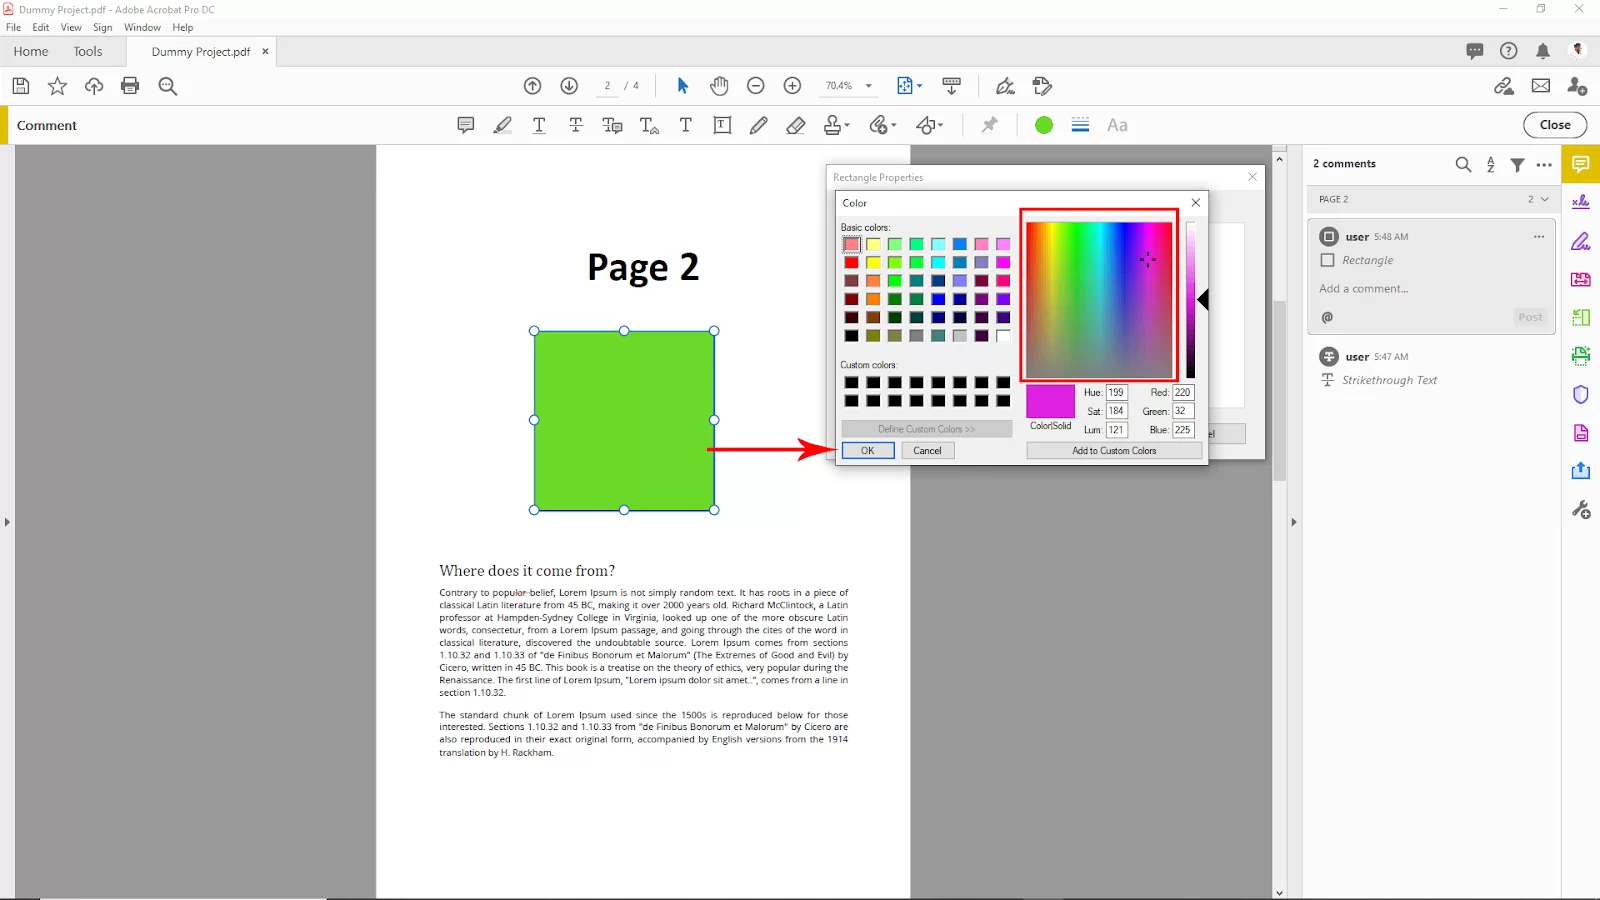
To change the fill color of the shape go to the upper right corner and click on the circle color pallet. And here you will see some colors. You can choose one of these for your shape. But if you need to color the shape with a custom color click on the settings icon under the circle color pallet.

Now you will see a panel will open. Now click on the fill color pallet, and here you will find some more color options. To add a custom color, click on the Other Color Option.

Now you will see your custom color panel will appear. Select your desired color from the color panel and then click ok. And your fill color will apply to the shape.
We also recommend that you see our step-by-step guide on how to redact in Adobe Acrobat.

Method 2:
Changing Text fill color
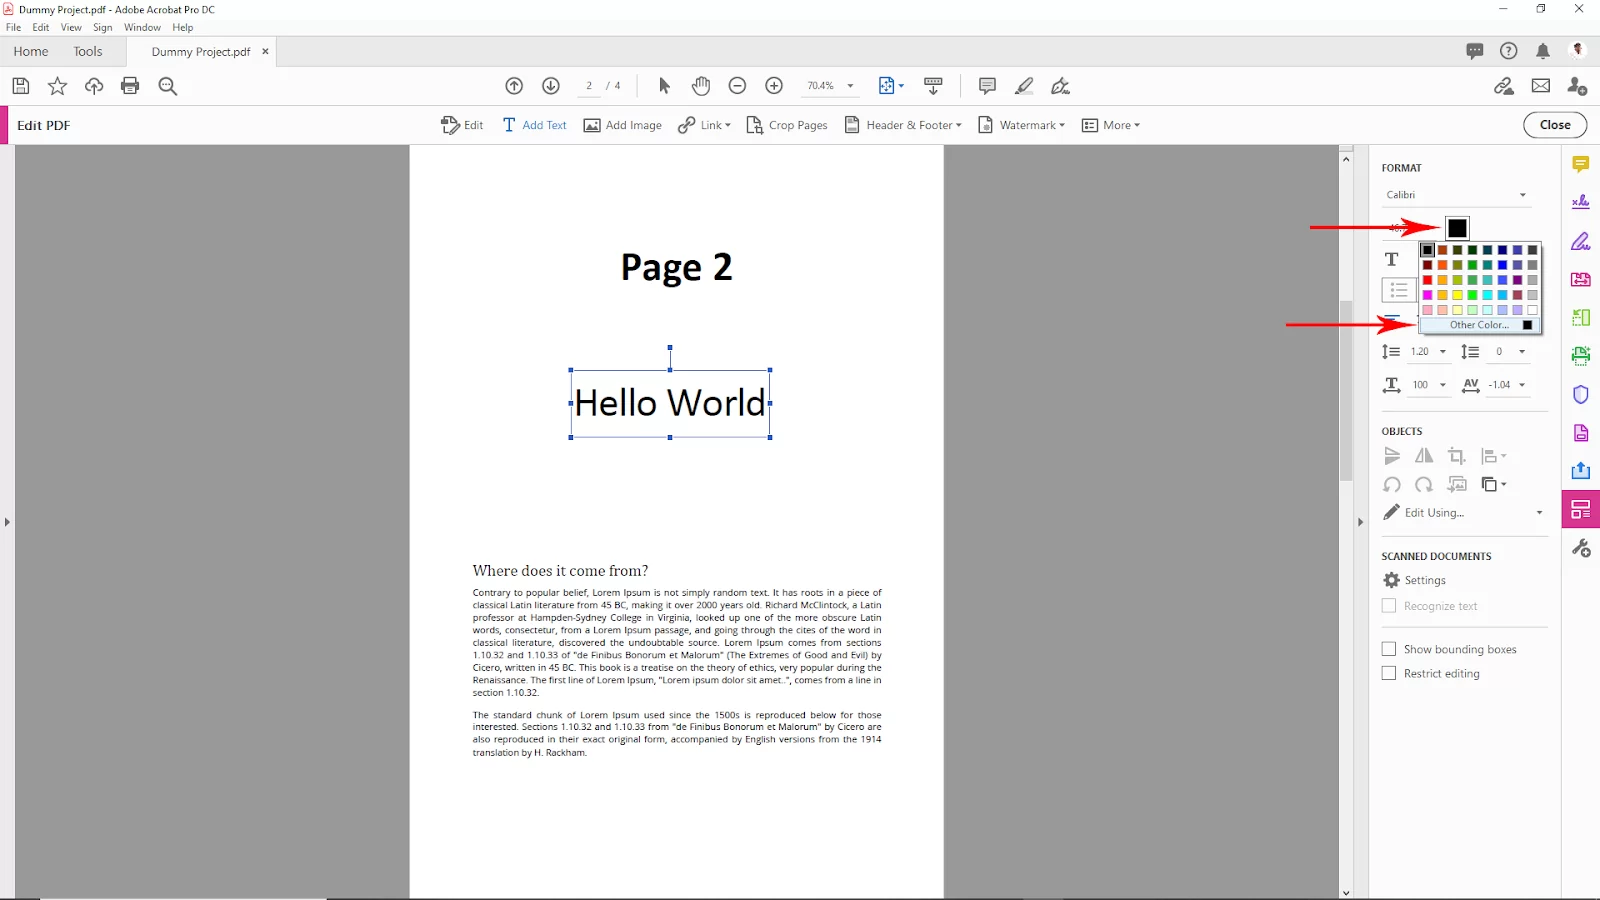
Select the text and you will see on the right-side upper corner the text setting will appear. Now click on the fill color option.

Now here you will see some fill color options. Now to add a custom fill color to the text click on the Other Color option.

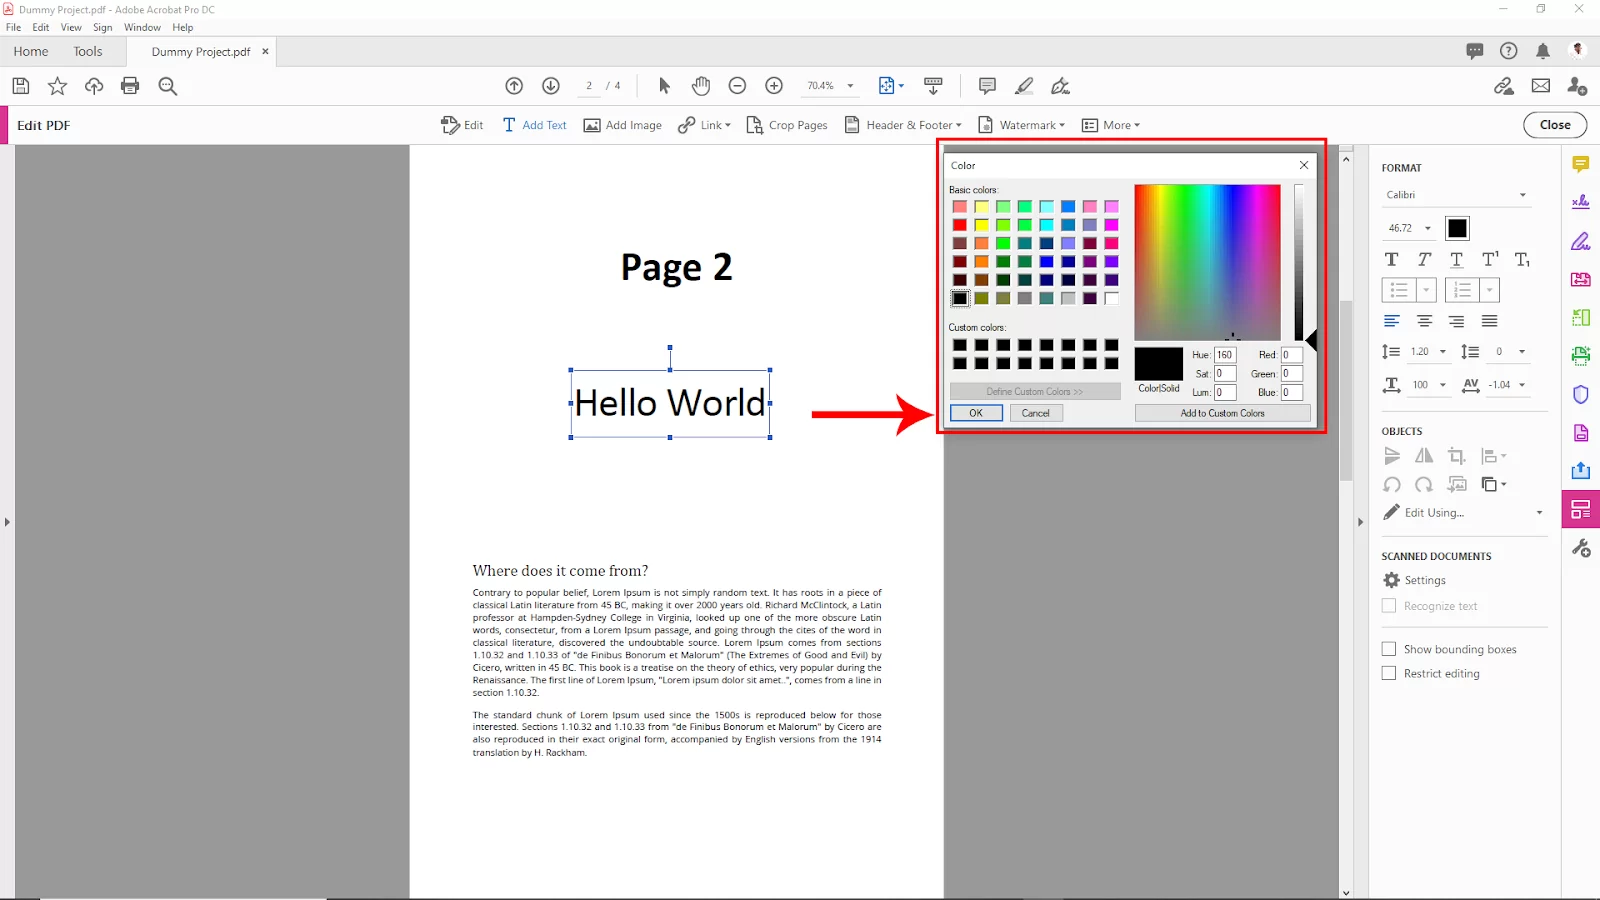
And your custom color pallet will appear now, choose a color and then click ok and your fill color will apply to the text.
You can also check out our in-depth article on how to flatten PDF in Adobe Acrobat.

How to Change The Fill Color of a Background in Adobe Acrobat
Follow the steps below to change the fill color of a background in Adobe Acrobat.
Step 1
Start by opening the PDF in Adobe Acrobat. Click File on the menu bar and choose Open. When you do this, you will see the open dialog box. Go to the PDF, choose it and click Open.
Step 2
Next, click document on the menu bar and choose the background. Choose add and replace from the fly-out menu. The Add Background dialog box will open.
Step 3
Now click the form color radio button to select it.
Step 4
In the From Color box, select a color. Select a color from the drop-swatches or use the Other Color button to add a new color to the Color dialog box.
Step 5
Finally, click ok to apply the color you want and close the Add Background dialog box.
How To Fill PDF Font Color in Adobe Acrobat
Step 1
Launch Acrobat Pro and open the PDF. You can open the PDF by going to the menu bar, selecting File and then Open. Navigate to the PDF, select it, and click Open when the Open dialog box appears.
Step 2
Next, click Tools on the menu bar and choose advanced editing. Next, select the touchup text tool from the fly-out menu.
Step 3
To highlight the text you want to edit, move the mouse cursor over it. Keep in mind that PDFs use paragraph breaks to split up lengthy text blocks into smaller ones. You can only choose one paragraph at a time.
Step 4
Next, right-click the selected text and select properties from the fly-out menu.
Step 5
Select a color from the swatches next to Fill. Next, select a color from the drop-swatches, or click Other Color to add a new color to the Color dialog box. Click Close to apply the color and exit the TouchUp Properties dialog box.
Did you enjoy reading this article? If you did, check out our in-depth article on How to Add Page Numbers in Adobe Acrobat.