Adding page numbers to your PDF documents in Adobe Acrobat is a great way to organize and keep track of your pages. It is a useful feature whether you’re working on a business report, a legal document, or a school project. You can add page numbers to your PDF documents in Adobe Acrobat easily and customize them to your preference. In this guide, we will show you how to add page numbers in Adobe Acrobat, including tips on how to customize and format the page numbers to suit your needs.
2 Steps to Add Page Numbers in Acrobat
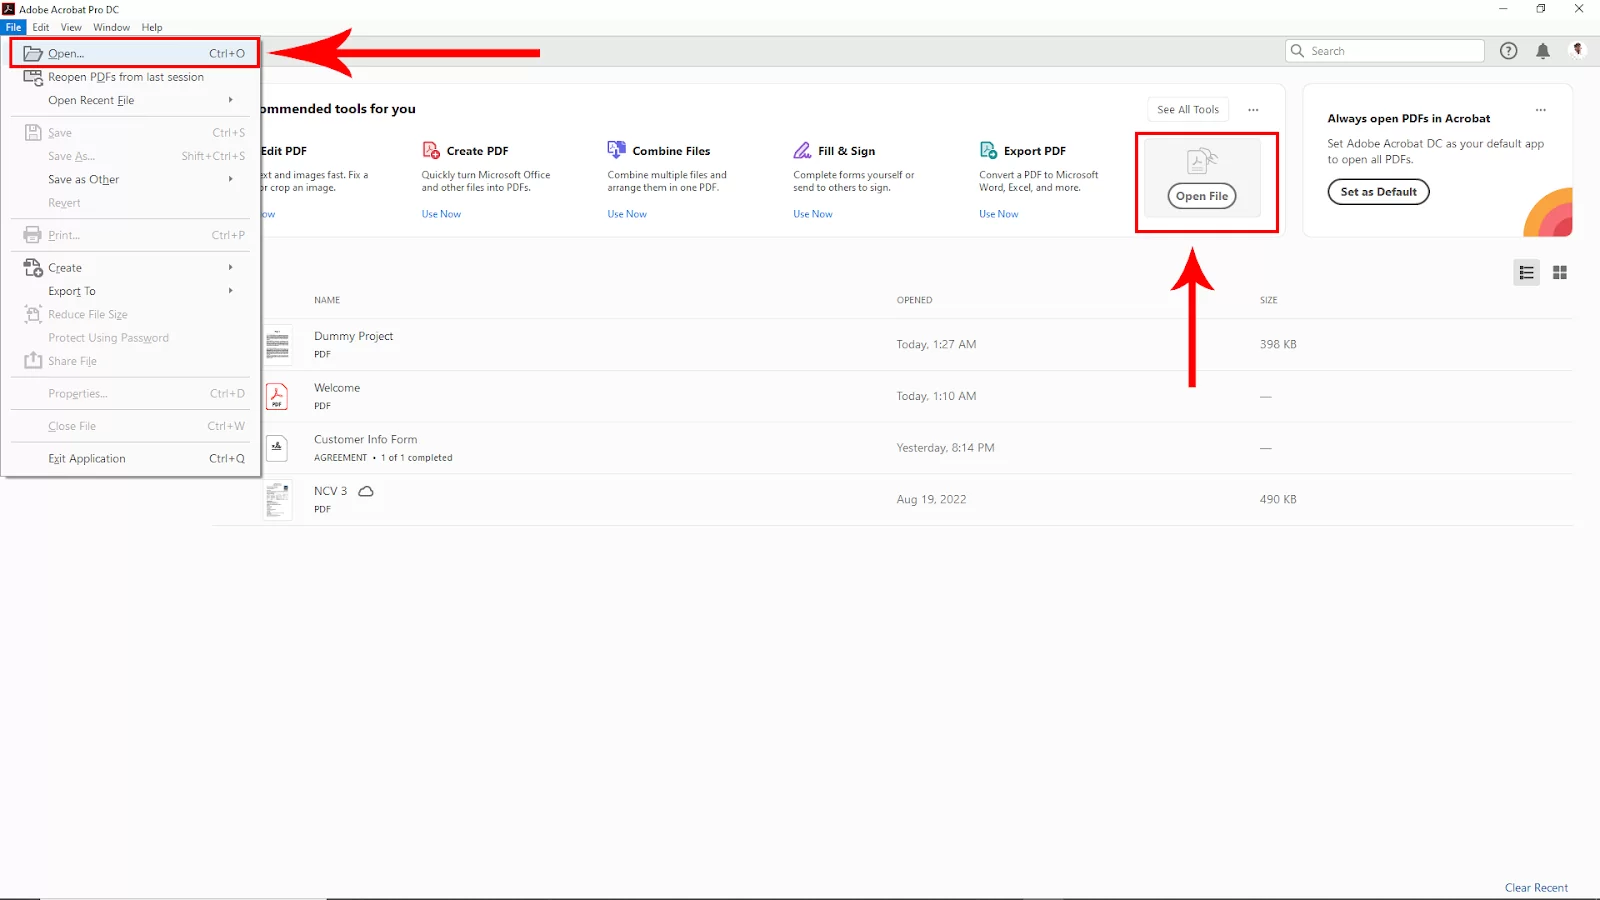
Step 1:
First, Open Adobe Acrobat software and then open your pdf file. To open a file, go to File > Open and then select your pdf file from your file manager. You can use short in Win [ Ctrl + O ] or Mac [ Cmd + O ]. You can click directly to Open file on the right corner and then open your File.
After opening the pdf file, go to Tools in the upper left corner. Click on that.
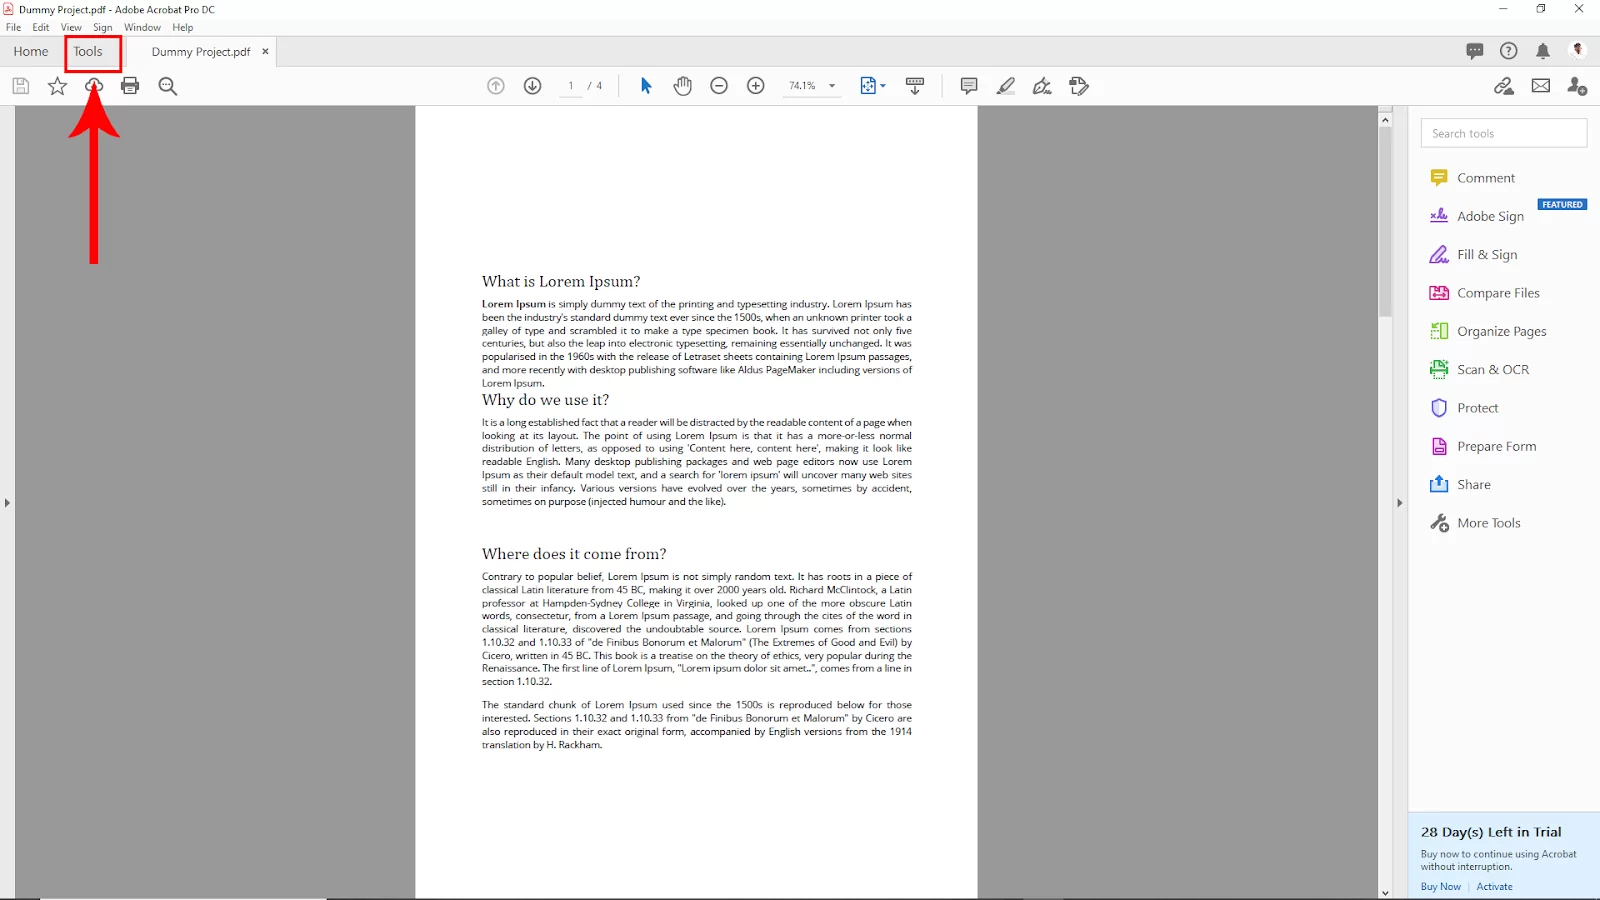
Then navigate to the Edite pdf option and click on that

Step 2:
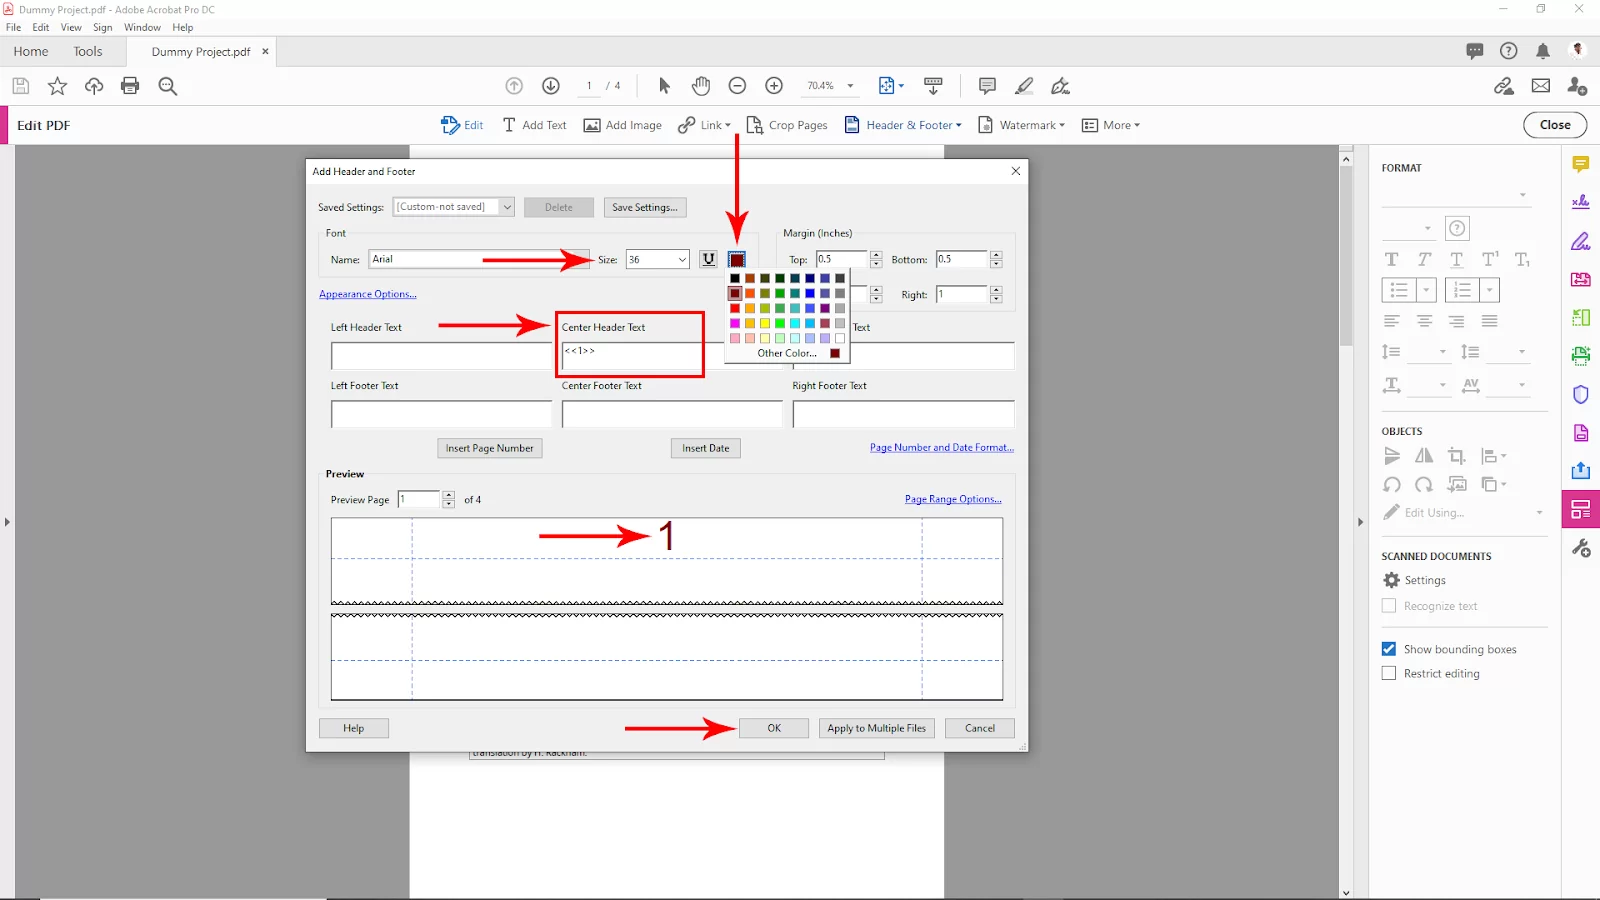
After clicking on the Edit pdf back to the page tab and click on the dropdown arrow of Header and footer from the upper bar, then click on Add.

Now the header and footer panel will appear. Here click on the current header text and write 1. You can change the size of the page number and color from here. And you will see your page number is added to the page. Then click ok.
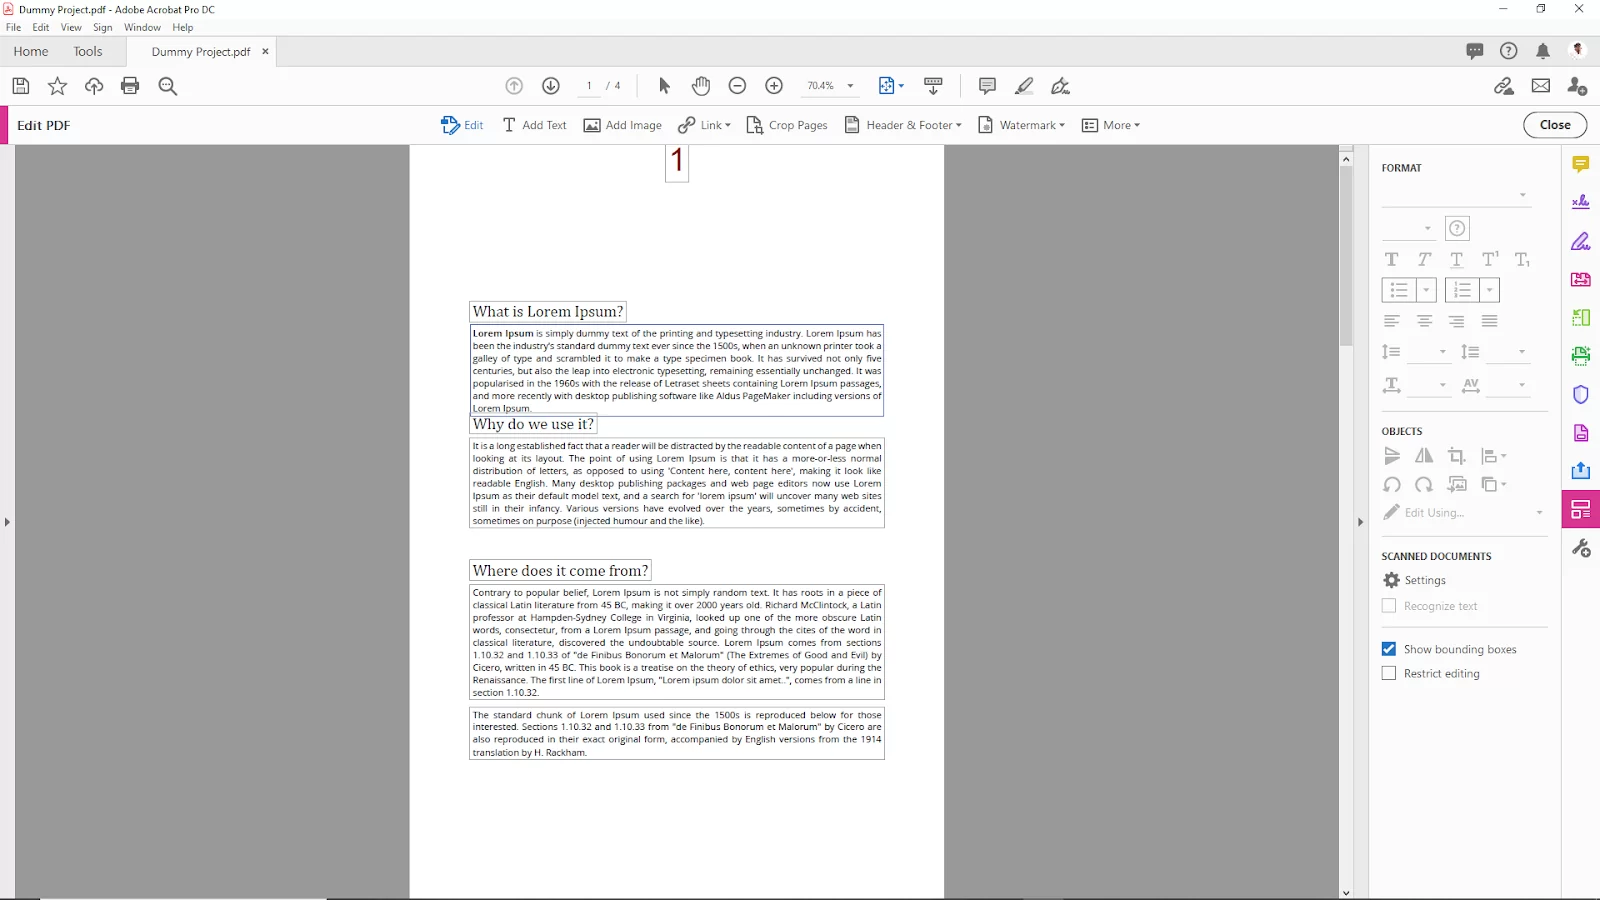
After clicking ok, you will see all the pages have a number serial by serial.
We also recommend that you see our step-by-step guide on how to redact in Adobe Acrobat.
Bates Numbering Using Acrobat
Bates numbers often identify both the person creating the document and their page numbers, occasionally required by courts and other legal settings. Using Acrobat, you can add these numbers to one or more documents in the desired style. Follow the steps below to do Bates numbering using Acrobat.
Step 1
Start by selecting More from the toolbar in Acrobat, then select Bates Numbering, and finally, Add.
Step 2
You will see a dialog box. Select the files or folders of files that need to be numbered by clicking Add Files and then using the Add Files and Add Folders buttons.
Step 3
Select the files you already have open by clicking the Add Open Files button. If prompted, enter the password to open any files that ask for a password.
Step 4
Drag files up or down in the list of your chosen files. Dragging the files up and down will change the order in which they’ll be numbered.
Step 5
Click OK and Add Header And Footer after dragging your files.
Step 6
Next, Click Insert Bates Number after deciding where the Bates numbers appear on the pages. Enter the desired numbering system’s specifics in the box, including the number of digits and any prefixes that should come before the actual numbers.
Step 7
To make the numbers appear correctly on the website, click OK and then change the font size or any other settings as necessary.
You can also check out our detailed article on creating signature using Adobe Acrobat.
Updating Page Numbers in PDFs
Follow the steps below to update page numbers in Adobe Acrobat PDFs manually.
Step 1
Begin by selecting the Tools tab.
Step 2
Next, select the Edit Pdf button in the tool’s center.
Step 3
Now select the header and footer in the Edit Pdf toolbar.
Step 4
Select update using the header and footer menu.
Step 5
Finally, select the OK button in the update header and footer dialog box.
Adding Page Numbers to The Opposite Side of Each Page in PDFs
If you want your PDF to be bound like a book, you may need to add page numbers to specific sides. Follow the steps below to add page numbers to the opposite side of each page in PDFs.
Step 1
Start by selecting the Tools Tab.
Step 2
Now select the Edit Pdf button in the tool’s center.
Step 3
Next, select the header and footer in the Edit Pdf toolbar
Step 4
Choose Add using the header and footer menu.
Step 5
Proceed to place your cursor in the left header text or left footer text box.
Step 6
Now select the insert page number button.
Step 7
Choose the page range option link.
Step 8
From the subset menu, choose the page range options.
Step 9
Go to even pages only and select it. This can be selected from the subset menu in the page range options dialog box.
Step 10
Select OK. This would close the page range options dialog box. Select OK again to close the Add header and Footer dialog box.
Step 11
Proceed to Re-select the header and footer buttons in the Edit Pdf toolbar.
Step 12
Also, Re-select Add from the header and footer menu. Then, select the Add new button in the information dialog box.
Step 13
Proceed to place your cursor in the right header and footer text. Now, select the insert page number button.
Step 14
Choose the page range options link.
Step 15
Select odd pages only from the subset menu in the page range options dialog box.
Step 16
Choose the OK button to close the page range options dialog box and select OK to close the Add header and footer dialog box.
If you enjoyed reading this article, you may also like to read our information packed guide on How to Reduce Pdf File Size In Adobe Acrobat.