Using Adobe Acrobat to create signatures can save you a lot of time and hassle when signing documents. This function allows you to easily add a digital signature to your PDFs, making it more convenient and secure than traditional printing, signing, and scanning. You can also personalize your signature and include it in your documents. I’ll teach you how to create signatures in Acrobat quickly.
2 Methods to Create Signature in Acrobat
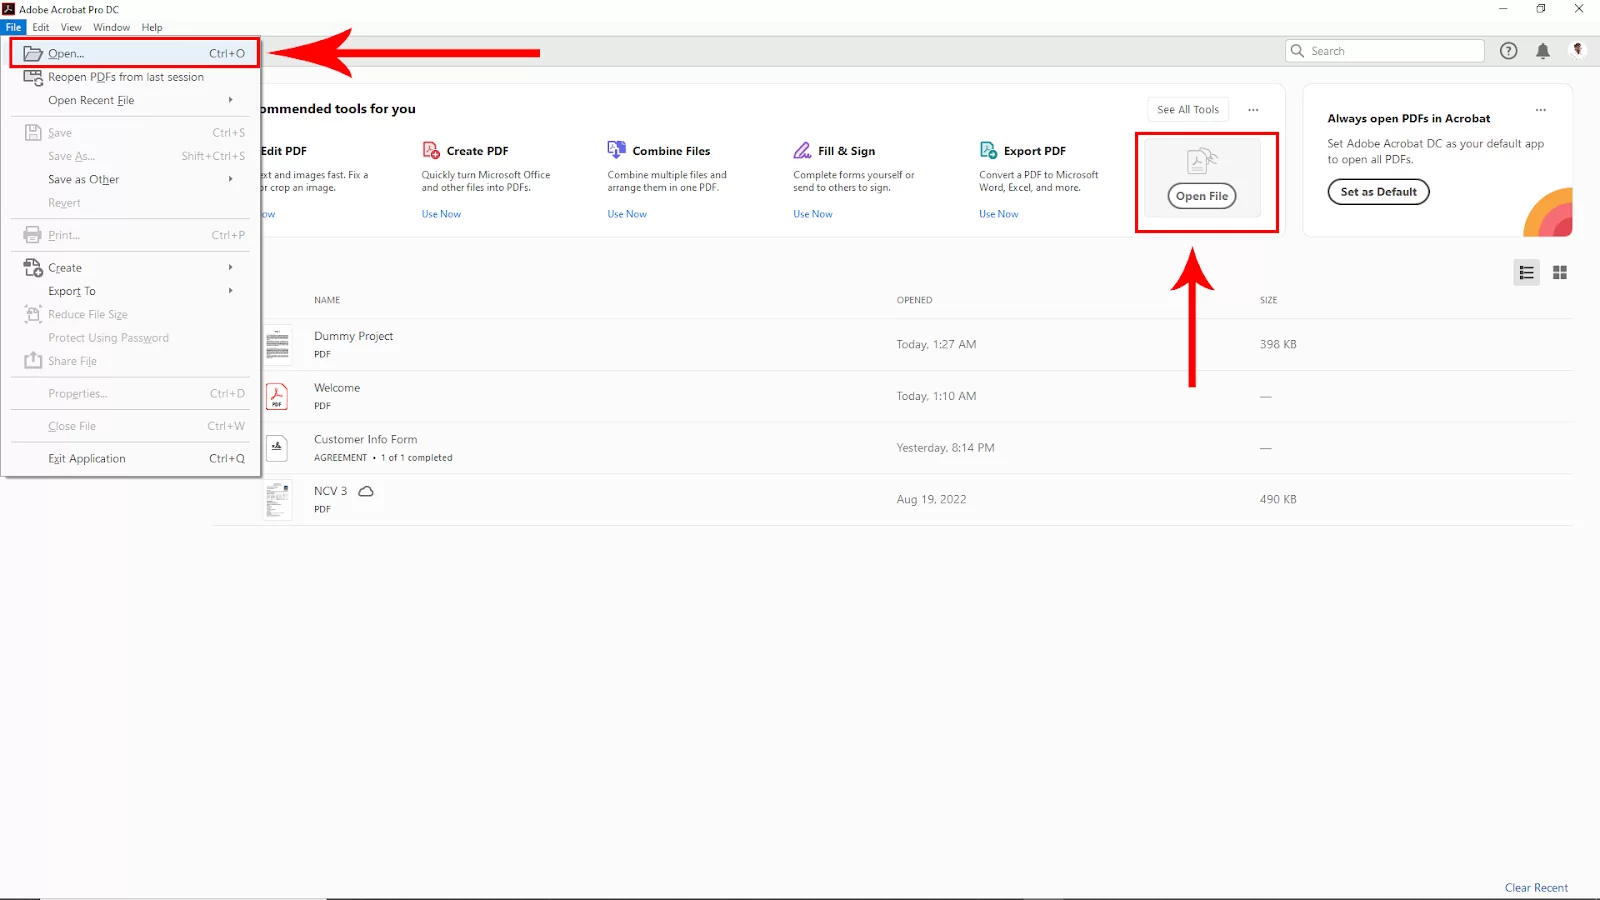
First, Open Adobe Acrobat software and then open your pdf file. To open a file, go to File > Open and then select your pdf file from your file manager. You can use short in Win [ Ctrl + O ] or Mac [ Cmd + O ]. You can click directly to Open file on the right corner and then open your File.
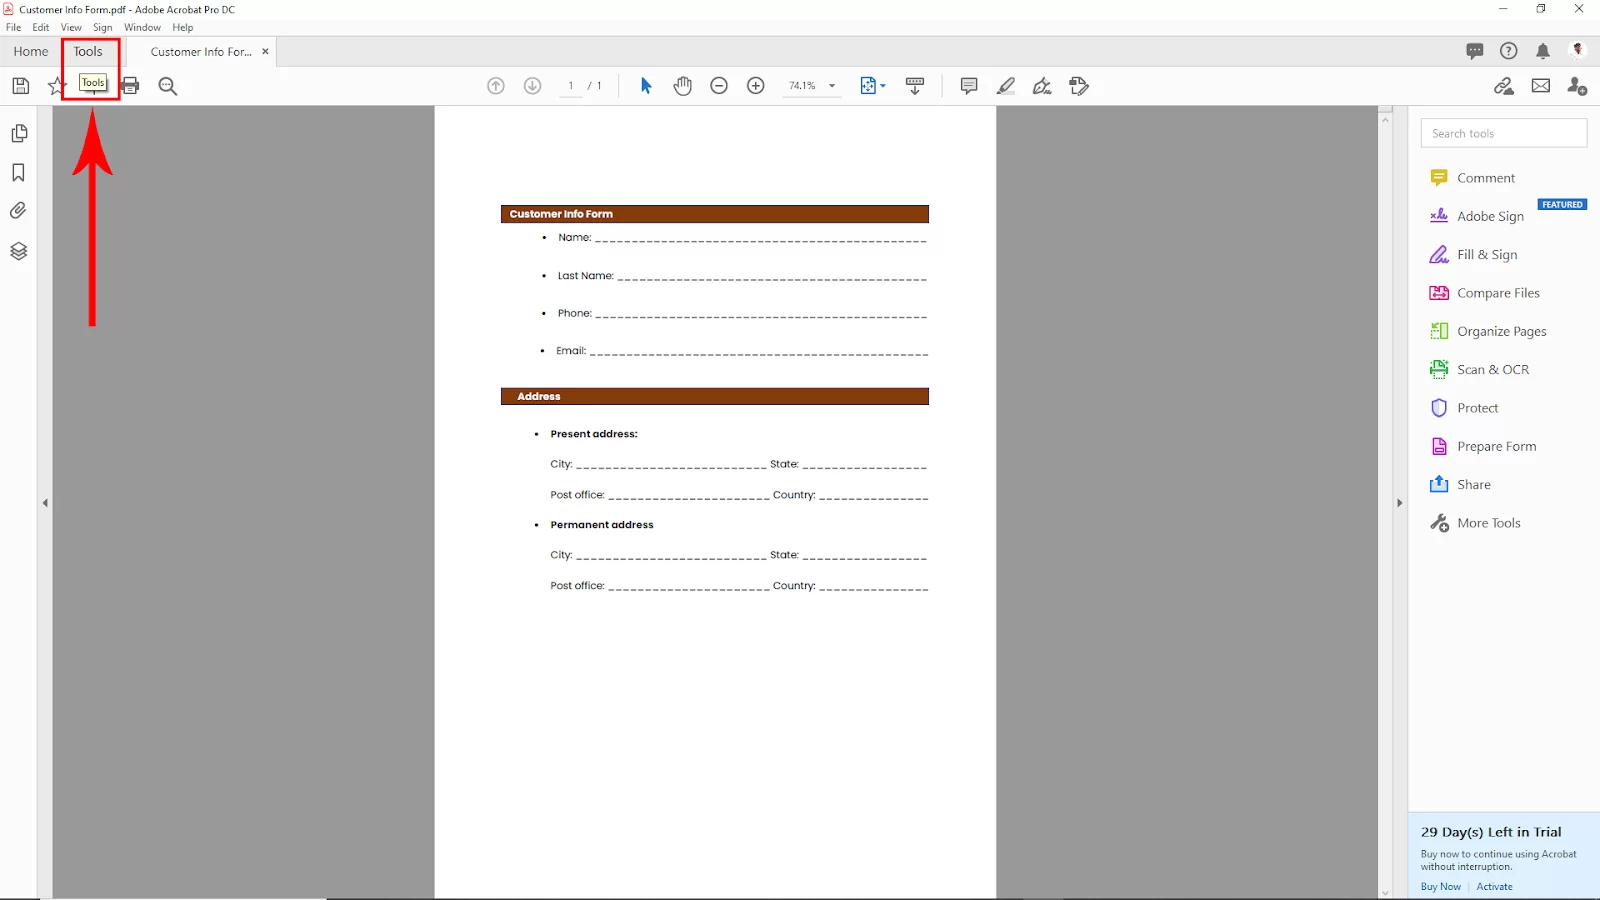
After opening the pdf file, go to Tools in the upper left corner. Click on that.
Then navigate to the Fill and Sign option and click on that
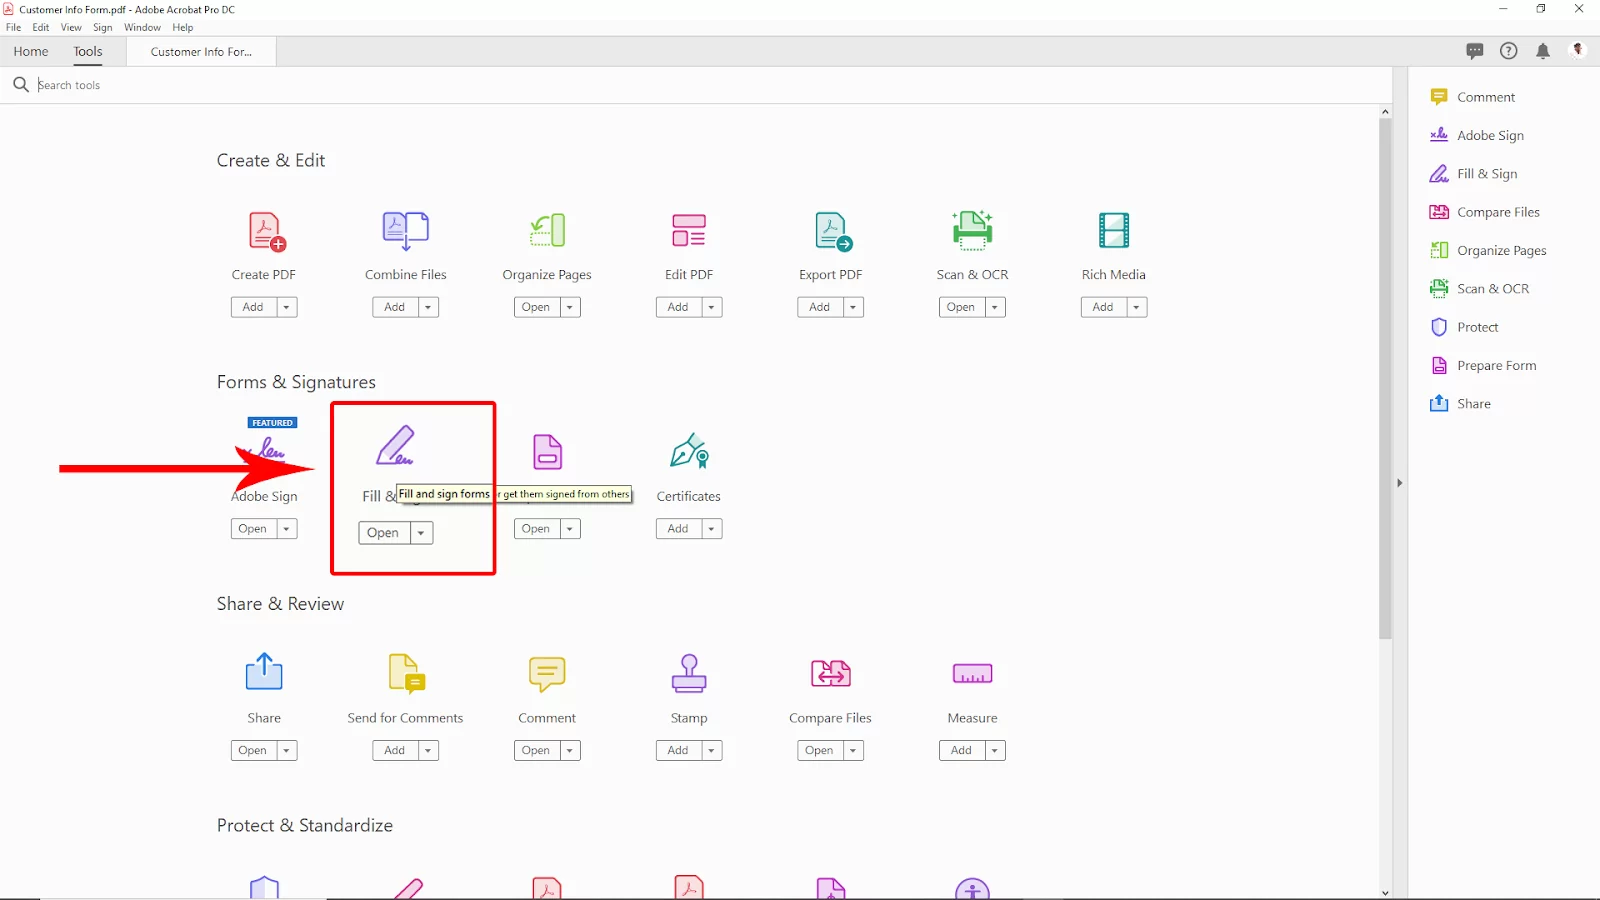
After navigating the fill and sign option, then Click on Fill and Sign.

Method 1:
After Selecting the Fill and sign option back to the page tab, and select the Sign option from the upper bar. And then click on add signature.

After clicking on add signature, you will see a new signature window will open. Now type your signature. You can change the default style of the signature by clicking on the dropdown arrow right side down corner and, choosing your signature style, then clicking apply.
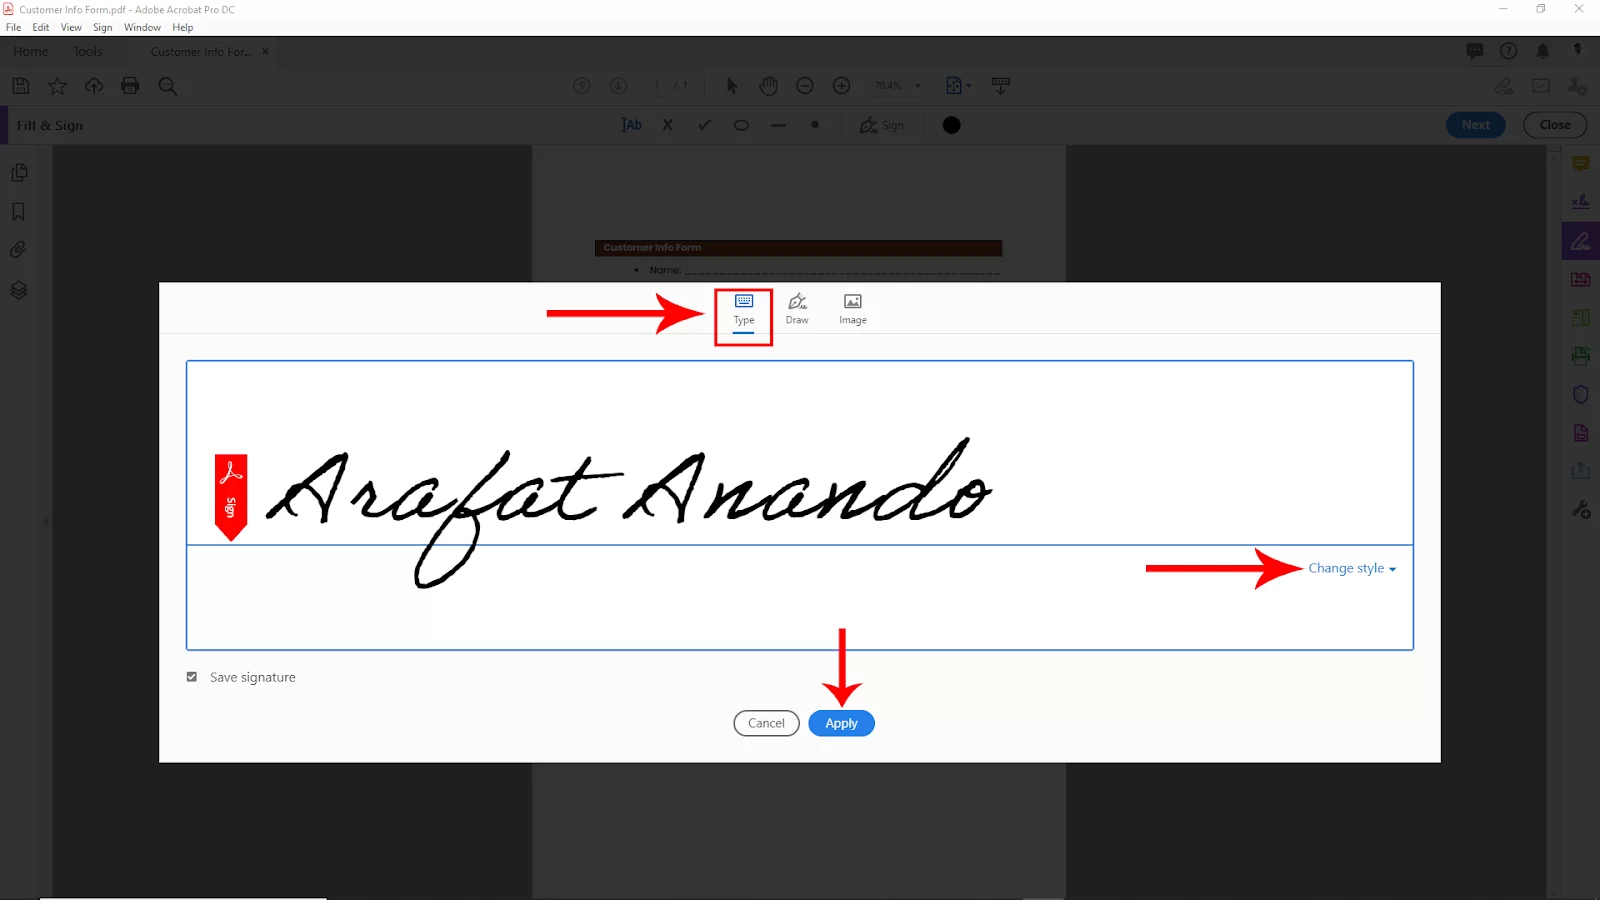
After clicking apply, click on the page where you want to add the signature. To change color, go to the upper bar, click on the circle color pallet, and choose your desired color to add to the signature.
We also recommend you see our step-by-step guide on making a fillable form using Adobe Acrobat.

Method 2:
To add a custom signature option, go to the signature panel. You will see in the upper middle that there was a custom signature option. Click on that and now click and Draw your signature in the panel canvas with your mouse’s left button. If you have done some mistake, then click on clear it will clear the signature, and you can draw again. After drawing your signature, click on apply.

After drawing your signature, click on your page wherever you want to add the signature. And your custom signature is created.

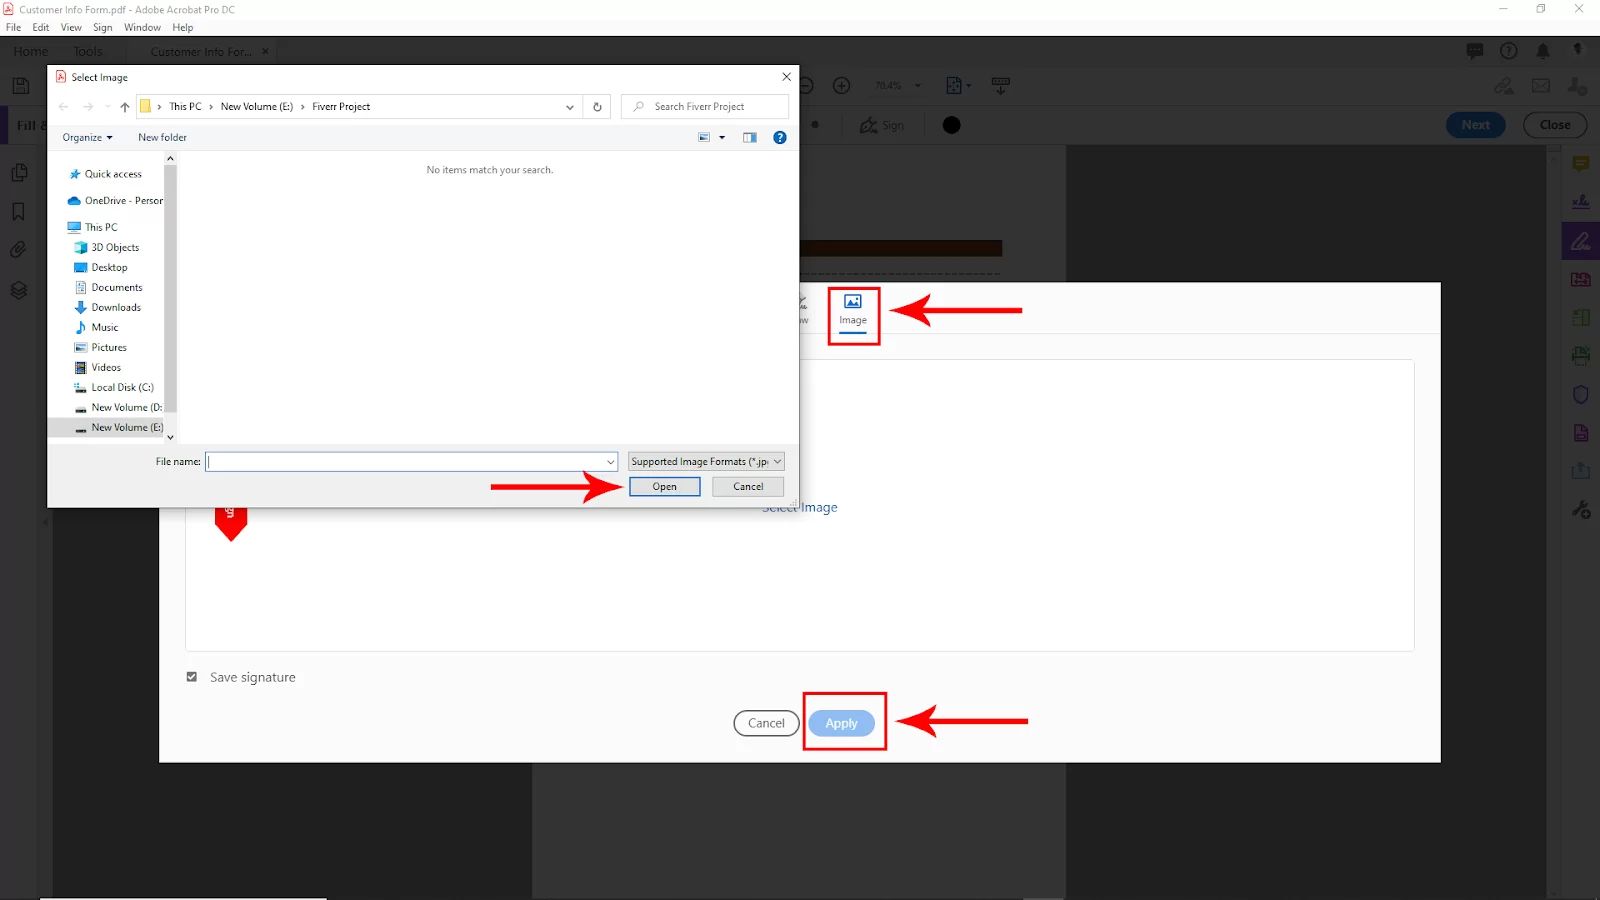
If you already have your custom signature image. Click on the Image signature panel, select your signature image from the file, and click open. Now click on apply. After this, click on your page wherever you want to add the signature.
You can also check out our in-depth article on how to delete pages in Adobe Acrobat.
How to Sign Your Form in Adobe Acrobat
Follow the below to learn how to sign a form using Adobe Acrobat.
Step 1
Start by opening the PDF document or form in Adobe Acrobat. Next, click Fill and Sign in the right pane.
Step 2
Now click the sign icon.
Step 3
In the Fill and Sign toolbar, choose whether to add your signature or just your initials. If you have already added your signature or initials, they will be displayed as options you can choose from.
Step 4
If you have already added your signature or initials, select it from the sign options and click on the place in the PDF where you want to add your signature. You can choose to type, draw or import a signature image.
Step 5
When you have chosen the way you want to import your signature, choose apply. Next, click on the place in the PDF where you wish to place the signature or initial.
Step 6
You can also move the placed signature or initial. To do this, click the field to highlight it and use the arrow keys. To resize or delete the field, go to the field toolbar and use the available options.
Sync a Signature Across Devices
When Acrobat saves your signature, it is stored in the cloud. This allows you to use your signature on the web, desktop, and all Acrobat mobile apps, including Acrobat reader, Adobe scan, and Adobe sign. All the platforms I mentioned here support photos, images, and hand-drawn signatures. If you want to store your signature in the cloud, choose to save to online profile when you create your signature.
How To Fix PDF Form Not Adding Signature Field
If your PDF form isn’t allowing you to add signature fields, follow the steps below to fix it quickly.
Step 1
Start by opening the document in Adobe Acrobat DC Reader.
Step 2
Go to tools>certificate.
Step 3
Choose digitally sign.
Step 4
Drag the box to the location where you want to sign; make it big enough to fill the full space automatically.
Step 5
Choose a signature.
Let’s Learn About Adobe Sign
Adobe sign allows an individual or business can submit, secure, trace, and manage e-signature procedures. Remember that Adobe Sign is a cloud-based service, which means all your signatures are stored in the cloud. The service aims to substitute fully automated electronic signatures for actual paper and ink signatures.
Adobe sign comes packed with a lot of awesome features, which I will list below.
- Using Adobe Sign, users can create workflows that need multiple signatures.
- Using Adobe Sign, users are given the option to choose between various digital and electronic signature types.
- Using Adobe Sign, users can generate branded documents and APIs to integrate with external apps such as Dropbox, Google Drive, Ms. Office, etc.
If you enjoyed reading this article, you might also like How To Draw On Adobe Acrobat.