Deselecting in Krita is a fundamental technique that allows users to release the current selection and return to a non-selected state. This is a crucial step in many digital art and design tasks, as it enables users to apply changes and transformations to specific elements within their projects.
Krita provides several methods for deselecting selections, allowing users to choose the best option for their specific needs. This guide will provide a simple overview of the various methods for deselecting selections in Krita, along with step-by-step instructions on how to effectively use these tools.
How to Deselect in Krita
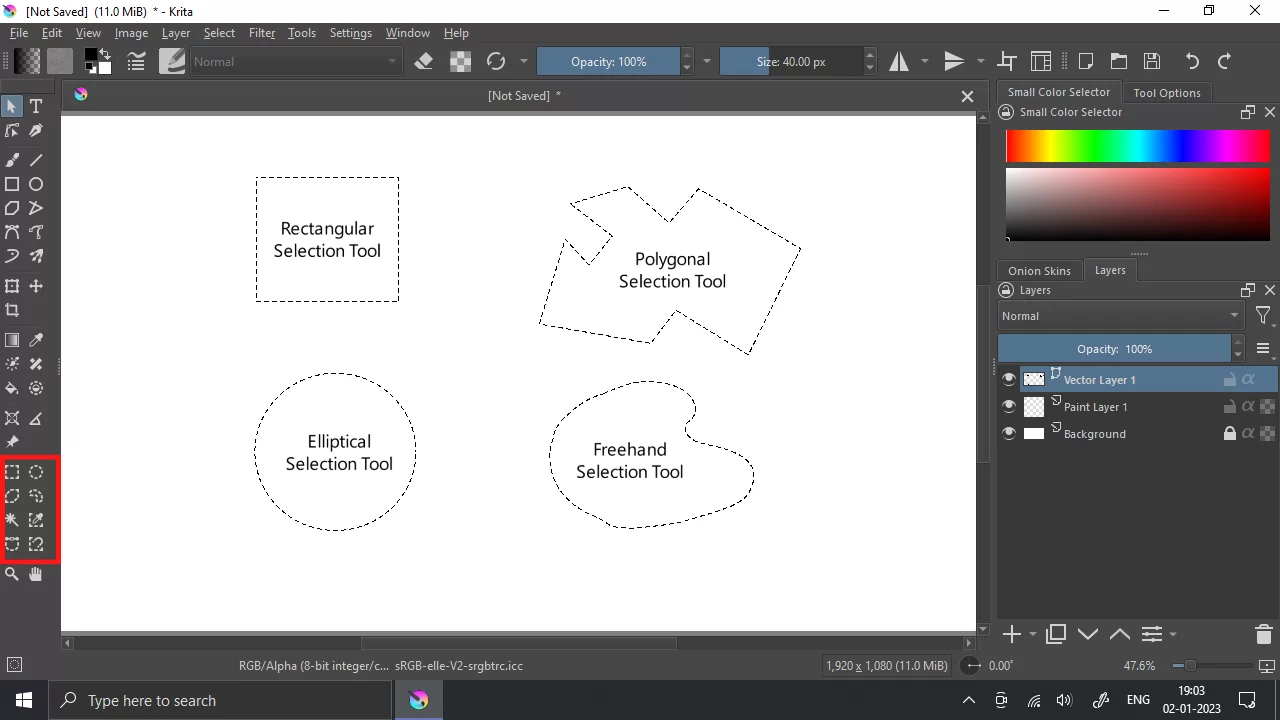
To create selections in Krita, many different tools are available in the toolbox. These are as follows:
- Rectangular selection tool, Elliptical selection tool, Polygonal selection tool, Freehand selection tool…
- Contiguous selection tool: It selects a contiguous area enclosed within a boundary.
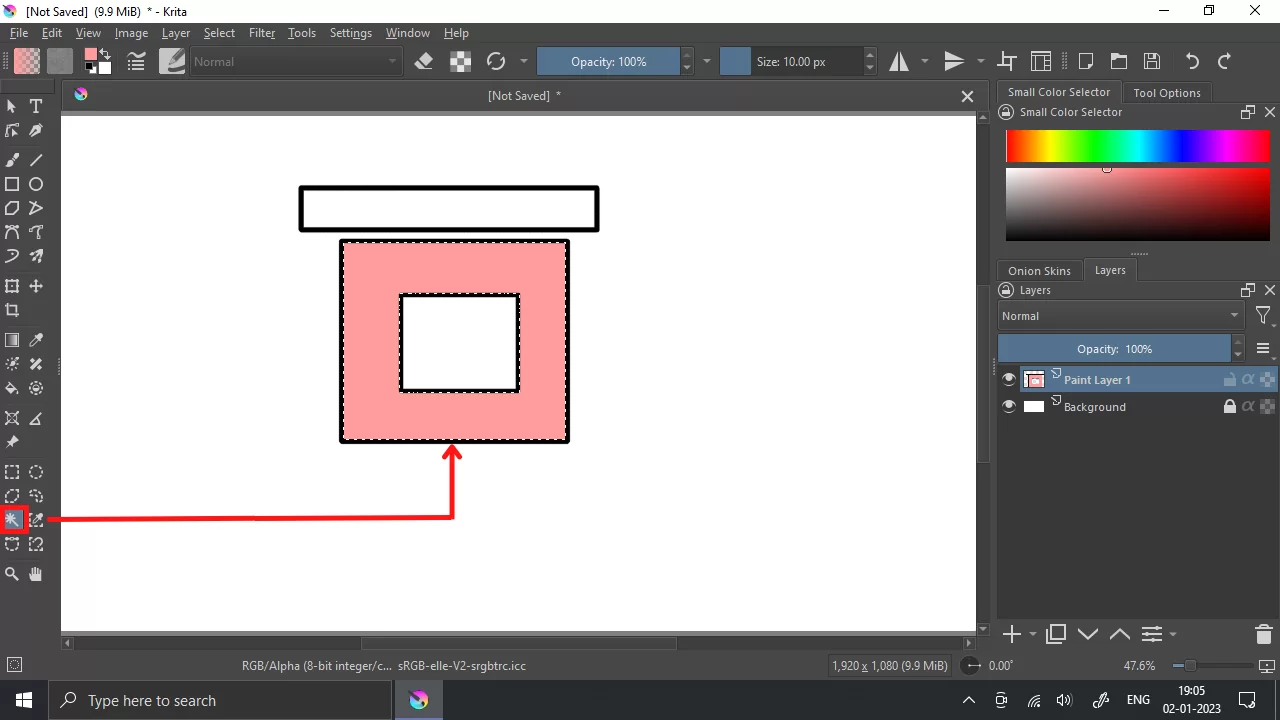
- Similar color selection tool: It selects all areas having similar color.

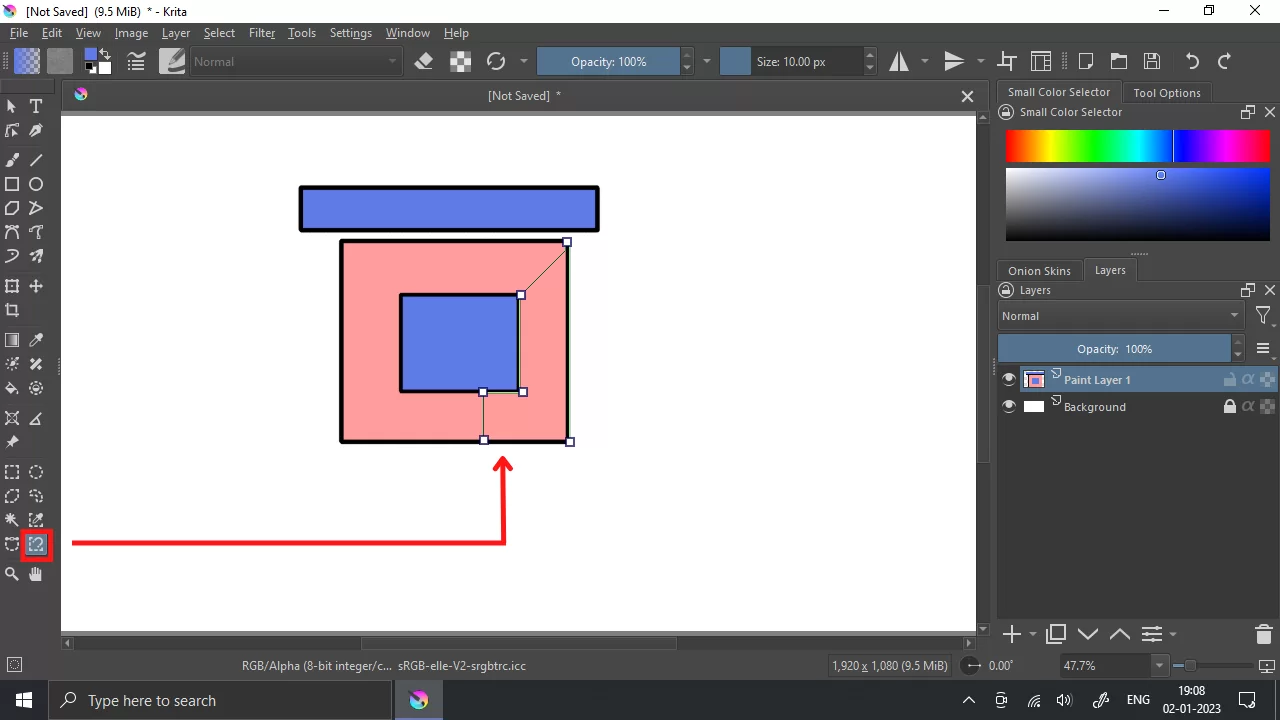
- Bezier curve selection tool: It creates bezier curves for selecting any area. You have to drag by holding the left key of the mouse to create curved lines of selection.

- Magnetic curve selection tool: It selects the area by snapping to boundaries or high-contrast areas of the image.
To create multiple selections altogether, you have to hold the Shift key while creating selections and to subtract any area from the selection. You have to hold the Alt key while creating a selection that is to be removed.
To Deselect the selection, you have two options:
- Press Ctrl+Shift+A
- Right-click on the screen, and a panel will open in which you can see the Deselect option and many other actions you can perform with selections.

But you have to keep one thing in mind, while Right clicking, you must be using a selection tool. Otherwise, you will not get this panel, and a brush and color selector panel will pop up in front of you.
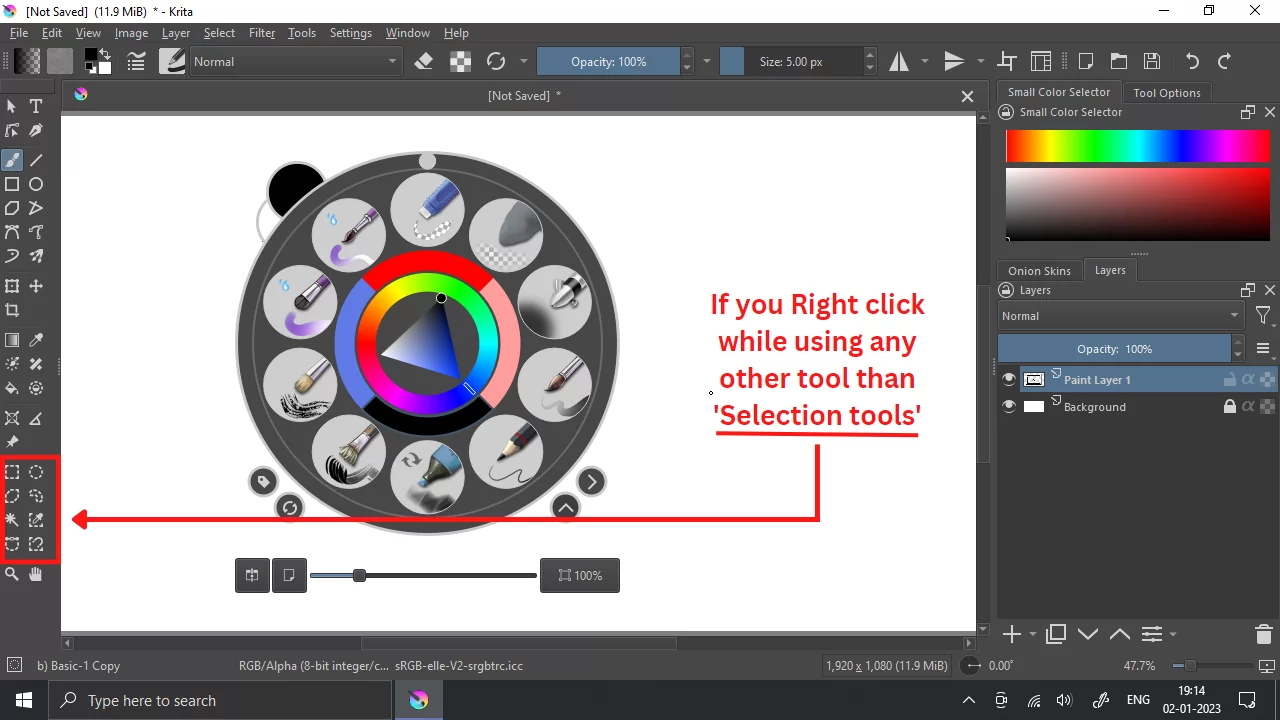
So to avoid this, you must use a selection tool while Right clicking on the screen to open the required panel.
We also recommend that you see our information packed guide on how to animate in Krita.
Adding Deselect Button To the Top Settings Bar in Krita
You will have to add the deselect button if you want to deselect a lot during your work and want to use a button. If you want to add the button, go to settings>configure toolbar. Next, scroll down the list on the left till you see the deselect option. When you find it, select it and click on the right arrow.
When you click on the right arrow, it will move the action to the right along with the ones in the upper settings bar. Next, click on Apply which is at the bottom, to accept the change. Then, click Ok to exit the window. You should now see a Deselect button in the top settings bar, which can now be used to deselect any changes you make.
You vcan also see our guide on how to move selection in Krita.
What are Selection Masks in Krita?
A selection mask allows you to remember and recall the edits you made on a layer selection. Selection masks work similarly to extra channels in other editing programs. The difference between selection masks and extra channels in other editing programs is Krita’s ability to assign them to specific layers and activate a selection using a single-layer click. Follow the steps below to create a local selection mask.
Step 1
Start by creating a selection and left-clicking on the desired layer and selecting local selection.
Step 2
You can perform transformation, deformation, and paint operations when you are isolating a selection mask with the Alt plus right-click.
Magic Wand Selection in Krita
We call the contiguous selection tool the magic wand tool because a Magic Wand represents it. This tool allows you to make a selection by selecting a point of color. The magic wand selection will choose any contiguous areas of color similar to the one you selected. You can also adjust the fuzziness of the tool in the tool options dock.
If you enjoyed reading this article, you will also like our guide on How to shade in Krita.