In After Effects, cutting a video clip is a simple process that can be accomplished by using keyboard shortcuts to split a clip at any point, creating two separate clips. This can be especially useful when working with long footage, allowing you to break it down into smaller, more manageable segments.
Cutting a clip can also serve as a backup, ensuring that you have a copy of your original footage in case of accidental deletion or modification. In this tutorial, we will show you how to cut a video clip in After Effects.
4 Steps to Cut in After Effects
There are several methods to cut a video in After Effects. Here are 4 steps to cut in After Effects.
Step 1:
First, Open Adobe After Effects. Then you should see a home window panel where you can create your blank project. Click Create New or you can go to File > New for the short key win [Ctrl + N] or Mac [Cmd + N].
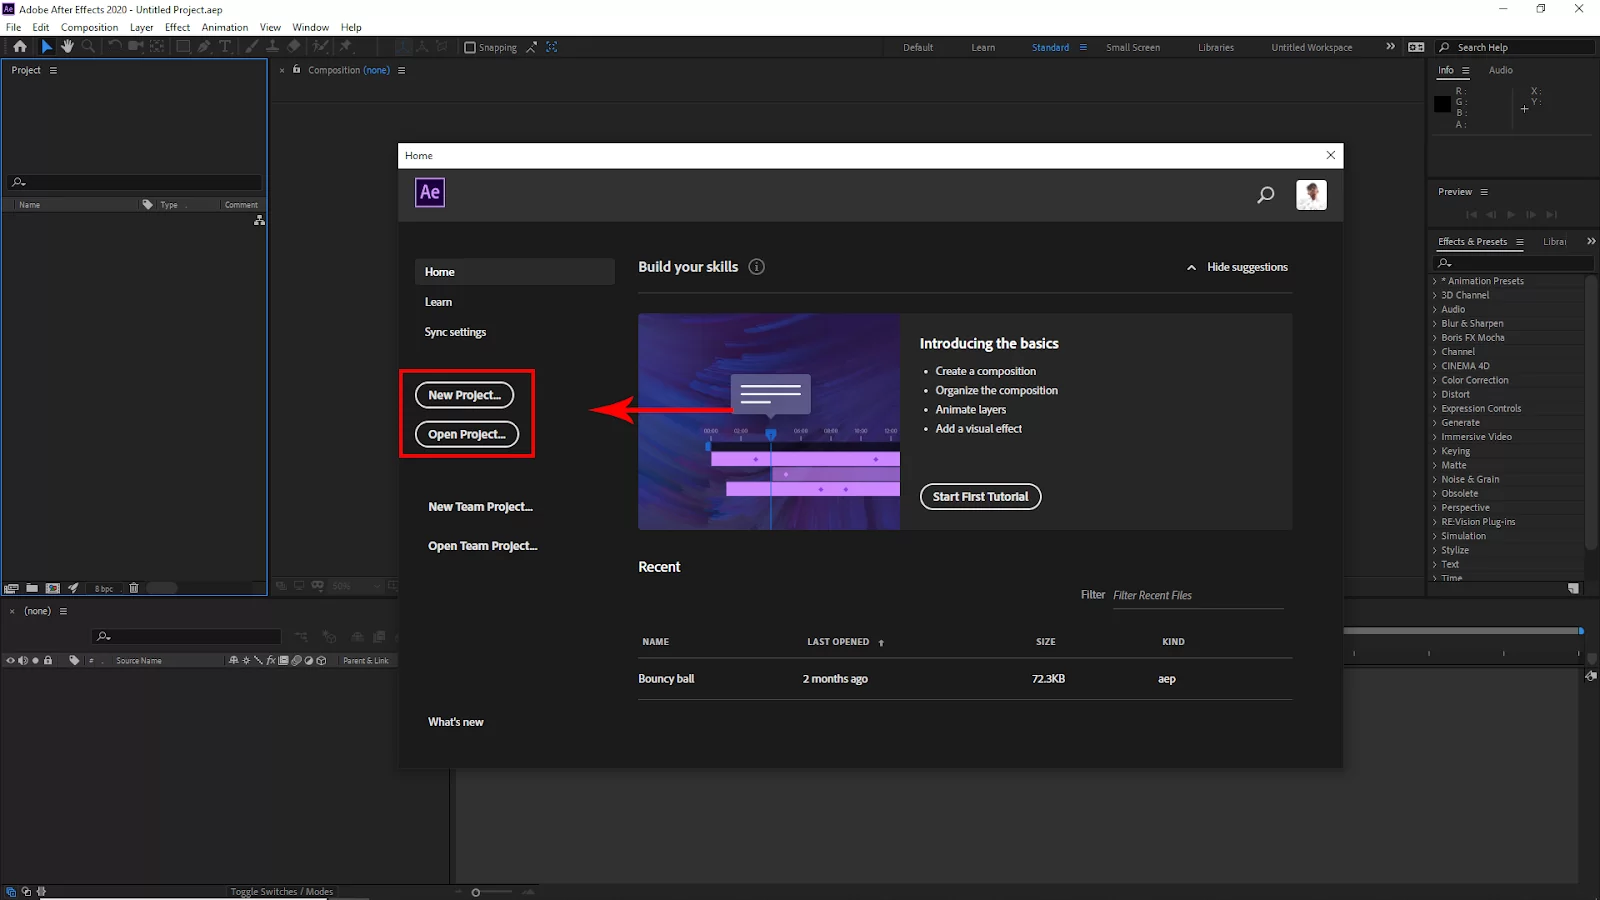
Or if you have an existing file you can open it from here just Click Open Project and select your project from the file and click open.

Another way to open an existing file, go to File > open and select your File. Short Key windows [Ctrl + O] and Mac [Cmd + O].

After clicking on Creating a new project you should see the Composition Settings panel. Here you will set your project Width and Height and select your project background color. You can also set the Frame Rate. Then Click Ok.
Step 2:
After creating your blank project you need to import your video or the footage that you want to cut.

To import your video go to File Import and select your video from the file, then click import. Or you can use the short key Win [ Ctrl + I ] or Mac [ Cmd + I ].
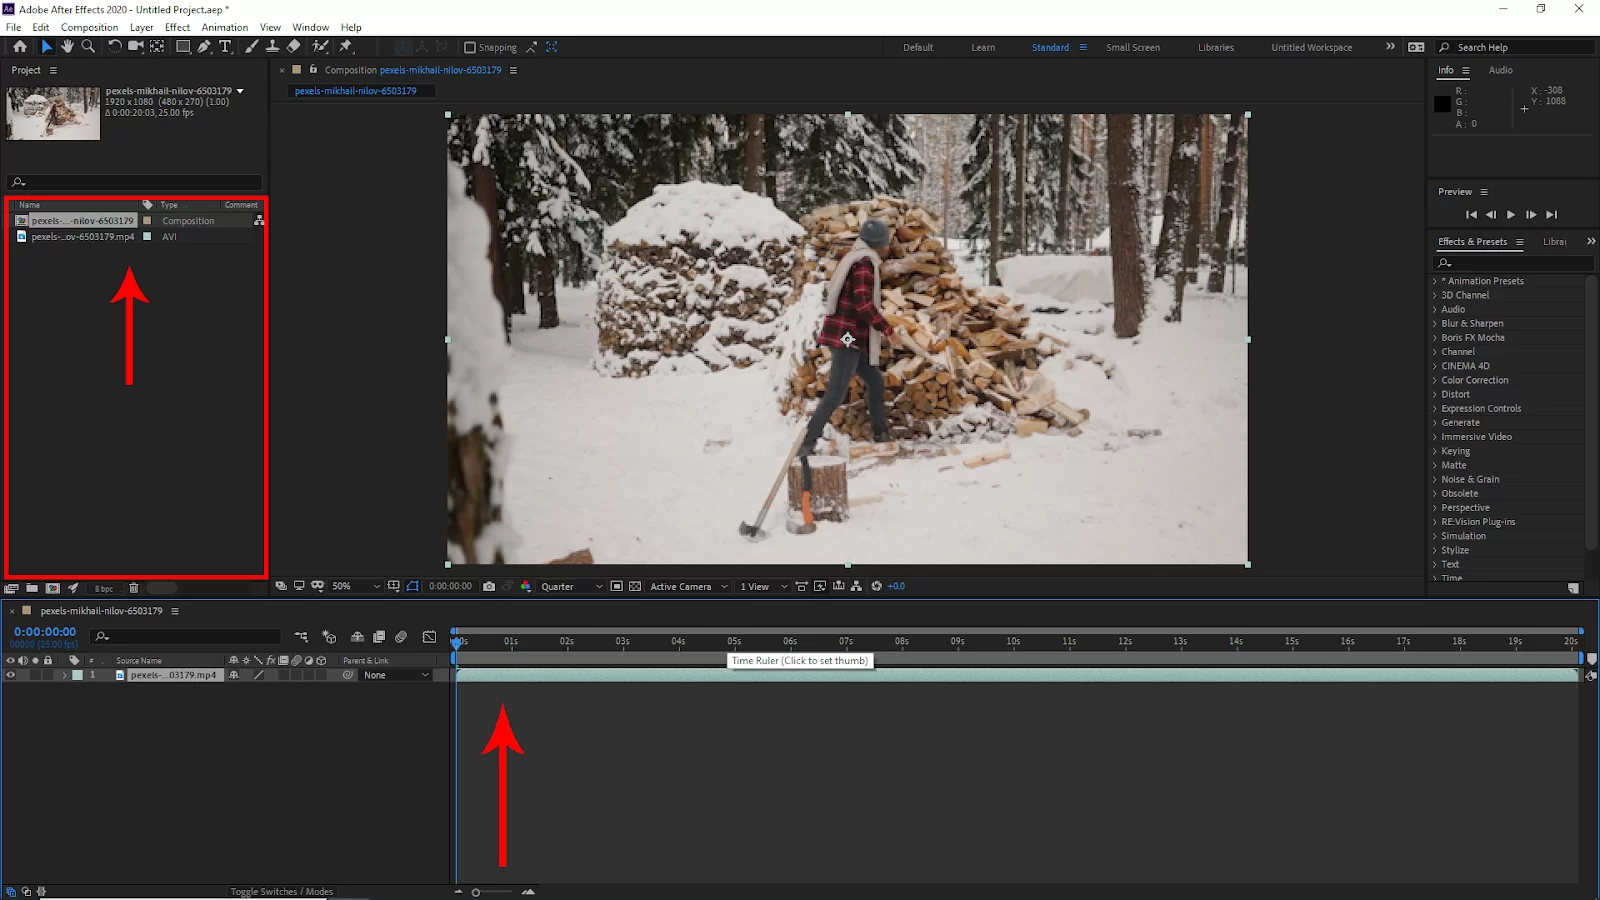
Now click and drag your video into the timeline. And select the video from the timeline.
Step 3:

Let’s move the playhead or current time indicator where you want to cut. Go to Edit and then click on Split Layer to cut the playhead or current time indicator position.
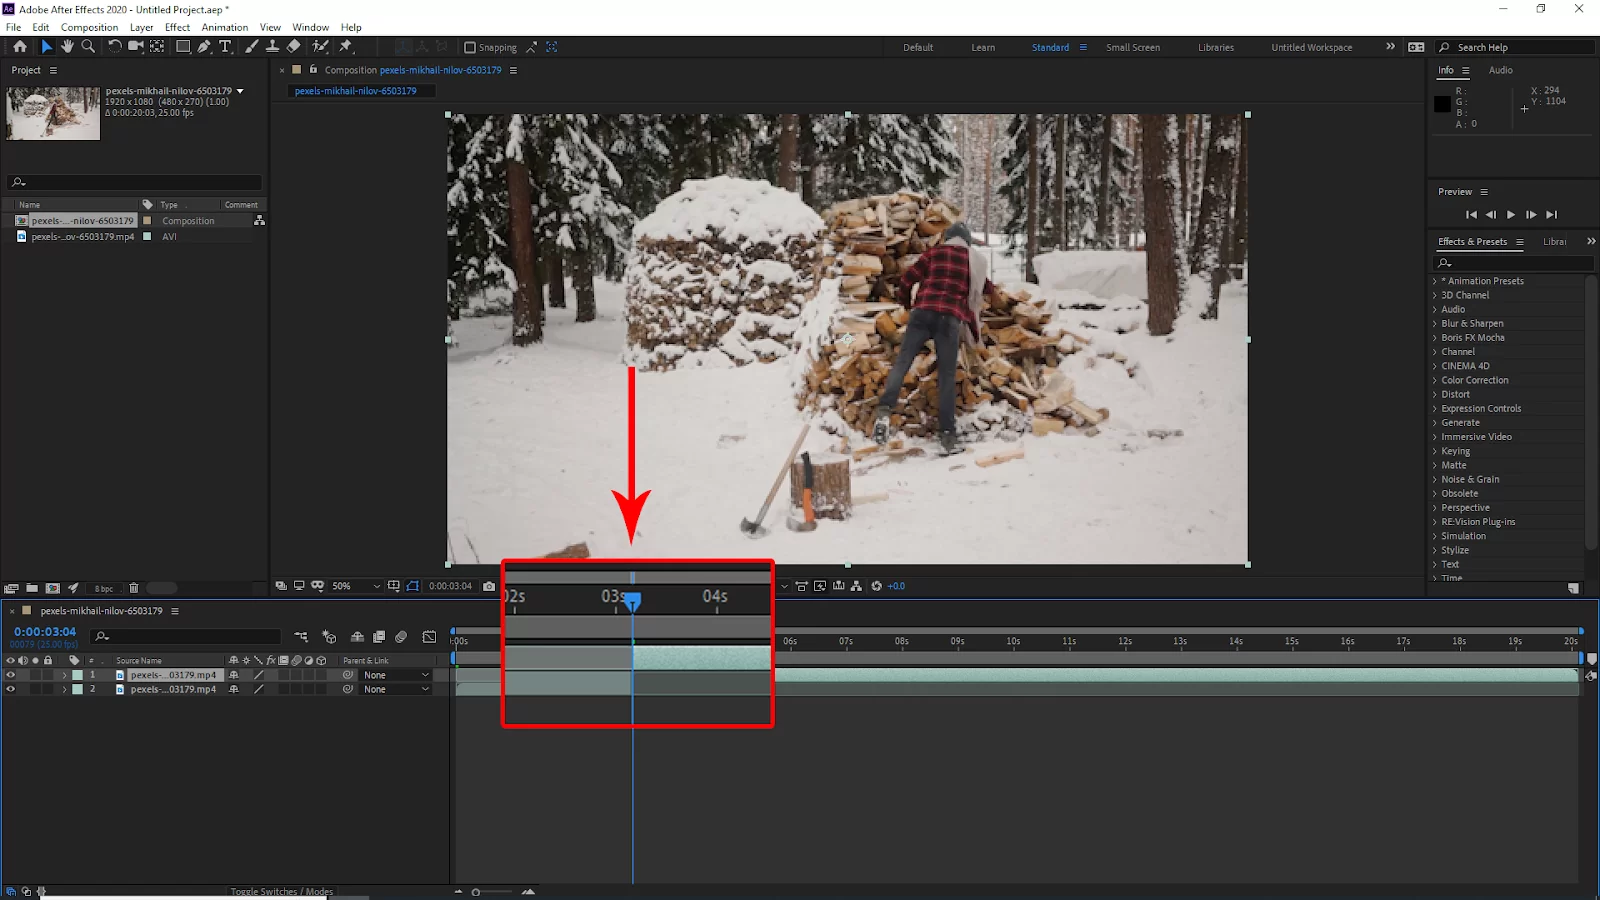
Or you can also use the short key Win [ Ctrl + Shift + D ] or Mac [ Cmd + Shift + D].
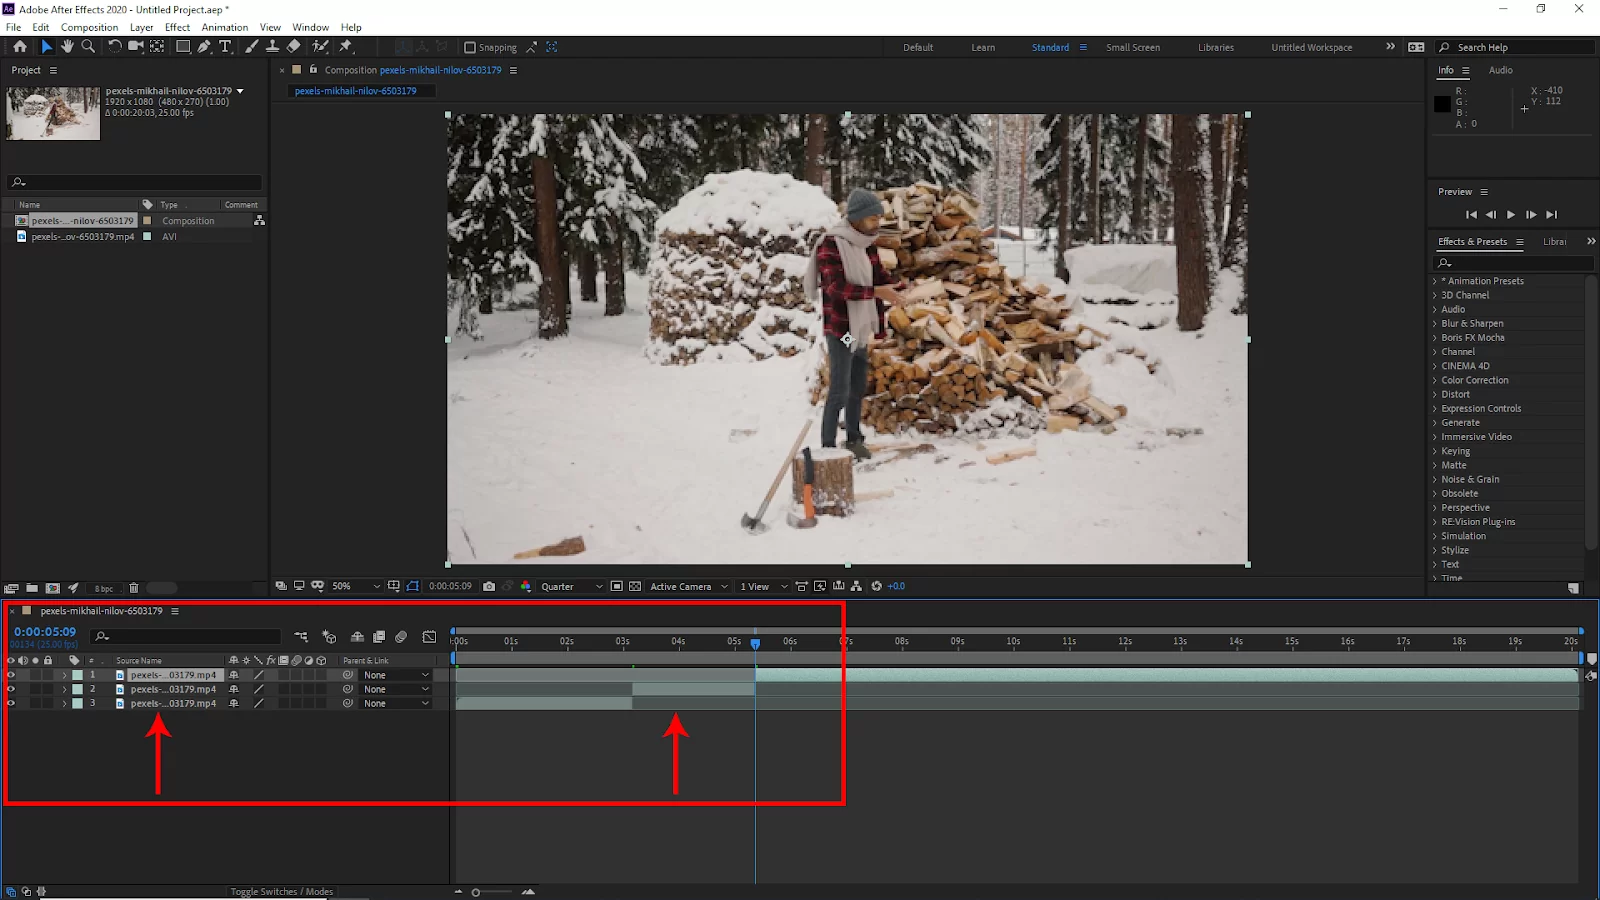
Every time you make a cut, it will create a new layer at the cut. Now you can delete the cut clip by pressing delete on the keyboard.
Step 4:
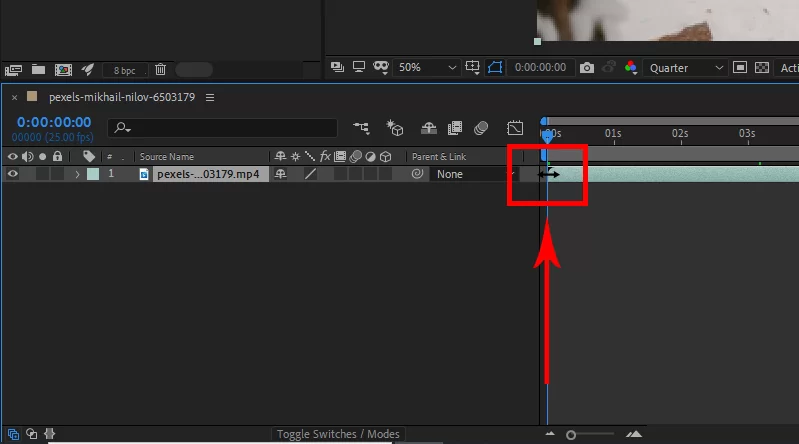
To cut the clip from the beginning, hover the cursor at the beginning of the clip, and you will see both side arrow symbols. And then click and drag it to the playhead position to make a trim.
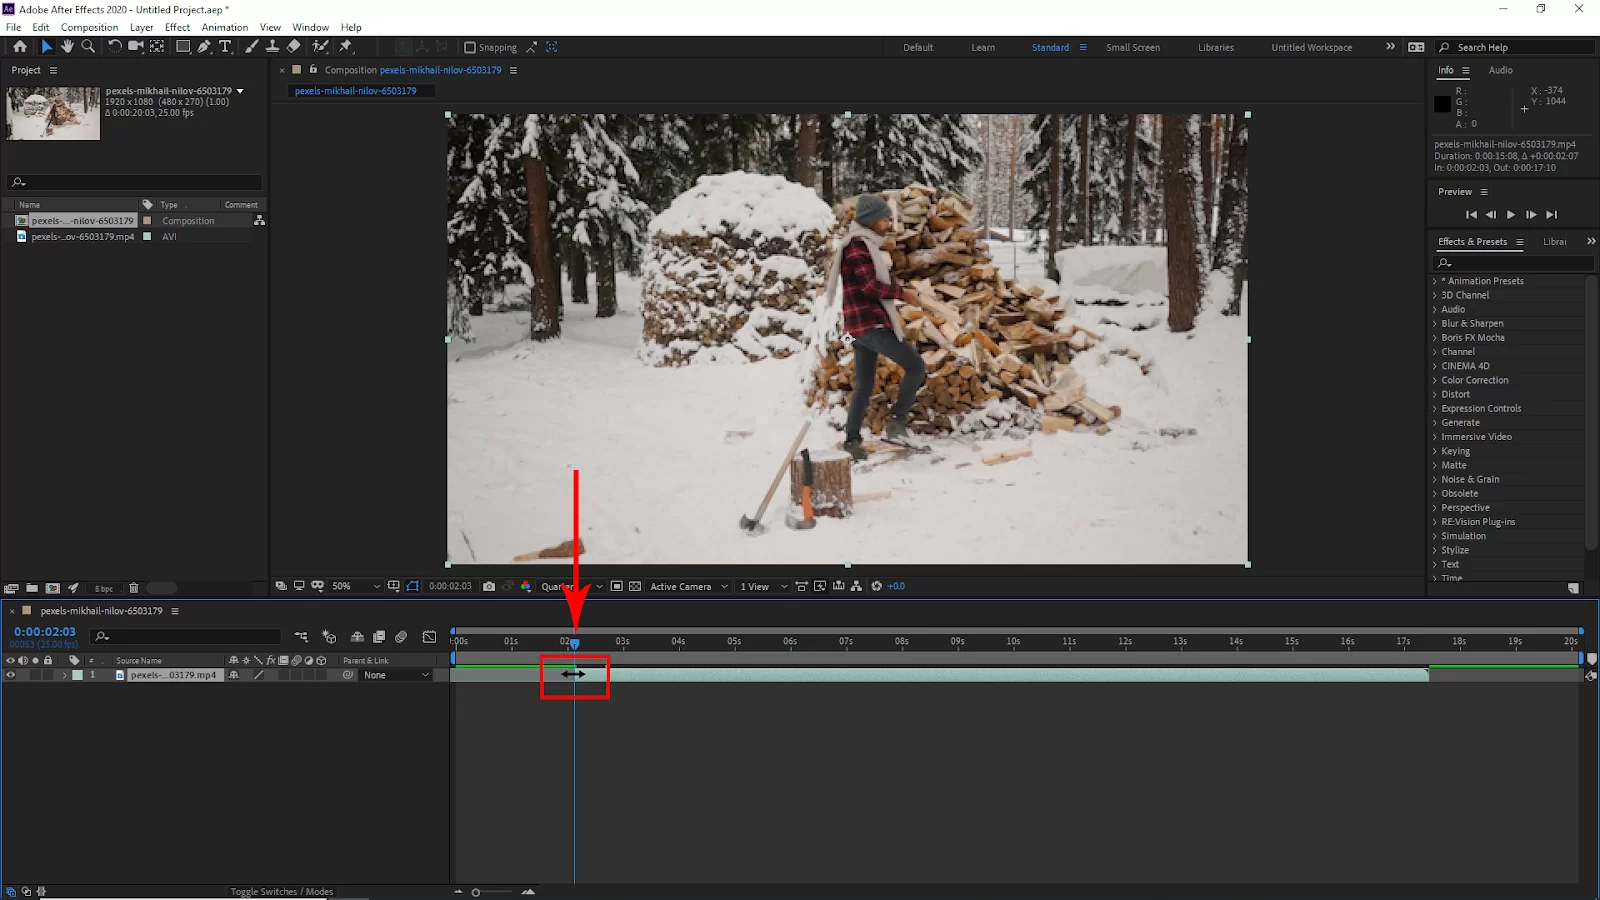
Hold down the shift key while dragging the edge of the clip to snap it to the playhead position. You can use this method to cut the ending of the clip.

You can also cut the beginning of the clip with a short key. Place the playhead in the area that you want to cut and then Win ( Alt + [ ) or Mac ( Option + [ ). It will automatically cut the left side of the clip. You can also use the same method at the end point of the video. To the right side, cut for Win ( Alt + ] ) or Mac ( Alt + ] ).
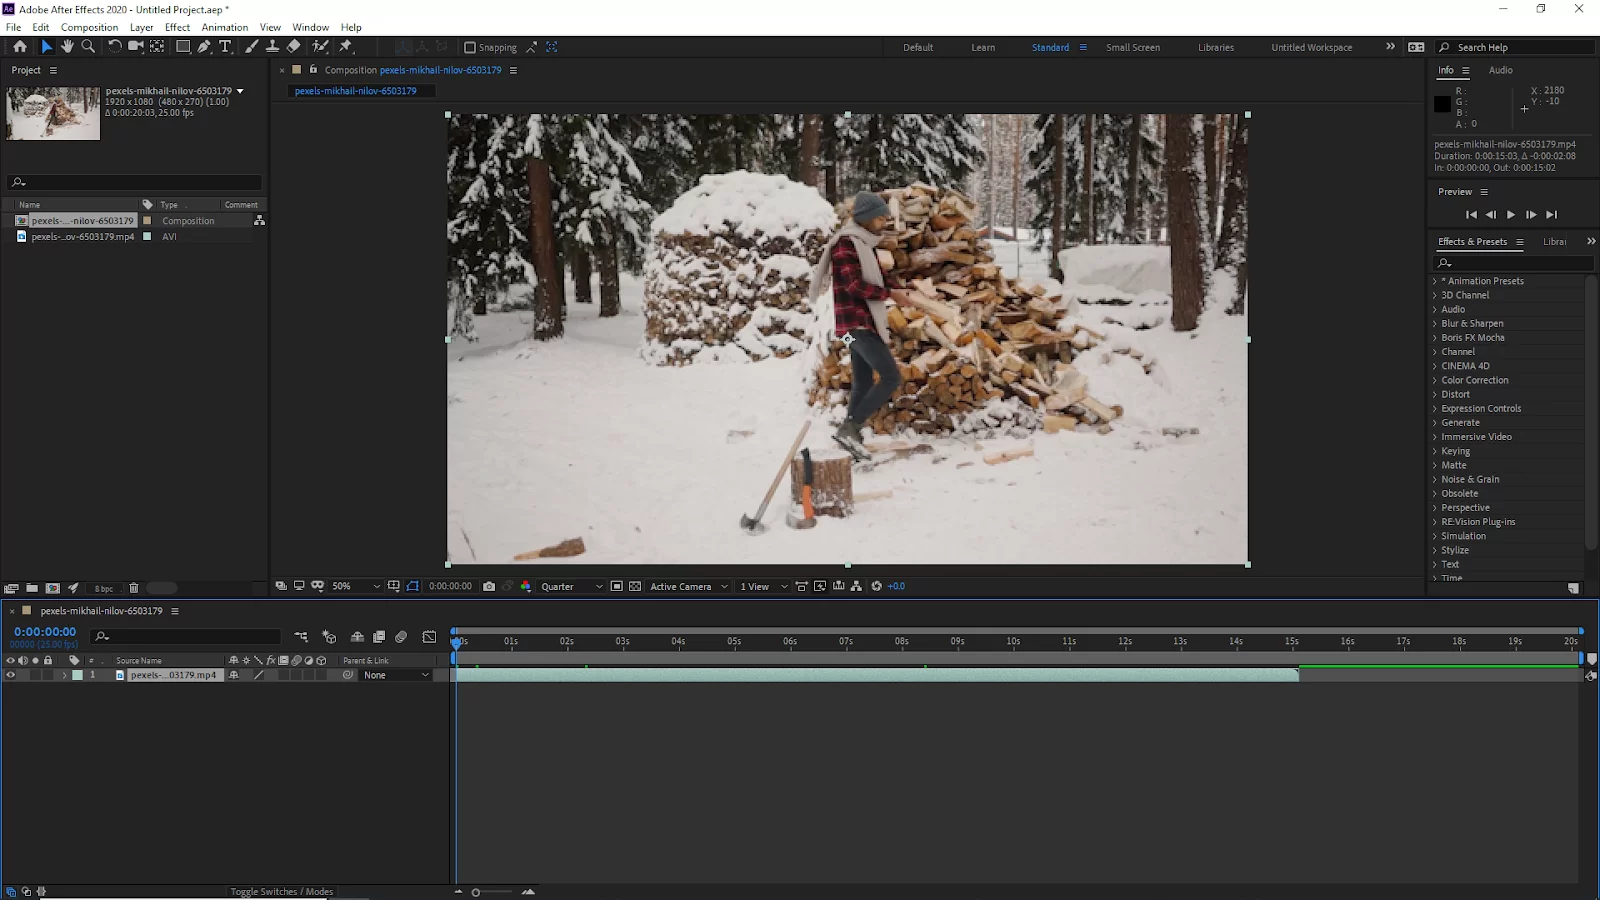
Now click and drag the clip to reposition it. Hold the shift key while moving the clip that will help you to move to the beginning of the timeline perfectly.
We aalso recommend that you see our step-by-step guide on how to duplicate layer in After Effects
Other Ways To Cut After Effects
Follow the steps below to cut your in After Effects. Keep in mind that this is an alternative method.
Step 1
To duplicate your layer, Ctrl + D on a PC or Command + D on a Mac. The clip should then be trimmed to the precise frame you desire by grabbing one end of your layer.
Step 2
Next, hold down the shift while dragging the ends of the clip to trim it to the position of your playhead. By doing this, you may avoid the hard task of having to match up your layer frame by frame and have it automatically snap to the playhead’s position.
Alternatively, you can also use shortcuts to cut your in After Effects. Follow the steps below.
Step 1
Place the playhead first at the precise frame that you wish to clip. Then, press Alt or Option to reduce a clip starting at the beginning. To trim the clip starting at the end, Use Alt + or Option. These two shortcuts will both trim the clip to the location of your playhead. That’s all!
You will like our in-depth guide on looping a video in After Effects
Slipping a Layer in After Effects
The term slipping isn’t well-known in After Effects. However, those who edit videos will appreciate this short technique for speeding up the procedure. Follow the steps below to slip a layer in After Effects.
Step 1
If you’ve established a layer edit, you can drag the layer left or right as if it were underneath the edit. This is done when you don’t want to change the position of the layer in the timeline.
Step 2
Since you will be altering the in and out points from the source of the layer rather than the timeline, the video in the composition window will change.
Step 3
To slip a layer, the Pan Behind Tool has been used. The Pan Behind Tool is available whenever you mouse over an area outside the layers in and out points in After Effects. Finally, click and drag left or right on the layer’s translucent area(s) when you’re ready to slip it.
You ccan also check out our detailed guide on rendering a video using After Effects.
Leave a Reply
You must be logged in to post a comment.