RPG Maker MV provides developers with a plethora of tools and resources to create their own RPG games. One of these tools is the Character Generator, which allows you to create unique and personalized characters in a snap. This feature can help developers save time and effort by eliminating the need to create characters manually.
Using the Character Generator, you can select from a wide range of options to customize the appearance of your characters, such as facial features, hairstyles, clothing, and more. You can also use this feature to create enemies and NPCs for your game, providing you with a wide range of options to populate your game world.
The Character Generator is a powerful tool that can help you create unique and diverse characters, giving your game a polished and professional look. We’ll show you how to get started using the character generator in RPG Maker MV.
How to Use Character Generator in RPG Maker MV
Step 1: Open the Character Generator window
From within the RPG Maker MV software, open the ‘Character Generator’ window by clicking on the head icon, as seen below.

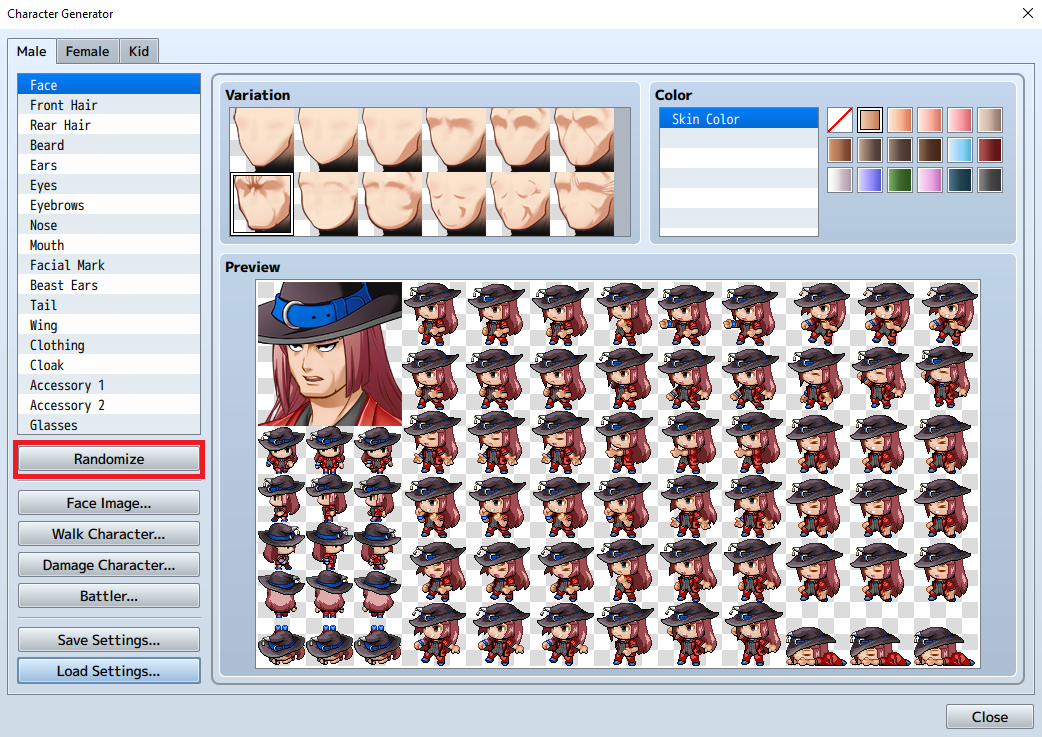
You should be met with the following window. The tabs at the top allow you to choose the gender and body build of your character. At the same time, the list on the left allows you to choose which part of the character you would like to change.

Feel free to play around and build your character to your heart’s content. Alternatively, there is also the Randomize button to generate a random character for you.
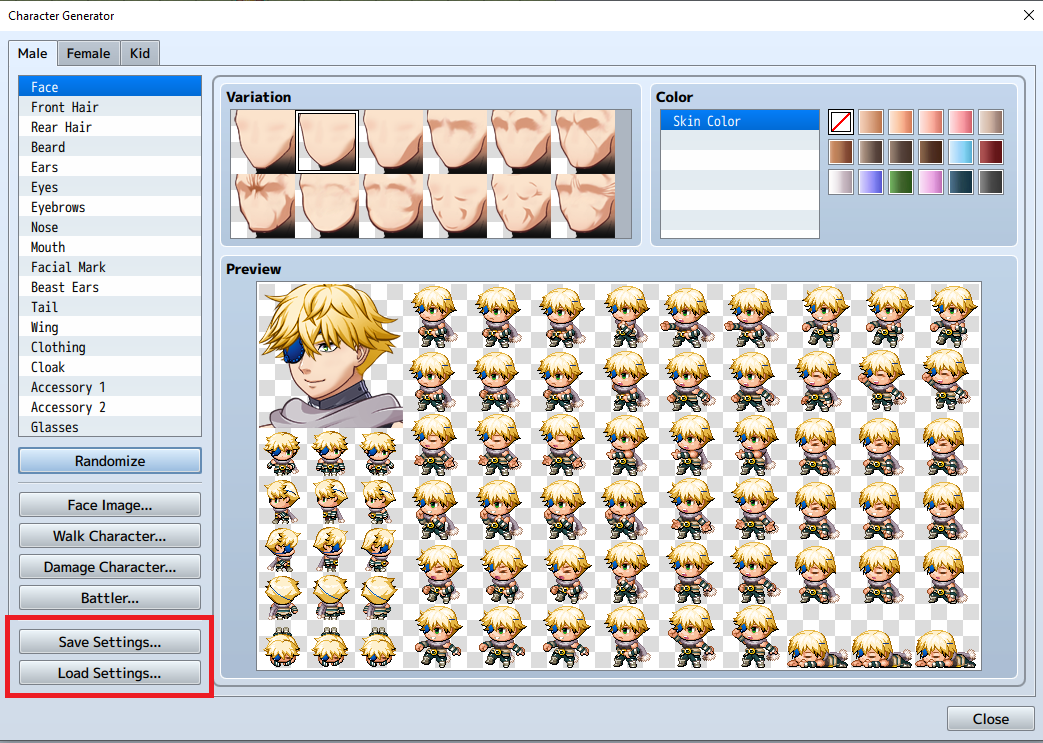
It is important to note that every time you close and open the ‘Character Generator’ window, the character you generate resets. If you wish to save the configurations of the character you’ve generated, use the ‘Save Settings’ button which will open up your File Explorer, allowing you to save the configuration of your character in case you want to load it up later on with the ‘Load Settings’ button.
Once you’re satisfied with the character you’ve generated, it is time for you to export them to your game. Choose any of the asset type you wish to export to your game (Face Image, Walk Character, Damage Character, or Battler).

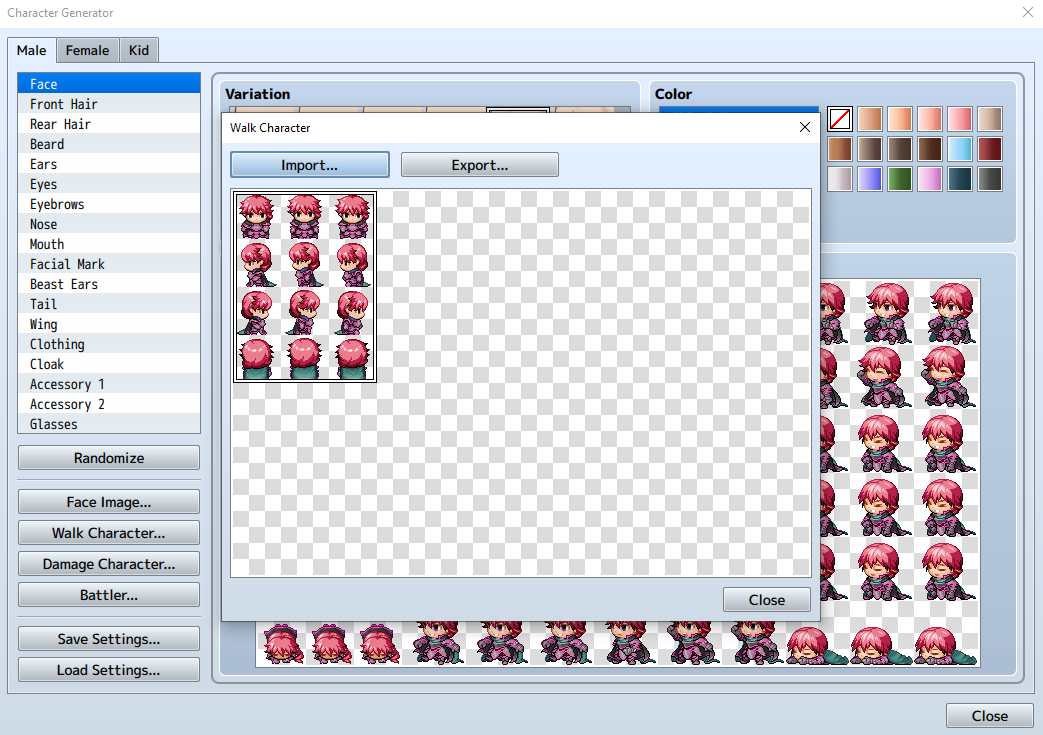
For this tutorial, we will only be doing the walking sprites of the character we’ve generated, but the process is the same for the face sprite, damaged sprite, and battler sprite. Click on the Walk Character button, and you will be met with this window.
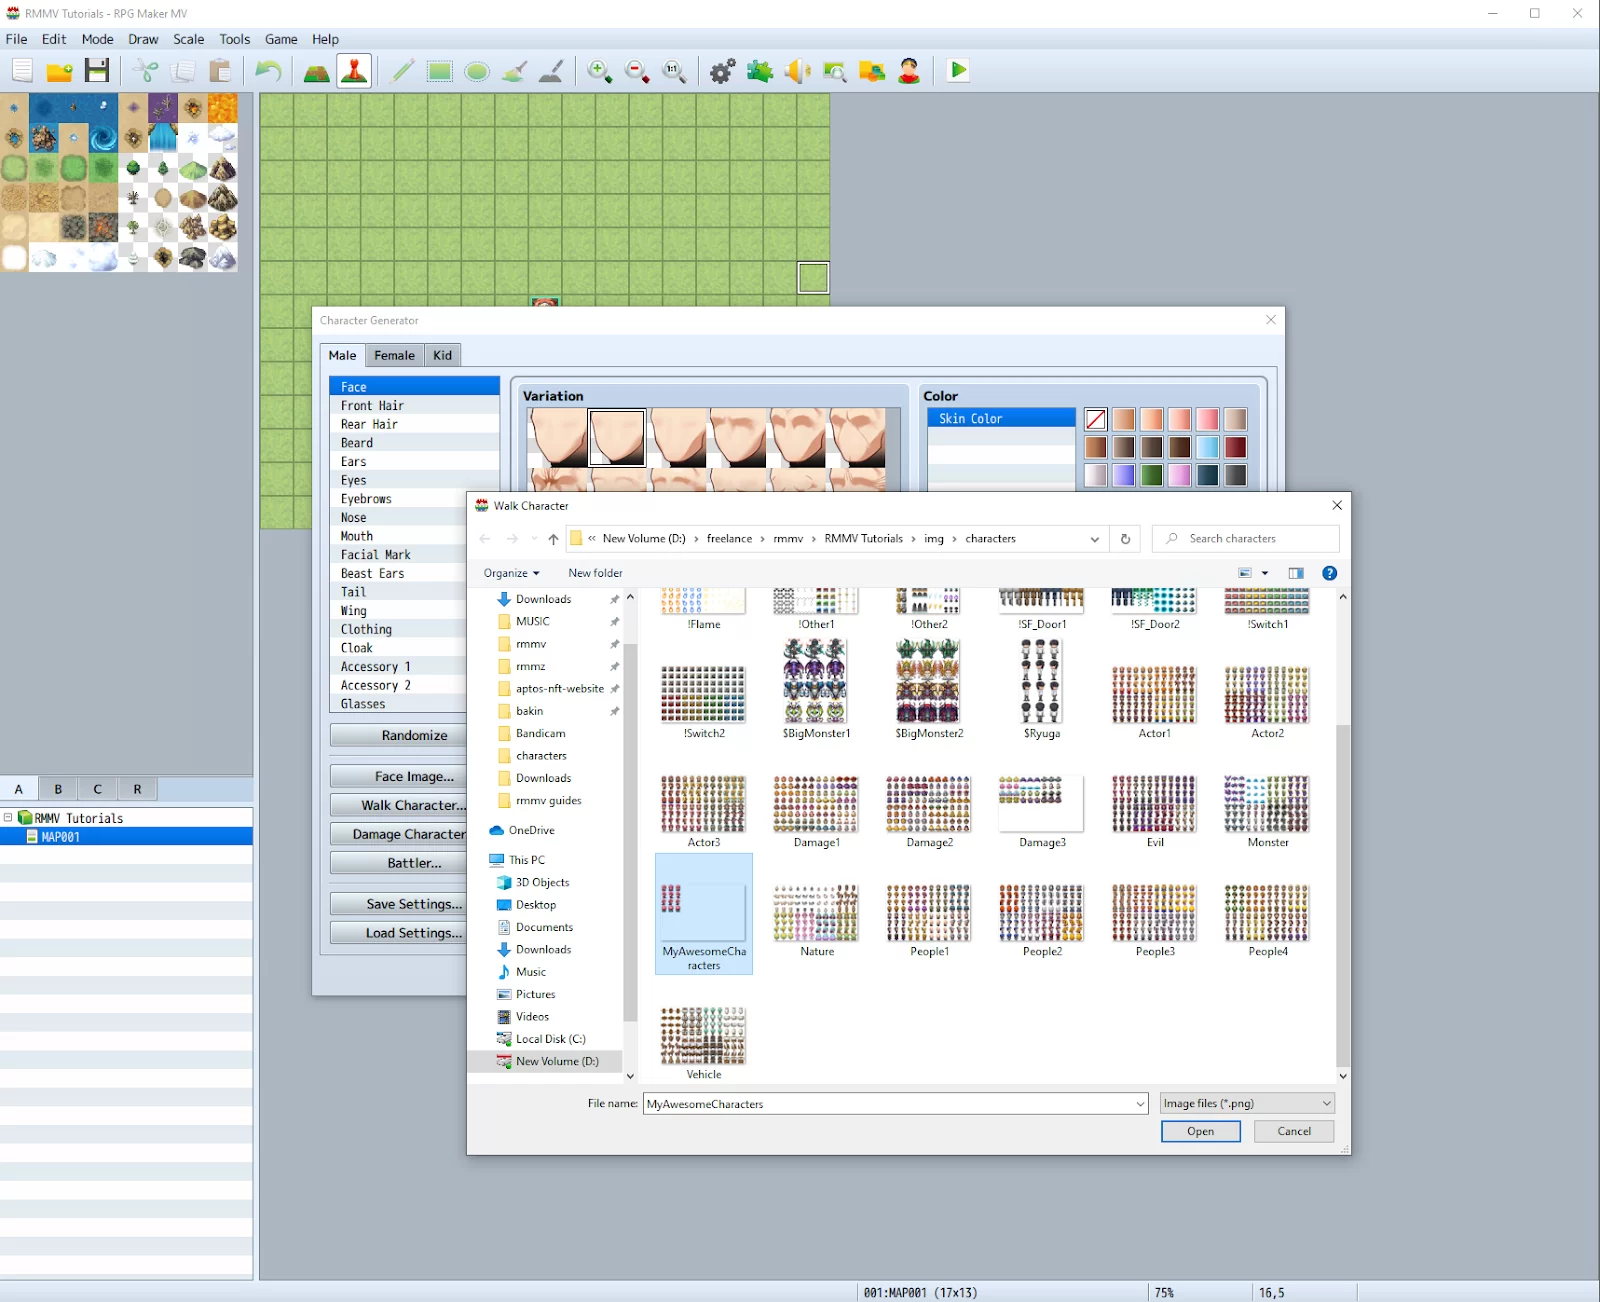
From there, click on Export and make sure you save it to the corresponding folder.

Since we are exporting a walking sprite, we want to save it in the ‘img/characters’ folder. Choose a name and click Save. Your newly created character sprite should now be in your game’s project folder.

Let’s close the ‘Walk Character’ window since we’re done exporting this character. Click ‘Close.’

Let’s create more characters. The more, the merrier they say. Generate another character and click on the Walk Character button once again, but don’t click on ‘Export’ just yet.

Remember the first character we created? Well, the Character Generator generates a sprite sheet that allows up to 8 characters in one file. Instead of clicking on the export button, let’s import the first sprite sheet we’ve made first by clicking on the Import button.

Choose the file with our first character and hit Open.
We’ve now imported the sprite sheet we made with our first character. Where is the first character that we’ve made, you say? Well, let’s move our second character by clicking on an empty spot in the sprite sheet.

This should now reveal the first character we’ve made, along with the second character. We are now ready to export the updated sprite sheet. Click the Export button, overwrite the old sprite sheet file using the same name, then hit Save.

A single sprite sheet generated by the Character Generator allows up to 8 characters. Feel free to create up to that many by repeating the process.

Viola! You’ve now learned how to use the Character Generator.
We also recommend you check out our detailed guide on how to install plugins in RPG Maker.
How To Make DLC Character Generator To Add More Features
If your updated character generator isn’t adding more features, then there is a problem. Thankfully, it isn’t something that can’t be resolved. The files to add more features should automatically be installed in the generator if you bought the DLC through Steam.
Also, properly naming the files is essential when manually installing them. All files must be numbered consecutively, with no gaps, for the generator. This can only be accomplished automatically if no parts have ever been manually added; as soon as parts are manually added, the program cannot determine how many were added and the current maximum number. Therefore, after manually adding parts, it is your responsibility to maintain the accuracy of the figures.
You can also see our step-by-step guide on how to import sprites in RPG Maker.
How Does The Character Generator Work?
The character generator uses a structure for filenames. Similar to the main software, the character generator searches relevant folders for items that are compatible, adding such items based on their file names. The real parts of the face or character must exist, together with a program icon, for the part to appear in the Character Generator.
To understand all these better, start by going to the RPG Maker Mv folder’s Character Generator folder. Then, Navigate to steamappscommonRPG Maker MV Generator from your steam folder. You’ll find five folders in this folder, each of which has a Male and Female folder with the generator’s gender-specific visuals in each. The folders operate utilizing the following methodology: The parts that will be added to the face graphic in the generator are contained in the “Face” folder.
The parts that will be added to the Side View graphics in the generator are located in the SV folder. The parts that will be added to the Walker visuals are in the TV folder, while the parts that will be added to the Damage graphics are in the TVD folder. The Variation folder contains the art that will be used as icons inside the generator.
Did you like reading this article? You may also enjoy reading our information packed article on how to edit saves in RPG Maker.