PicsArt’s Blend feature is a powerful tool that allows you to seamlessly merge multiple images together to create stunning, one-of-a-kind creations. This versatile feature offers a wide range of benefits that can help you take your photo editing skills to the next level.
One of the biggest advantages of the Blend feature is its ability to add depth and dimension to your photos. By blending different exposures or combining elements from different photos, you can create images that look truly professional. Additionally, the Blend feature also allows you to achieve a variety of creative effects, such as creating double exposures or compositing images together.
Another benefit of the Blend feature is its ease of use. The tool is intuitive and user-friendly, making it accessible to users of all skill levels. You can blend images together in a few simple steps and achieve professional results.
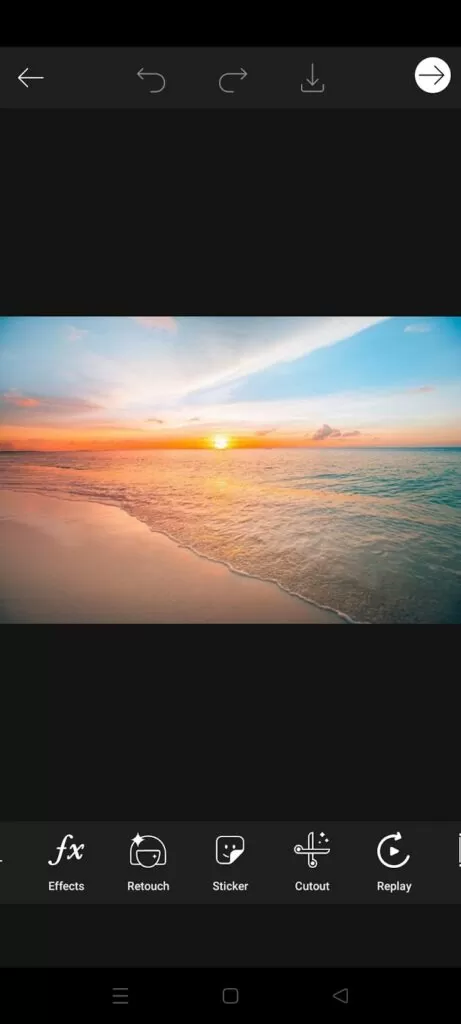
How to Blend on Picsart
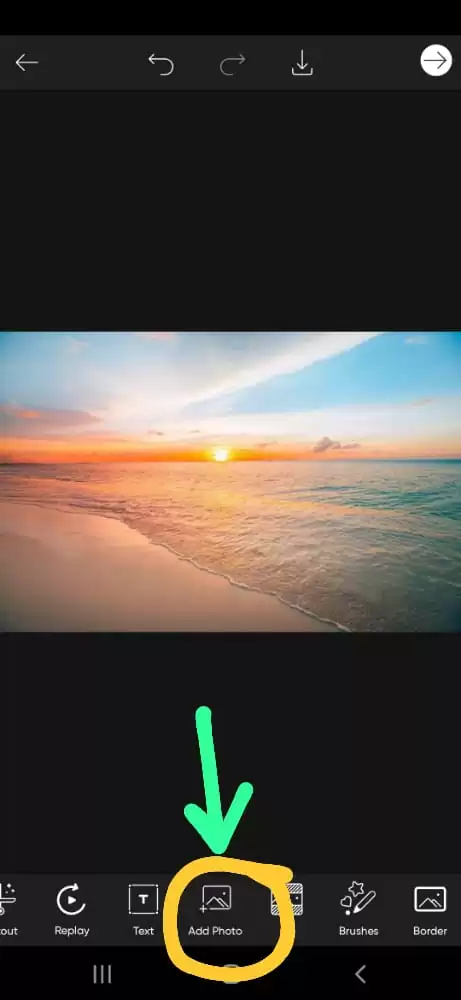
Step 1: Select a Background. You can also add a custom background you want to blend your image into. Speaking of “custom,” you can also add custom stickers to your images using Picsart.
Click on Add Photo to select the image you want on the background.
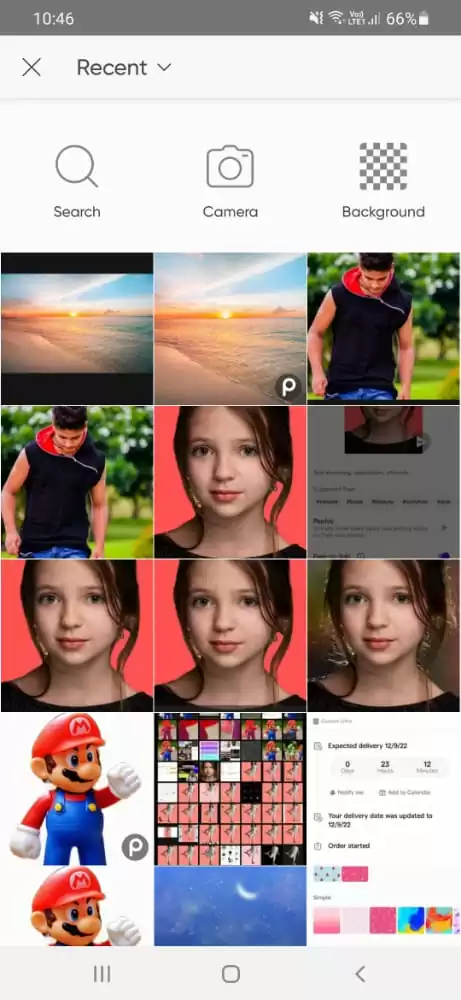
Step 2: Select the photo.
Step 3: Your second photo is also imported now. First, we will remove the background from the second photo. Click on BG. Removing the background will allow for nicer blending.
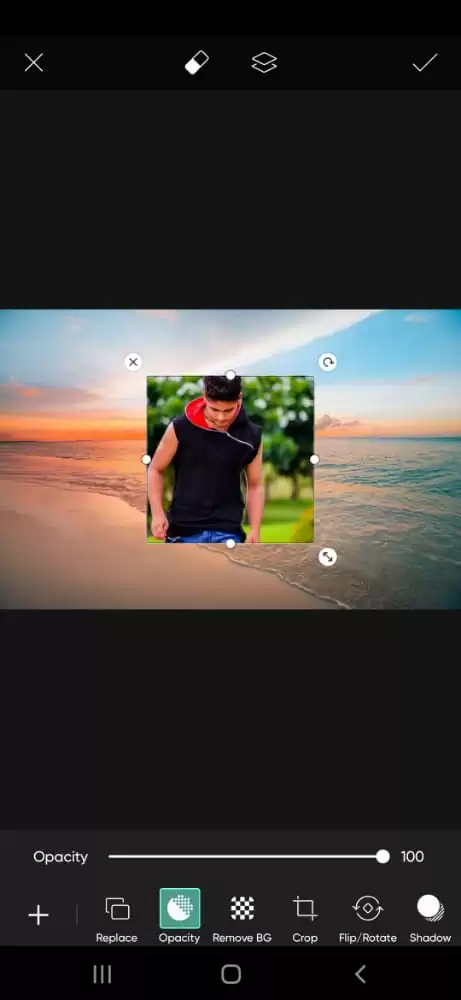

After removing the background, adjust the photo and Click on Blend.


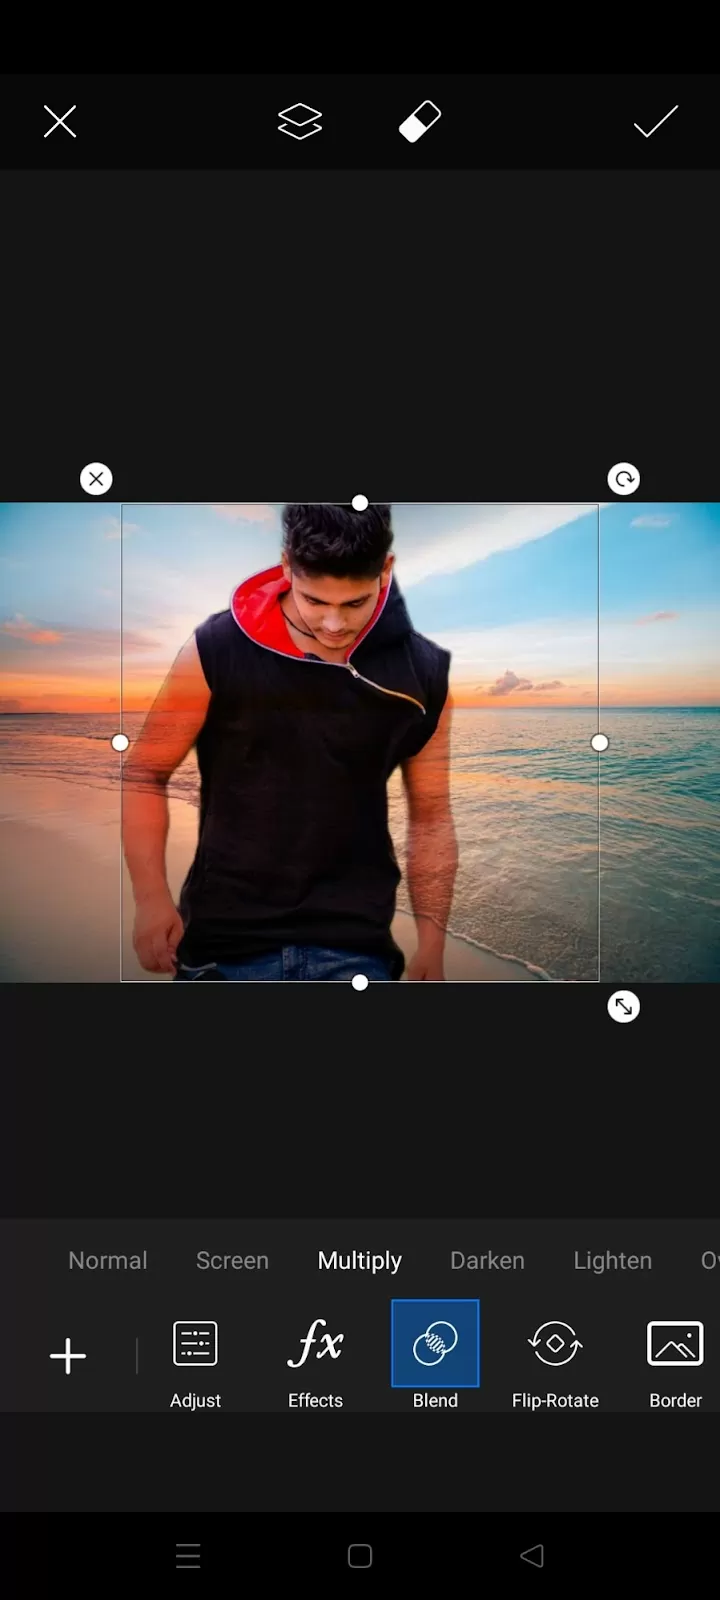
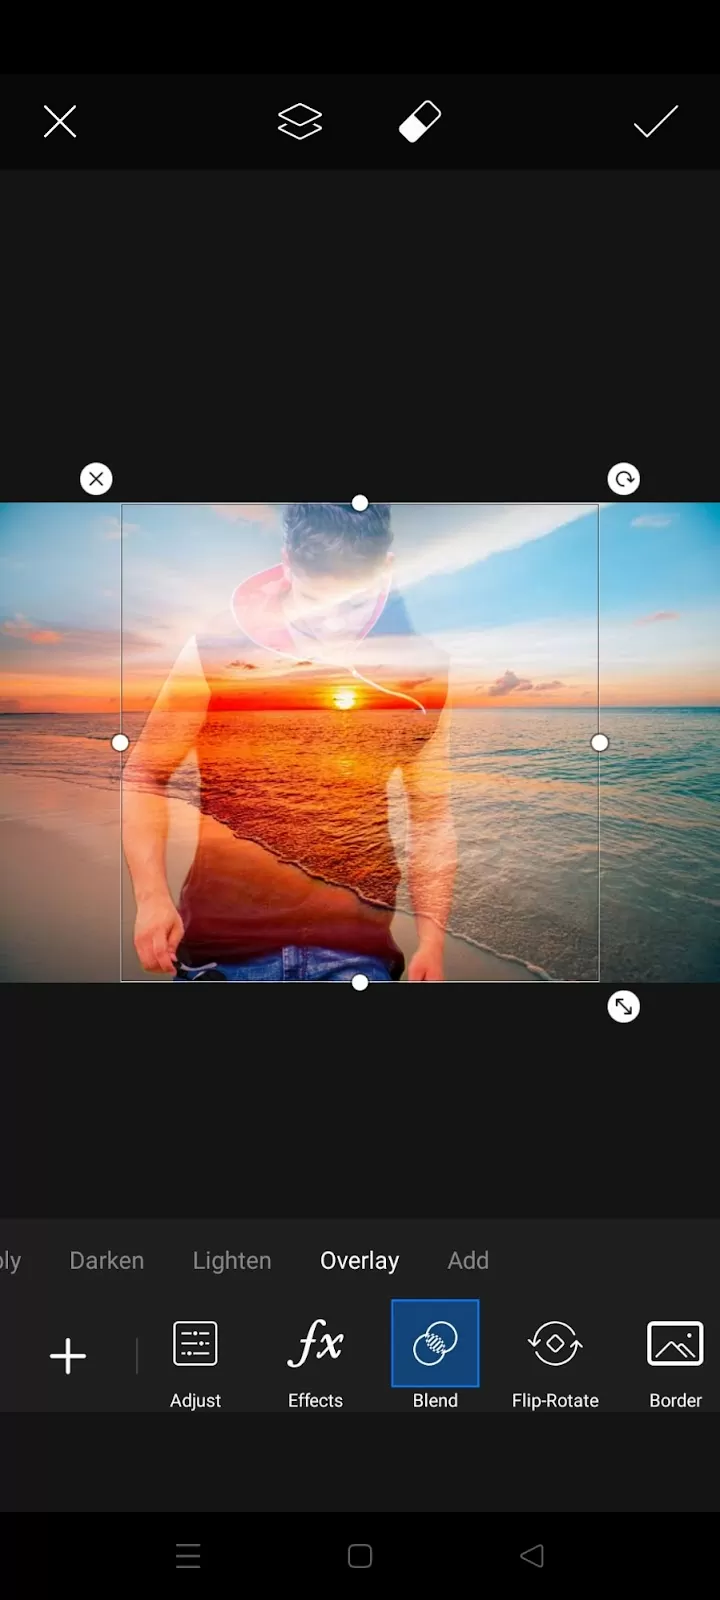
There are different categories in the Blend option, like Screen Blend, Multiply, Darken, Lighten, and Overlay Blend.

After blending the two pictures, click on the tick, which is on top, and then save it to your gallery.
Here are a few other pieces of info you might be interested in learning:
How to Blend Colors on Picsart?
Blending is an effect you can add to a layer to change how the colors blend with colors on lower layers. It gives a smooth transition from one color to the next. Now we will do this process in the Picsart app.
STEP 1: Open Picsart and Take one picture.
Now go to the Brush option.


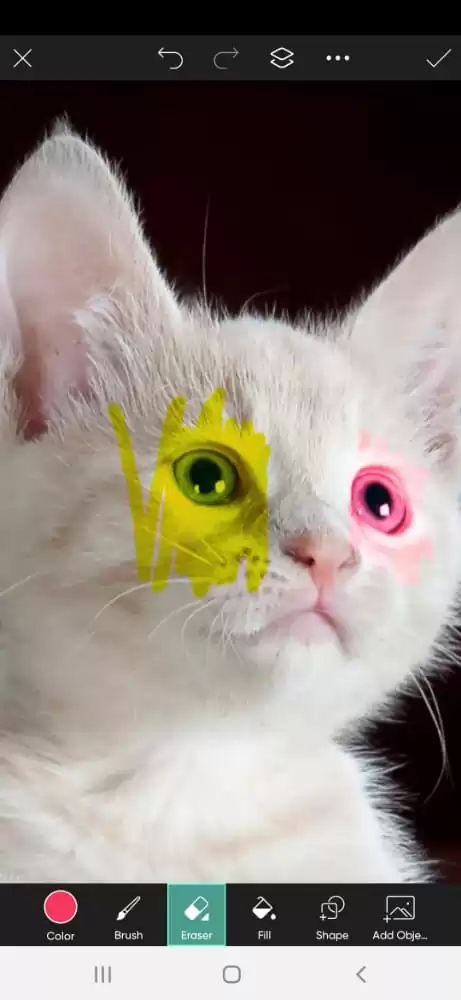
Step 2: There is a layer tool at the top. You can create more layers. I am making two layers. And applying the brush to the desired place. I’m using a yellow brush in layer 2. In layer 3, I am using red on top of the cat eye.

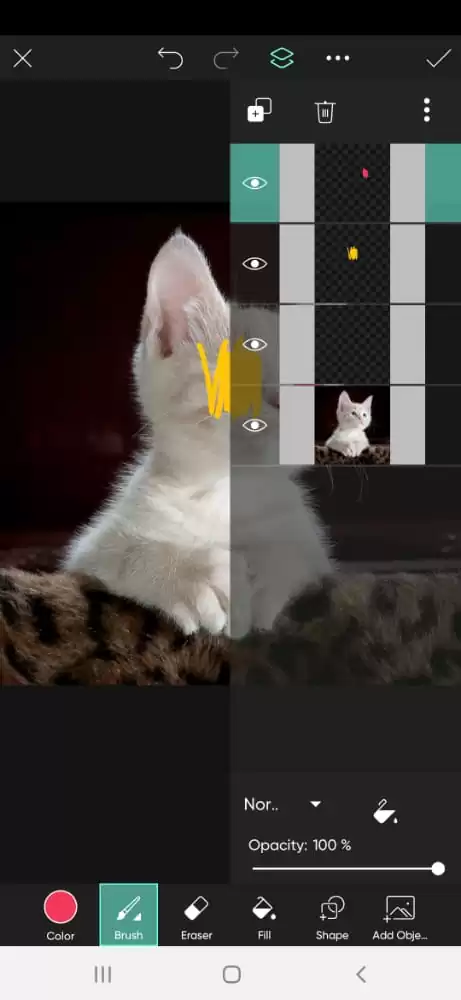
Click on normal to select other blending categories. In layer 2, Take Darken blending, and in layer 3, take overlay blending.
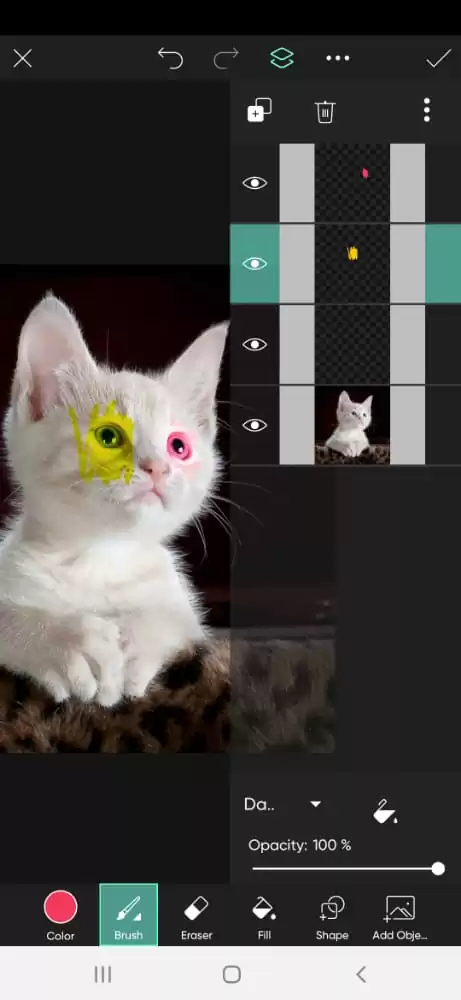
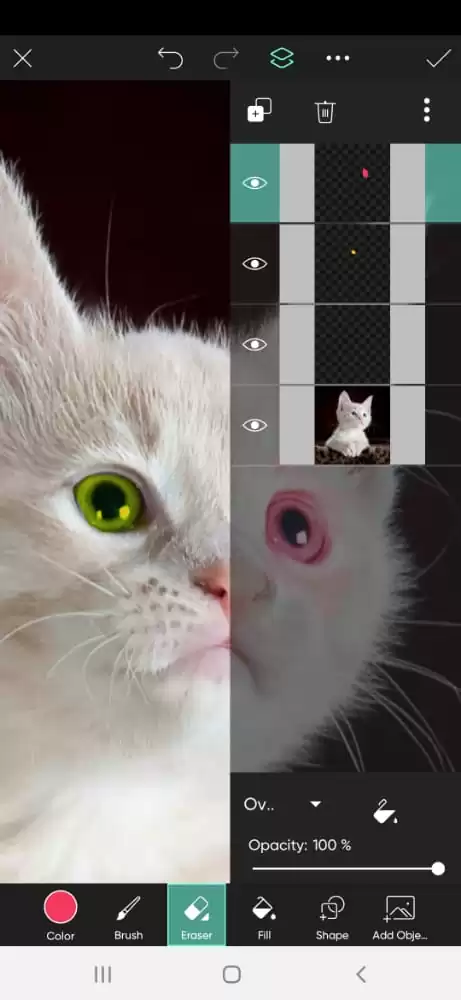
Erase the color where I don’t want the color to show using the Eraser tool. Click on layer 2, and remove the yellow and blue color in layer 3.
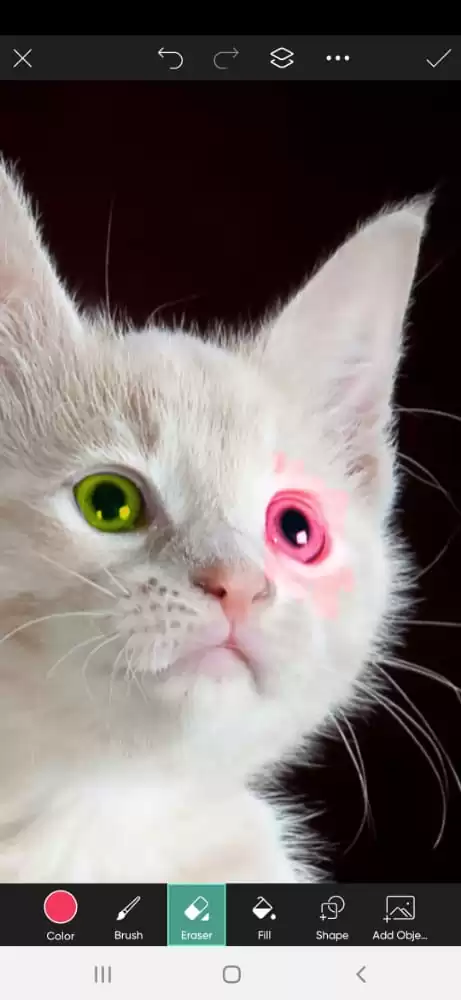
After removing the color, not in use, click on the tick and save the picture to your gallery.
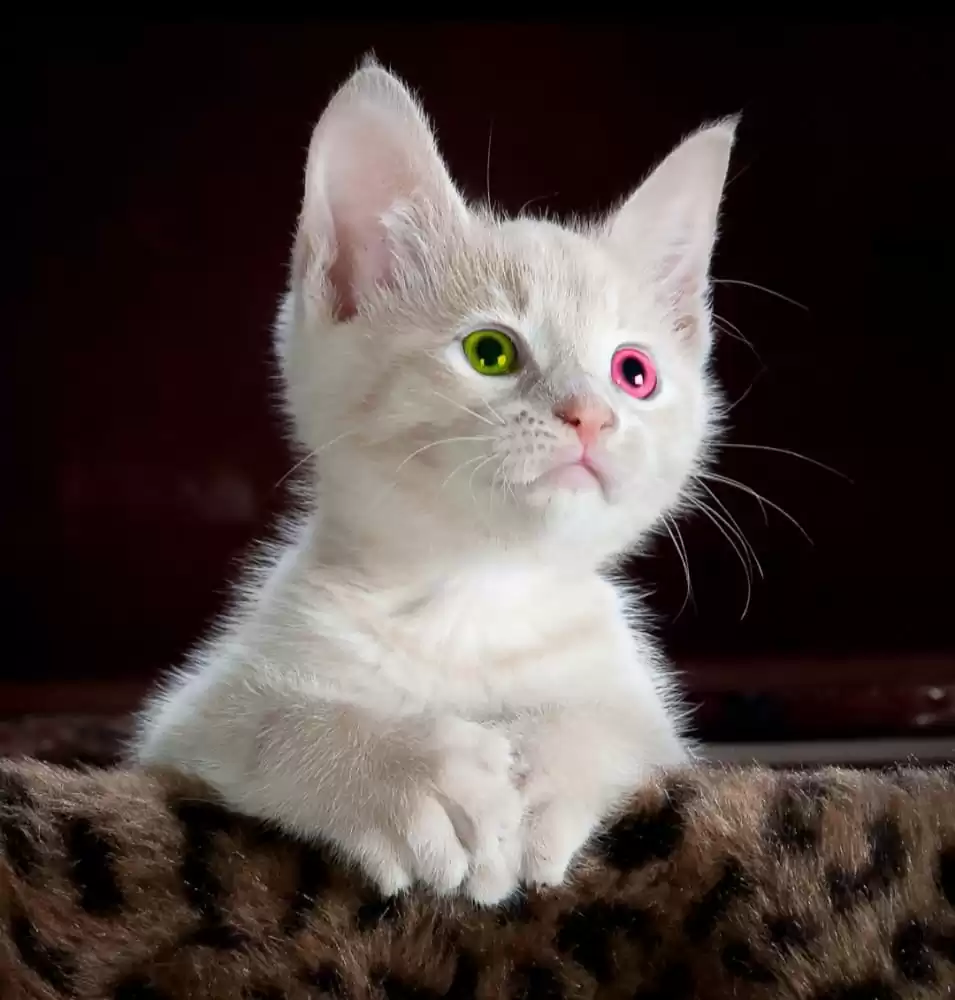
This is our final result. In the original picture, we had blue eyes, but now after doing the color blending, we have yellow and red colors.
Why Do You Need To Blend?
Simply put, combining elements from many pictures creates an entirely original image. One of the advantages of layering photos is that it gives everyday photos a fantasy quality, making the blending method especially stunning in abstract or surreal images.
By adding unusual or otherworldly components, you may make an ordinary shot appear avant-garde or like a well-executed contemporary artwork. Blending could be useful if you’re in a band and want to create a gritty record cover. This Blend effect is also ideal for creating unique book covers, social media postings, and posters.
It’s not necessary to blend two images to produce unique art. Blending can also be used to produce fashionable double-exposure effects. Use it to blend natural-looking photographs for an effect that is imperceptibly smooth and appears real.
Blending Photos To Make Layers
Follow the steps below to blend photos when making layers.
Step 1
Start by opening the Picture. Next, select your desired photos by selecting edit.
Step 2
Next, choose Overlay Pictures. Also, select the photos you wish to use as an overlay by tapping add photos.
Step 3
Now, expand the image, and you can change the photo’s size.
Step 4
The next step is to alter the blending process. You are solely responsible for customizing the blending and opacity of the photos.
Step 5
The last step is verification. You are free to save your work and distribute it however you like.
Blending a Character into a Background
Follow the steps below to blend a character into a background using Picsart.
Step 1
As usual, the first step is to crop a Picture. By selecting Tool, then crop, you may crop the image to the exact dimensions of your object. After finishing, click the checkmark.
Step 2
The next step is to pick a Background Picture. Open the app, then choose your preferred background image.
Step 3
Now you need to resize the image. Open PicsArt first, choose your image, then pick the resize option under the tool tab and enter the top credentials. Your picture’s quality will enhance ten times as a result. After finishing, click the checkmark.
Step 4
Now you need to Include a Character. After choosing a character, choose the desired photo by clicking the Add Photo icon. After that, tweak it by checking its size and position in the picture. Do not yet click the checkbox.
Step 5
After you are done including a character, you need to utilize lighting for blending. Then click Adjust after selecting the layer of your object. Once your object is light and suitable, experiment with the brightness and contrast settings. When finished, select the first checkbox; do not select the second for the object.
Step 6
Now you have to make some color adjustments. Go to FX, color, colorize, and drag the filter tab to darken until the color scene is most prominent on your background; there to integrate your object into the surroundings. Then, dim the object sufficiently so that the scene looks realistic.
Step 7
Now you have to duplicate objects in White. Locate the top-center icon with the two squares. The DUPLICATE tab should be selected. Put that in the earlier image because it adds to the original image.
Step 8
To make it all black, select FX, color, black and white, and move the bar to the right. You can use more filters by selecting the top middle icon and adding more editing. Now your photo should be a white copy. When done, click the first checkmark.
Step 9
You should make the white duplicate brighter. After selecting the opacity tab and lowering the white duplicate’s opacity level so that the bottom layer is hardly visible, click the first checkmark.
Step 10
Use the eraser and brush tools in the Tool Adjustment window to experiment with the contrast, brightness, and highlight settings until you achieve a result that makes your image appear genuine.
If you enjoyed reading this article, check out our informative article on how to take a screenshot using Picsart.
Leave a Reply
You must be logged in to post a comment.