As a video editor, I know how important it is to be able to add text to my videos. Whether it’s a title, credits, or a caption, text can add context and clarity to your footage. In this tutorial, I’ll show you how to add text to your videos using Final Cut Pro easily.
We’ll go over everything from choosing the right font and color to positioning and animating your text. So grab your editing software, and let’s get started.
3 Methods to Add Text to Final Cut
There are a couple of methods to add text in final cut pro. It’s very simple and easy to use a final cut pro for adding text to your video. In this final cut pro guide, there 3 Methods to add Text.
Method 1
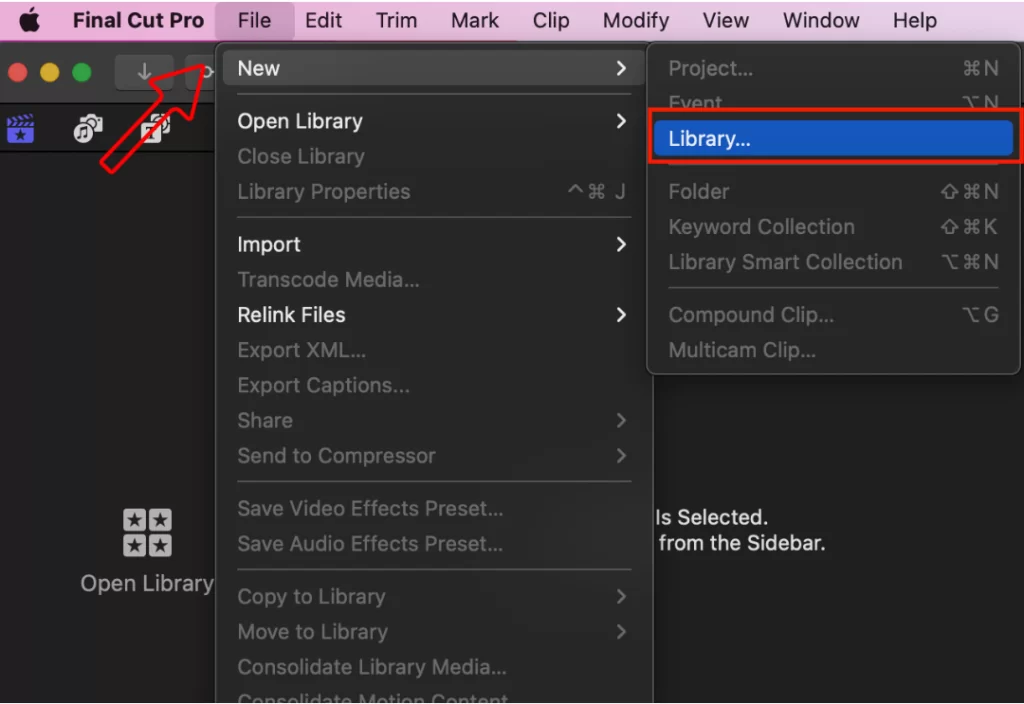
First, Open Final cut pro. Then navigate to the File menu, select New > Library Click to save after entering the library’s name.

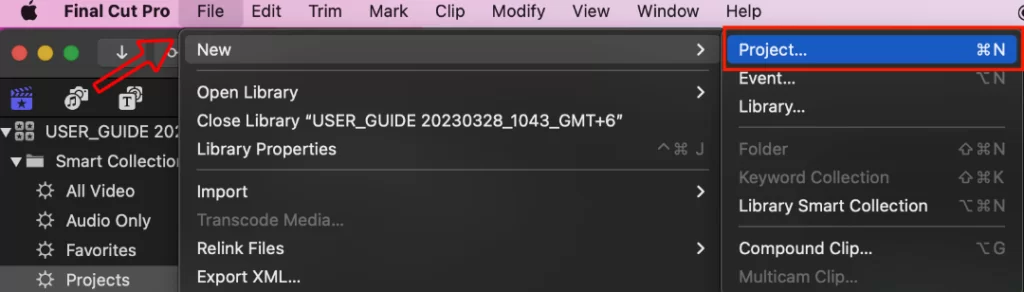
Next, navigate to the file menu again, select New > Project and click ok after entering the project’s name.

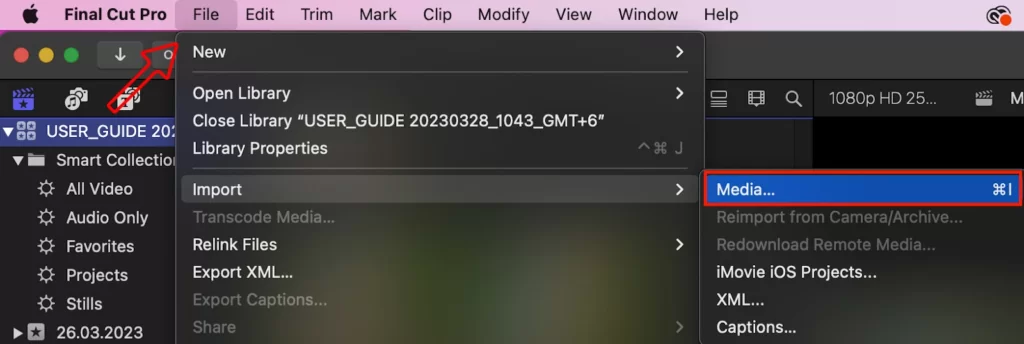
After this, go to File > Import and choose Media. Browse your file manager for the video file you want to work on.
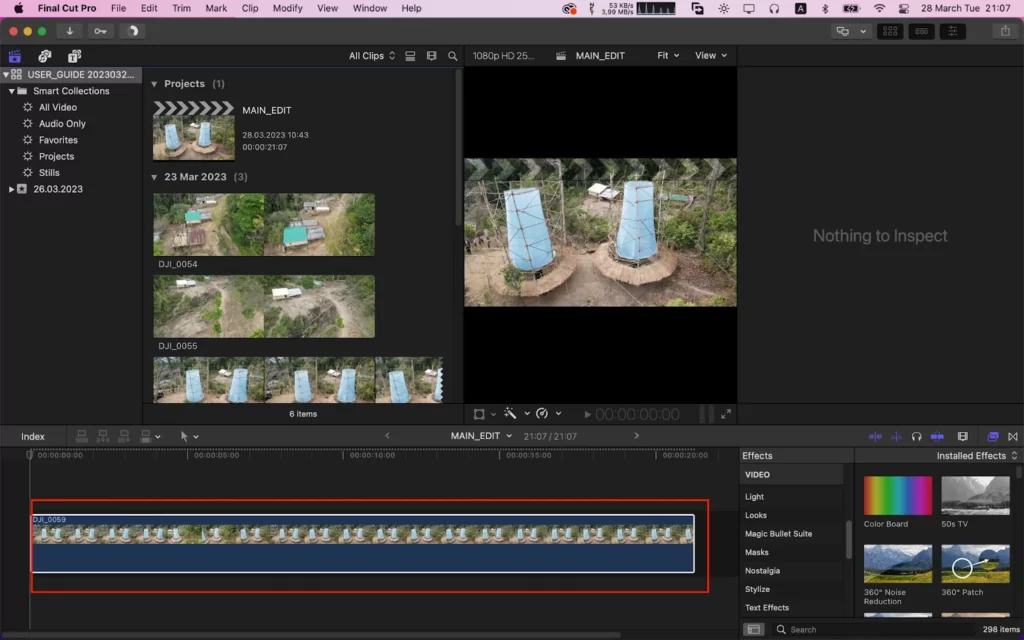
Once you have done the process, your video will appear in the Final cut pro Library. Now you can just drag and drop to your timeline to edit it.
Method 2
Add Titles To Video
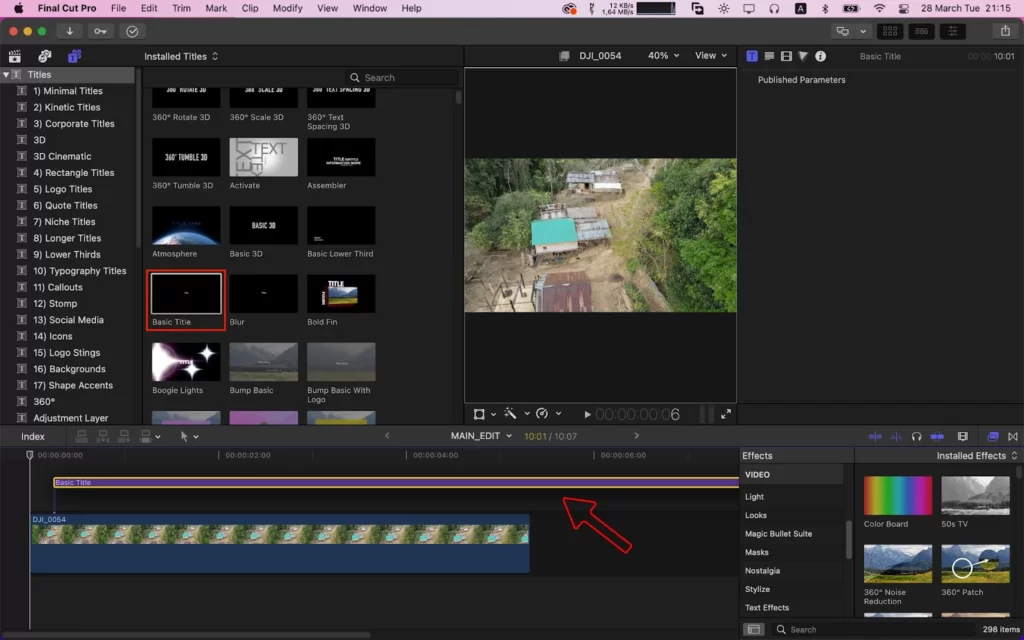
To add text, select Titles by clicking the T button in the top left corner of the workspace area of the Final cut Pro Screen. Drag a text type from the titles list onto the timeline below. Double-click the text for editing.

To change the text’s font color, click the text teacher button in the top right corner of your workspace area.
Make sure your video editing is accurate.

Now you can press the export button and save the customized Final cut pro video files.
Method 3
Add Title as Clip in Primary Storyline
Step 1:
If you want to add text as a title, there are two steps to do this in your final cut pro video.
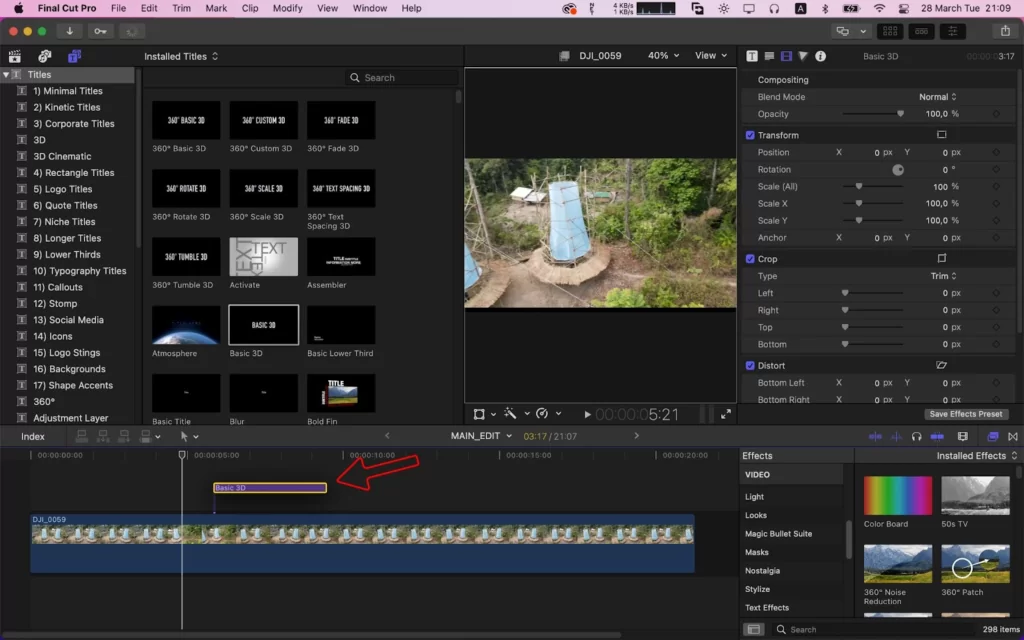
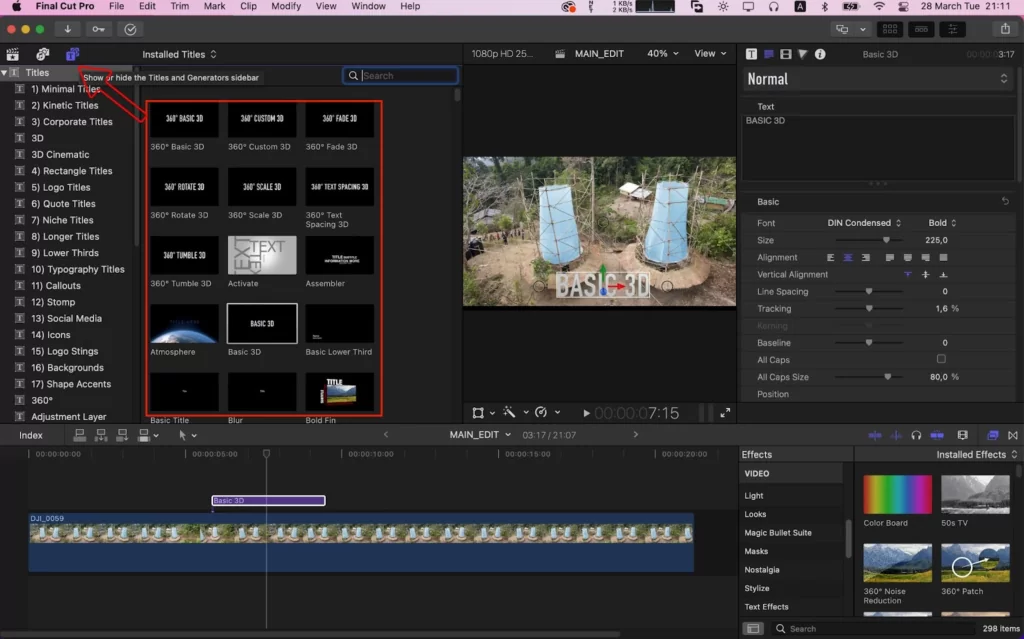
In the top left corner, click the Titles and Generators button. This will bring up the titles and generators sidebar with a list of titles and generator categories available.

Select any of these categories by clicking it. You will see this will bring up options within that category. Now you can choose one of the following categories. To drag the title between two clips on the timeline just drag it. Use a title in place of an existing one from the title browser.
Step 2:
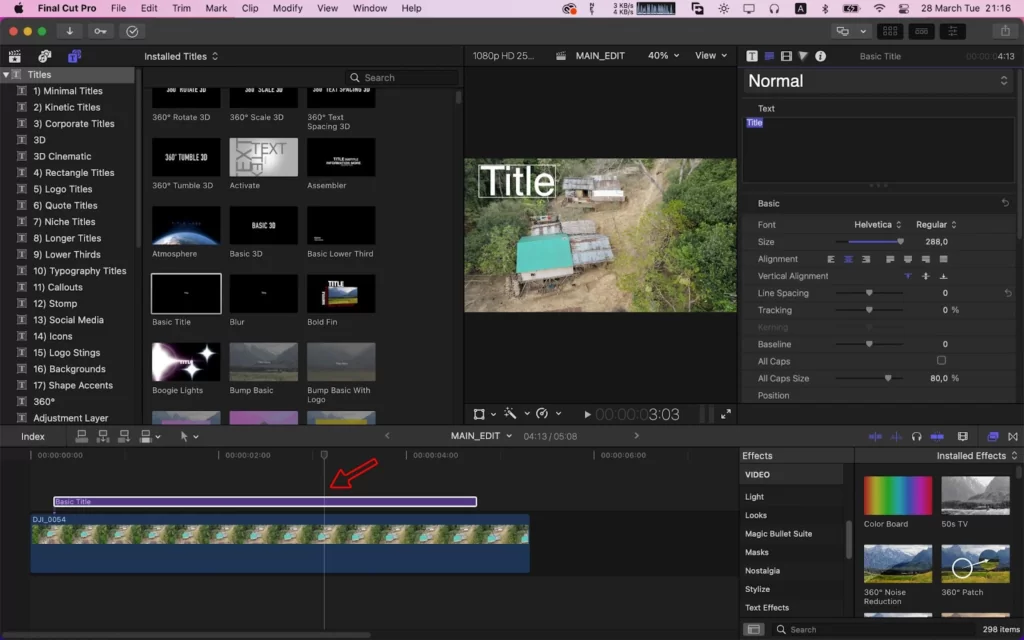
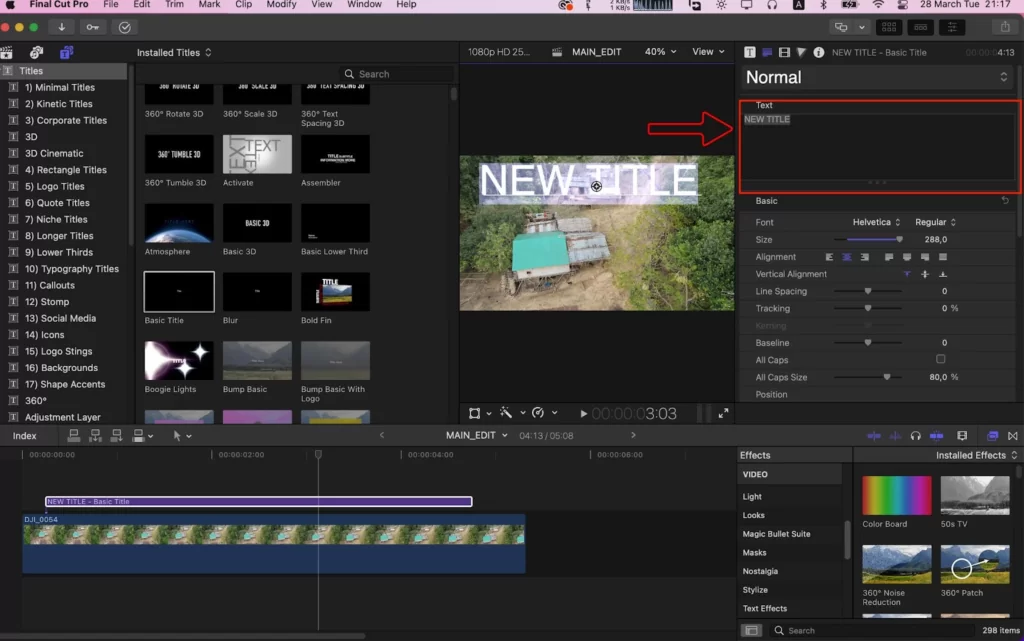
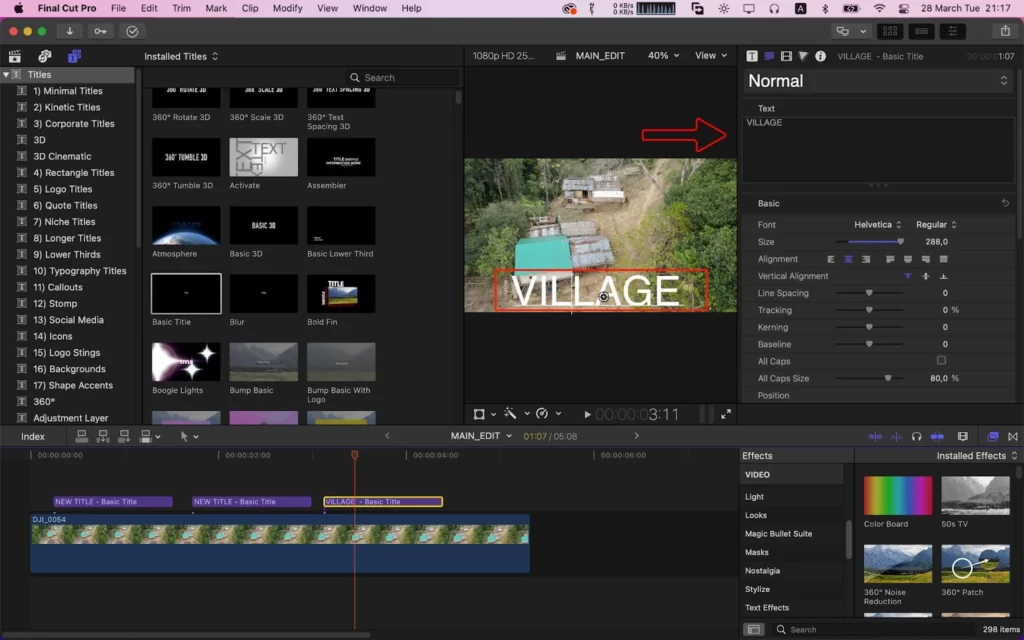
Choose a basic title clip in the timeline. Hover the mouse cursor over the chosen title clip. Double-click the title text and then enter the text for your title.
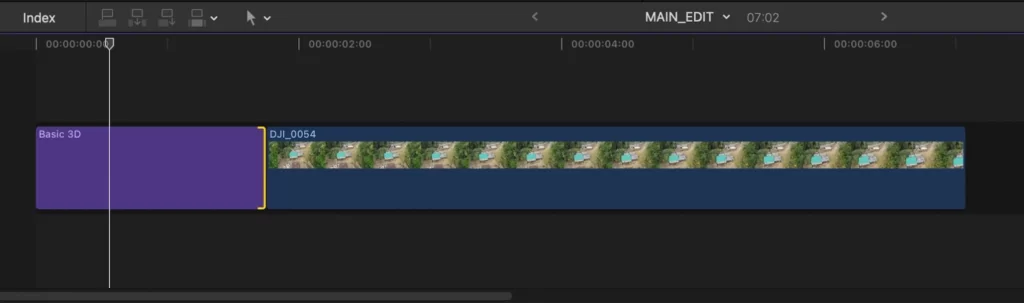
You can use this same method for as many text titles as you need. Enter your new text as needed.

Moving and Adjusting Text in Final Cut Pro
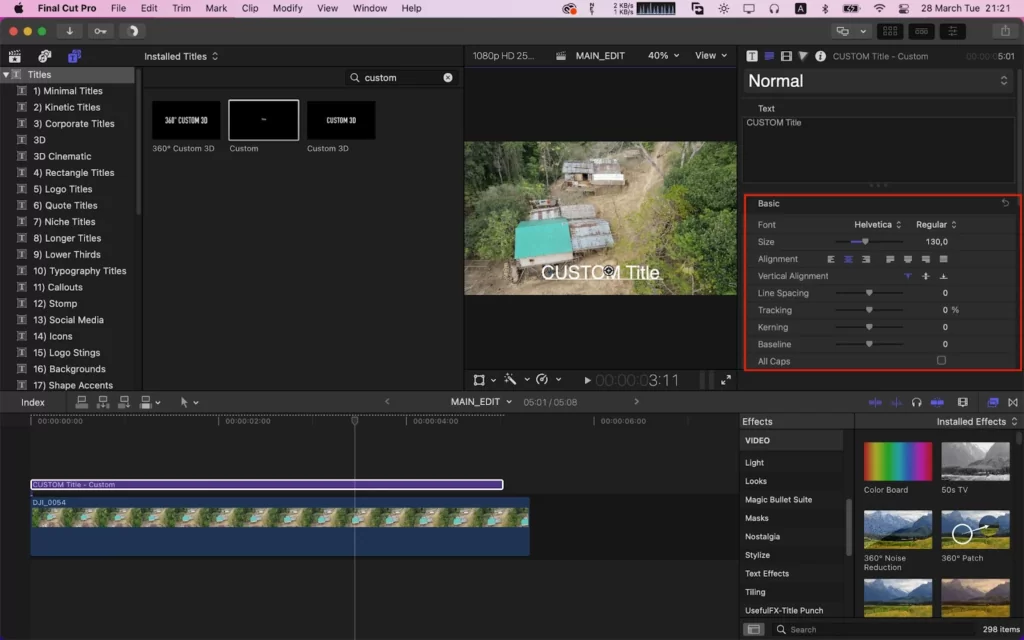
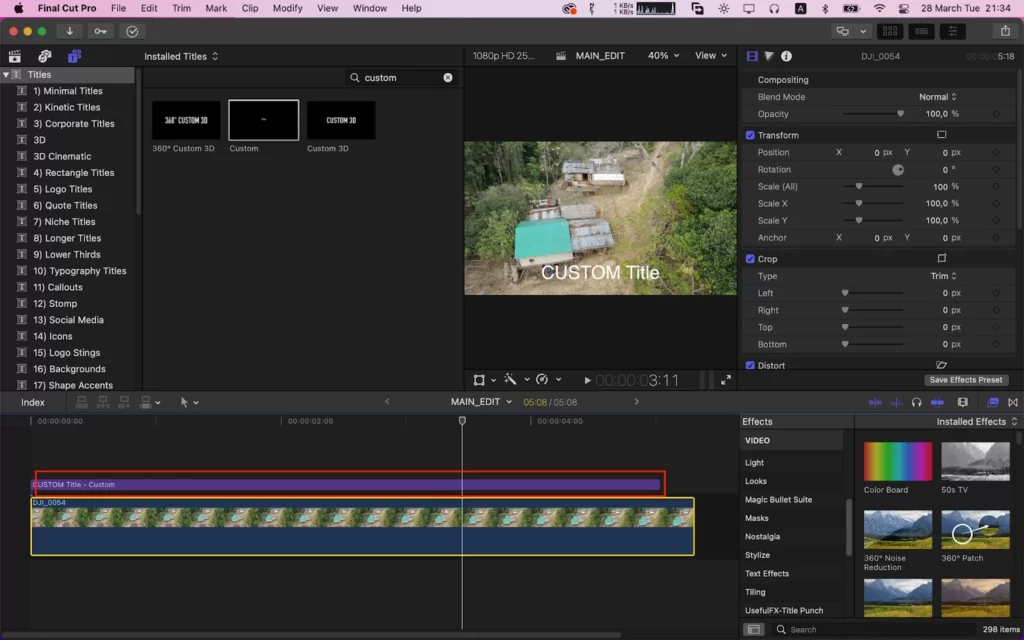
Select your desired text To make changes after you add text. Using the text inspector, you can make any necessary adjustments like fonts, color, alignment, text styles, opacity, blur, size, and line space. Now choose the desired value. Additionally, the inspector can alter the outline of the text and add a shadow.

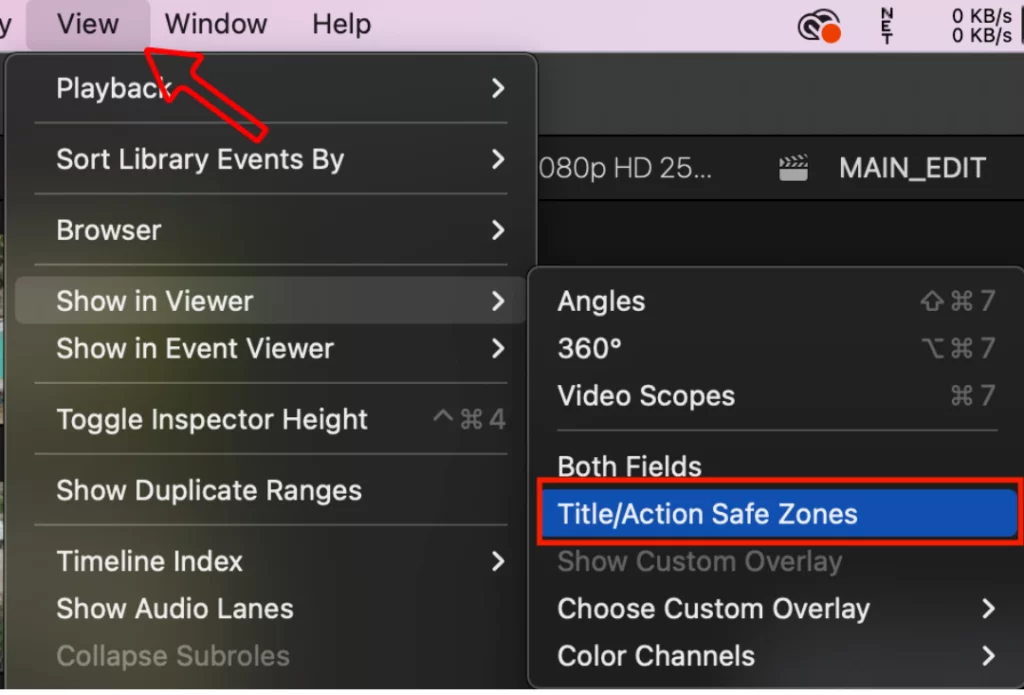
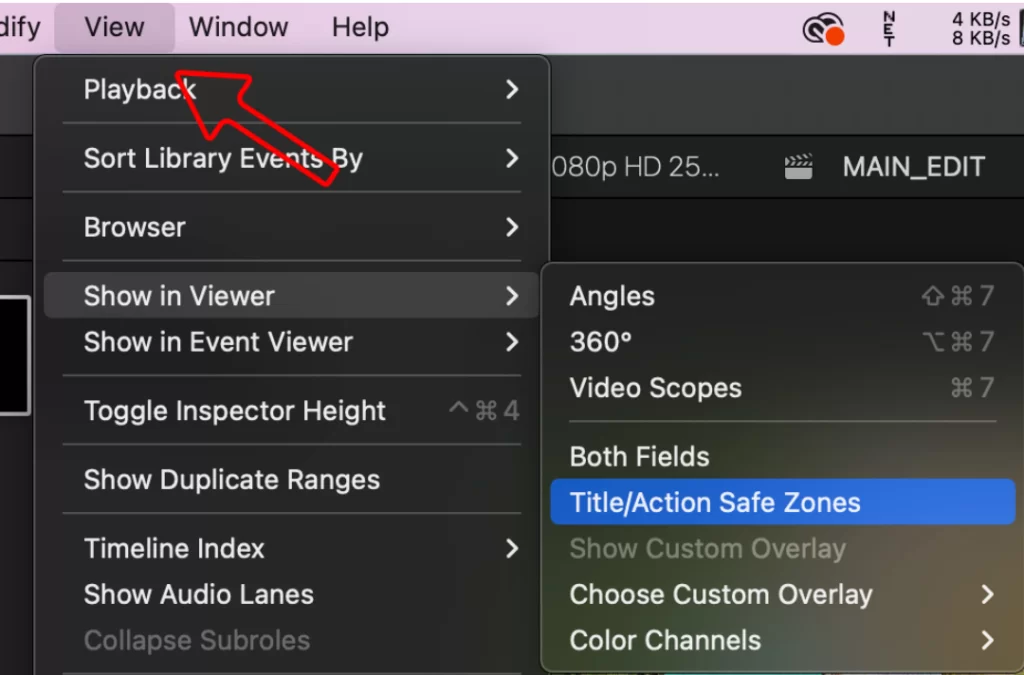
To modify the text view position in the inspector. Dragging the text is the Easiest method of moving it. To move the text click and hold in the canvas wherever you like it. Select View > Show viewer > Title/Action Safe Zones From the upper menu to move the text precisely while dragging.
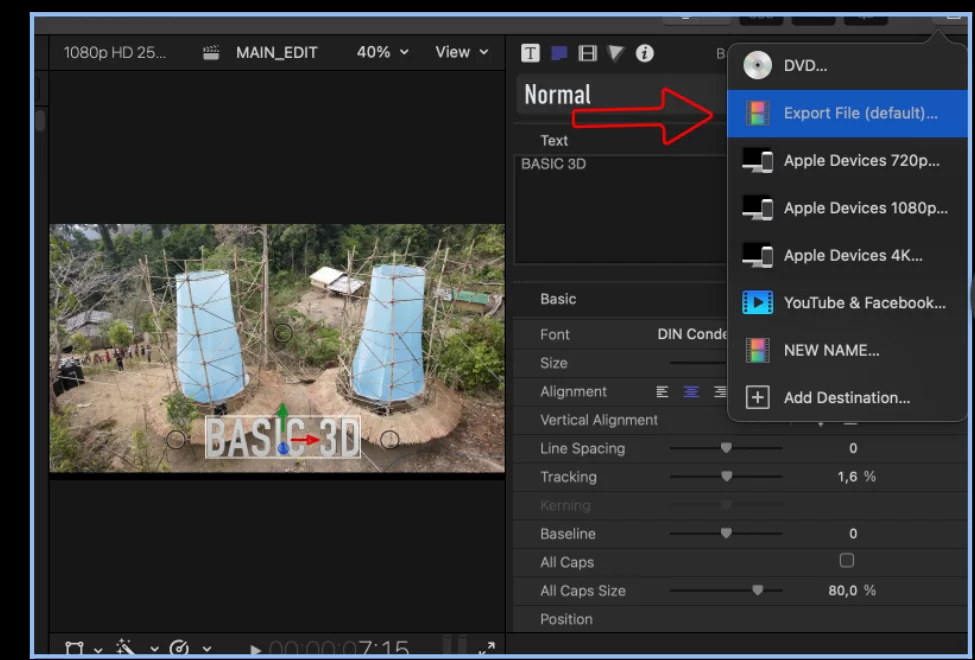
Now check the video preview when you have done it. If you are satisfied with how it looks and done with your other basic editing, now export your video to the desired location via the export video button.
How to Add Text to Title
If you have added a title clip, the next thing is to add your text.
Step 1
In the Final Cut Pro timeline, select a short title clip.
Step 2
Put the cursor over the title clip of your choice.
Step 3
Enter your title text by clicking twice on the title text.
Step 4
Depending on how many text titles you have in your timeline, you can repeat this for as many text titles as you need.

Step 6
Add new text as necessary.
Check out our detailed article on adding LUTs in Final Cut Pro.
How to Add Animated Text to Video in Final Cut Pro
An excellent approach to add interest and appeal to a Final Cut Pro X video is to use animated text. You may add standard video editing to target children, improve commercials and instructional videos, and more.
Step 1
Open the program, and look for the library. You can end it by selecting File from the menu if you discover one.
Step 2
Go to File > New > Library to start. Select Save after naming the library. Next, choose File > New > Project. You can enter the name in the new box and click OK.

Step 3
By choosing File > Import Media, choose the video you want to edit. To add a video to the timeline, drag it there.
Step 4
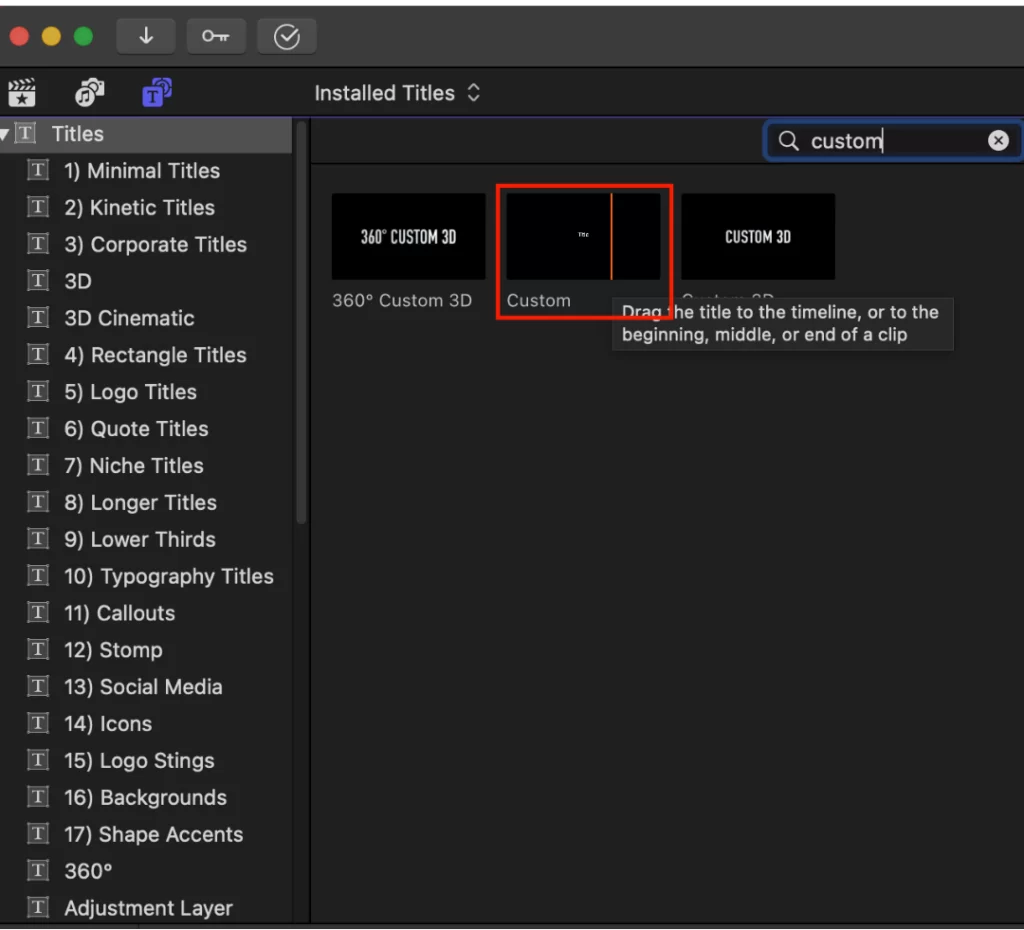
In the window’s upper left corner, choose the Title menu. Search Custom now, then drag it to the timeline. Simply typing Custom into the search bar is another option. The text can now be edited in the next step. Go to the Text Inspector to accomplish this.
Step 5
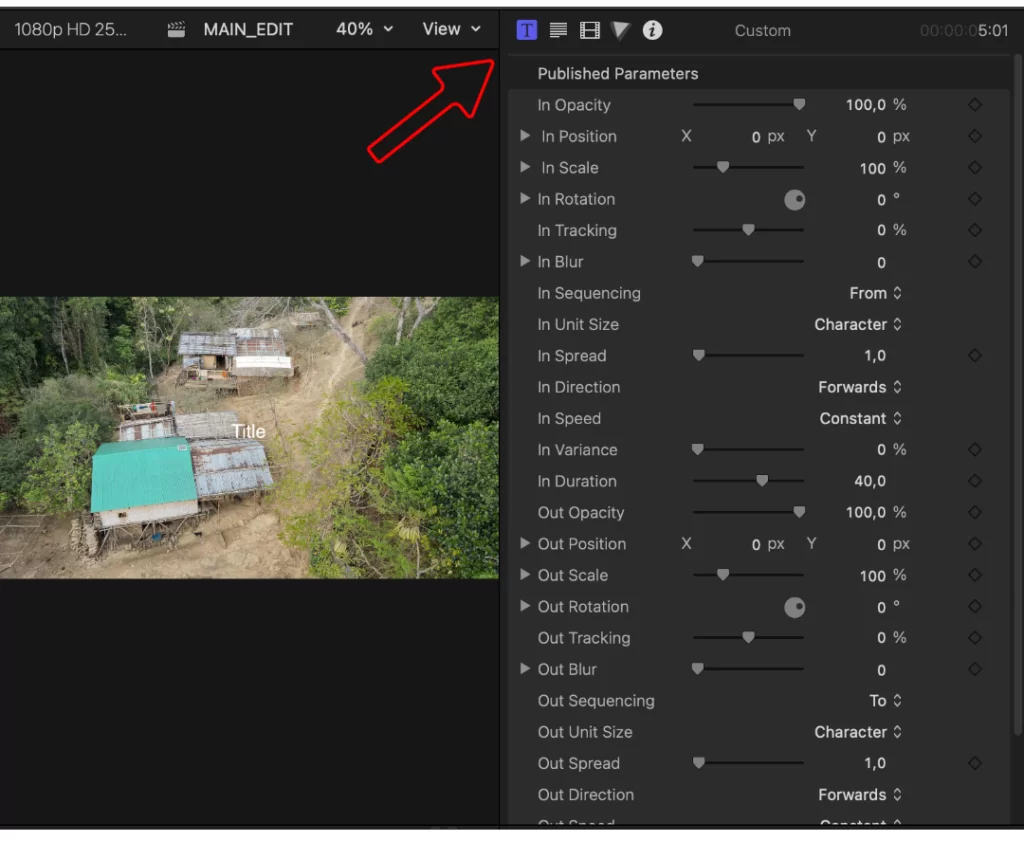
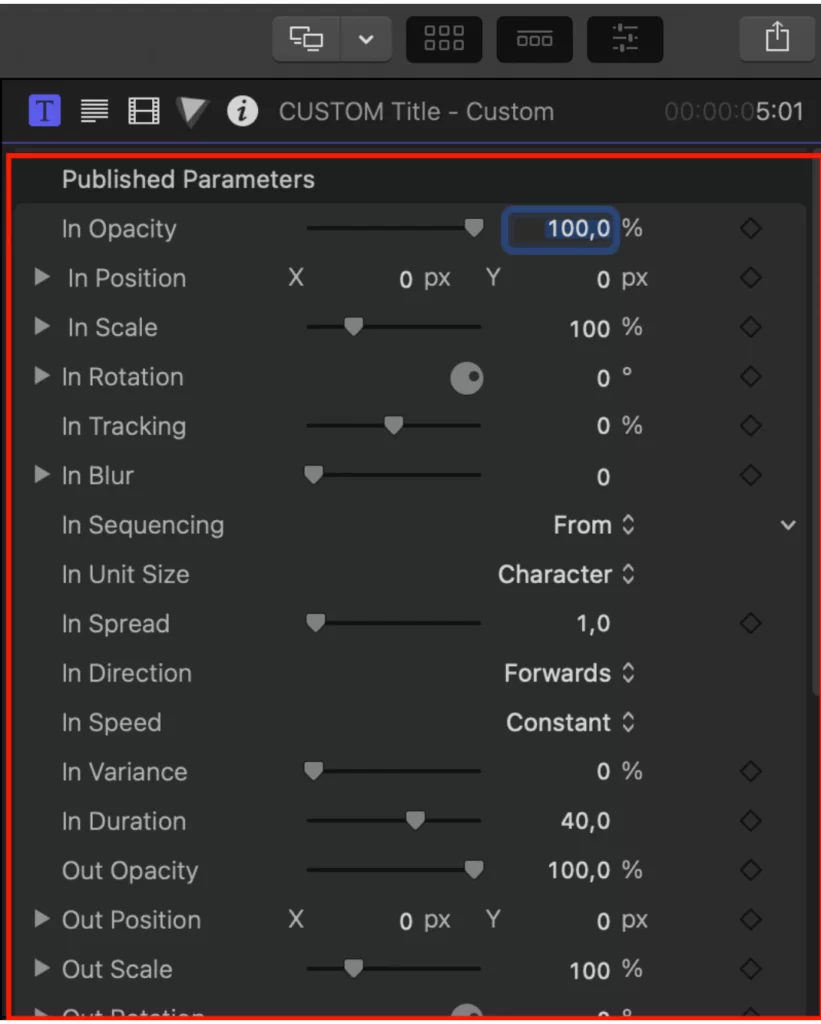
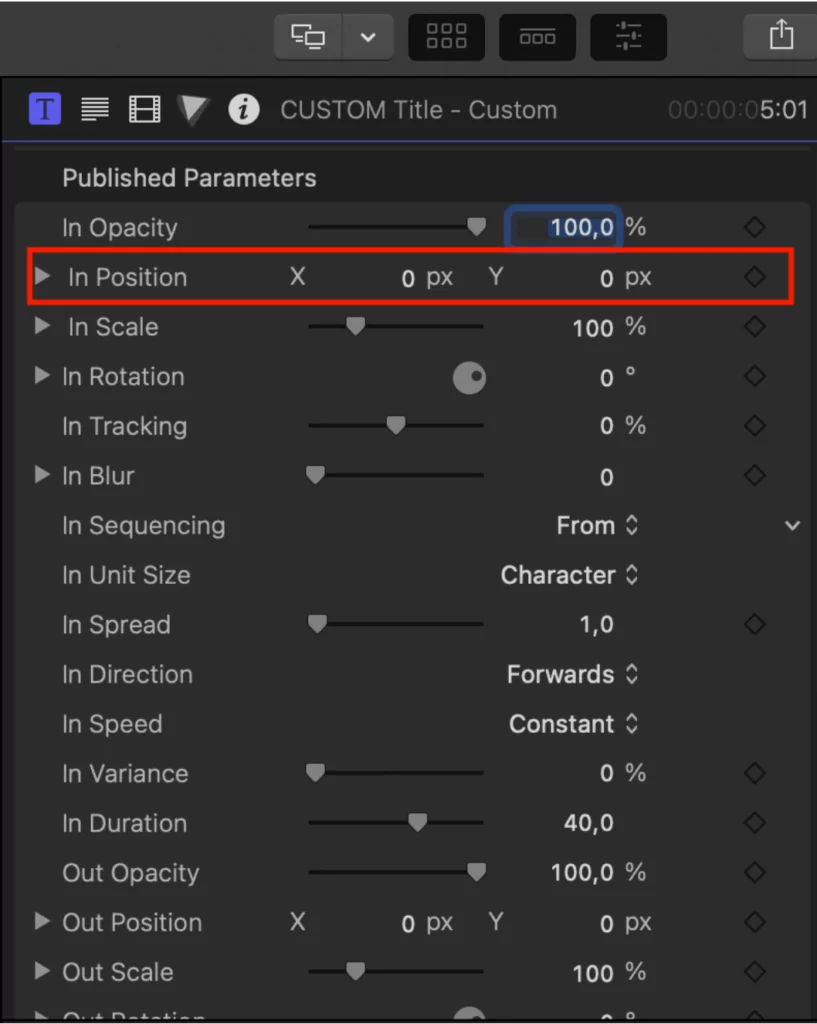
Now the text can be edited. Go to the Text Inspector to accomplish this. On the right side of the screen is the text inspector. Many parameters may be altered, including font, size, and color. The next step is to go to Access Published Parameters.
Step 6
You can modify the text’s duration by clicking on the right side of the text box in the timeline. The text is going to turn yellow. The length of the text can then be adjusted by dragging it to the left or right.
Step 7
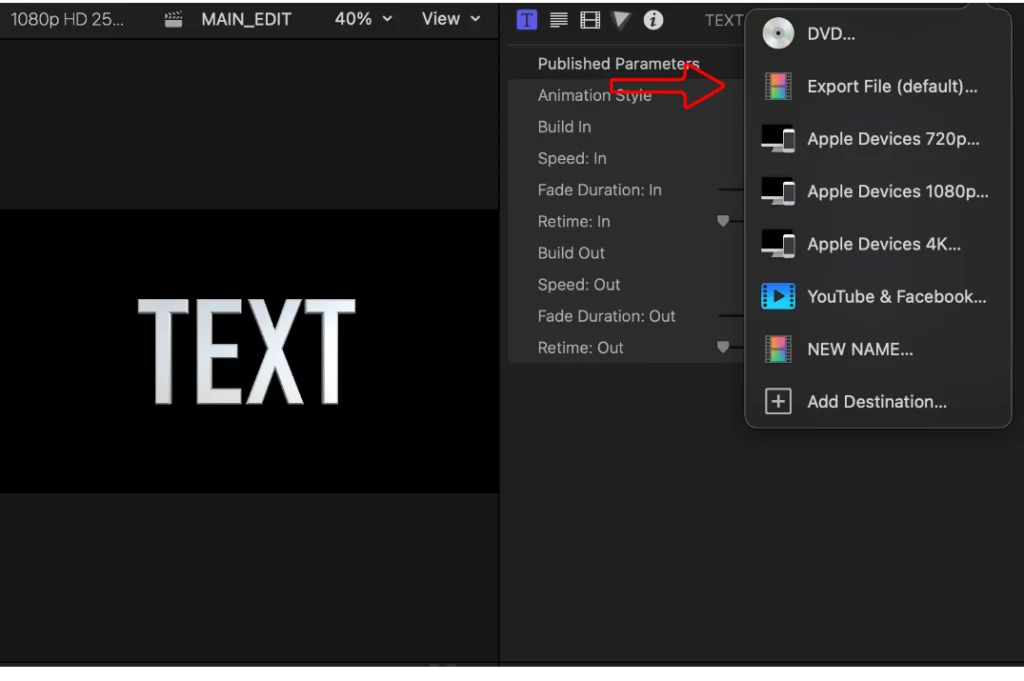
When you’re through editing your video, export it to your computer by clicking the Export button in the top right corner. Final Cut Pro also makes good software for splitting clips.
We also recommend that you read our in-depth article on how to split clip in Final Cut Pro.
Move and Adjust Text in Final Cut Pro
Follow the steps below to move and adjust your text in Final Cut Pro.
Step 1
After adding text, pick the desired text to make adjustments.
Step 2
You can change everything that needs to be changed using the Text Inspector. The options include the font color, alignment, text styles, opacity, blur, size, and line spacing. You only need to select the desired value. The Inspector may also change the text’s outline and include a shadow.
Step 3
To edit the wording, view the Position in the Inspector.
Step 4
The simplest way to move the text is to drag it. To move the text on the canvas, simply click and hold. To accurately drag the text, choose Show Title/Action Safe Zone from the View menu. When you’re done, enjoy the video. Use the export video button to send your video to the proper location after basic editing. The video will be exported using this to your master file.
If you enjoyed reading this article, you will also like our article on how to add text in Final Cut Pro.