Adding objects to your PDF files may seem daunting but it’s actually a straightforward process that can help you take your documents to the next level. In this guide, we’ll walk you through the essential steps required to add objects in Adobe Acrobat Pro, including images, shapes, stamps and text.
We understand that the software can be overwhelming, and you may have questions or encounter issues during the process. Be patient and practice the steps. We promise your software won’t break if you make a mistake.
Let’s dive in and learn how to add objects in Adobe Acrobat Pro!
How to Add Objects in Acrobat
There are many objects in Adobe Acrobat. You need to choose your desired one and what type of object needs in your pdf file. In This guide, I will show you how to add necessary objects, such as text, images, shapes, Stamps, etc, to your page.
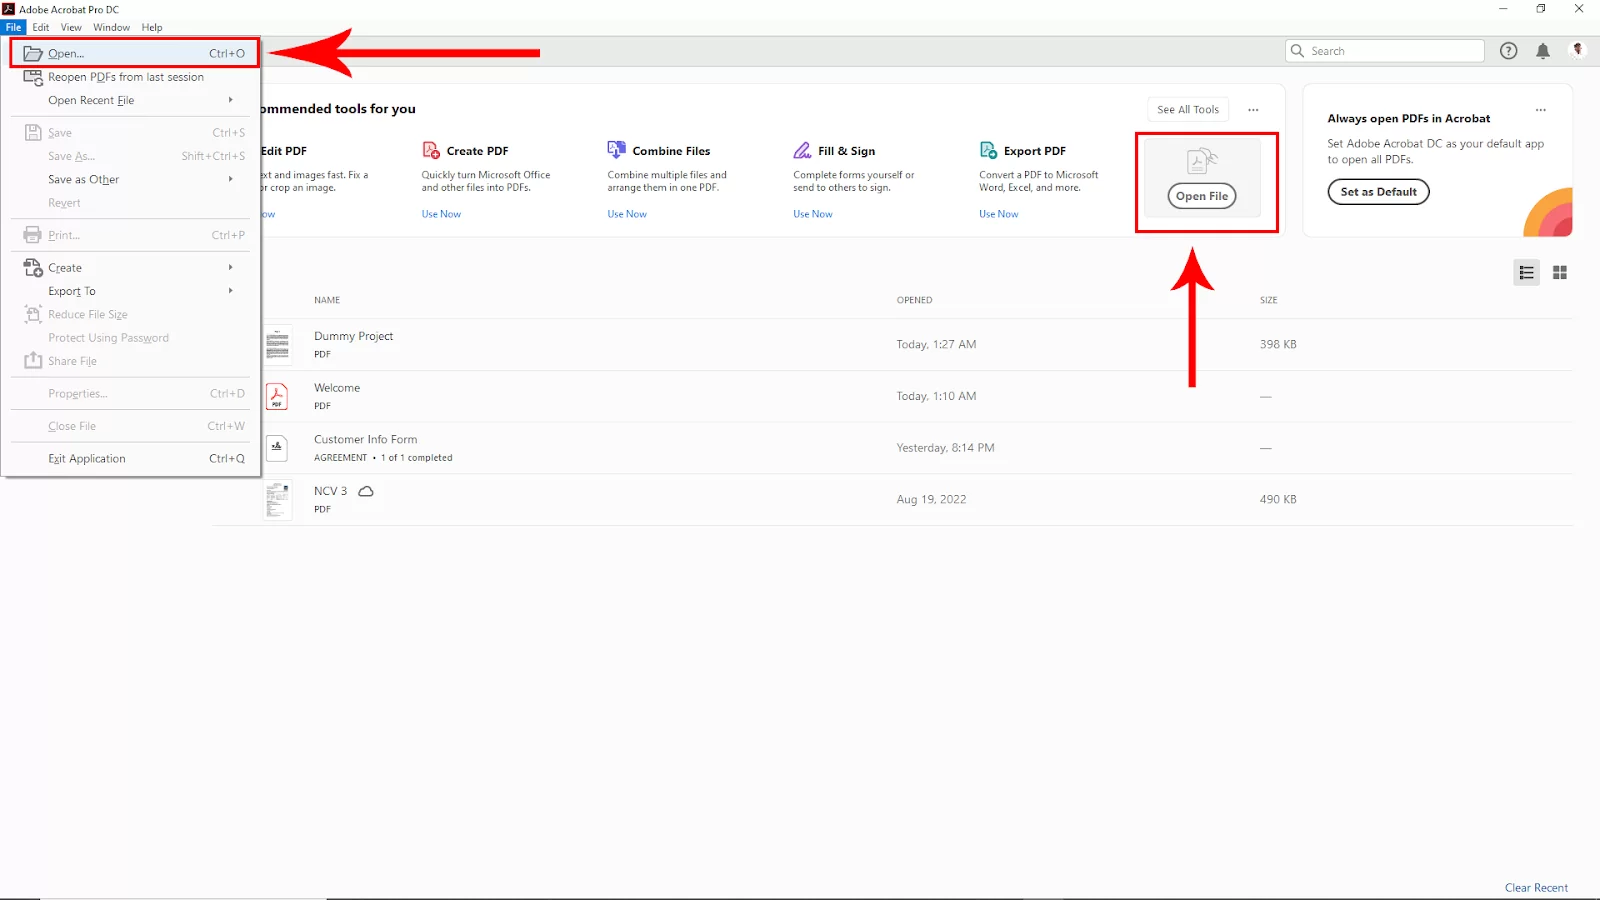
First, Open Adobe Acrobat software and then open your pdf file. To open a file, go to File > Open and then select your pdf file from your file manager. You can use short in Win [ Ctrl + O ] or Mac [ Cmd + O ]. You can click directly to Open file on the right corner and then open your File.
Adding Images
After opening the pdf file, go to Tools in the upper left corner. Click on that.
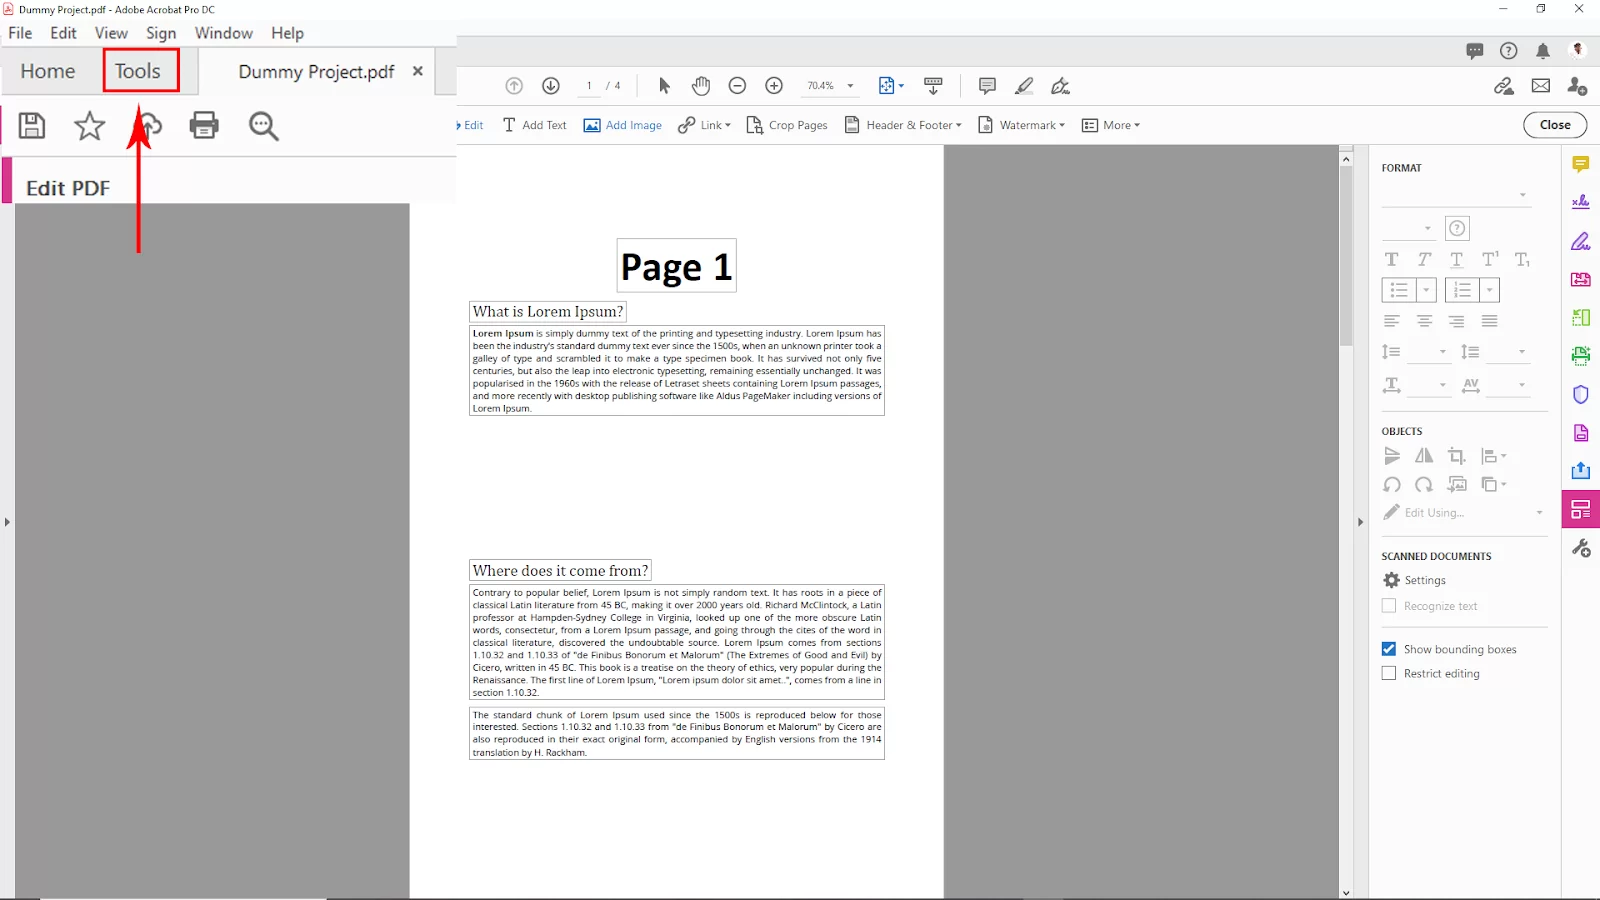
Then navigate to the Edite pdf option and click on that

After Selecting the Edit Pdf option now back to the pdf file tab, then click on the Add Image Option from the upper bar. And then, your file manager will open. Then select your image from the file manager and click Open.

After opening your image, now click on the page where you want to add the image, and it will add there. To resize the image, click and drag the rectangle anchor point of the image.

Adding Text to the page
Selecting the Edit Pdf Option Ont the tools tab. Select the Add Text Option from the upper menu. Now click wherever you want to add the text. And type your text. You will find all the text settings on the right side upper corner after you create a text and select it. You can change the text font, color, spacing, alignment, etc.

Adding Stamps
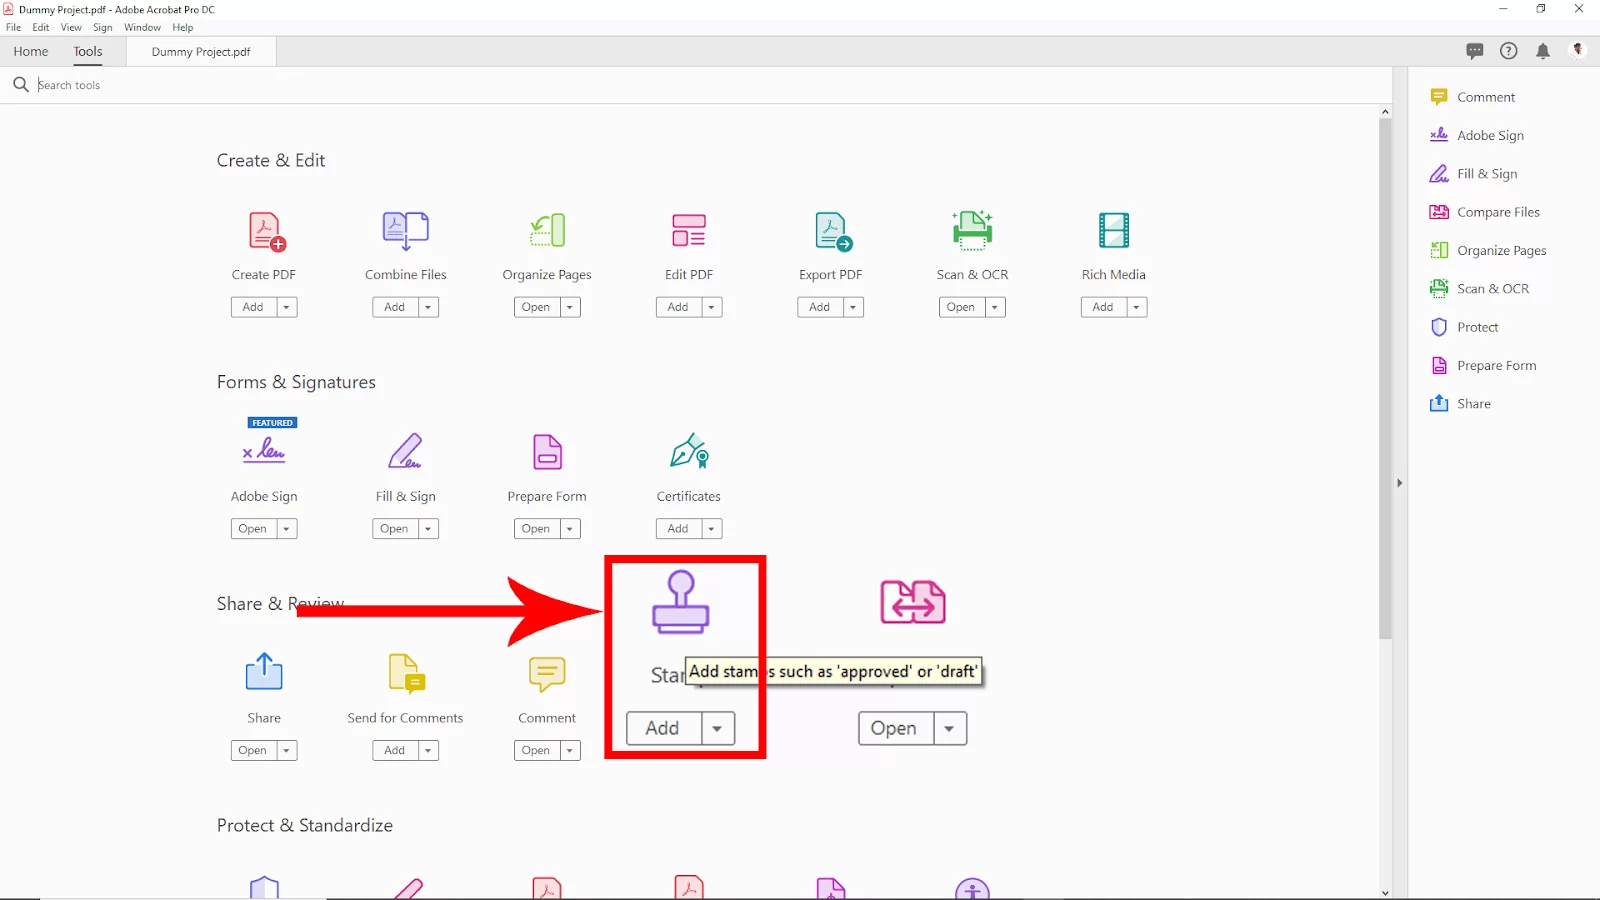
Go to the Tools Tab and select the Stamp Option.
After selecting the Stamp Option back to the page tab, a stamp panel will appear. Here you can find the default stamp. You can also import your stamps here and then apply. Click on import in the upper right corner of the stamped panel and select your stamp from the file. To apply a stamp, select it and then click wherever you want to add it on the page. and your stamp will be added.

There are some preinstalled stamps in adobe acrobat. Click on the upper left corner Stamp Dropdown option. Click on the dynamic And select your desired stamp and then click on the page wherever you want to add the stamp.

After selecting the stamp, click on the page wherever you want to add the stamp. And your stamp will be added to the page.

Adding shapes
Go to the Tools tab, then select the comment option.

Back to the page tab, Click on the right upper corner shape dropdown options. Here you will find some shapes. For this example, I use the rectangle shape.

After selecting the shape now, click and drag where you want to add the shape. To change the color, click on the upper corner of the color palate and select your color. You can increase the border value and color from here. And also can change the opacity.
We also recommend that you see our step-by-step guide on how to make a fillable form using Adobe Acrobat.

Can Shapes Be Added in PDF?
You can add all the shapes you want in PDF. You can insert any information you need to draw your viewers using the variety of shape options that PDF files offer. With this file format, you may add forms to your document using the supplied Pencil Tool to draw free-form shapes or insert pre-made shapes from the Tools menu.
There are various shapes that you can input in your PDF, and they are; rectangles, arrows, ellipses, polygons, clouds, text callouts, etc.
How To Create Circle Annotations in Acrobat
Using the Circle tool, you can draw a circle or an ellipse on your PDF. Hold down the Shift key as you draw to draw a complete circle. Shapes can be changed after placement by sliding one of the shape’s resized handles. You can also create a circle annotation if you follow the instructions I’m going to give you next.
Use the shortcut key Ctrl + Alt + C or Command + Alt + C on a Mac to launch the Circle tool. Alternatively, you can click the button in the Comment Tab of the toolbar to launch the Circle tool. Next, Drag and drop to make your desired shape. To draw a perfect circle, hold down the Shift key.
Annotation Properties You Should Know
Visit the Properties Tab on the toolbar, right-click on the annotation, select Properties from the mouse menu, or select the edit button on the Mini Toolbar to access the Circle properties. The following property settings are present in the Circle annotation.
- Line width
This Sets the size of the borderlines
- Style
Sets the borderline’s style.
- Color
This Sets the border’s color.
- Fill Color
This sets the fill color.
- Transparency
This sets the shape’s transparency.
- Note/Comment
A note can be written on forms to be visible when the mouse hovers over them.
- Save as default
This will set the default appearance settings for any future Circle annotations when selected.
- Locked
When selected, Locked prohibits the annotation from being moved or resized, modifying its appearance properties, or being deleted.
- Author
You can edit the author by using the author feature.
- Subject
This enables subject editing.
If you liked reading this piece, you will also like our article on How to Add Page Numbers in Adobe Acrobat.