One of the most significant elements that bring your game to life is the characters. These characters can be the protagonist, the NPCs, the enemies, and any other figures that inhabit your game’s world. Adding characters to your game can make it more engaging, dynamic and interactive. In RPG Maker MV, adding characters is a simple process.
Developers can import pre-made characters or use the built-in Character Generator to create custom characters, enemies, and NPCs, which can be further customized by editing their sprites, attributes, and behaviors. Once imported or created, the characters can be placed in specific maps, events, and scenes in the game, bringing your game’s story and world to life. With the right set of characters, your game can create an immersive experience that players will remember.
We’ll show you how to get started.
Steps to Add Characters in RPG Maker MV
Step 1: Open the database
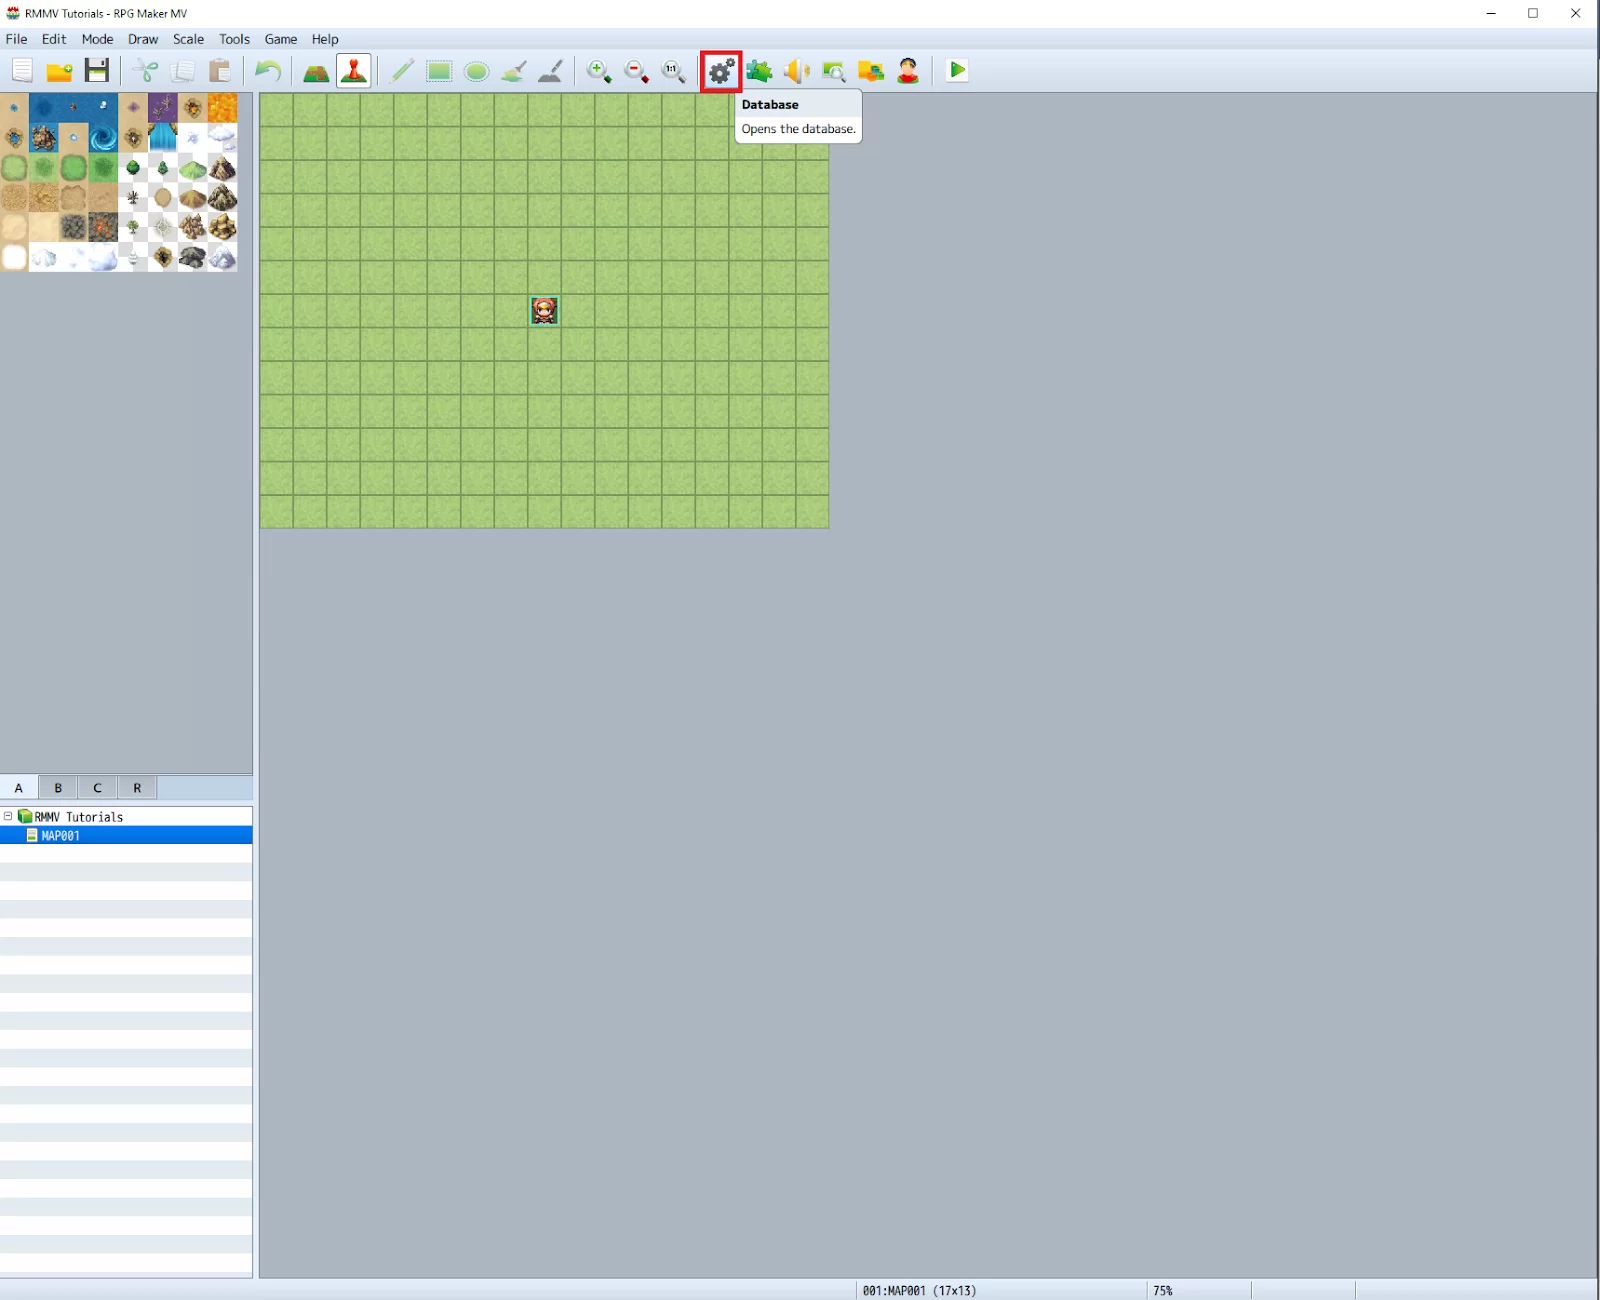
Open the Database window by clicking on the gear icon, as seen below.
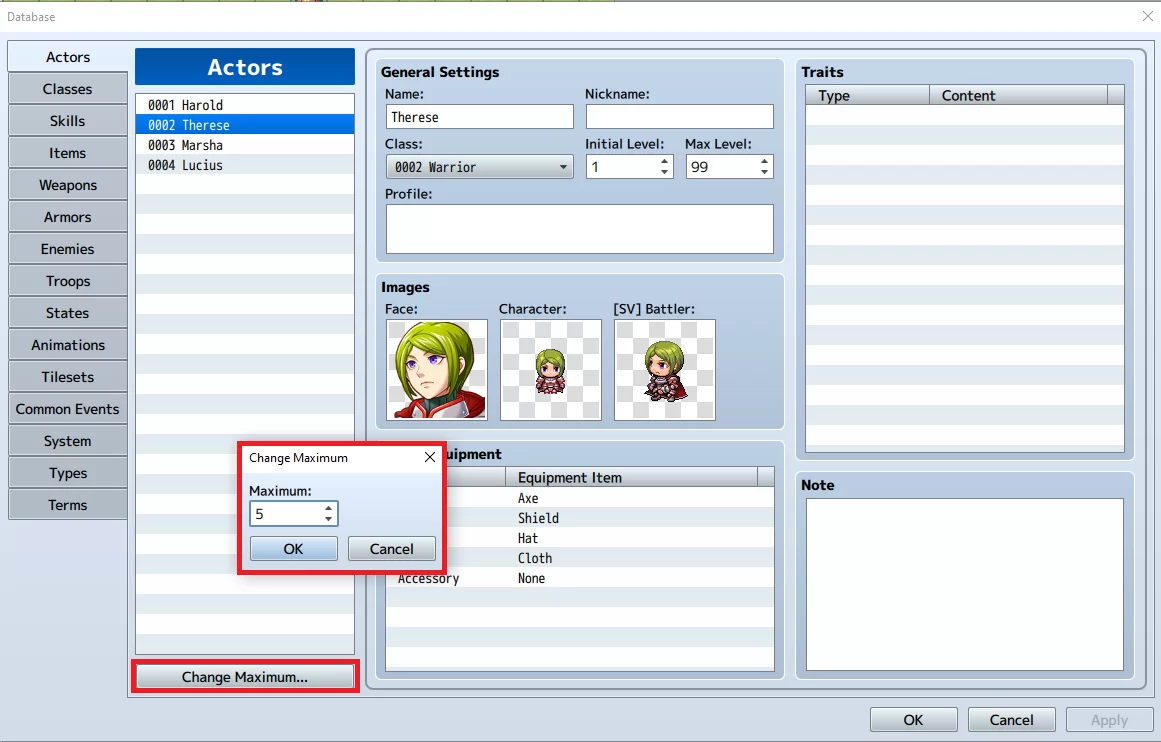
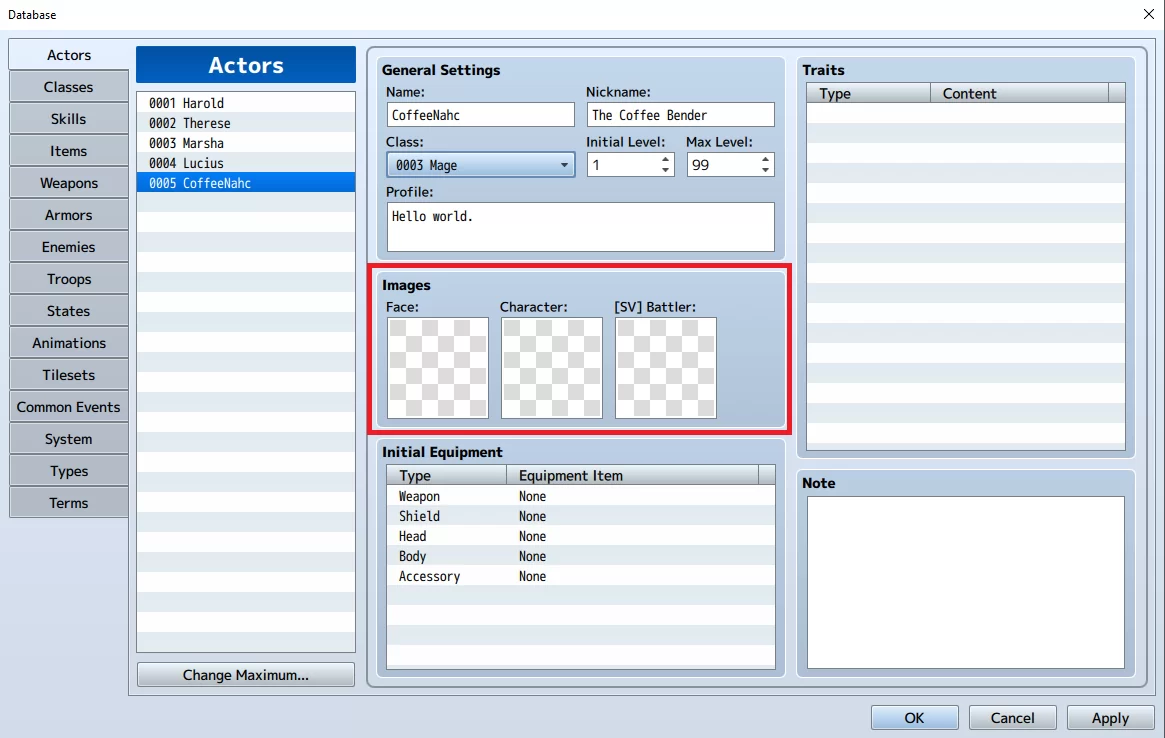
You will be met with the following window below. Make sure you are in the ‘Actors’ tab.

The Actors are all the playable characters in the game, and is set to these four starting characters by default by the engine. We could change the maximum playable characters by clicking on the Change Maximum button as highlighted below.

We would like to create a new character for this tutorial. Go on and click that button and change the maximum number of actors to 5.
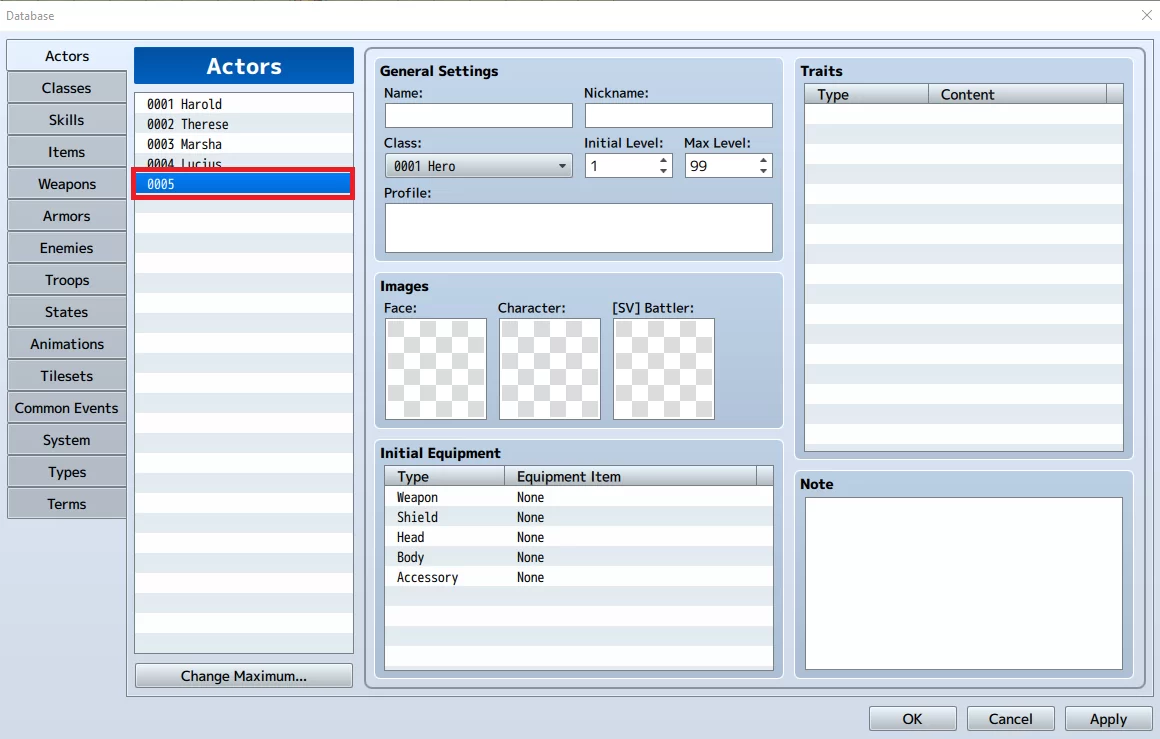
This will create an empty row on the actors list. Click on that row so we could start defining our new character.
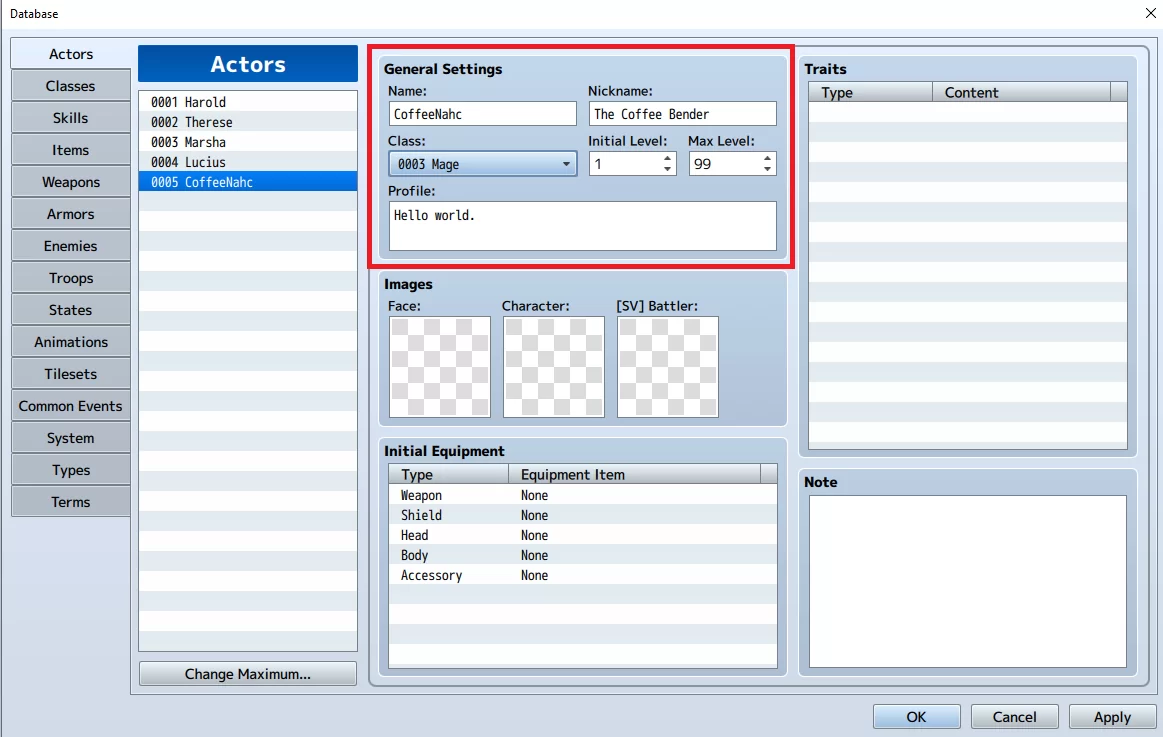
Let’s start with the General Settings. Fill in these fields (Name, Nickname, Profile) to describe your character. After which, click on the dropdown box below to choose a starting class for your character.
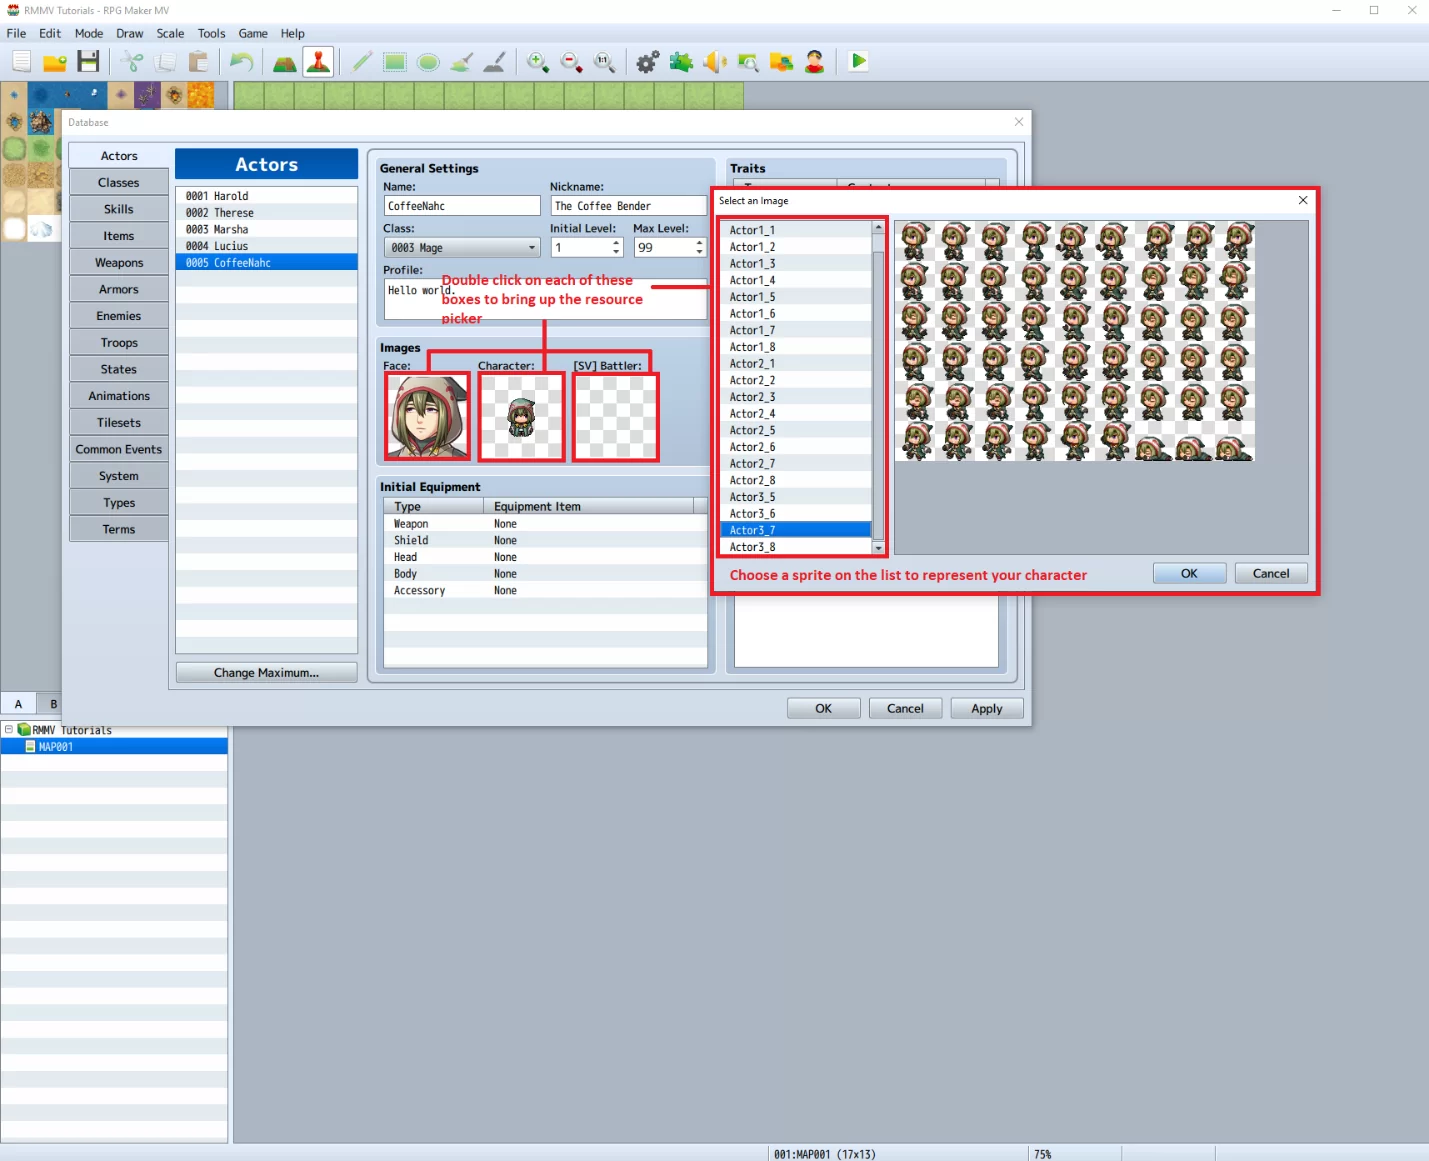
Let’s choose image sprites for our character to define its looks. Double-click on each of these transparent boxes to bring up a window where you can choose the Face sprite, walking sprite, and side-view battler sprites of your character.
Once you’re done choosing, simply click on OK to close the resource picker window and register your choice.
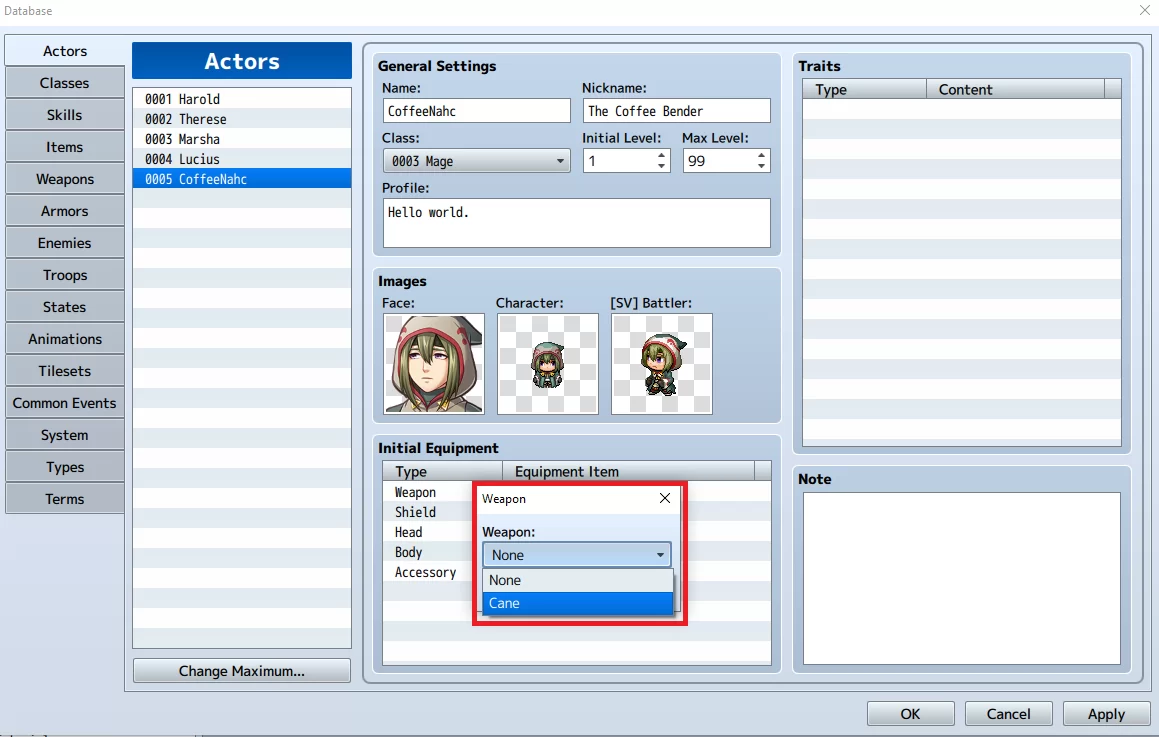
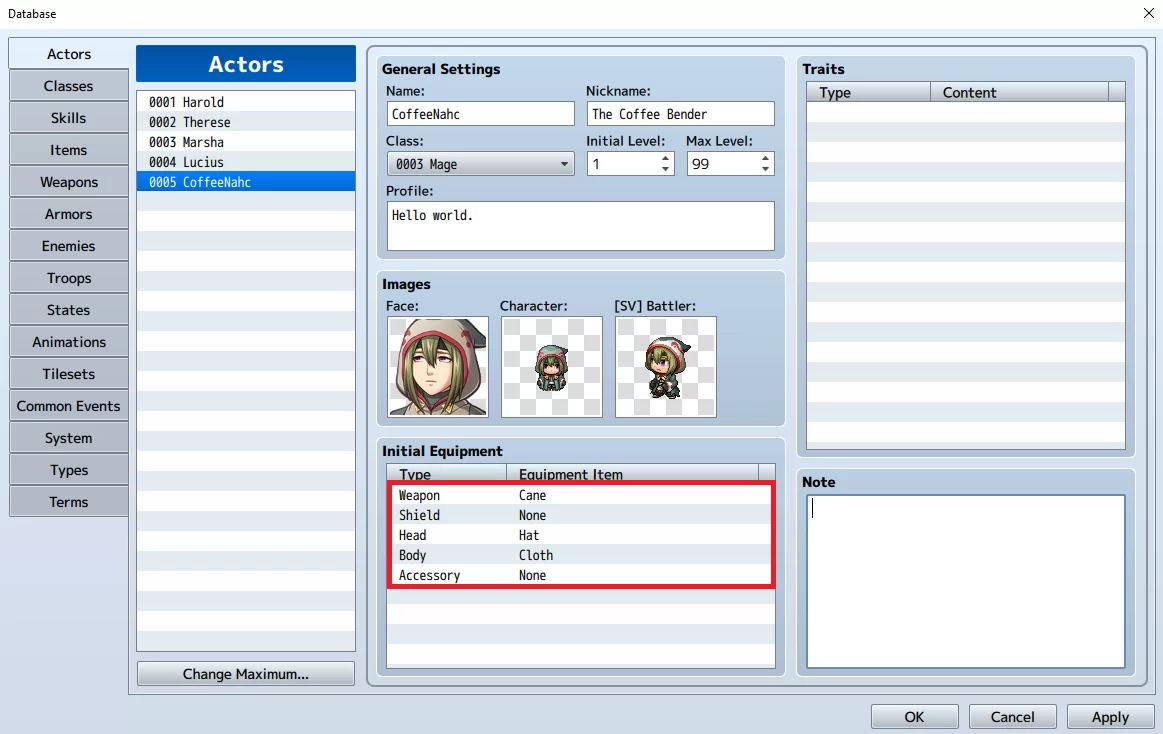
Now let’s add some starting equipment for our character.
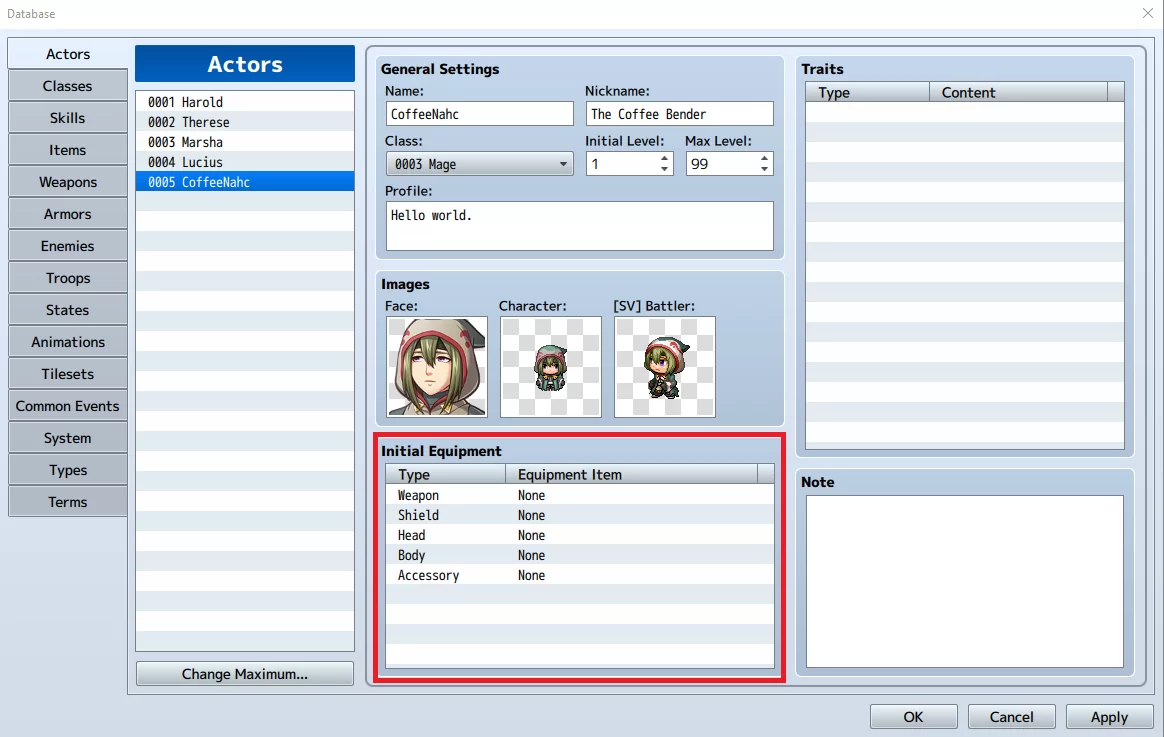
Select a desired row and double click on it to open up the item picker window.

From there, click on the drop-down box to choose an item.
Do the same for other equipment types, or you could leave them as none. Your choice.
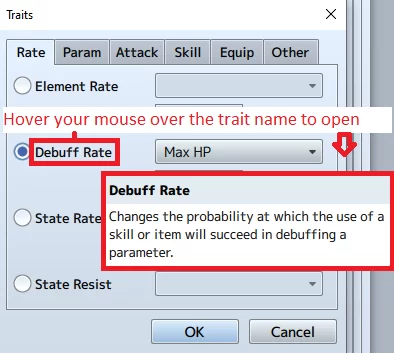
Our next concern is the trait box where we could define the traits of our character such as elemental weaknesses, elemental strengths, etc. Double-click on an empty row to open up the traits window and start defining some traits.

You will be met with the following window.

If you wanna know what each trait does, simply hover your mouse over the trait name to show a help window explaining them.
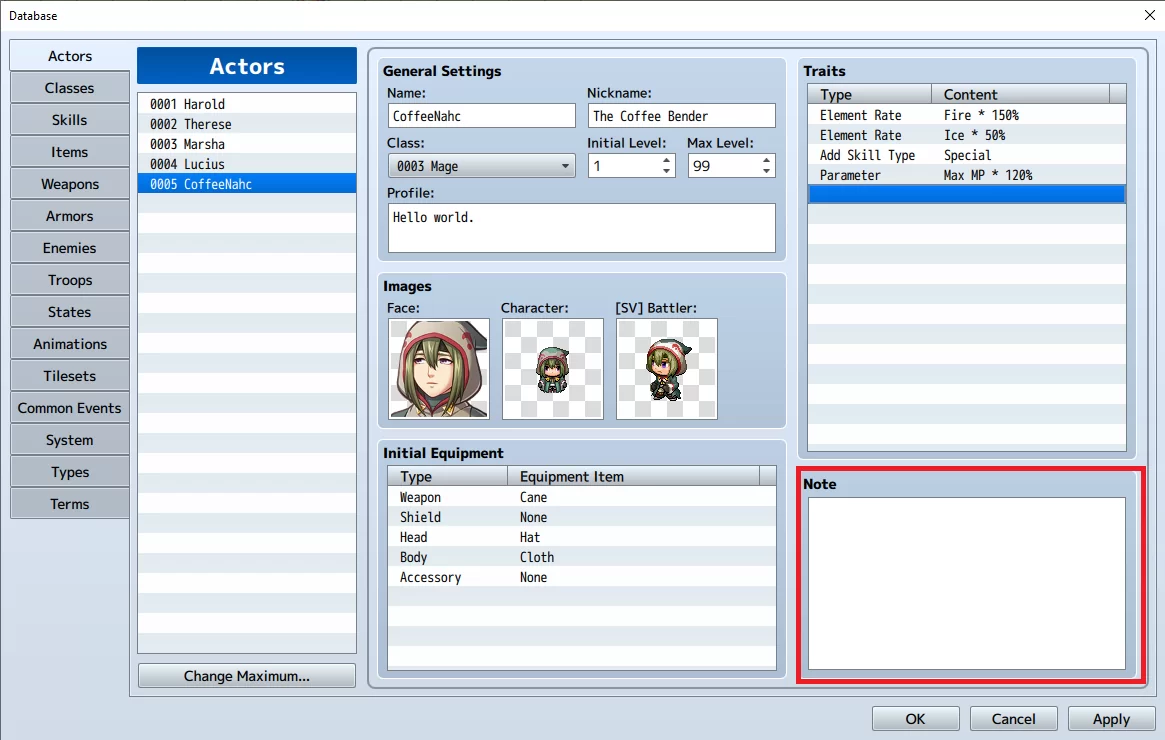
The Notes text area is where you can put your own notes regarding the character. It also usually utilized by plugin developers for plugins. You can leave it blank for now.
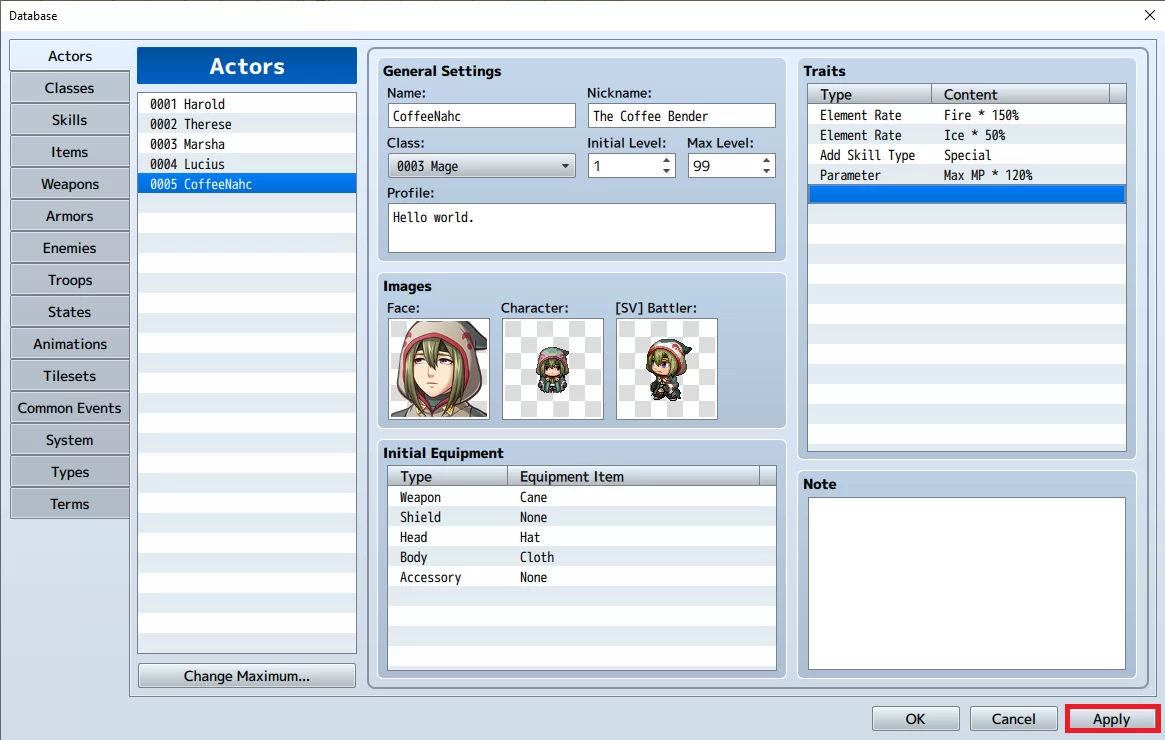
Once you’re satisfied with your character, hit Apply to save your changes and click on OK to close the database window.
We also recommend that you check our guide on how to add audio files in RPG Maker.
Viola! You’ve successfully added a new character.
How to Add Characters Mid-Game in RPG Maker
To add actors mid-game, you must first ensure that they are initialized. Initialization needs first to be done on first adding. If it isn’t done, the data will be blank.
Don’t use the script commands, but instead, use the event command of change party member. This would add a fourth actor. Then use the initialize option on that command. The script equivalent of what of the above explanation isn’t known because no one adds a regular actor by script anymore unless it is a dynamic actor that doesn’t exist in the database.
The initialization tells the engine to reset all actor data to base database values. If you don’t initialize, the last stored value will be used—which is a blank actor. This is especially true when you have dozens of blank actors in your database.
The idea behind this is that an actor can be added and removed throughout the game. It also keeps his last info from when he was in the party before. This is why actor data is stored in the savefile if the actor exists.
However, you need to tell the engine to load the data from the database. This can be done by setting the init flag on the event command for adding the actor you want. This should be done when adding the actor for the first time, as it will prevent false data from being used.
You ccan also see our step-by-step guide on how to use the character generator in RPG Maker.
Adding More Than Four Characters
There are times when you want four characters actively fighting on your screen, and then you want to switch out members of your party for other characters. If you’ve ever been in this position, then there are simple ways to get around it.
The RPG Maker by default, allows you to have up to 8 or more party members traveling with you at a time. You can switch up the battle party—which is the top four party members, anytime you visit the menu.
Any number of actors can be in your party, but by default, only the first four battle members can engage in combat and appear as followers. Any additional actors are in reserve and can be accessed through the menu afterwards.
It is the formation menu that gives you the ability to alter the battle members by adjusting the order of actors, and there is an event command to enable or disable it. You can easily turn it off by default and turn it on only at savepoints to allow the player to alter formation only there.
Did you enjoy reading this article? You may also like our detailed guide on how to make custom tilesets for RPG Maker.