One of Procreate’s key features is the usage of layers, which enables you to build several images on top of one another.
Our article’s major focus is on Procreate’s layers because we’ll demonstrate how to merge them, provide you with some background knowledge on the layer structure, and explore further uses.
Let’s get going!
Merging Layers In Procreate
You might occasionally run out of layers depending on the dimensions and resolution of your canvas. Layers can be easily combined if you ever find yourself in a scenario where you don’t have enough. If your drawing isn’t finished yet, we advise you to combine layers where the drawings don’t intersect.
Merging layers might aid in shrinking the image file size if your artwork is finished.
SEE: How To Use Procreate
Merging Two Layers Together
Start by rearranging the layers. The layers you plan on merging must be close to one another. Adjust the layers as necessary.

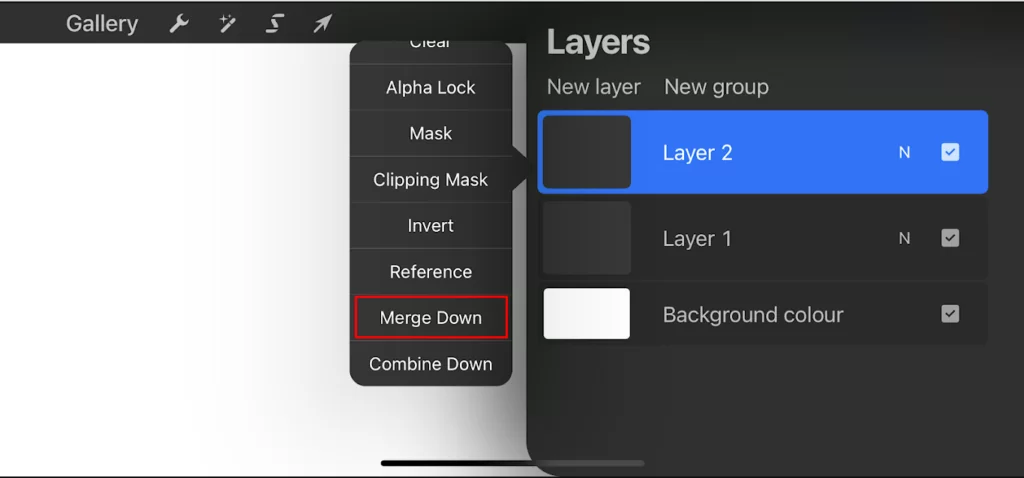
To merge the layers, tap on the particular layer’s thumbnail, then choose the “Merge Down” option. Here’s an illustration below:

Merging More Than Two Layers
Layers can be merged using a gesture shortcut, which works with just about any number of layers. All you need to do is put a fingertip on the top layer and another on the bottom layer while all the layers are close to one another. Pinch each layer to the next. Keep practicing, and you’ll get it.
Unmerging Layers
You can only undo a merge using the usually undo capability after it has already been completed.
Once you’ve closed and reopened your work, or if too much time has passed, you won’t be able to unmerge your layers.
To prevent mistakenly deleting something in Procreate and being unable to undo the mistake, it is crucial to keep in mind how the undo feature functions.
Group Layers in Procreate
If you require your job to be even more organized, you could realize that you wish to group particular layers together.
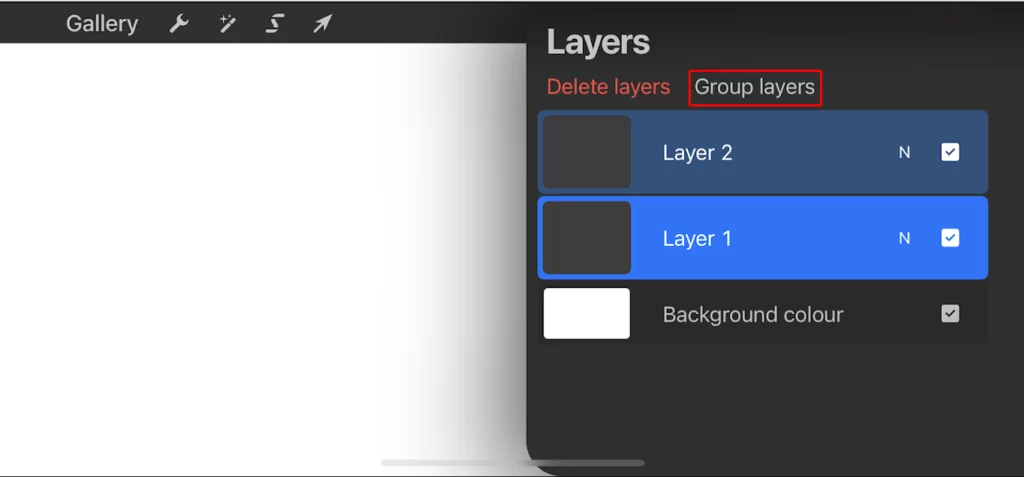
You can accomplish this by selecting the layers you want to group and then hitting the “Group Layers” option. The layers menu is located in the top right corner, where this button can be found.
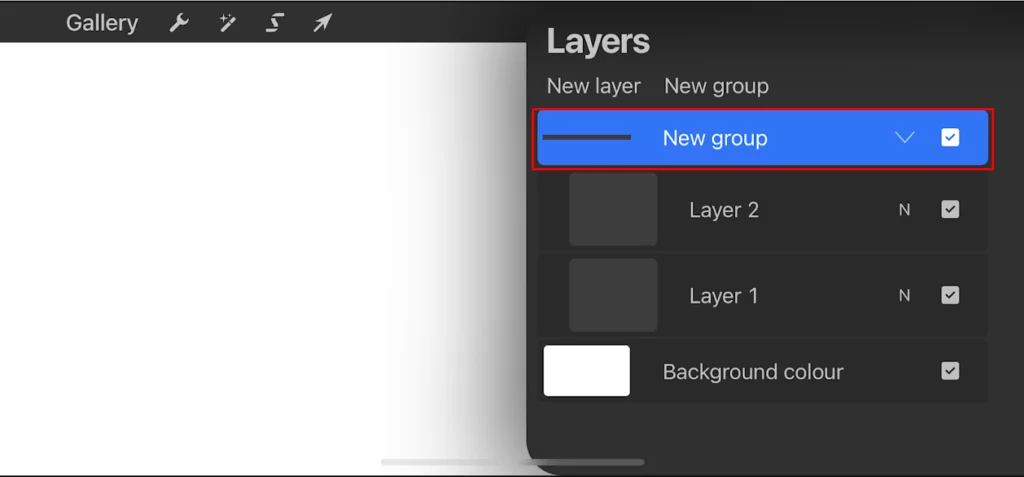
Simply click the downward-pointing arrow next to the name of the grouped layer to view your grouped layers.
This makes it much easier to see and alter all the layers you’ve grouped together.


After merging the layers, this is how it’ll look:

You can actually give the group a name that you’ll easily remember at this point.
Layers can be ungrouped by simply dragging them out of the group.
Other Things You Can Do With Layers In Procreate
Deleting Layers
When removing layers, there is no need to be concerned about losing any data. You won’t lose anything, and the data will be unaltered.
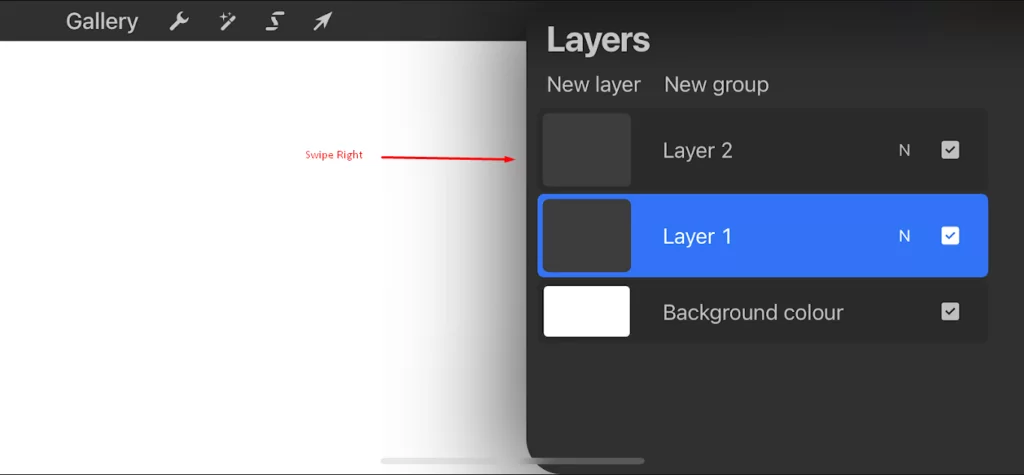
Layer deletion is also fairly straightforward. To remove layers, choose the ones you want to get rid of and then choose delete from the menu displayed when you swipe right on a layer.
Duplicating Layers In Procreate
You must first choose the layer you wish to duplicate before proceeding with the identical steps as if you intended to merge it with another layer.
There is yet another option to replicate the layer in the menu that appears when you swipe right. You can now have two copies of the specified layer by tapping duplicate.
Final Thoughts
One of Procreate’s most helpful features is the ability to merge layers. At first, it might seem a little challenging to get the hang of this strategy, but once you do, you’ll wonder why you didn’t utilize it sooner!
Procreate is the best program if you’re looking for one that gives you access to a wide variety of tools and techniques to make incredible digital art.
For more Procreate tutorials, feel free to go through our articles on How to Make Stickers on Procreate and How to Add Fonts in Procreate.

Leave a Reply
You must be logged in to post a comment.