Notion is a flexible tool that can create tables and dividers. Tables help you organize information while dividers visually separate different sections on a page. In this article, we’ll show you how to make tables and dividers in Notion, step by step.
What is a Table in Notion?
Notion has responded to user requests by adding a new, simple feature. With a table, you can easily organize your data by arranging it into rows and columns or using header rows and columns to highlight important information. You can navigate the table using the tab key.
Creating a Table
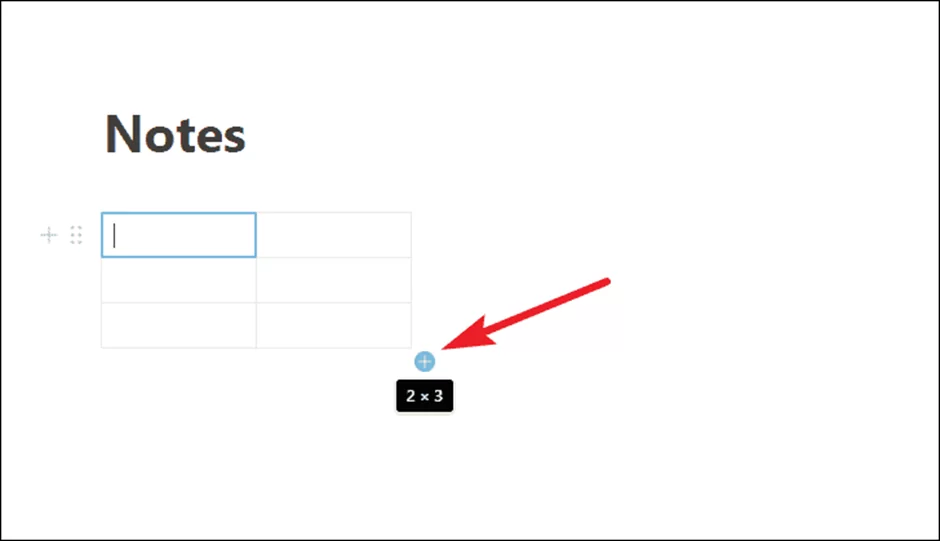
To create a table in Notion, use the slash command. Simply type “/table” and select the first suggestion from the blocks that appear.

When you create a table in Notion, it will initially have 2 rows and 3 columns. If you need more space, you can add more rows and columns by dragging the bottom-right corner of the table outward diagonally.
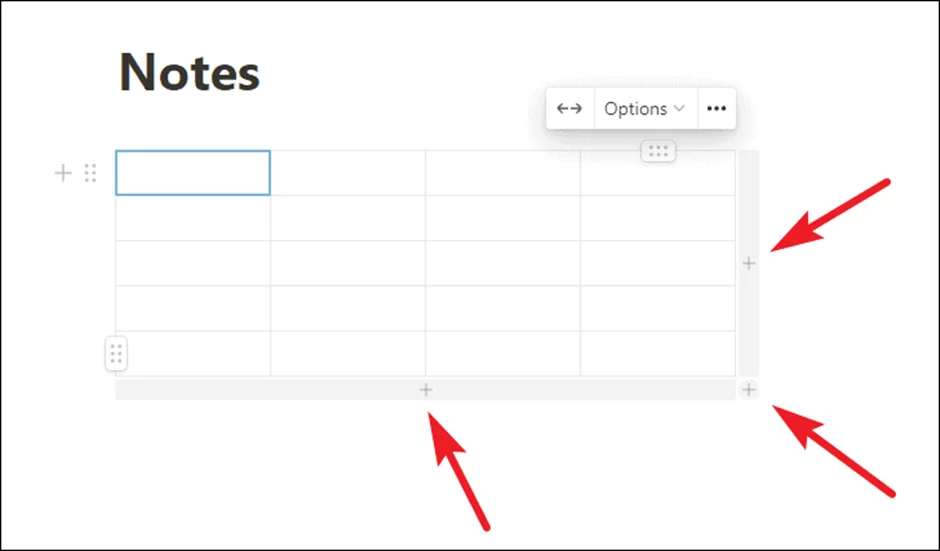
If you want to add more columns to your table, you can drag the bottom-right corner of the table outward to the right. To add more rows, drag the corner down towards the bottom of the page.

In addition to dragging the corners, you can also use the ‘+’ icons that appear at the bottom, right, and bottom-right corners of the table to add rows, columns, or both one at a time.
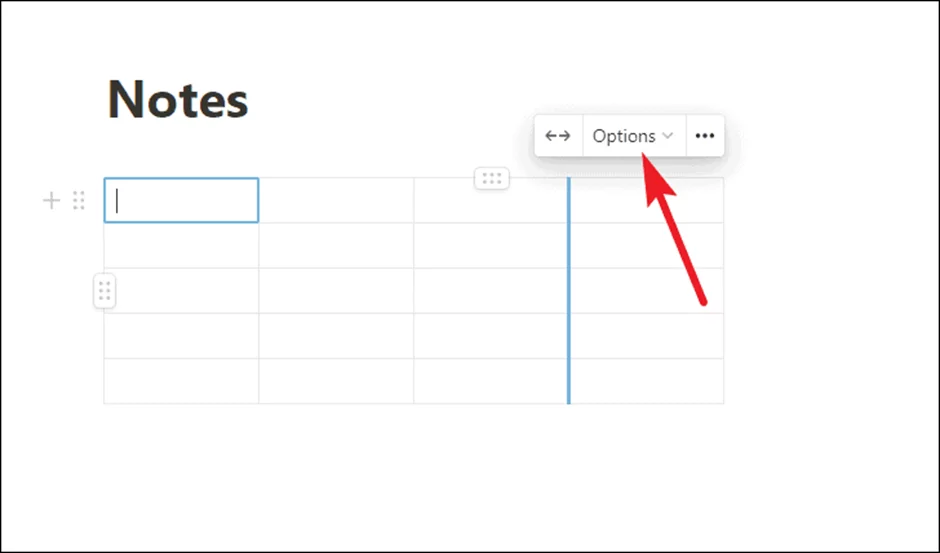
If you want to make a header for a column or row in your table, simply click on “Options”.
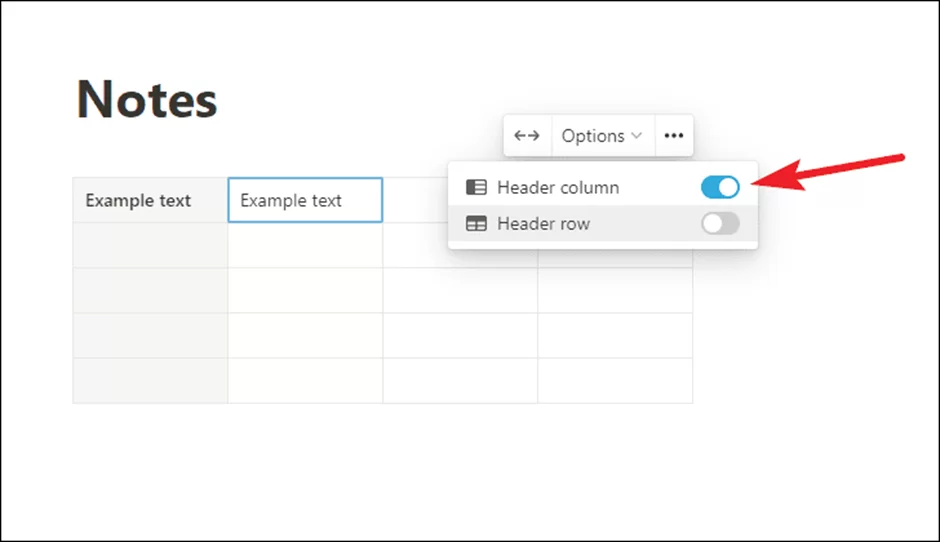
Once you click on “Options”, you can enable the toggle for “Header Column” or “Header Row”, or both depending on your needs. Header columns and rows are visually distinguished from regular columns and rows by having darker shading in the background and bolder letters.
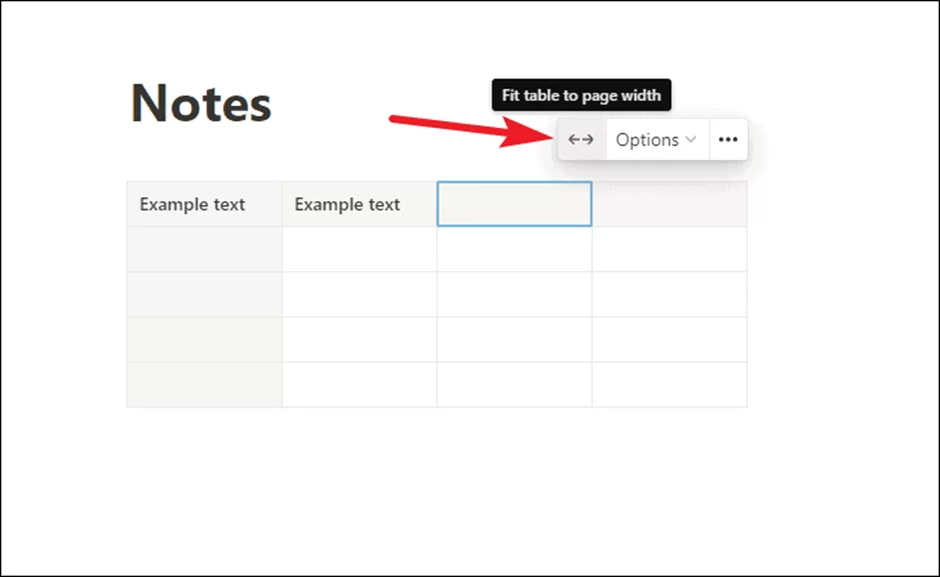
Notion also provides an option to fit your table to the page width, which can be particularly helpful when you add a new column. This option will adjust the width of the entire table to ensure that it looks neat and tidy, rather than having one oddly-sized column. To fit your table to the page, simply click on the two arrows pointing away from each other.
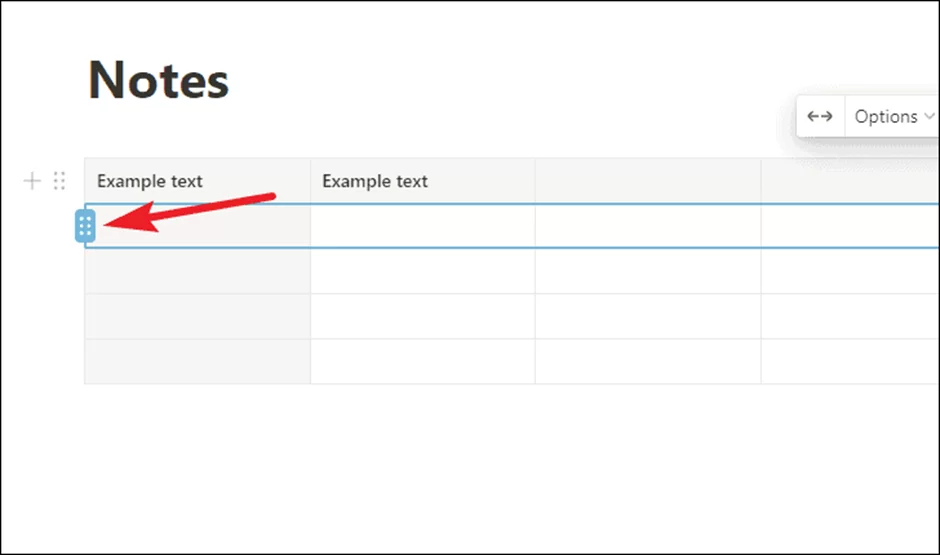
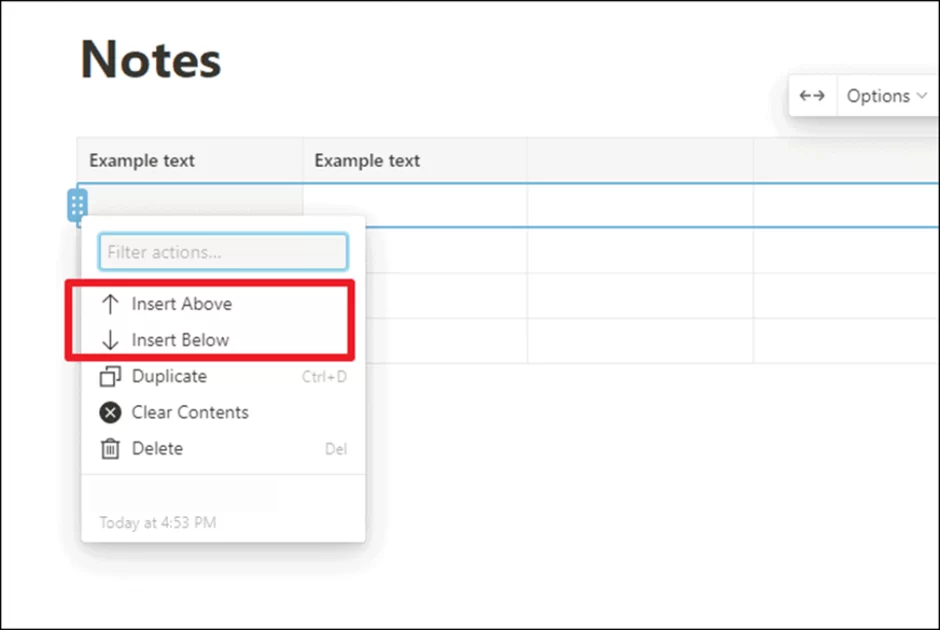
If you need to insert new columns or rows into the middle of an existing table in Notion, you can do so easily. To insert a new row, simply navigate to the first cell of the row where you want to insert the new row. Then, click on the “row handle” icon, represented by six dots.
Once you click on the “row handle” icon, a menu will appear. From there, you can select “Insert above” or “Insert below” to add a new row to your table in the desired location.
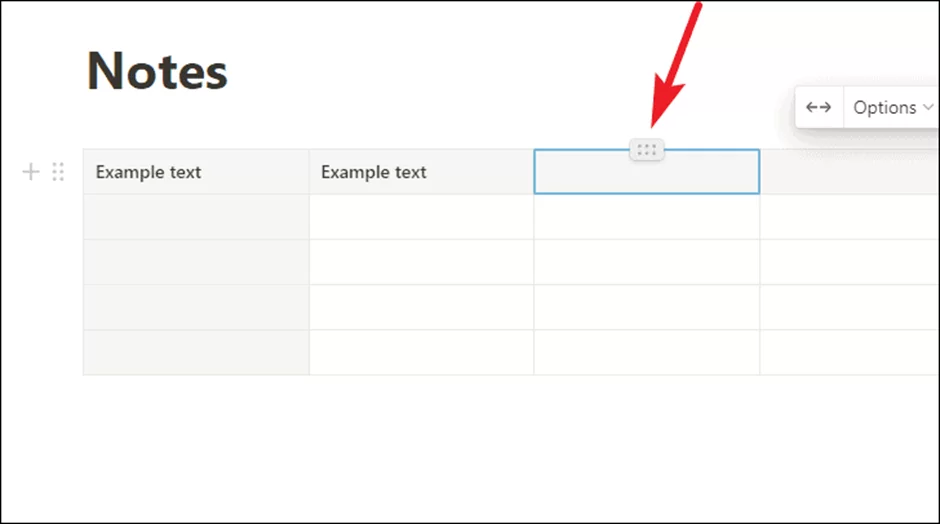
To insert a new column into your table in Notion, navigate to the first cell of the column to the left or right of where you want to insert the new column. Then, click on the “column handle” icon, represented by six dots.
Once you click on the “column handle” icon, a menu will appear. From there, you can select “Insert left” or “Insert right” to add a new column to your table in the desired location.

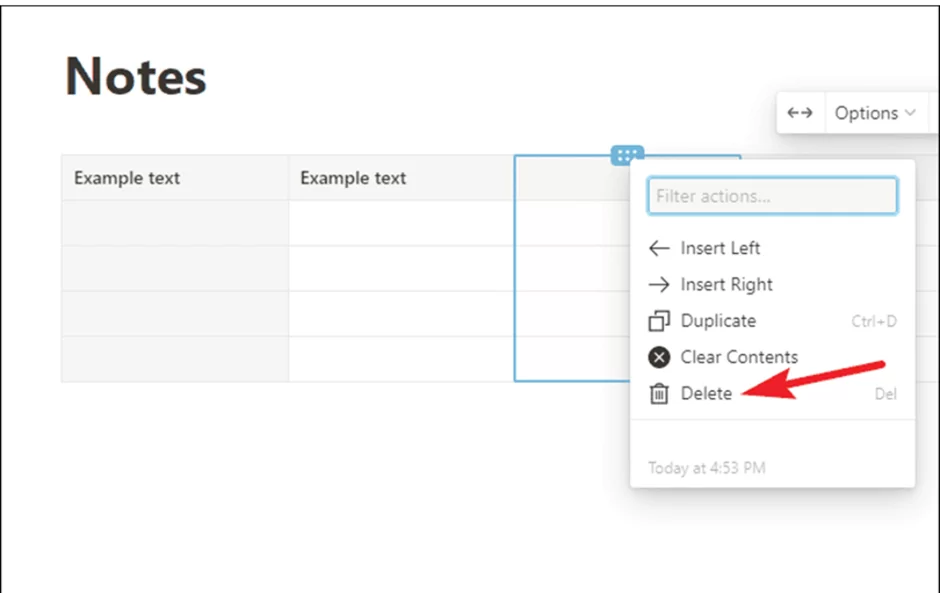
If you need to delete an entire row or column from your table in Notion, it’s a quick and easy process. Simply navigate to the row or column you want to delete and click on its handle. Then, select “Delete” from the menu to remove the row or column from your table.
You should also check out our in-depth article on how to change font in Notion.
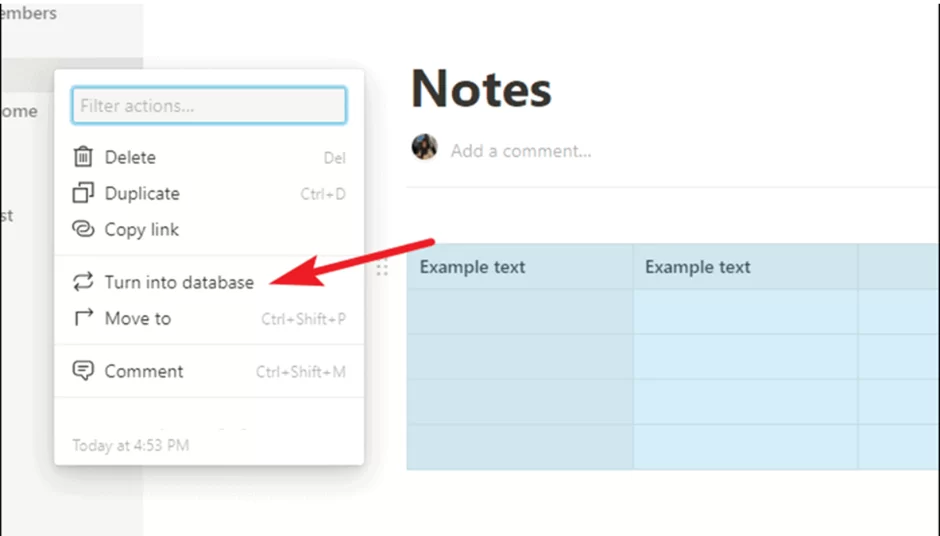
If you find that your table in Notion no longer suits your needs and you require more advanced functionality to accurately represent your information, you can convert it into a database with ease. To do this, click on the “table handle” icon (represented by six dots) to the left of the table.

Once you click on the “table handle” icon, a menu will appear. Select the “Turn into database” option from there to convert your table into a database in Notion.
That’s everything you need to know about creating and customizing tables in Notion!
Also read: How to undo in Notion
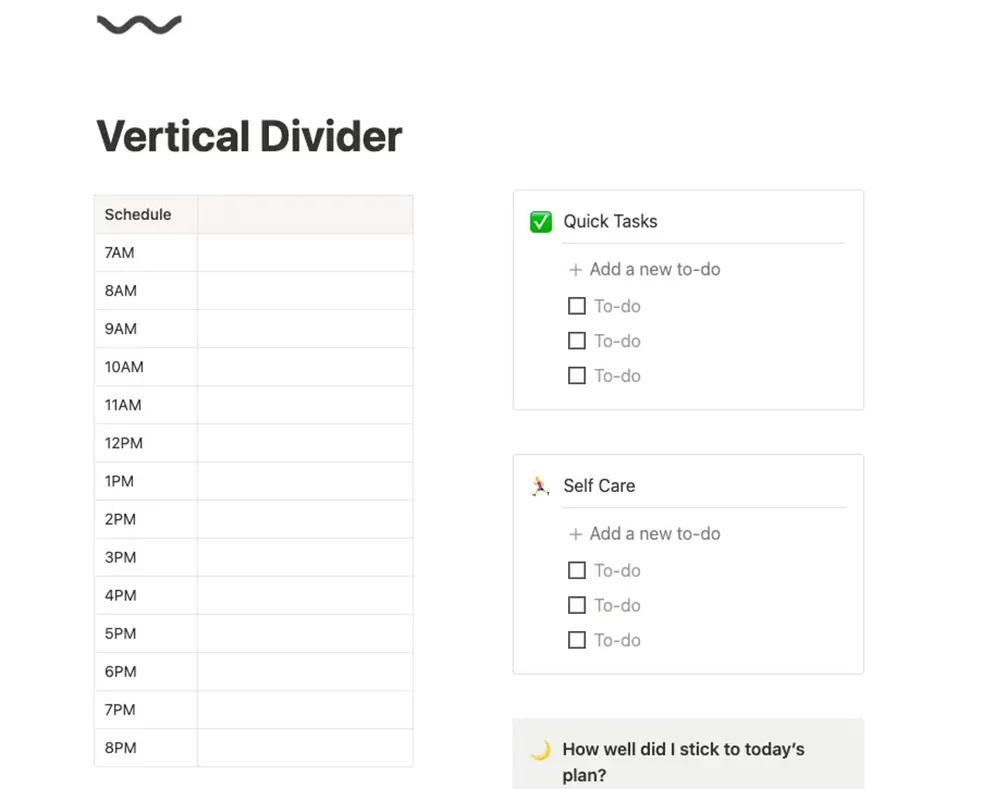
How to Add Vertical Divider in Notion
If you’re looking to add a vertical divider to your Notion page, you may be disappointed to learn that there’s no built-in function for this. However, there is a simple workaround that we can go over!

The Process
Please note that this example assumes that you already have your columns set up in Notion.
Type /quote to add a Quote block anywhere on the page.
Drag the Quote block in between your two columns.
In the “Empty Quote” section, hold down the SHIFT key and press ENTER repeatedly until the divider is long enough.
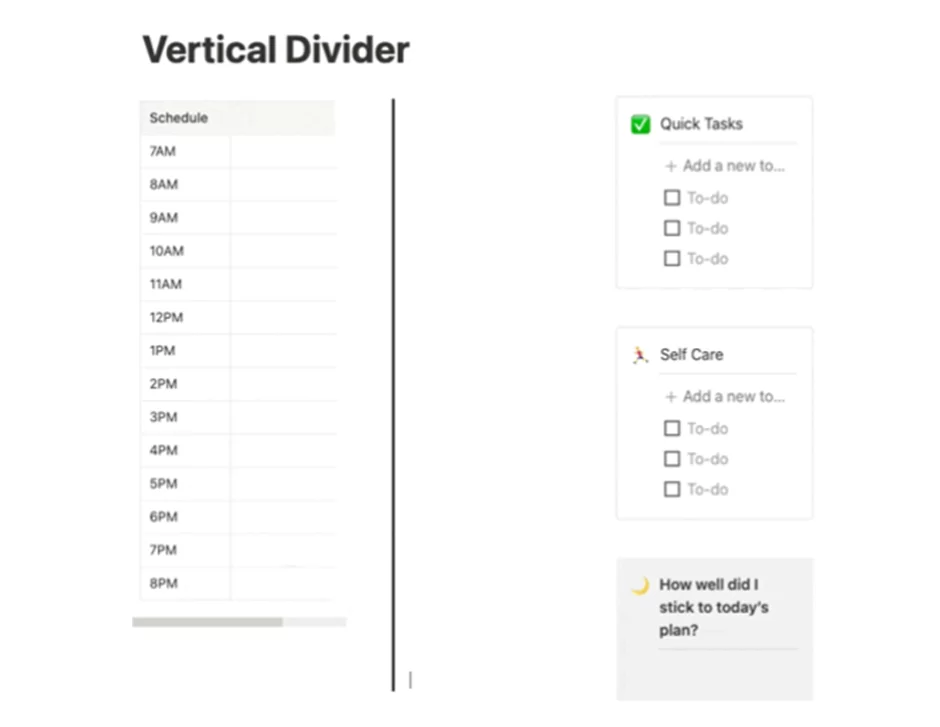
Click on the border of the Quote block and adjust the width to make it thin. Congratulations, you have now created a vertical divider bar!

Adjust The Design Of The Vertical Divider
You can change the color of the divider bar by following these steps:
- Right-click on the Quote block that contains the divider bar.
- Select “Color” from the drop-down menu.
- Choose a color from the available options or use the color picker to select a custom color.
The divider bar will now be displayed in the selected color.
Dividing A Page Vertically In Notion
To add columns to your page, you can use the column blocks. You can call them up by typing /2c or /3c in a new line on your page. These blocks will create columns with equal width on your page, and you can add content to each column separately.
You can also adjust the width of each column by dragging the divider between them. For more information on different page layouts, you can check out the Notion Foundation Page Layouts.
Conclusion
Tables and dividers in Notion can help you organize your information and make it easier to access. Whether you’re using Notion for work or personal use, these features can help you create a more structured and efficient workflow. By following the simple steps provided in this article, you can create tables and dividers in Notion and start organizing your information more efficiently.
Did you enjoy reading this piece? Check out our detailed guide on how to make a template in Notion.