As creators, we aspire to present our audience with the most comprehensive content possible. In light of the latest advancements in device form factors, which continue to shrink in size, scrolling has become an essential component of any website or application. Without scrolling capabilities, the users’ ability to access details and media present in the app or website is severely restricted.
Adobe XD, an excellent tool for developers and designers seeking to create wireframes, prototypes, and designs for digital products, has integrated a novel feature known as “Scroll Groups” to enable scrolling.
This article was written to provide you with comprehensive guidance on how to incorporate scrolling capabilities into your Adobe XD artboards.
Adding Scrolling Capability to an Adobe XD Artboard
If you’re a designer or developer, you understand the importance of presenting your audience with a seamless user experience. One way to achieve this is by incorporating scrolling capabilities into your Adobe XD prototype. By simulating scrolling, you can provide your users with access to the full range of content available on your website or app.
To accomplish this, you’ll need to adjust the size of your artboard while maintaining the original View Point. This technique enables you to create the illusion of scrolling without actually changing the dimensions of your artboard.
Whether you’re using an existing artboard or creating a new file, the process is straightforward. Follow these simple steps to add a scrolling capability to your Adobe XD artboard:
Create A Vertical Scroll Effect
To begin, you must create content that exceeds the limits of your screen area. To achieve this, you can add simple shapes to your artboard. This will provide you with ample content to work with and enable you to simulate scrolling effectively.
To create shapes, follow these steps:
- Select the Rectangle Tool from the toolbar on the left-hand side of the screen.
- Draw a rectangle shape that extends beyond the edges of your artboard.
- Adjust the size and position of the shape as necessary to create your desired content.
- Repeat this process for each additional shape you wish to add.
When you add your shapes or elements, you can proceed to the next step in the process. Remember, the more content you create, the more effective your scrolling simulation will be.
Once you have added your desired content, you can select the artboard by clicking on its name or by Ctrl-clicking (Windows) or ⌘-clicking (Mac) on the artboard.

Next, ensure that Scrolling is selected in the Scrolling section of the Properties Inspector.

Take note of the value displayed in the Viewport Height field.

Now, click and drag the bottom-middle handle of the artboard. This will extend the artboard beyond its original size. However, if you used a default template, you should see a dotted guide where the artboard used to end.

Remember to adjust the size and position of your content accordingly to ensure it fits within the expanded artboard.
Creating A Horizontal Scroll Effect
To create a horizontal scroll effect in Adobe XD, follow these steps:
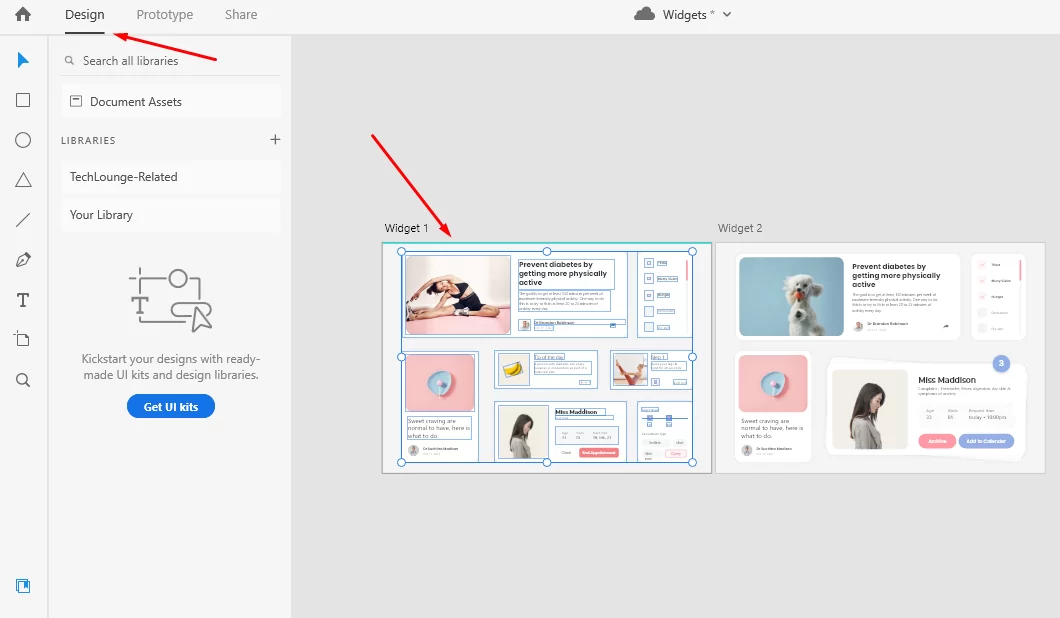
Step 1: In the Design mode, select the objects that you want to turn into a scrollable group.

Step 2: Look for the icon that looks like a stack of papers with a blue arrow pointing down, located in the Property Inspector. Click on it to create a scrollable group.
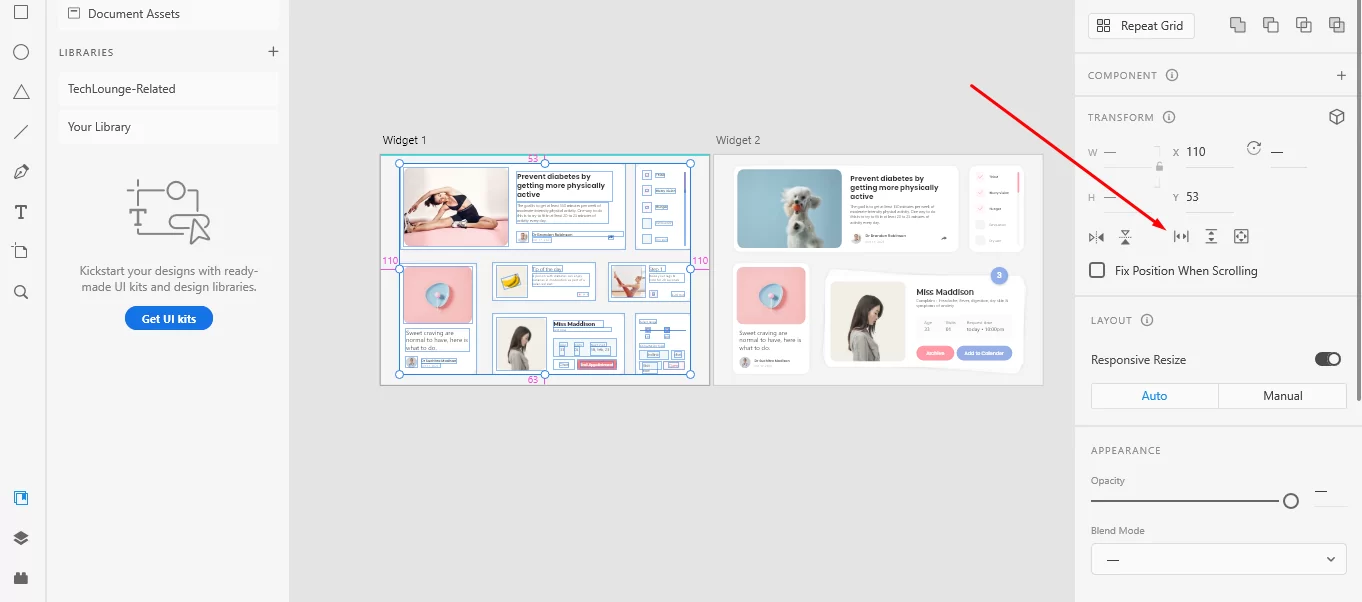
Note that the viewport automatically adjusts its dimensions to provide an instant preview experience. Alternatively, you can use the keyboard shortcut ⇧⌘H on a Mac or Shift + Ctrl + H on Windows to create a horizontal scroll effect.

To view the entire horizontal scroll effect, click on the Play icon. This will allow you to see the scrolling behavior of the group you just created.
Creating A Horizontal And A Vertical Scroll Effect
To create a combination of horizontal and vertical scroll effects in Adobe XD, follow these steps:
Step 1: In the Design mode, select the objects you want to turn into a scrollable group.
Step 2: Select the icon indicated below in the Property Inspector.
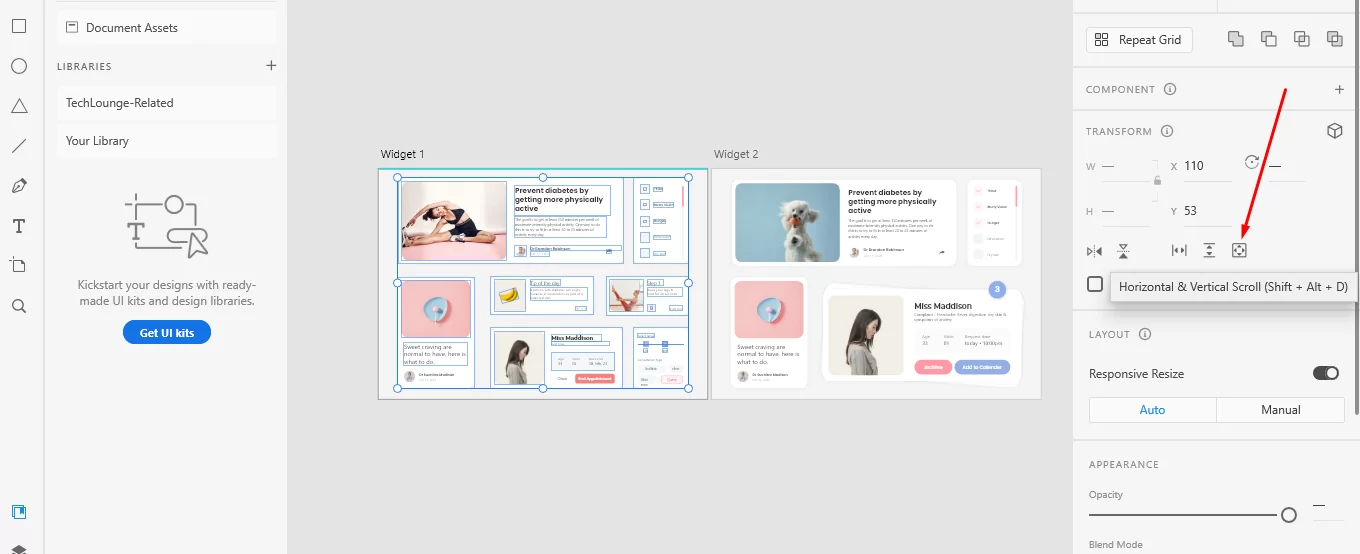
The Viewport automatically adjusts its dimensions to provide an instant preview experience. Alternatively, you can use ⇧⌘D in macOS and Shift + Ctrl +D in Windows to create a combination of both horizontal and vertical scroll effects.

By using these steps, you can create objects that allow scrolling in all directions, which is particularly useful for creating interactive maps or other complex layouts. Once you have created your scrollable group, you can preview the entire effect by selecting the Play icon.