Using preset in Lightroom can help you save a lot of your time and create professional-looking photographs. The process of adding a preset is straightforward and this article will help you unlock this exciting feature in Lightroom.
How to add presets on lightroom
These comprehensible steps will guide you into downloading, uploading and importing presets into Lightroom. You will also learn how to save your preset so you don not lose track of it.
Step 1: Open lightroom application
There are two innovative versions of Lightroom; Lightroom CC and Lightroom Classic. The difference between these two versions is plausible. Lightroom CC is perfect for beginners who wish to enjoy the thrill of editing pictures without going too technical. It also functions well regardless of the device used and edits pictures while preserving the original format in Adobe cloud for easy access any day and time.
Lightroom Classic, on the other hand, is perfect for professionals who have been in the photography and editing niche for quite a while. It offers many features and packages to make your work pleasing to the eyes, and you can make purchases and work offline.

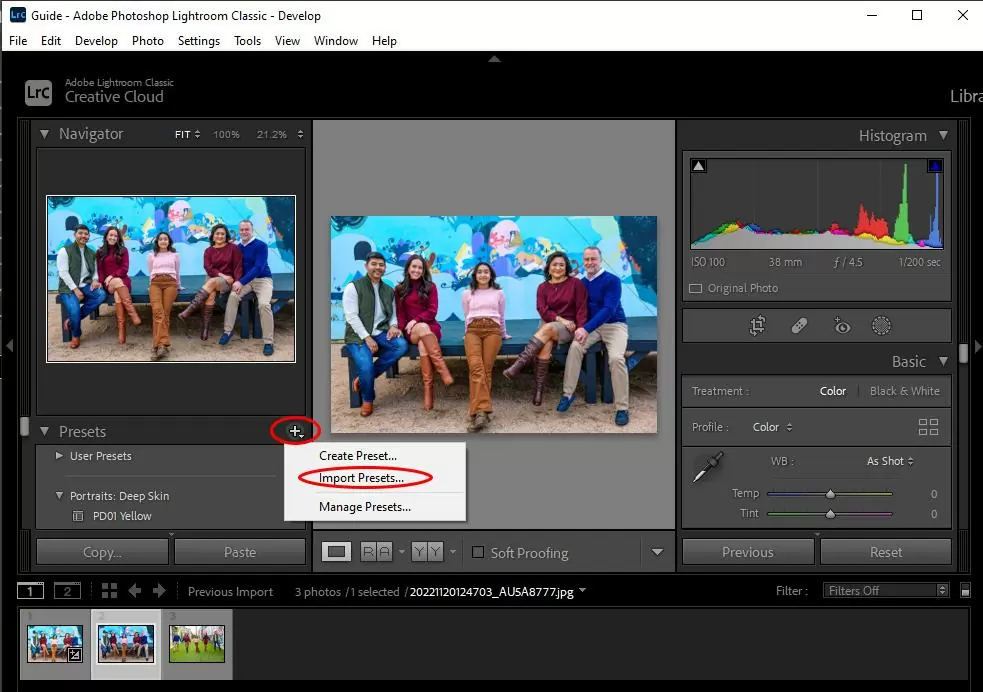
Step 2
Go to the preset menu and click on the plus sign just like the area circled in red below. You should expect a pop-up menu for which you should click on “import presets.”
Step
From the list of possible file paths, select where you have your saved or downloaded preset. You could have them in your download folder, or desktop in this case.
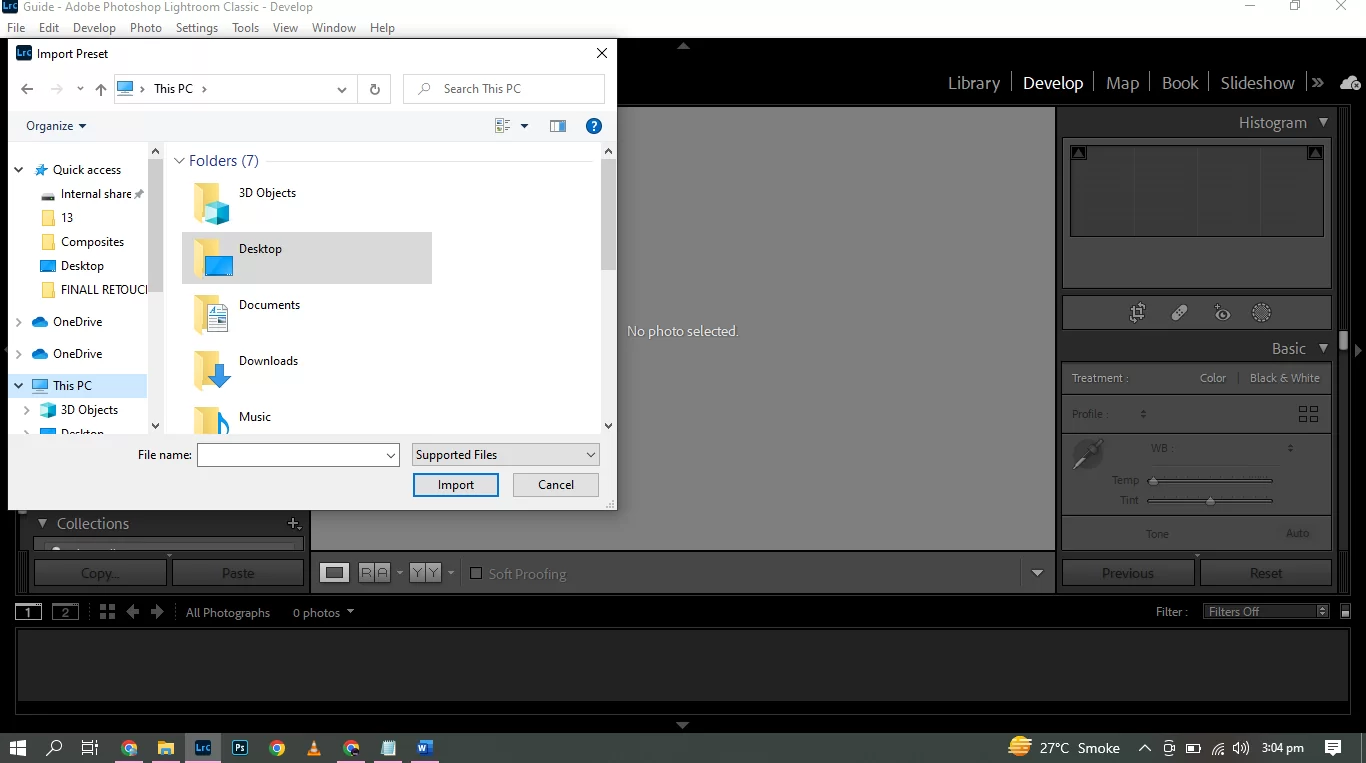
Step 4
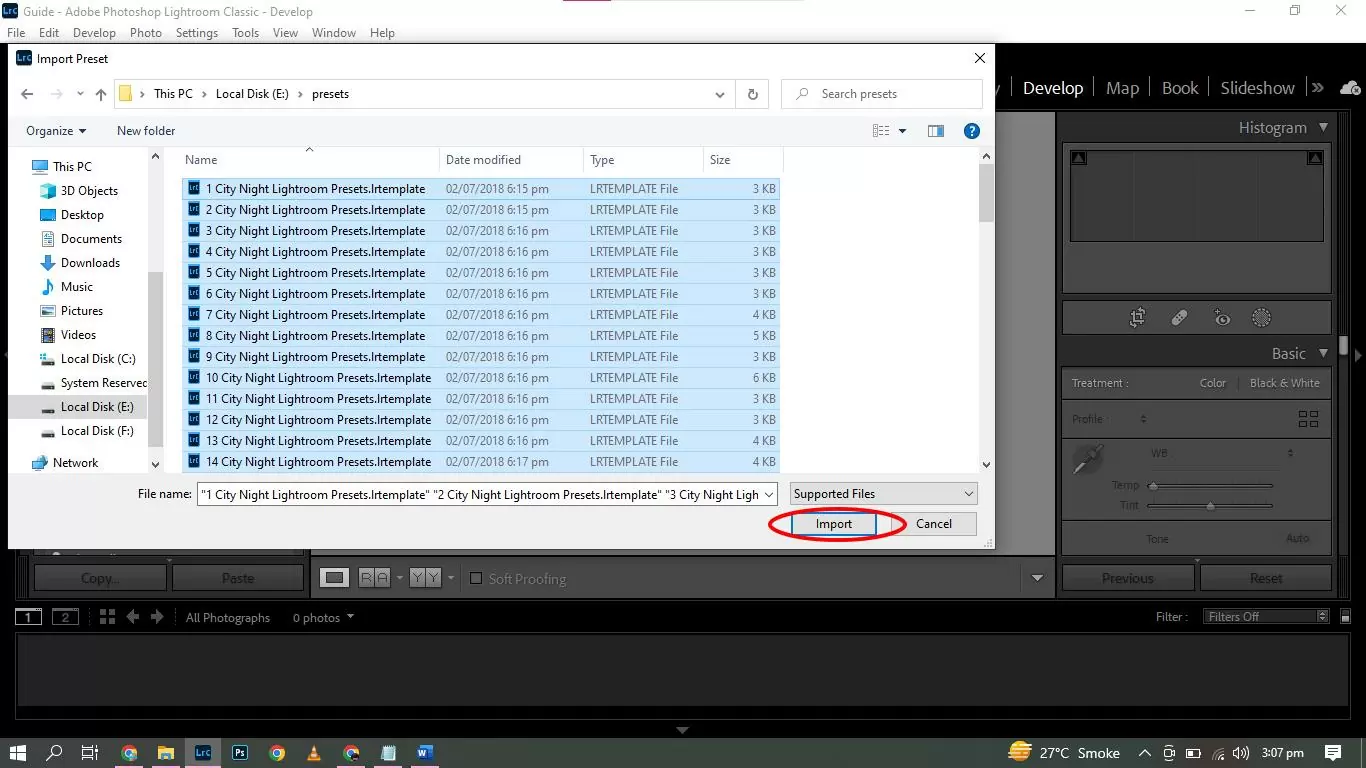
Before selecting your desired preset, you should know that there are two important types of preset described by their file formats. One has its file format to be .xmp, and the other has its file format to be .irtemplate. These file types will determine the location where they would be installed.
Select single, multiple or all presets you want to import, and then hit the Import Button.
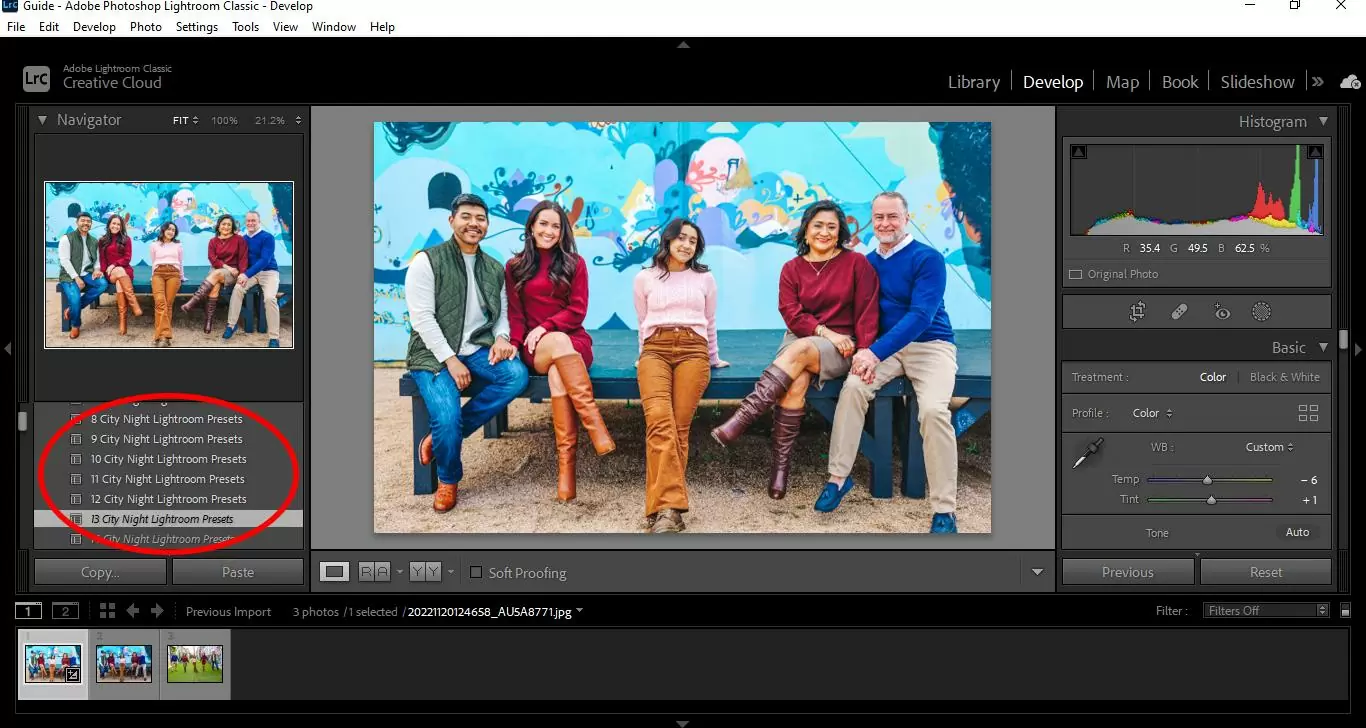
Step 5
After importing your new preset, you are ready to use them. Go to the develop module and navigate to the left side of Lightroom’s window for the preset option. Click on the plus sign and select your choice of preset from the drop-down menu. After selecting your preferred preset, Lightroom will automatically apply it to your photograph.
Frequently Asked Questions
Why Are Presets Not Appearing in Lightroom?
Before going to the preset menu, it is important to have at least one image imported to your Lightroom catalogue. If the catalogue is empty, the preset menu will also be blank. This implies that you should have imported at least one image before using a preset.
Another option is to check your preferences. Toggle over the screen to the top menu bar of Lightroom’s window and click on preferences. Click on presets and go further by selecting the visibility option. You might see an option called “store presets with this catalog” checked. Uncheck it, so your presets can appear.
However, if you see the option “Show Partially Compatible Develop Presets” unchecked, give it the check sign so your presets will be visible.
Do Professional Photographers Use Preset?
Using presets in Lightroom is a good representation of professionalism in photography. Knowing the right preset to apply to a picture requires in-depth skill and years of experience.
Editing photos with individual settings might take a lot of time. Applying presets helps photographers edit a large number of images within a short time, thereby maintaining or enhancing their level of efficiency.
Another good thing about presets is that it helps you maintain consistency. This means that your presets can be uniquely applied to your image for easy identification and help it stand out among other photographs. You would find a different level of uniformity in your images when editing manually.
With Lightroom presets, you can adjust your images without losing their originality. Sometimes especially for newbies, working manually on the editing process or settings might leave the image looking unnatural and overly edited. With presets, yiu can adopt a straightforward and subtle approach to editing your images.
Are Lightroom Preset Just Filters?
Filters and presets are similar because they change a picture’s overall appearance. However, there are some major differences between them, so you shouldn’t confuse presets for filters.
One important difference between them is customisation. Filters cannot be edited or customised to suit one’s preference. However, the settings associated with presets can be easily tweaked or adjusted to suit your taste. The lack of customisation makes filters easily applicable to mobile apps such as Instagram, WhatsApp or Twitter. Presets permit advanced editing options to help you create images that are unique to you.
Why Are my Presets Greyed Out?
If your presets are not fully compatible with your image type, your preset might look greyed out and italicized. This often occurs with JPG and PNG images; in this case, the presets might be designed strictly for editing RAW files, thereby inapplicable to any other form of an image.
Leave a Reply
You must be logged in to post a comment.