After taking a photograph, you might notice weird continuous lines and colors with an optical effect, and those lines may form a rainbow pattern across fine or minute details. This strange optical effect is known as Moire, pronounced as “more-ay,” which may ruin your photos’ overall appearance and quality.
The moire effect is peculiar to some objects or photography niches. In this article, you will learn everything about Moire; from its definition to how you correct it on Lightroom.
What is Moire In Lightroom?
Moiré occurs in photographs when a scene, an object, or a fabric being photographed contains repetitive details (dots, lines, checks, stripes) that exceed the sensor resolution. The camera produces a strange-looking wavy pattern that is distracting and not what you want from a corporate headshot.
.If your photography niche revolves around taking headshots, you must have an expansive knowledge of outfits or fabrics susceptible to a moire effect. Anything with fine details, such as curtains, woven fabrics, lace materials, screens of television, and laptops, can be affected by moire.

How is Moire Created?
Moire starts with your camera’s sensor trying to separate the repetitive patterns of fine lines on your focus while trying to take a shot. In the end, the images’ patterns overlap with those of the original image, and a new interference pattern of Moire is created. This visual perception of grids and fine overlapping lines reduces the quality of your graphics.
How to Avoid Moire When Taking Photographs
Moire has always been an issue for photographers from time immemorial. In the past, the best way to avoid Moire was to use a device with an anti-aliasing filter. Interestingly, this filter still exists even in some modern cameras. An anti-aliasing filter might reduce the incidence of Moire, but it would reduce the image’s quality by making it blurry.
There are, however, a few ways to avoid Moire. These ways require attention to minute detail, patience, and creativity.
• Take Test Shots
This is the most effective way to prevent Moire in your image. After taking a shot, you will have to intentionally zoom in on the image and survey the entire picture for any signs of Moire. You can change outfits, angles, or locations if you notice an unwanted visual effect.
• Take Closer Shots
Reducing the distance between you and your model or subject increases the distance between fine lines, reducing the chance of a moire effect. By moving close to your image, you can capture fine details.
• Change Aperture
Altering your camera’s aperture, either increasing or decreasing, might reduce the effect of Moire, but this option could be better due to complications that come with choosing the wrong aperture. Increasing the aperture too much might cause a form of diffraction, ruining your image’s quality. However, photographers have discovered a perfect aperture of f/11 to prevent Moire.
How to Get Rid of Moire Using Lightroom
Step 1: Start With The Develop Module
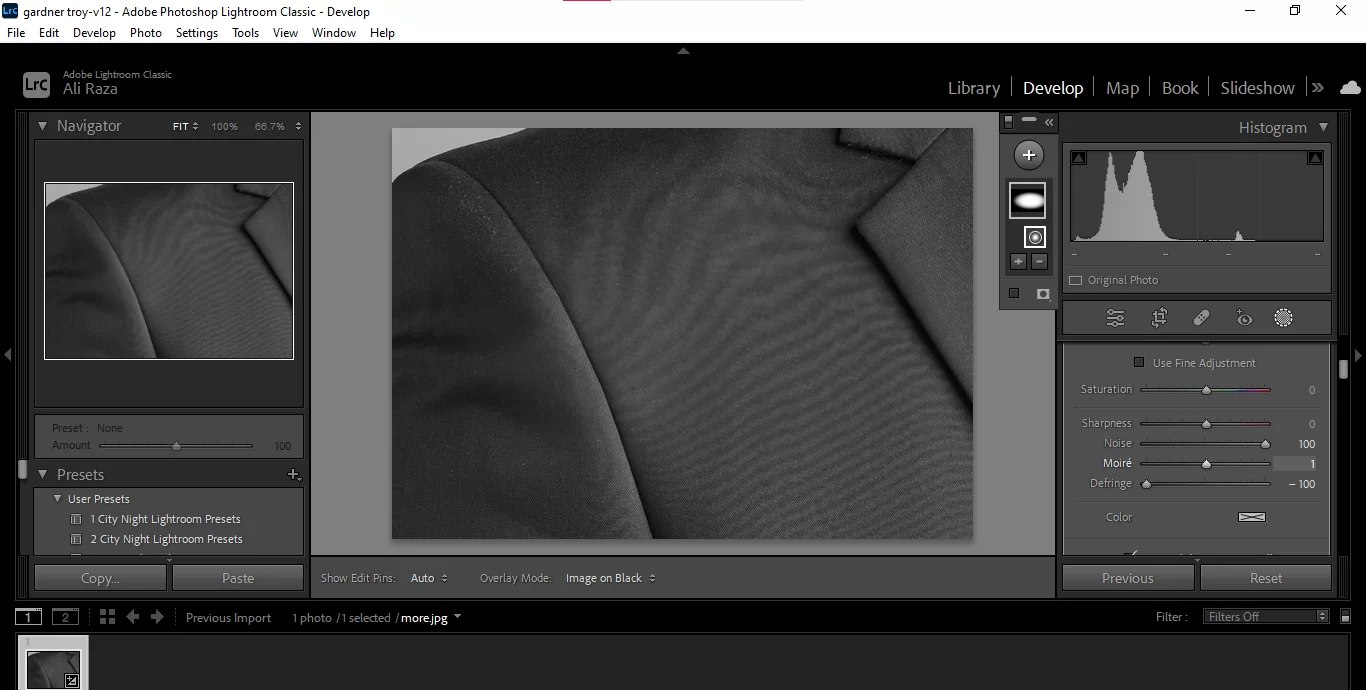
The develop module is where you spend a huge fraction of your time. It is a very important aspect of Lightroom, which gives you a wide range of options for transforming your image into perfection. One easy way to access it is to click on “D” on your keyboard.
Step 2: Pick a Brush
Once you’ve opened the develop module, navigate to the window’s top right corner. Below the histogram, you should see a list of options for photo editing. Click on the adjustment brush option, which is the most direct way of getting rid of moire.
Step 3: Work With The Moire Slider
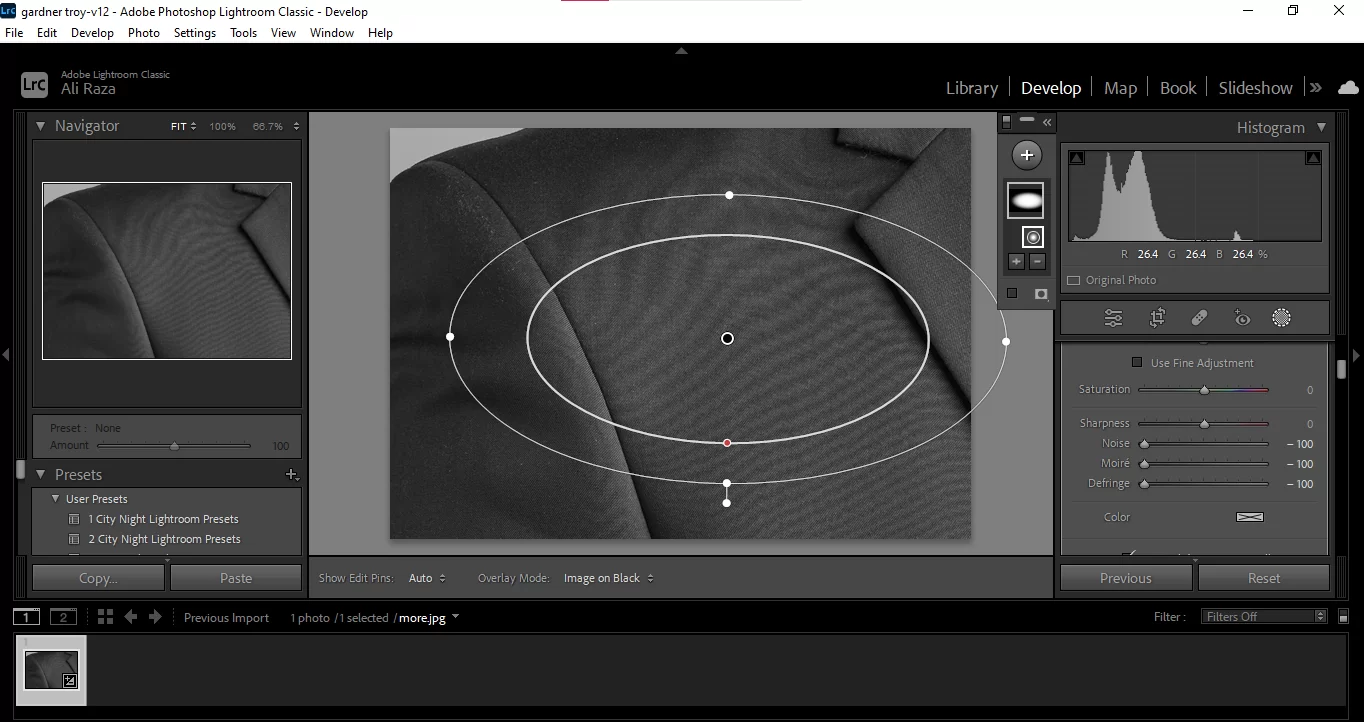
After clicking on clicking on the adjustment brush tool, you should see a list of sliders; scroll down for the moire slider and get ready for the next adjustments. Below the moire slider of the panel, there are some brush adjustment options. Increase the size of your brush to work at a fast pace, and make sure the edges of your brush are feathery for a precise workflow.
To increase your brush size using the shortcut method, click on “]” on your keyboard. To reduce the size of your brush, click on “[.”
Step 4: Paint Over The Moire Pattern
Click on the area of the picture that affected my moire, and begin to carefully overly that area. Make sure you have the “show overlay” option checked to ensure that you can see your painted areas. To do that, click on “O” on your keyboard.
After masking the area of the moire, move the moire slider to 100 till the optical patterns are no longer visible. This method might not eliminate the moire, but it is the only effective way to correct the visual interference and make it less visible to the eyes.
Conclusion
Moire is an unwanted visual element of a photograph, and you can prevent that by taking multiple shots, changing the focus or aperture of your camera, and so much more. In cases where there is an unavoidable existence of moire, Lightroom can help you take care of that.
Leave a Reply
You must be logged in to post a comment.