If you are in the photography or photo editing newbies category, you might find certain editing software, including Lightroom, quite strange. A glance at the intimidating tools and panels in this useful app might make you feel discouraged.
This article is packed with understandable step-by-step guides to making you a pro at using this software. You can finally be assured of cracking the code, maximizing Lightroom’s attributes, and making your photos pop better with a splash of uniqueness. Let’s start with the basics first!
What is Lightroom?
Adobe Lightroom is the best choice for beginner photography enthusiasts because it is easy to understand and use. It is a photo editing software linked to Adobe Creative Cloud to store edited photos and allow you to share these enhanced images. Another beautiful feature of this app is the privilege to use it on any device, mobile/IOS devices, and personal computers.
It allows both professional and amateur photographers to adjust the color, exposure, brightness, sharpness, and much more after photographing. Lightroom is ideal for processing RAW images or pictures taken from a RAW camera. After making a swift edit, you can export those images in your preferred sizes.
Other Cool Things You Can do on Lightroom
• You can easily get rid of objects you do want in your image within split seconds.
• To make the editing process easier and more precise, Lightroom can place your unprocessed image alongside your processed image for comparison, review, and corrections.
• Your videos can attain a cooler and more professional look after editing on Lightroom.
How to Use Lightroom
We know you cannot wait to get into the tutorial to enjoy the great features and benefits of Adobe Lightroom. Here are instructions to get you started:
1. Open The Application
As I stated earlier, Lightroom can be used on mobile devices, laptops, and the web to keep your projects.in perfect sync. To get started, choose your preferred work device and open the software.
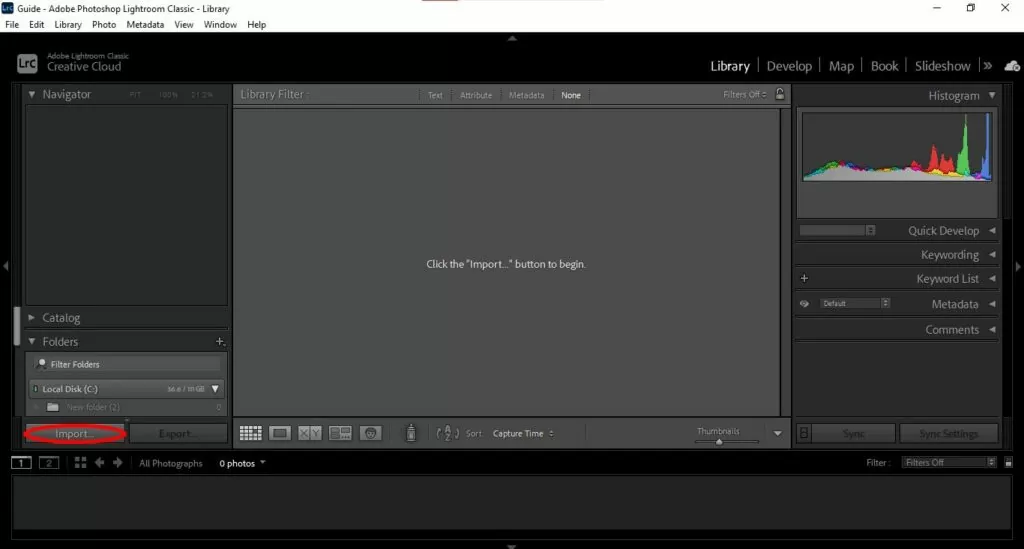
2. Import Your Photos
There are diverse ways to import your unedited pictures into Lightroom, and this diversity is highly dependent on the type of device used. You can import from your digital camera, phone’s camera, or memory card into your computer.
However, the process of photo importation is the same for whichever method you prefer. To import from your camera, external hard drive, or memory card, do the following:
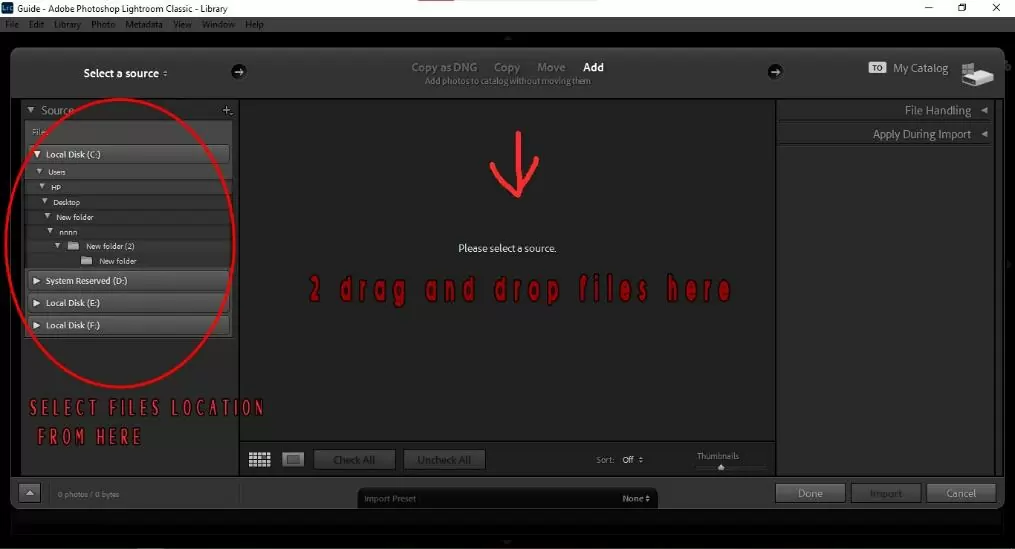
Step 1: Plug in Your Preferred Device Onto Your Computer.
All things being equal, Lightroom should automatically detect the presence of an external device and open the import dialogue for you to make your selection. If that did not happen for you, check out step two.
Step 2: Go to File -> Click Import Picture/Video
Click on the import button in the bottom left corner of Lightroom’s toolbar. Or you could go to the far right of your screen and select file, then click on import picture or video. You would see the memory card, camera, or device plugged in on the import dialogue.
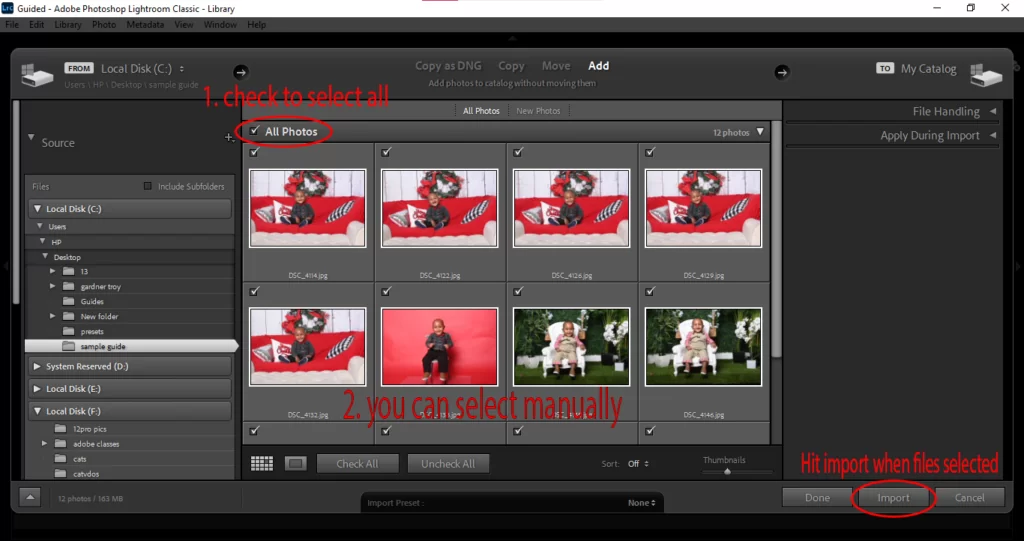
Step 3: Lightroom might have all your pictures checked. You can click those little checkboxes on the thumbnails to uncheck the pictures you do not wish to Import.
Instructing Lightroom on how you want your pictures to be handled is important. You can start by clicking either the copy, move, add or copy as DNG. What difference exists between copy and copy as DNG? Below are a few explanations:
• Copy
This option is ideal if you import from a digital camera or memory card. It ensures the files remain in the original location and, at the same time, creates a copy on your preferred destination.
• Copy as DNG
DNG means Digital Negative Image, a raw picture format for editing photos. It looks exactly like images in RAW form but has a smaller capacity. However, converting images from RAW to DNG should only be used by professionals with concrete reasons for wishing you use DNG. If you don’t have a good hang of it, I suggest you stick to the initial “copy” option.
Step 4: Choose a Destination
To avoid searching for your images after importing, it is important to let Lightroom know you would love to keep or find your imported images. At the top right corner of your window, click on the destination and expect a drop-down menu to appear. Click a destination option of your choice and move to the next step.
Step 5: Create a New Folder
To keep track of your photos, create a new folder after choosing your preferred destination. Do this by clicking on the new folder button at the bottom left of the dialog box. Once it is opened, you can call your new folder Lightroom photos or anything you wish to name.
Step 6: Open Lightroom File Handling Menu
The most important aspect of the file handling menu is instructing Lightroom on importing duplicates. Click “don’t import suspected duplicates” to prevent importing similar images into the catalog.
3. Organizing and managing photos in Lightroom
If you wish to venture into an extensive career in photography, you will appreciate this cool Lightroom feature. You can create an organization system to help you keep accurate track of your folders. You can add your preferred keywords or arrange them by mood, concept, context, or genre, similar to your favorite music playlist.
• Stars: Photo Option -> Set Rating -> Five Star
This option allows you to organize your pictures by giving them ratings between one to five. You are free to leave them unrated if you wish to. The easiest way to give your pictures a rating is to click the number on your keyboard; to rate 1 star, click one on your keyboard; to rate two stars, click two on your keyboard, and so on.
For a more technical approach, click on the photo option, set the rating tab, and pick your preferred rating.
• Flags
This option is useful if you wish to delete or keep some pictures. To eliminate unwanted images, flag them as rejected by clicking ‘X.’ For images worth keeping, flag them as pick by clicking on ‘P.’
• Color Label
Using color labels is another cool way to organize pictures, especially if you appreciate color psychology. This process is simple and easy to do. You can assign a red color label to wedding pictures to signify love and romance. Depending on how to interpret color, ally it to the necessary context in your photographs. To give your photo a color label, click either 6, 7, 8, or 9 on your keyboard.
• Keywords: Library Module -> Select Image -> Keyword Option -> Input Keyword
Using this option will help you narrow your search while looking for pictures in the future. This method is fast, easy, and reliable. To add a keyword to your picture, go to the library module (which will be discussed extensively later on), and a popout menu should appear; click on keywording and type in your preferred keyword choice.
4. Time to Edit Your Photos!
Step 1: Basic Photo Adjustments or Edits
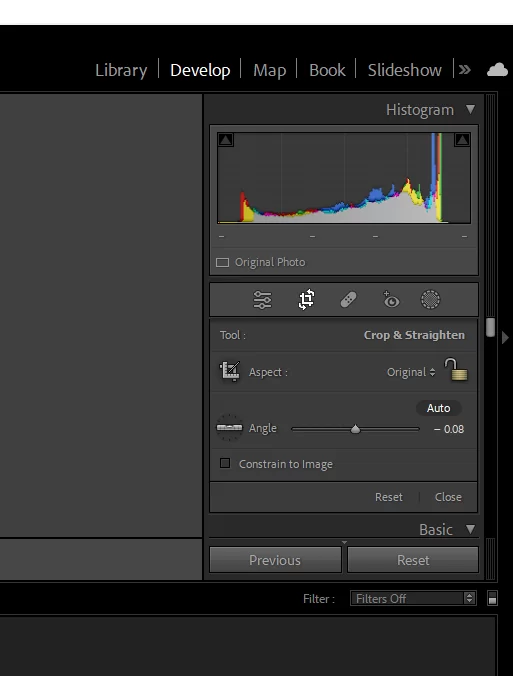
The initial but not-so-necessary step to take in editing your pictures is doing some touch-ups here and there, such as cropping, straightening, and red eye correction. Knowing how to make these minor adjustments is ideal if you’re a beginner, and you can do these through Lightroom’s developer tab.
• Cropping in Lightroom
Cropping is optional for some pictures, especially if you are satisfied with how it looks. But in cases where you have to eliminate an outlier or a distraction in the picture, a crop tool would be necessary.
To crop your picture, survey the top of your settings window for the crop tool and click on it. You should expect to see a grid tool over your picture, then go ahead and make the necessary adjustments. Click done once you are satisfied with the results.
• Straightening in Lightroom
This tool is ideal for creating a professional-looking photo. In situations where horizontal areas of your photo look a little skewed, you can easily fix that using the ruler icon in your crop tool menu.
• Red Eye Correction in Lightroom
If you take pictures of people, you will find this tool very useful. In cases where a person or people in your photos seem to have a red eye due to your camera’s flash, you can easily fix that with this option. Just zoom in on the photo and click the red eye tab on the red eye correction tool.
Step 2: Making Adjustments Using The Sliders
It will help if you pay attention to these sliders’ impact in making your photos look professional. You can access the exposure and color adjustment sliders in the basics panel. In this panel, you can adjust your photo’s exposure, contrast, highlights, texture, saturation, etc.
• White Balance
There are two important sliders beneath this option; color temperature and tint. These sliders help you erase unattractive color imbalances in your unedited pictures.
• Exposure
Depending on your preference, this slider helps to either darken or lighten your picture. If your photo is too dark, you can easily slide the right to brighten it. Too light? Slide to the left to darken it.
• Contrast
This slider works exclusively for white and black areas of your photos. Increasing the contrast will make the white fields of your photo lighter and the black areas darker.
• Highlights
The highlights slider affects the delicate areas of your photo. Increasing the highlight slider will make those light areas in your photo brighter. While decreasing the highlight will only make them darker.
• Shadows
For easy understanding, this slider is the opposite of the highlight slider and is peculiar to only the dark areas of your photos.
• Texture If you are still looking for a better original photo texture, you can use this cool slider. It helps you sharpen or fine-tune your images without losing their originality or specific details.
• Clarity
The clarity slider works exclusively on mid-tones in your photo by adding contrast, making your photos pop more with luminance.
• Saturation
This slider works by increasing or decreasing the intensity of colors in your pictures.
Step 3: More Detailed Adjustments
You can make special edits to specific areas of your picture. You can do that by making use of the Light tool. Start by selecting the area you wish to modify and use the brush tool to make necessary adjustments.
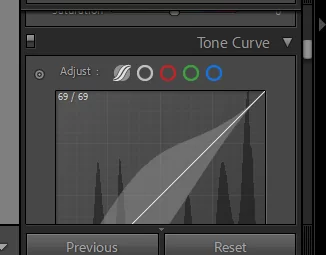
Curves
Curves fundamentals are a little tricky. These can take your editing to the next level.
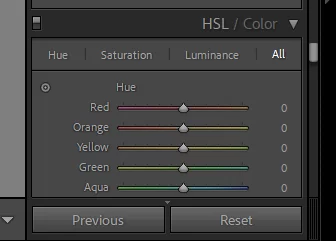
HSL Pannel:
It enhances, reduces, or changes selective colors in photos.
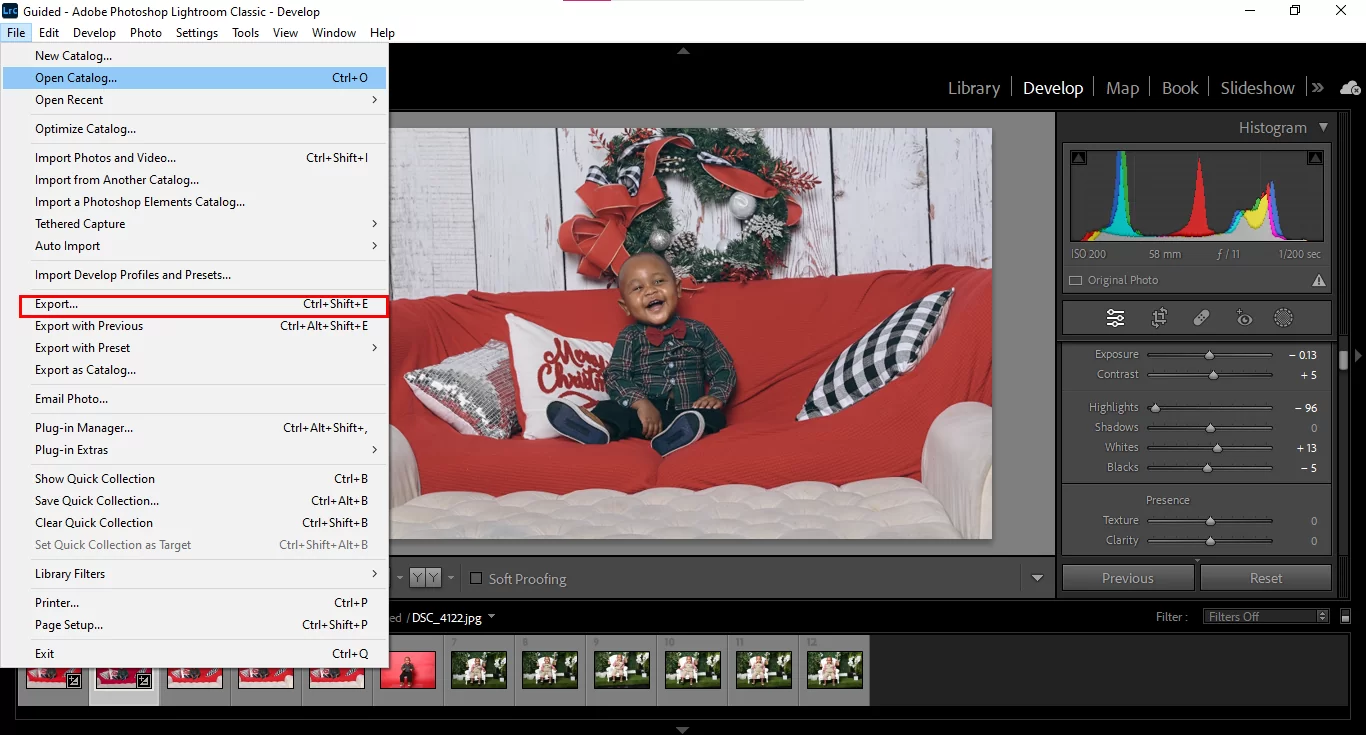
Final Step: Export/Save
To save/Export photos in lightroom
Press Control or Command + Shift+ E
Or simply go to File, then click export.

A popup will appear with multiple options. You can select the location where to export and the size of exporting photo watermark, and also you can custom name your photos.
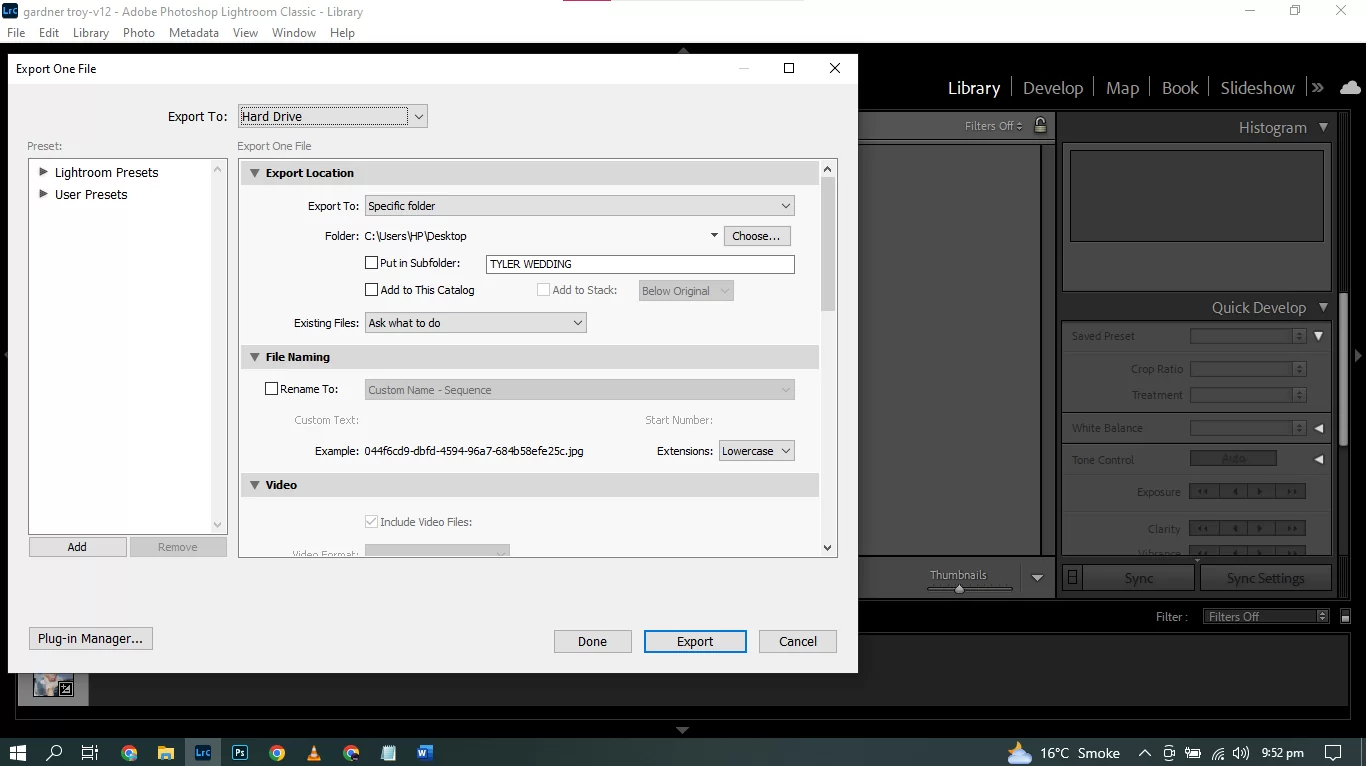
You can select the file where you want to export your photos.
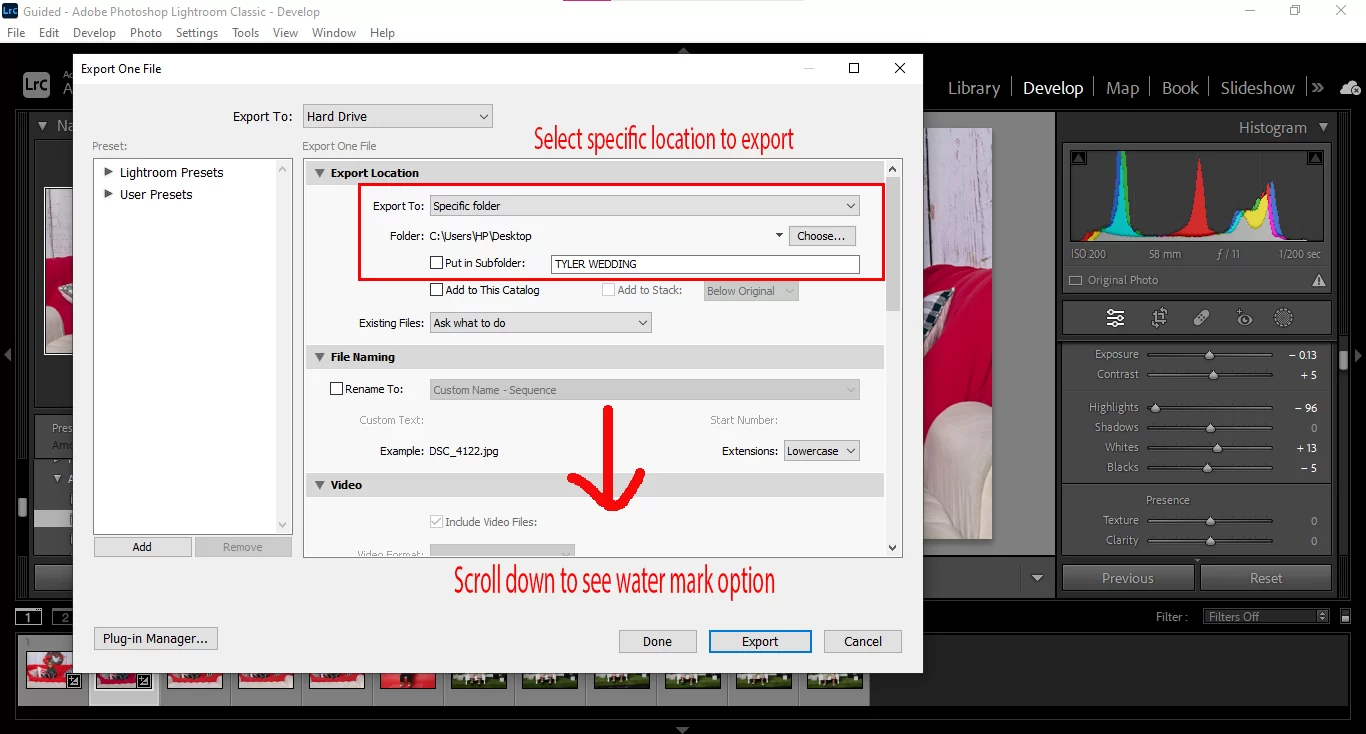
You can choose a specific location mentioned here!

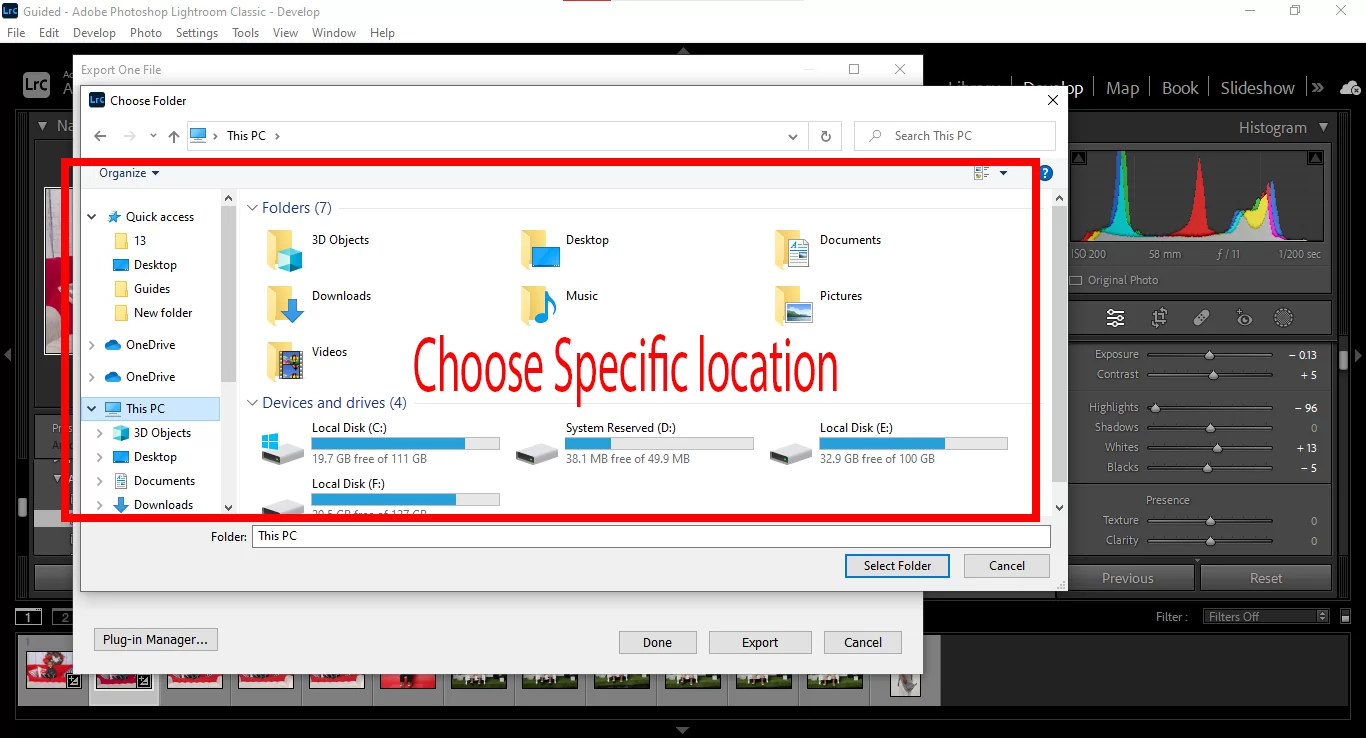
After picking your preferred location, your newly edited picture is ready to be seen and appreciated by everyone.
Leave a Reply
You must be logged in to post a comment.