
Similar to an eraser on paper, Procreate’s eraser tool functions similarly. To erase, press down on the circle using your finger or the Apple Pencil. Then click “Erase” to get rid of your drawing’s background. You are now prepared to begin working on your project after completing this. There is a tool for anything, whether you want to paint, sketch a portrait, or sketch something abstract.
Erasing on Procreate
The eraser tool is located at the top right corner of the screen, and with the tool selected, you can swipe on your canvas to erase parts of your image as you wish. Take a look at the illustration below:


When an eraser is used, the background of the photo is exposed. For this example, we used a black background because our image is a bright one, and to demonstrate this clearly, our background color is black.
The eraser tool comes with some settings. Tapping on it gives you the room to select the type of brush you would like to use. For this example, we are using the medium hard blend brush.

There are two options on the right of the screen. The top option is where you adjust the size of the brush. Putting your finger or Apple pencil on it and swiping up or down increases or decreases the size.

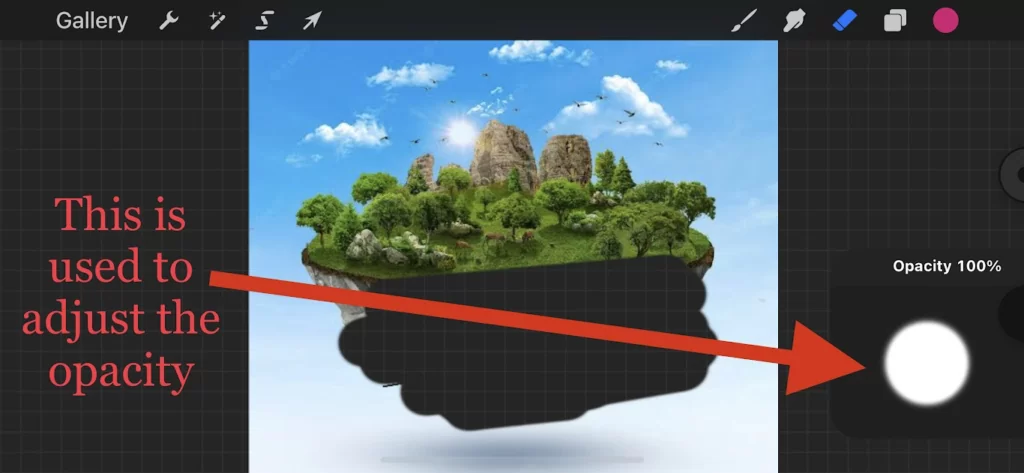
The option below is the opacity gauge. Just like the size of the brush, swiping up increases the size, and swiping down decreases it. If you want to erase the portion of the image completely, then set the opacity to 100%.
Some Practical Tips When Using The Eraser Tool
Tip 1: The Size and Opacity of The Eraser Should Be Adjusted
The ability to change the eraser size and opacity is one of the best features of Procreate. The eraser can be either extremely large or extremely microscopic. If you don’t want the background to be fully removed, you can alternatively change the opacity.
Tip 2: Apply A Smaller Size To The Edges
You may change the eraser tool’s size in Procreate to make it incredibly fine and tiny. Around all corners, it is always recommended to use a very small eraser. This will make it easier for you to erase something with a crisp line and precise edge.
One fantastic feature of Procreate is that if you make errors, you can double-tap the screen using your two fingers to return to the previous position, eliminating any concern that you might make a mistake and be unable to fix it.
Tip 3: Crop Your Photo
Cropping the image in Apple’s Photos app before importing it into Procreate is one of the first things you should do before removing anything. This is done to crop the photo as much as possible so that all you have to erase will be very little.
Naturally, this makes complete sense because erasing in Procreate will be quicker and simpler because there’s less to erase. To cut down on the portion of the background, you need to delete with Procreate and crop even more of the background as possible.
Tip 4: Zoom In and Out With Your Image
You can use your two fingers on the screen to zoom in and out or enlarge and reduce a picture or layer using Procreate, yet another fantastic feature. Make the object quite large if you require a very clean edge, and use your eraser to remove as much of it as you can from the edge.
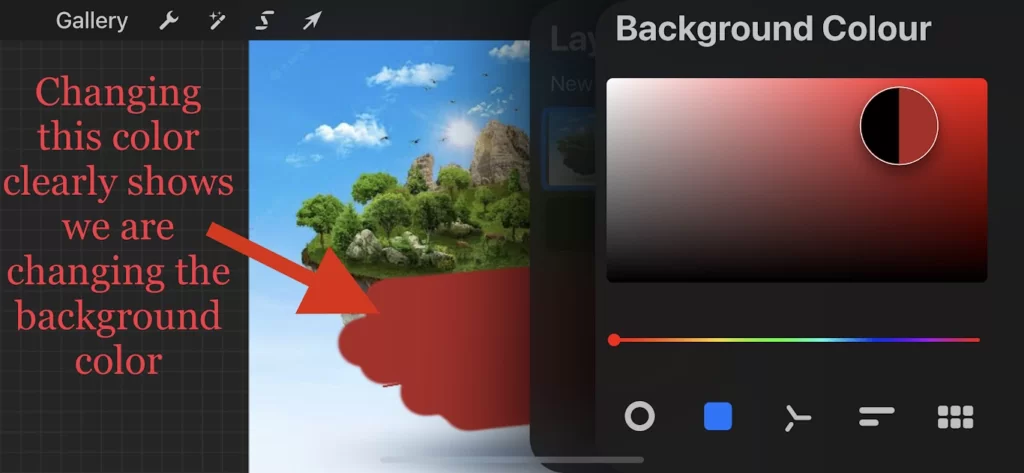
Tip 5: Change Your Background To Check The Status Of Your Erasing
Changing the background color in Procreate from white to another color will allow you to see how neat your erasing is. You can easily change the background back to white if you need to. However, altering the background to a darker shade or a different color makes any spots you may have overlooked visible.
An excellent technique to determine whether there are any problems with your erasing in Procreate is to change the background color. This demonstrates the Procreate app’s versatility and how simple it is to use once you learn these little tips and techniques.
Conclusion
One of the most useful tools in Procreate is the eraser. A background can easily be removed from the software. The eraser can also crop an image and eliminate undesired areas.
Procreate has a useful eraser tool, but you must be careful how you employ it. Although it is simple to use, this feature can be quite sophisticated. Cropping your image is required before selecting the eraser size. The canvas size will then need to be changed. To make the eraser easier to use, alter its shape by varying the height.
Leave a Reply
You must be logged in to post a comment.