Green screening, also known as chroma key compositing, is a technique used in video production to superimpose one image over another by removing a specific color (usually green) from the background. iMovie, Apple’s video editing software, has a built-in green screen feature that allows users to easily add this effect to their videos.
In this guide, we will show you how to use the green screen feature in iMovie to create professional-looking videos with stunning visual effects. Whatever your user level, you’ll find the instructions easy to follow and the results impressive.
How to Use Green Screen on iMovie
Step 1: Select the clip you would like to use the green screen effect on. You can also drag the footage you want to use as the background onto the timeline. This will be the video that will be visible behind the subject of the video.
Tip: Once a clip is selected, you will notice a yellow border around it.

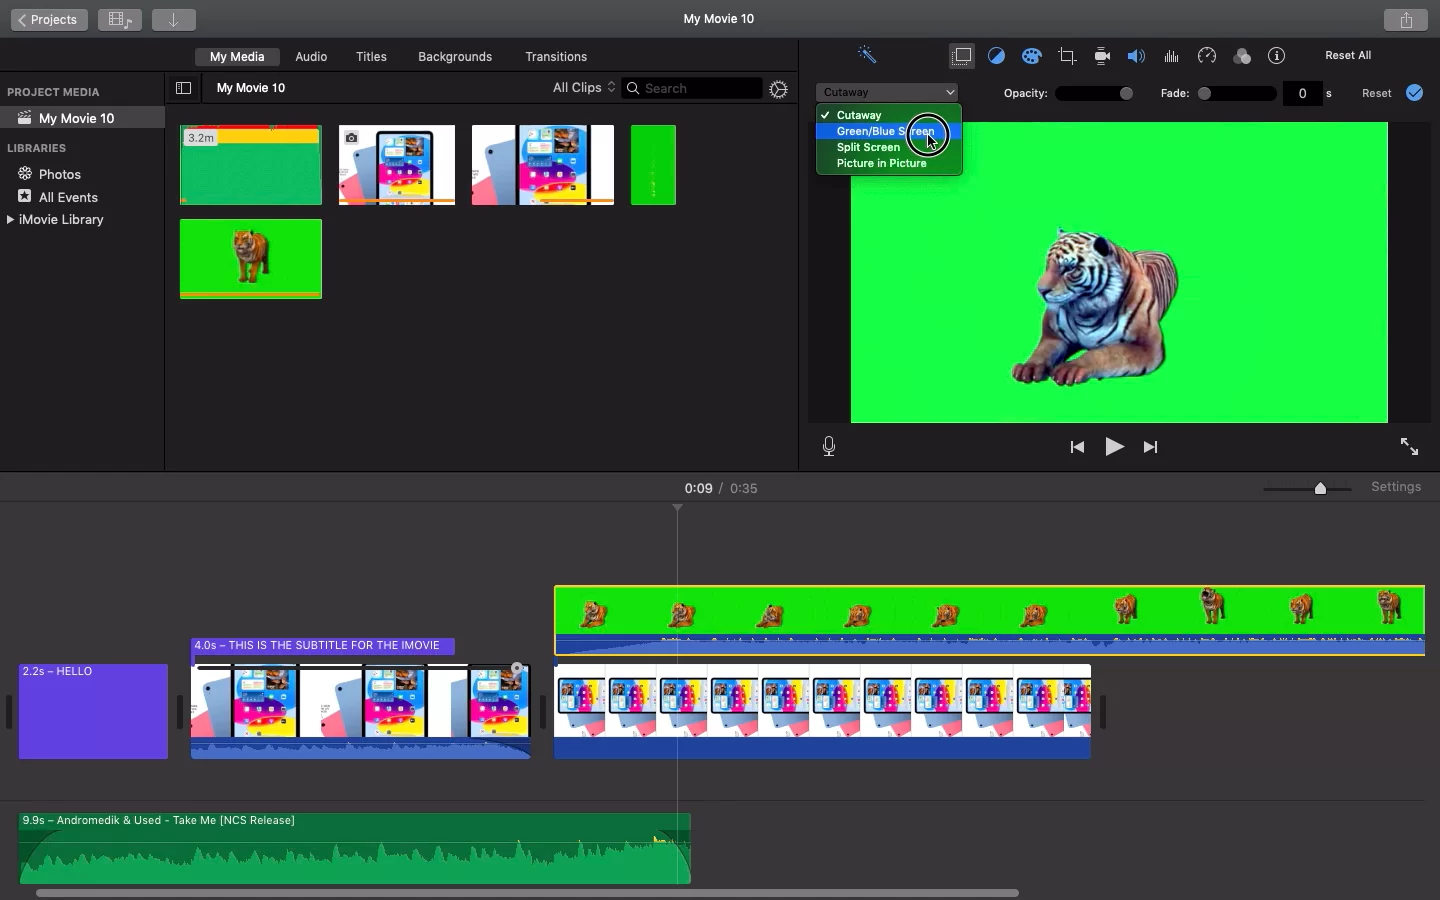
Step 2: Select the overlay settings from the toolbar present on top of your video view area.

Step 3: Click on the overlay style inside the overlay settings.
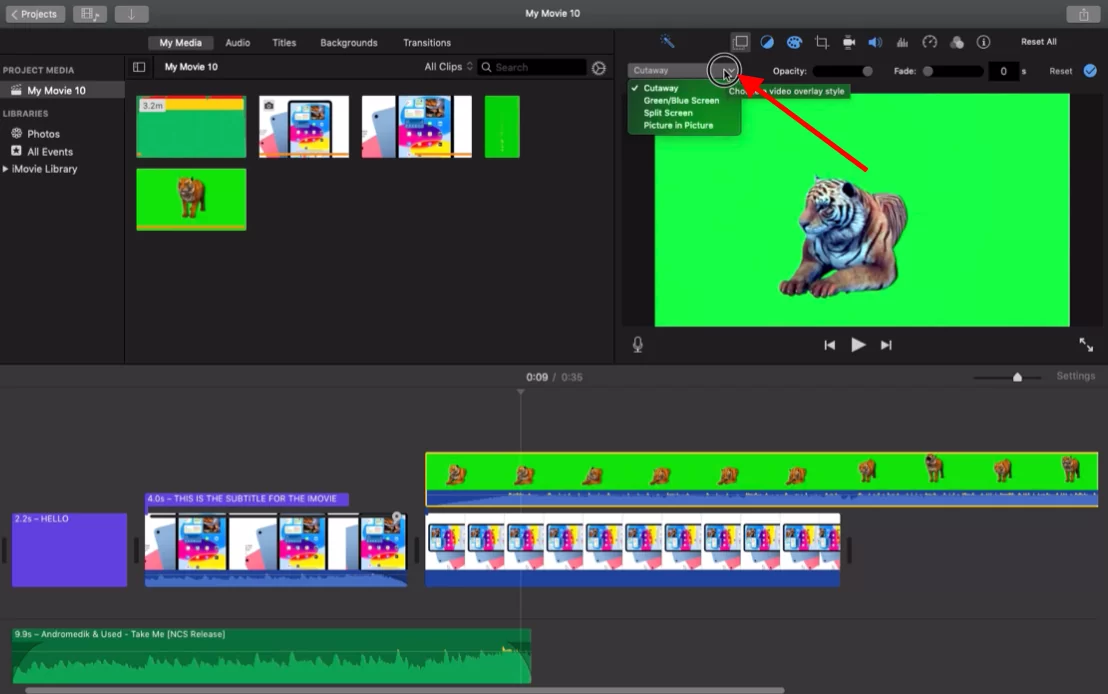
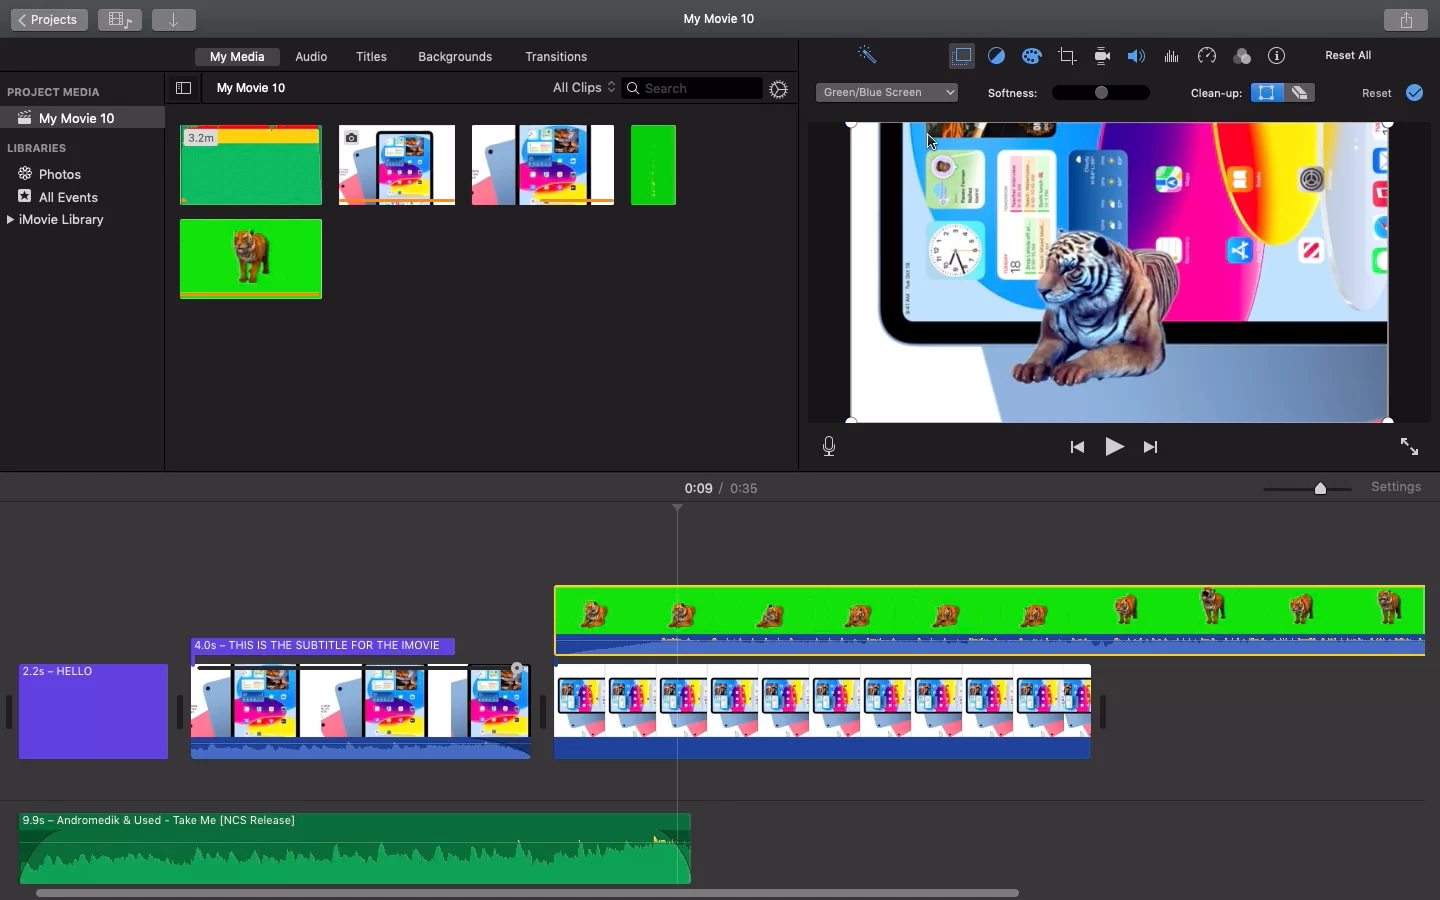
Step 4: Select the Green/Blue screen option. Use the color picker to select the green/blue color from the background. You can adjust the color range and intensity of the key to fine-tune the effect. Use the Clean Up tool to remove any unwanted areas in your clip.
Step 5: To hide green screen, deselect Green/Blue screen option. Now you can see the Green screen is hidden from the video.
You may also like to read our step-by-step guide on how to trim a video in iMovie.
Other Footage Effects on iMovie
You can utilize many of the filters and additional effects that iMovie provides. If you want to emphasize and highlight a certain section of your footage that is too good to be scanned through, you can slow it down.
Alternatively, to make a long video shorter and more engaging for the audience, consider speeding it up if it was shot in a fixed location with little movement.
iMovie has a variety of special effects but iMovie also offers high-fidelity filters that give your work a more cinematic feel. Did you know that iMovie offers 13 innovative filters to enhance the appeal of your film?
The innovative filters range from retro filters to inventive filters like the comic book. Use the proper filters and color editors to create the atmosphere you want for your film, depending on the theme or emotion you want to convey.
Various Modes on iMovie
Three modes are present in iMovie they are Magic Mode, Cinematic, and Storyboards.
- Magic Movie
The newest addition to iMovie is Magic Movie. Magic Movie enables you to style and edit videos. It also allows you to add music, transitions, and titles. This mode will automatically select the best video material from your collection and edit it to improve the overall quality of your video. iMovie contains more than 20 styles in addition to the standard video editing tools like clip trimming, splitting, and deletion.
- Storyboards
If you’ve ever used iMovie, you were probably editing in the storyboard mode. Similar to Magic Movie, Storyboard has 20 templates from which you can choose when editing videos. You could simply make whatever kind of film you want ranging from cookery to product reviews and even green screen backgrounds! Isn’t that awesome?
- Cinematic Mode
You can utilize Cinematic mode to edit your video clips for footage captured in Cinematic mode on iPhone 13 upwards. By doing so, you may make expert videos and alter the depth-of-field effect in previously shot footage. To create your videos, you might also add videos in cinematic mode to fresh storyboards.
More About Green Screen Usage
To use the green screen effectively, it is important to know how it works. You can alter how much of the footage’s green or blue is erased after adding the green screen effect. You can choose the green screen background clip in the timeline if you’re working on a Mac rather than an iPhone or iPad. To make the necessary adjustments, try clicking the Video Overlay setting option in the menu bar.
To alter the transition between green screen background footage, you can also use iMovie’s softness control tool. Using the crop button and dragging the frame’s corners will allow you to isolate specific parts and then use the clean-up button and drag it across your video if you want to mask a particular section of the footage.
If you enjoyed reading this article, you will also like our in-depth guide on how to split your clips using iMovie.