Creating a glass look in Photoshop can be a useful technique for adding a unique and polished touch to your designs. This tutorial will walk you through the steps for creating a glass look in Photoshop, from setting up your document to adding the final touches.
How to Create Glass Look in Photoshop
Open Photoshop and create a new document. The size of the document will depend on your intended use for the glass effect. For this tutorial, we will use a document size of 800 pixels by 600 pixels.

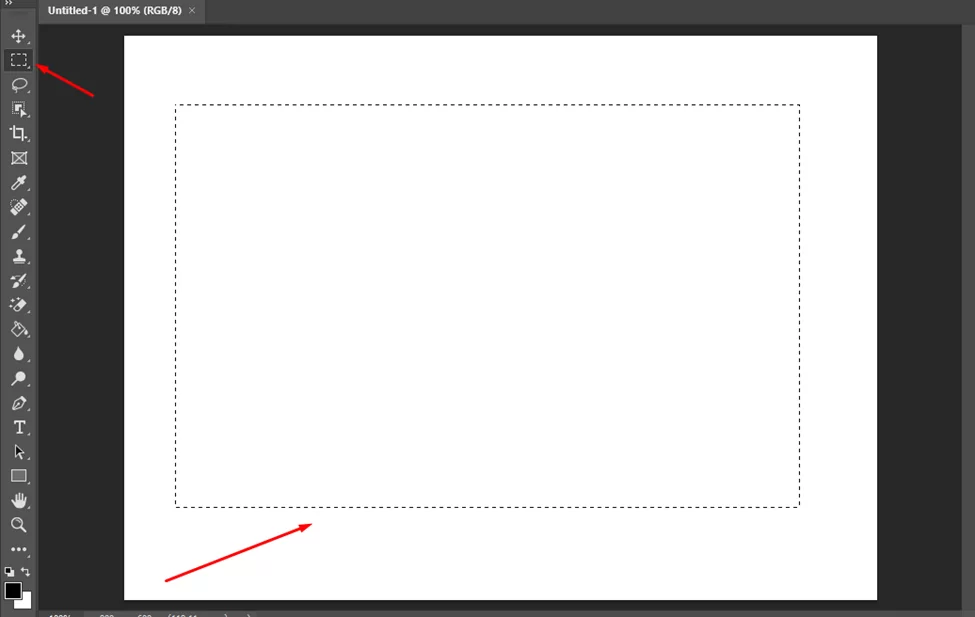
Use the Rectangular Marquee tool to create a rectangular selection on your document. This will be the area where the glass effect will be applied.
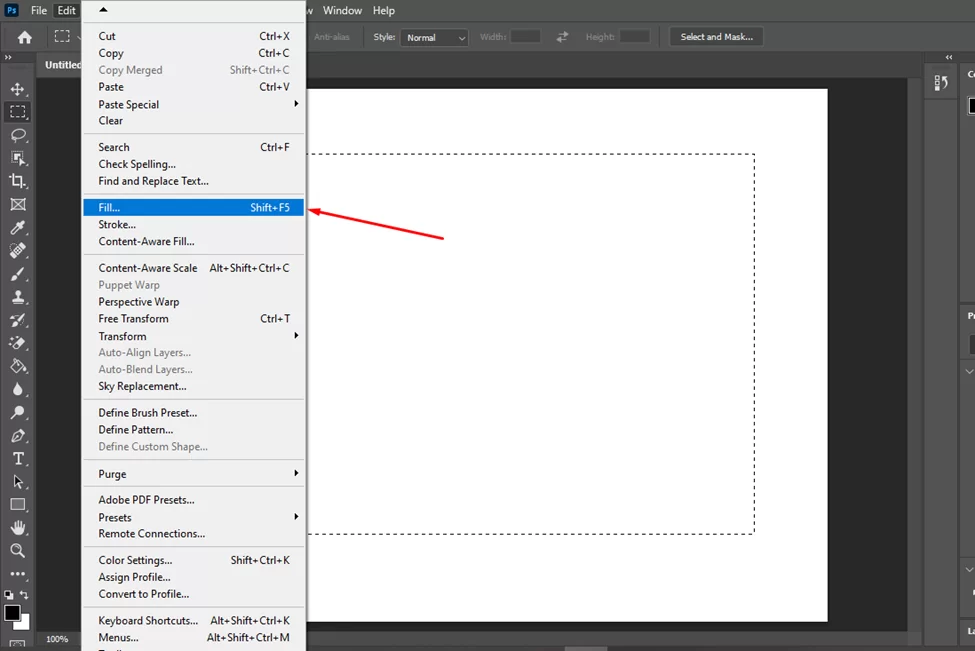
With the rectangular selection still active, go to Edit > Fill.
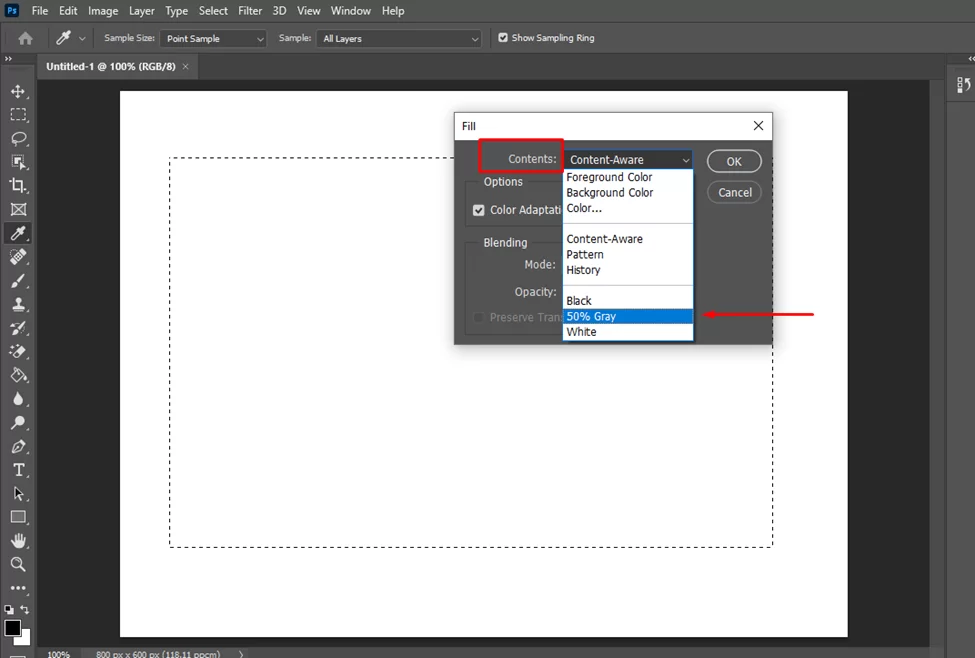
In the Fill window, set the Contents to 50% Gray and click OK. This will fill the selected area with a medium gray color.
Go to Filter > Noise > Add Noise.

In the Add Noise window, set the Amount to 10%, the Distribution to Gaussian, and the Monochromatic option checked. Click OK to add noise to the gray area.

Go to Filter > Blur > Gaussian Blur.
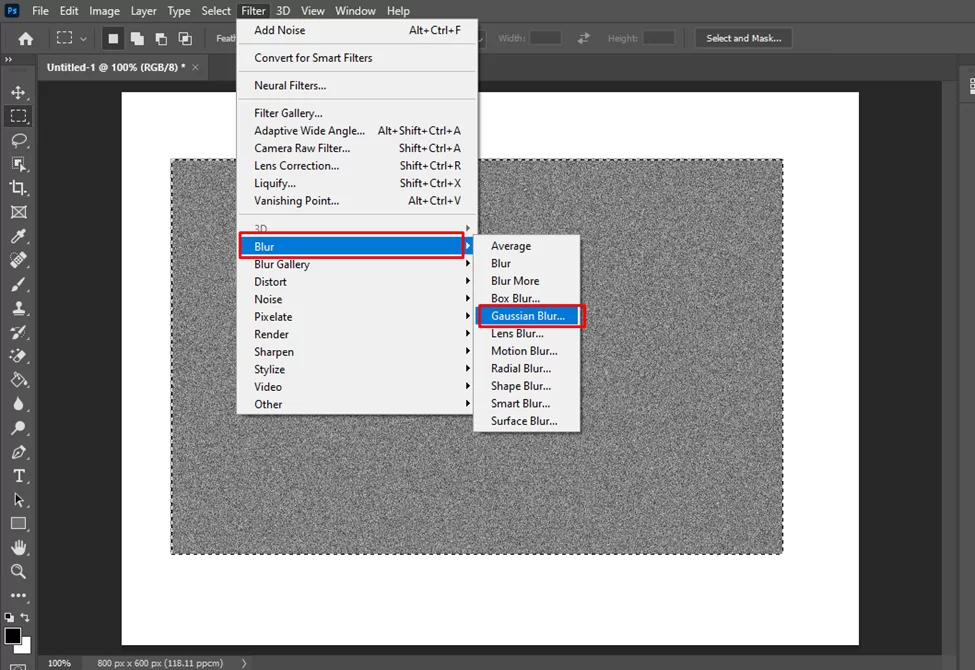
In the Gaussian Blur window, set the Radius to 1 pixel and click OK. This will soften the noise and give the glass a frosted appearance.

Duplicate the layer and give it any name of your choosing

With the rectangular selection still active, go to Layer > Layer Style > Bevel and Emboss.

In the Bevel and Emboss window, set the Style to Inner Bevel and the Technique to Smooth. Adjust the Depth and Size values to your liking to control the intensity of the bevel effect. Click OK to apply the bevel and emboss effect.

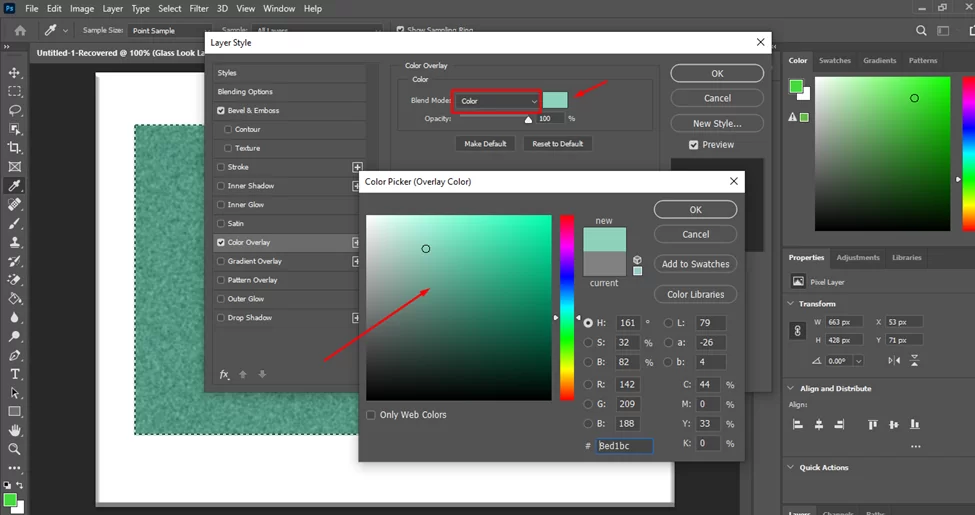
Go to Layer > Layer Style > Color Overlay.

In the Color Overlay window, set the Blend Mode to Color and choose a color for the glass. This will add a colored tint to the glass effect. Click OK to apply the color overlay.
To add highlights and reflections to the glass, create a new layer above the glass layer.

Use the Brush tool to paint white onto the new layer where you want the highlights to appear.
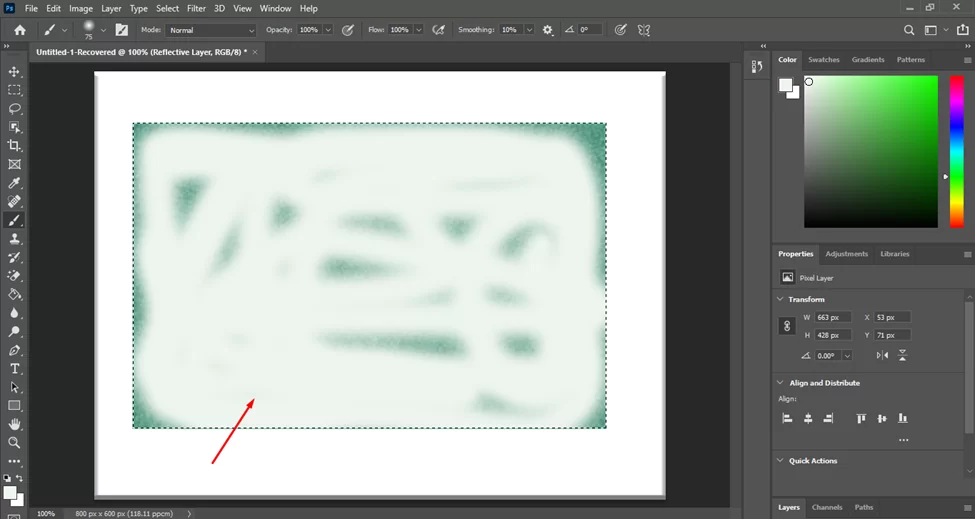
Then, go to Filter > Blur > Gaussian Blur and set the Radius to 1-2 pixels. This will soften the highlights and give them a more realistic appearance.

Using the Glass Effect
Below is a list of steps you can take to apply the glass effect created on your objects. Assuming you already have objects created, these steps will be applicable.
- To create reflections in the glass, copy and paste objects from other layers onto the new highlights layer. Position the objects to create reflections in the glass, and use the Transform tools to resize and adjust the placement of the reflections as needed.
- Adjust the opacity of the highlights and reflection layers to fine-tune the realism of the glass effect. Lowering the opacity will make the highlights and reflections less intense while increasing the opacity will make them more pronounced.
- To finish the glass effect, merge the highlights and reflections layers with the glass layer by selecting both layers and going to Layer > Merge Layers. This will combine the layers into a single glass layer, allowing you to easily apply any additional adjustments or effects.
- Save your document to preserve your work.
With these steps, you should now have a fully realized glass effect in Photoshop. By experimenting with different colors, bevel settings, and highlight and reflection placement, you can create a wide variety of glass looks to suit your designs.
Why Designers Create Glass Look In Photoshop
There are several reasons why designers may create a glass look in Photoshop. Some of the main reasons include:
- To add a polished and professional touch to a design. The glass effect can give your design a sleek and refined appearance, making it look more finished and polished.
- To create a unique and eye-catching effect. The glass effect can be used to create designs that stand out and grab viewers’ attention.
- To add a sense of realism to a design. The glass effect can be used to create reflections and highlights that make an image look more realistic and three-dimensional.
- To add a touch of elegance to a design. The glass effect can be used to create a sense of sophistication and elegance, making it a popular choice for wedding invitations, branding, and other design projects that require a more sophisticated look.
- To create a versatile effect that can be customized to fit different design needs. The glass effect is highly customizable, allowing designers to create a wide variety of looks to suit their specific design needs.
Overall, the glass effect can be a useful tool for designers looking to add a polished, unique, and versatile touch to their designs.
Leave a Reply
You must be logged in to post a comment.