For photographers, taking a shot does not stop there. The real work is in further trying to enhance the picture to give an overall perfect result. Lightroom is designed with cool features to make your images look extra beautiful and correct any errors. This article will help you begin your editing journey with Adobe Lightroom.
How to Edit in Lightroom Step-by-step Guide
Step 1: Open the Lightroom application
There are two popular versions of Lightroom to suit your preference. Lightroom CC is cloud-based and supports its use on mobile devices, desktops and websites. You can always access your images wherever you are and on the go. The second and oldest version is Lightroom Classic which offers a professional approach to editing your pictures.
Step 2: Import photos you want to edit
Importing photos in Lightroom is one task that beginners might find somewhat challenging. Start by having your memory card reader, or digital camera plugged into your computer.
To have Lightroom automatically detect the contents of your card reader or camera: Survey the top of Lightroom’s window for the edit option beside the file option. Click on edit, then select preferences. Beneath the “General” tab, locate the import option and check the “Show import dialogue when a memory card is detected” box.
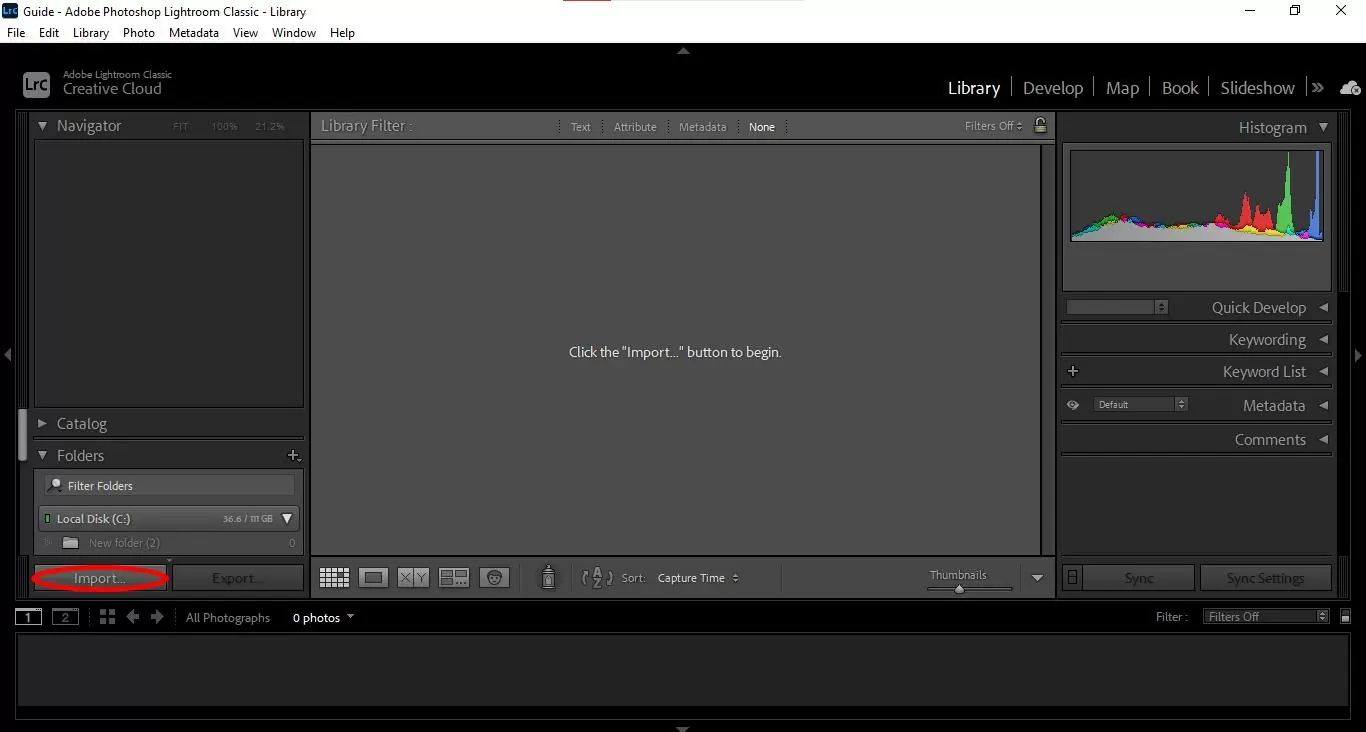
To go about importation manually, you will need to instruct Lightroom on how you want your images to be handled. Go to file, click on import photos and videos, and choose the image you wish to import. You may find your photos to import from the area circled in red.
This area consists of different locations where your images are contained; it could be your memory card or external hard drive. Click on any of these options, click on the image you wish to edit, hit the import button, or drag and drop the image.


Step 3: Go to The Develop Module
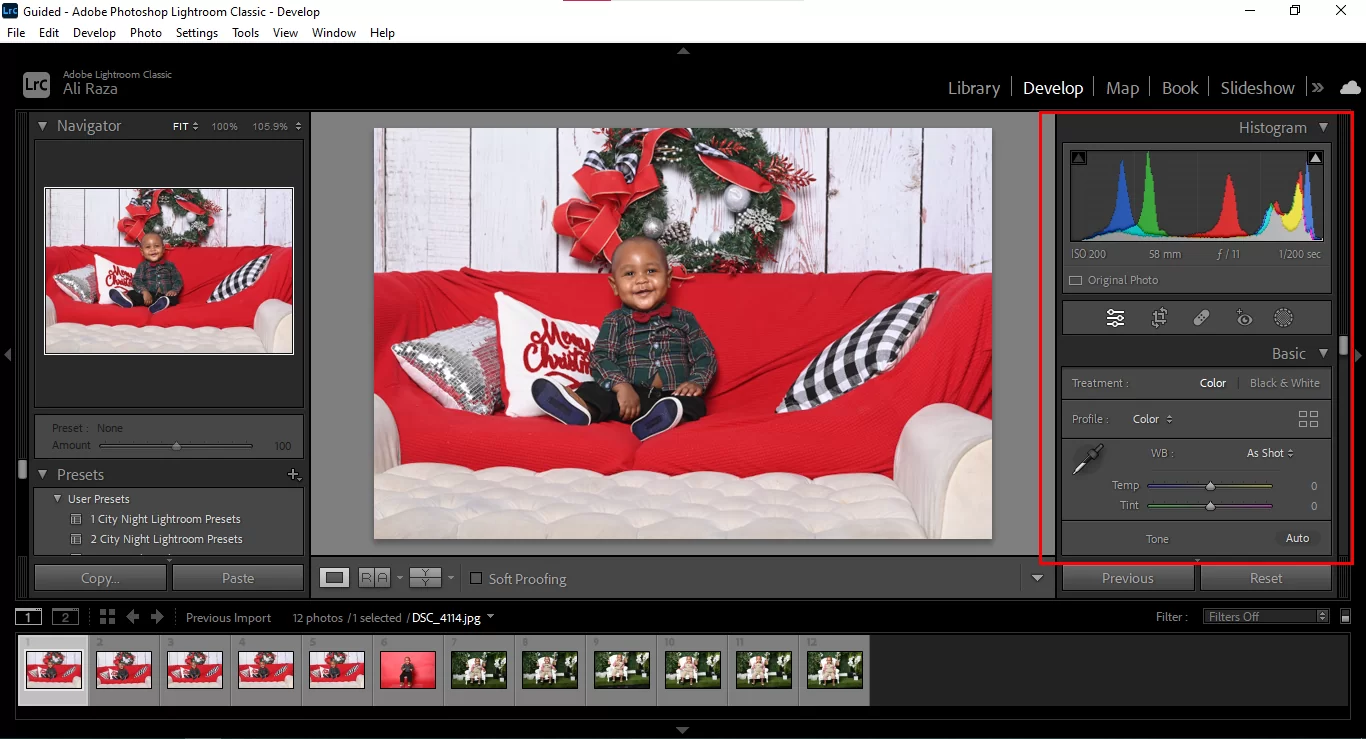
After importing your desired image, go to the develop module on Lightroom’s window or hit “D” on your keyboard. Here, you will find a wide array of options to begin the process of editing.
Navigate the develop menu for various editing options such as white balance, temperature, tint, exposure, contrast, saturation, highlight, clarity, and so on.
Here are some settings you need to know first
1. Cropping and Straightening
Cropping and straightening are excellent ways to improve the composition of your image and enhance focus on Important elements in your image and properly align the edges. To access the crop tool, go to the develop module and click on the little crop icon below the histogram. A simple shortcut to the crop tool is clicking on “R” on your keyboard.
After opening this tool, you should see a list of options: aspect, angle, constraint, and tool overlay options. The aspect option allows you to change the dimensions or ratio of your image, and the angle option allows you to change the angles of your image in degrees. Tool overlay is ideal for guiding how you make adjustments to your image.
2. Healing
The healing option is another cool feature in Lightroom that might be quite technical but helps you easily and perfectly eliminate blemishes and minute errors in your image. To access the healing tool in the development module, click on the little pill icon beside the crop icon.
After clicking on the icon, hover your mouse over the area you wish to edit and click. You should expect a second circle which gives you a chance to select another part of your image to act as a replacement.
3. Red-eye fix
The red eye in any image is quite an unpleasant sight caused by a light reflection from the camera’s flash on the subject’s eye. Lightroom has a red eye removal tool to eliminate such capturing errors. This tool is located in the develop module; click on the little eye icon beneath the histogram to make changes.
4. Clone
Just as it sounds, it is ideal for duplicating certain elements in your image and eliminating distractions in the image. To access this tool, click on a little circle with dots surrounding it in the develop module.

The crop option consists of two important tools: the aspect and angle tools. The aspect tool gives you a list of Lightroom’s crop ratio options that you can select from. Aspect ratio describes the relationship between your image’s height and width expressed in ratio. The angle slider helps you rotate your image in specific angles or degrees.

Color grading
Color grading in Lightroom helps you to make specific modifications to the tones and colors in your image. This feature is very important in landscape and nature photography because it adjusts the lighting in the image to make it look realistic and powerful.
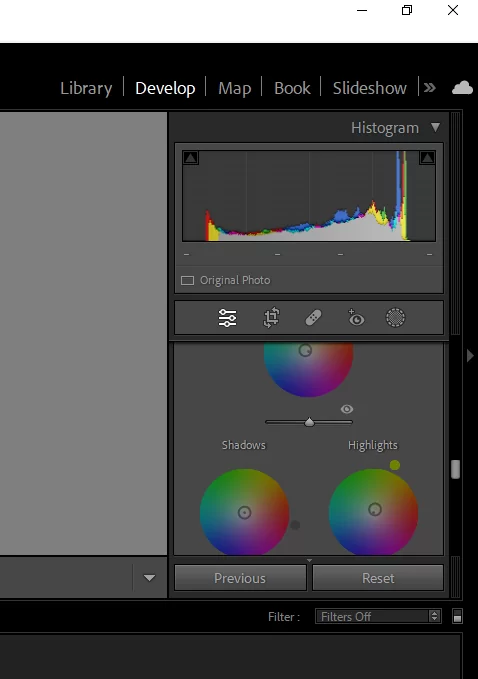
To access the color grading tool, go to the develop module, and click on the little settings icon next to the crop icon. You should see about three color wheels that look the same. These three wheels, however, have functions peculiar to each of them. The first wheel controls or enhances mid-tones. Beneath the first wheel are two wheels that control shadows and highlights in the image, respectively.
To use, click inside the circle and rotate the knob around the circle to make changes to the colors in your image. As the knob approaches the arc of the circle, the more intense the color or saturation is.
Curves
The tone curve tool is tricky and difficult for beginners to understand. It is composed of a graph corresponding to all the tones in your photograph. This tool can portray your image as darker or lighter than the original. Pulling the tone curve line upwards makes your image brighter, and pulling downwards makes your image darker.

HSL Panel:
The HSL panel consists of sliders that allow you to adjust your image’s hue, saturation, and luminance. The hue primarily describes colors, and changing the value of each color slider changes the color appearance of your image. The primary color either shifts to a primary or secondary color next to it.
Saturation describes the intensity or strength of a color. Adjustments to the slider would make the colors in your image intense or soft. Luminance determines how bright the colors in your photograph will be. Increasing the slider increases the brightness of the colors.

Leave a Reply
You must be logged in to post a comment.