Are you in need of a simple way to create an eye-catching arrow graphic in Photoshop? If so, you’ve come to the right place! In this blog post, we’re going to explore how to draw an arrow in Photoshop, and it’s easier than you might think. From creating basic arrows with lines and shapes to more complex ones using custom brushes, you’ll be able to make just about any kind of arrow graphic imaginable. So, grab your graphics tablet (or mouse), fire up Photoshop, and let’s get started!
How to Draw Arrow in Photoshop
To draw an arrow in Photoshop, follow these steps:
Open Photoshop and create a new document or open an existing image file.

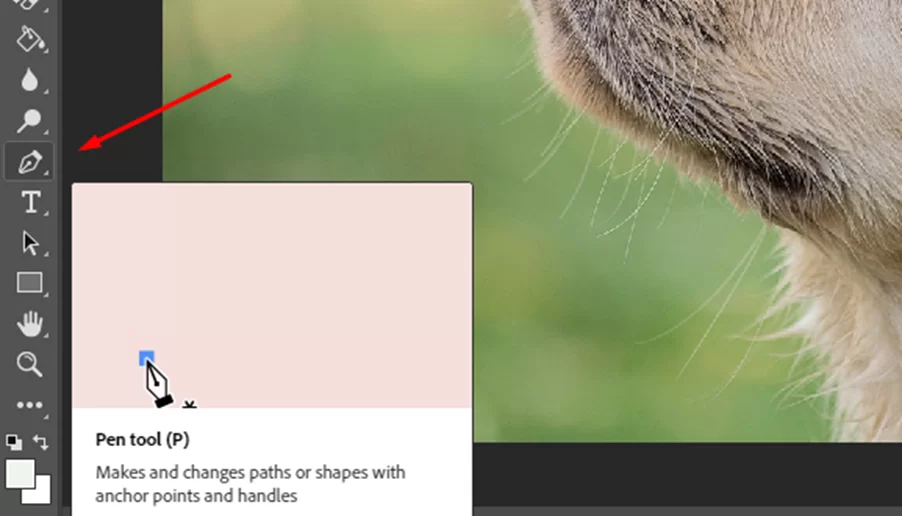
Select the Pen tool from the toolbar on the left side of the screen. The Pen tool allows you to draw precise paths and shapes.
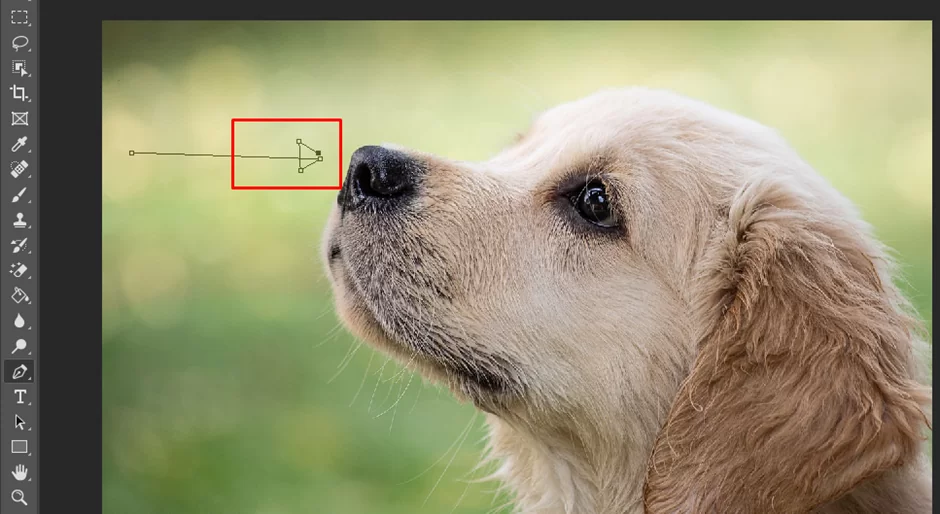
Click on the starting point of the arrow to create a new anchor point. This will be the base of the arrow.

Click on the endpoint of the arrow to create a second anchor point. This will be the tip of the arrow.

To create the sides of the arrow, click and drag to create two additional anchor points on either side of the arrow. These anchor points should be placed halfway between the base and the tip of the arrow.
With the Pen tool still selected, right-click on the canvas and choose “Stroke Path” from the menu.

In the Stroke Path dialog box, select the Brush tool from the “Tool” dropdown menu. Click “OK” to stroke the path with the brush.

Use the Properties panel on the right side of the screen to adjust the size, color, and other properties of the arrow.

Use the Direct Selection tool to fine-tune the shape of the arrow by selecting and moving individual anchor points.


To add a text label to the arrow, select the Type tool from the toolbar and click on the canvas to create a new text box. Type the desired text and use the Properties panel to adjust the text’s font, size, and color.

When you are satisfied with your arrow, save the image by going to File > Save or pressing Ctrl+S (Windows) or Command+S (Mac).

And that’s it! With these steps, you can easily draw an arrow in Photoshop using the Custom Shape tool. Keep in mind that this technique will only work on regular layers, not on background layers.
To draw an arrow on a background layer, you’ll need to convert it to a regular layer first. To do this, double-click on the layer’s name in the Layers panel and click “OK” in the dialog box that appears. This will convert the layer to a regular layer and allow you to use the Custom Shape tool on it.
Benefits of Using Photoshop To Draw Arrows
There are several benefits to using Photoshop to draw arrows, including:
- Precise control over the appearance of the arrow: In Photoshop, you can customize the stroke color, stroke width, and fill color of the arrow, allowing you to create a professional-looking arrow that fits your specific design needs.
- Easy to adjust the size, rotation, and position of the arrow: With the Transform tools in Photoshop, you can easily adjust the size, rotation, and position of the arrow. This allows you to fine-tune the placement of the arrow on your image.
- Multiple arrow shapes to choose from: The Custom Shape tool in Photoshop includes a variety of predefined arrow shapes, giving you numerous options to choose from. This allows you to select the best arrow shape for your design.
- Non-destructive editing: When you draw an arrow in Photoshop, the arrow is added to a separate layer, allowing you to make changes to the arrow without affecting the rest of the image. This is known as non-destructive editing, and it’s a key benefit of using Photoshop for drawing arrows.
Overall, using Photoshop to draw arrows offers precise control and flexibility, allowing you to create professional-looking arrows that fit your specific design needs.
Where Did The Arrow Shape Go In Photoshop?
If you’re unable to find the arrow shape in Photoshop, there are a few potential reasons for this. Here are some common causes and solutions:
You May Be Using The Wrong Tool
The arrow shape is only available in Photoshop when using the Custom Shape tool. If you’re using a different tool, such as the Pen tool or the Brush tool, you won’t be able to access the arrow shape. To select the Custom Shape tool, go to the toolbar and click on the rectangle with a dashed outline icon.
You May Have Accidentally Hidden The Shape Options
The Custom Shape tool includes a variety of predefined shapes, including the arrow shape. If you’ve accidentally hidden the shape options, you won’t be able to access the arrow shape. To show the shape options, click the down arrow next to the shape preview in the options bar at the top of the screen.
You May Have Removed The Arrow Shape From The Default Set Of Shapes
In Photoshop, you can customize the default set of shapes that are available in the Custom Shape tool. If you’ve removed the arrow shape from the default setting, you won’t be able to access it. To add the arrow shape to the default settings, go to the Edit menu and choose “Preset Manager.” In the Preset Manager, select “Custom Shapes” from the drop-down menu and click the “Load” button. Select the “Shapes.csh” file and click “Open.” This will add the arrow shape back to the default set of shapes.
If you’re still unable to find the arrow shape in Photoshop after trying these solutions, there may be a different issue at play. In this case, you may want to try restarting Photoshop or your computer to see if that resolves the problem.
Conclusion
Now that you know how to draw an arrow in Photoshop, you have the power to add a unique design element to all your projects! Whether it’s for graphic design, web design, or just for fun, it’s now easier than ever before. Keep practicing and soon enough you’ll be creating arrows like a pro. So get ready to take your designs up a notch and give those arrows some wings!
Leave a Reply
You must be logged in to post a comment.