One of the exciting features of Lightroom is the capacity to save every modification you’ve made to the various tools in the software. With that, you don’t always have to go through the whole process all the time, but you can edit your photos instantly.
How To Create A Preset In Lightroom
Below, I’ve outlined easy instructions for creating your own presets on Lightroom.
Step 1: Open the lightroom application
On your desktop, mobile or web browser, open either Lightroom Classic or Lightroom CC, whichever you find super convenient and easy to use.
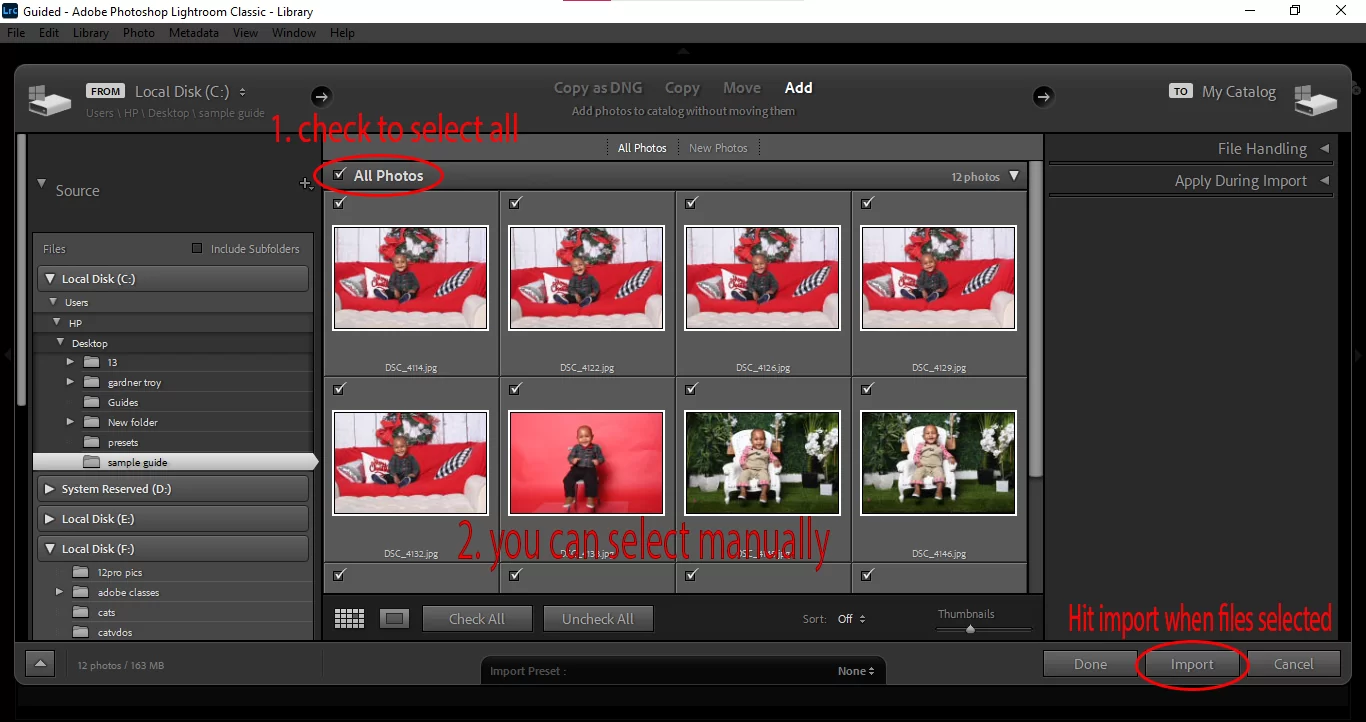
Step 2: Import photos you want to edit
After having your card reader, external hard drive, or digital camera already plugged into your computer, go to file and click on import photos and videos from the drop-down menu. Lightroom should automatically detect the contents of your external drive and open the images for you. Click on the image you wish to import, and hit the import button.

If Lightroom does not automatically detect your images, you may find your photos to import from the area circled in red as shown beware. Click on the preferred file location, and select the picture you want, or drag and drop on the workspace.

Step 3: Explore The Develop Module
After importing your desired picture, go to the develop module and explore the various editing tools to help you create an outstanding Image. There are quite a number of these tools, and we will pick just the most important ones for a brief insight into their uses and benefits.

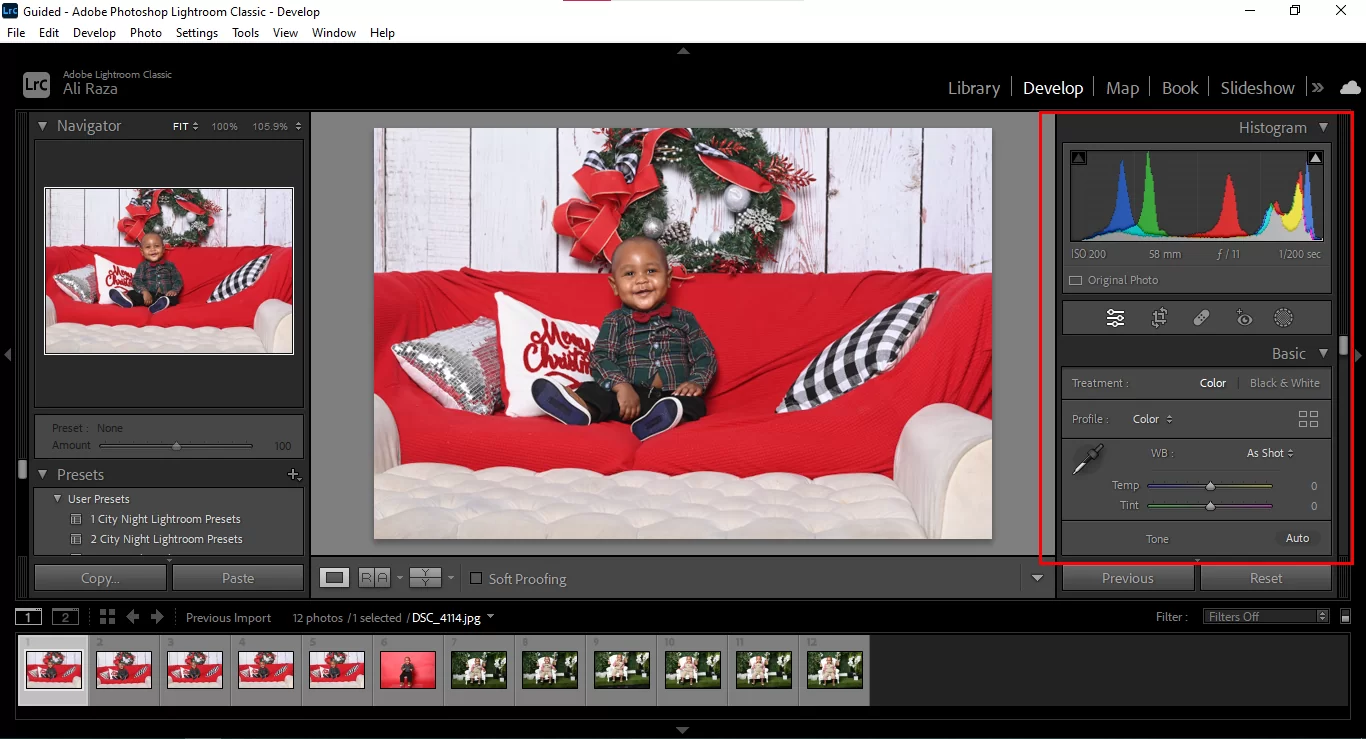
Here are some settings you need to know first
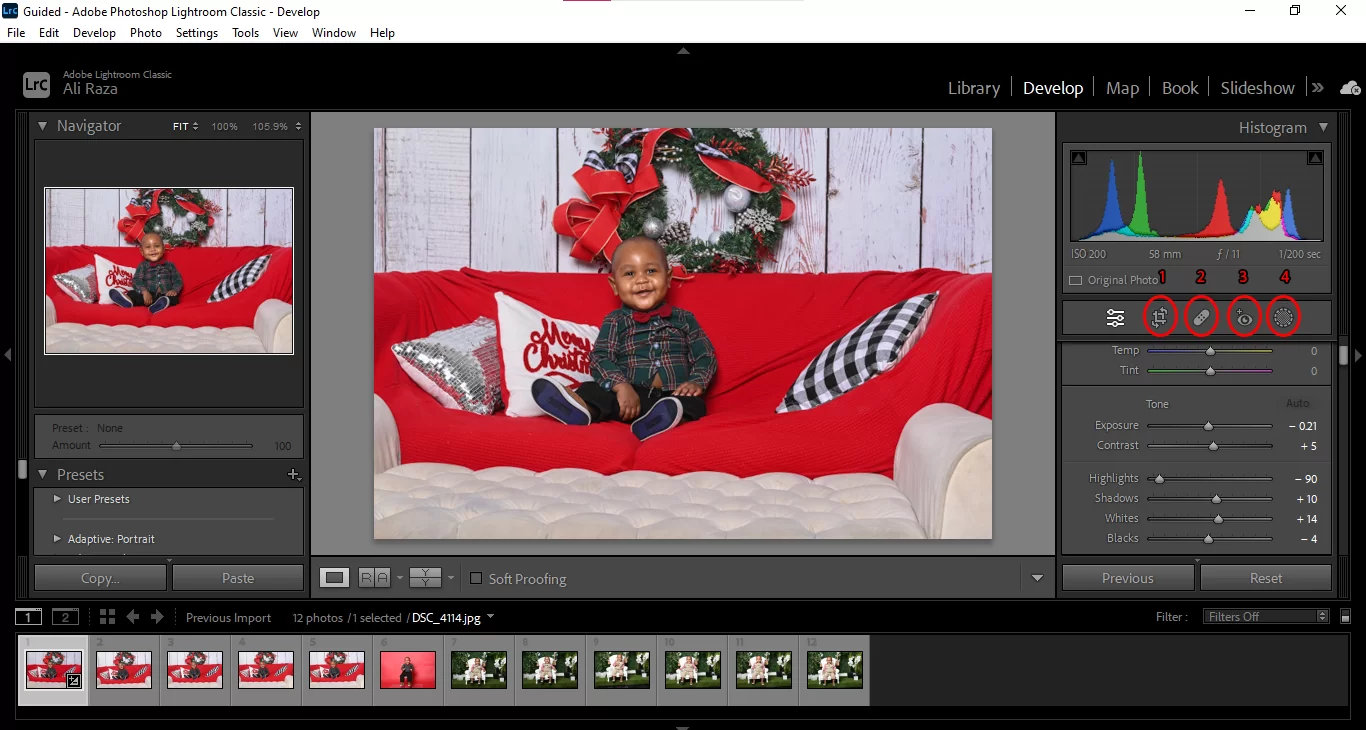
1 Cropping and alignment
Cropping is quite popular in photo editing. Although not necessary in all situations, it is ideal for enhancing focus on the image subject and removing distractions. To access the crop tool, go to the develop module and click on the crop icon, which is a little square with little dashes around it. You can also access this tool via your keyboard by clicking on “R.”
After clicking on the crop icon, you should see guide borders and lines around your image in your work area. To crop your picture, you can easily drag the guidelines at the sides or corners to any dimension you want.
2. Healing
With the heal tool or healing brush, you can remove minor distractions or unwanted elements in your photo. The process is quite technical, but once mastered. It would be one of the easiest editing tasks for you in Lightroom.
To access the heal tool, go to the develop module and click on the band-aid icon below the histogram. In the brush option, select “heal” and make certain modifications to the healing brush via the sliders associated with it. Modifications include size, feather, and opacity.
For size, moving the slider to the right increases the size of the healing brush, while moving it to the left decreases the size. The feather slider defines the intensity of your brush. For a seamless edit, choose a higher number by moving the slider slightly to the right. The opacity is mostly at 100, according to Lightroom’s preset. If you wish to have more visibility, you can decrease the slider.
After adjusting your brush, click on the area of the image you wish to heal. A second circle will appear, allowing you to select an area of the image you wish to replace for the site you want to erase. Lightroom will automatically make the necessary changes.
3. Red-eye fix
This mostly occurs when taking snapshots of faces. This occurs when the camera’s flash is reflected in the subject’s eye. This error is very common in animal photography. To correct the red eye, go to the develop module and click on the eye icon.
After Selecting, go to the image, click on the center of the red eye, drag outwards to cover the eye, and make adjustments by working on the darken and pupil size slider.
4. Clone
Cloning in Lightroom involves duplicating a certain object in your image to either replace a part of the image or eliminate blemishes. It is very similar to the heal tool.
Step 4: Time to Create Your Preset
When you are finally confident with your editing results, convert your settings into your own presets by searching for the preset tab on the left side of Lightroom’s window.

Click on the plus ( + ) sign in front of presets, as shown below.

You should expect a pop-up menu as shown in the area circled in red below. Click on create preset and get ready for the final step.

Step 6
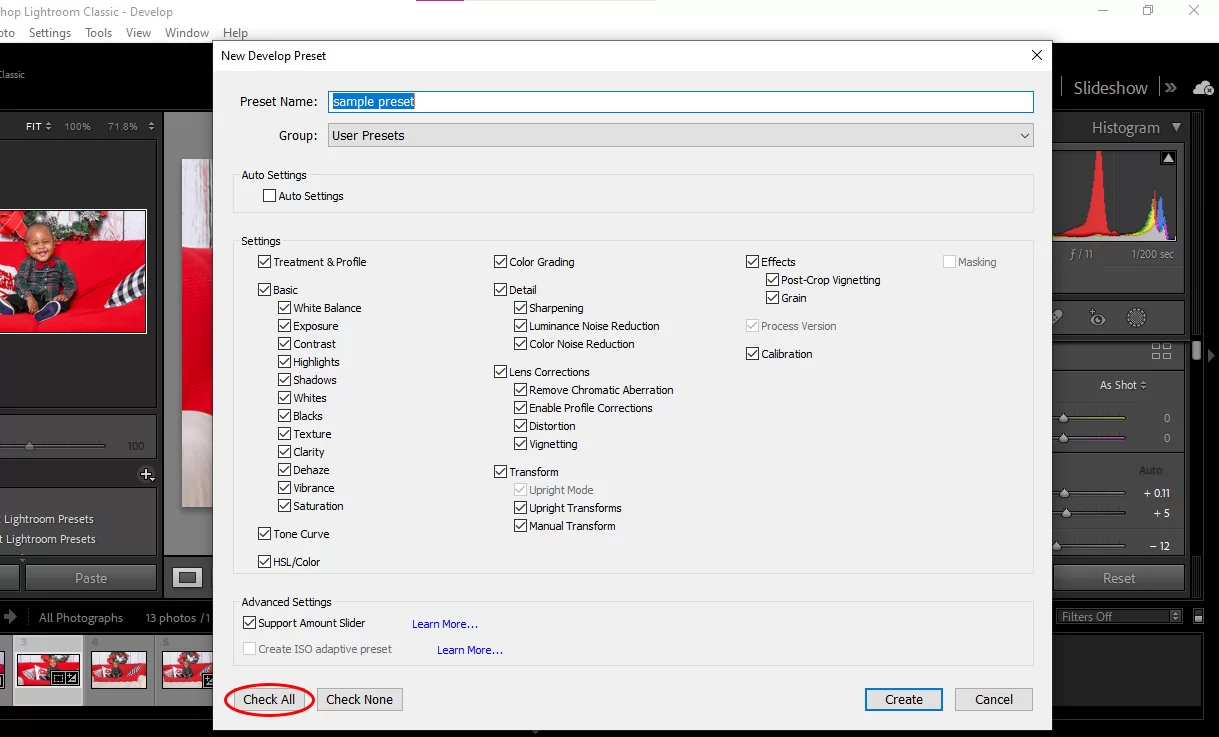
A new development window will appear with various options to create your first preset. Start by giving your preset your own unique title for easy identification. Check the settings you want to save in your preset. Just like the area circled below, I have pretty much checked everything.
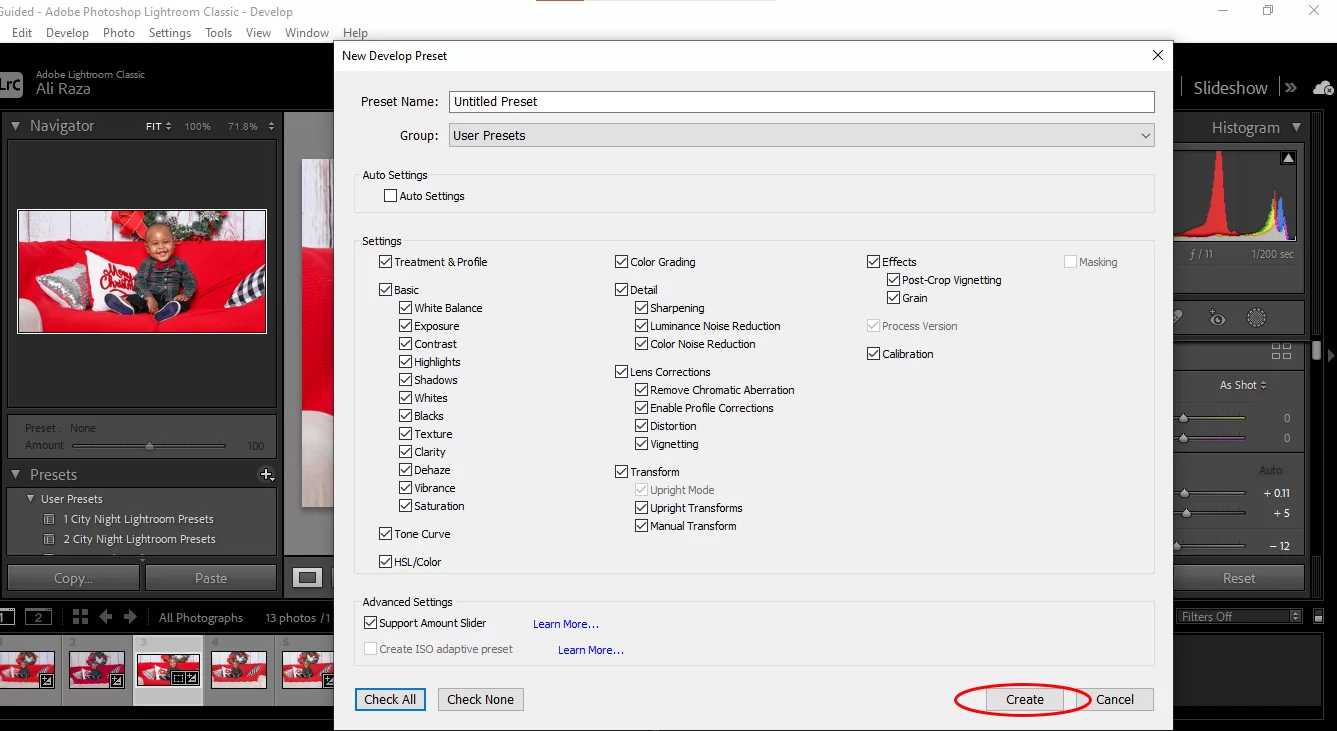
When satisfied with the settings, click on the create tab to have your preset automatically saved.

You can check the auto-select option to allow Lightroom to select or check the necessary settings suitable for your preset.

You can check all to select all settings you have made to your photo.
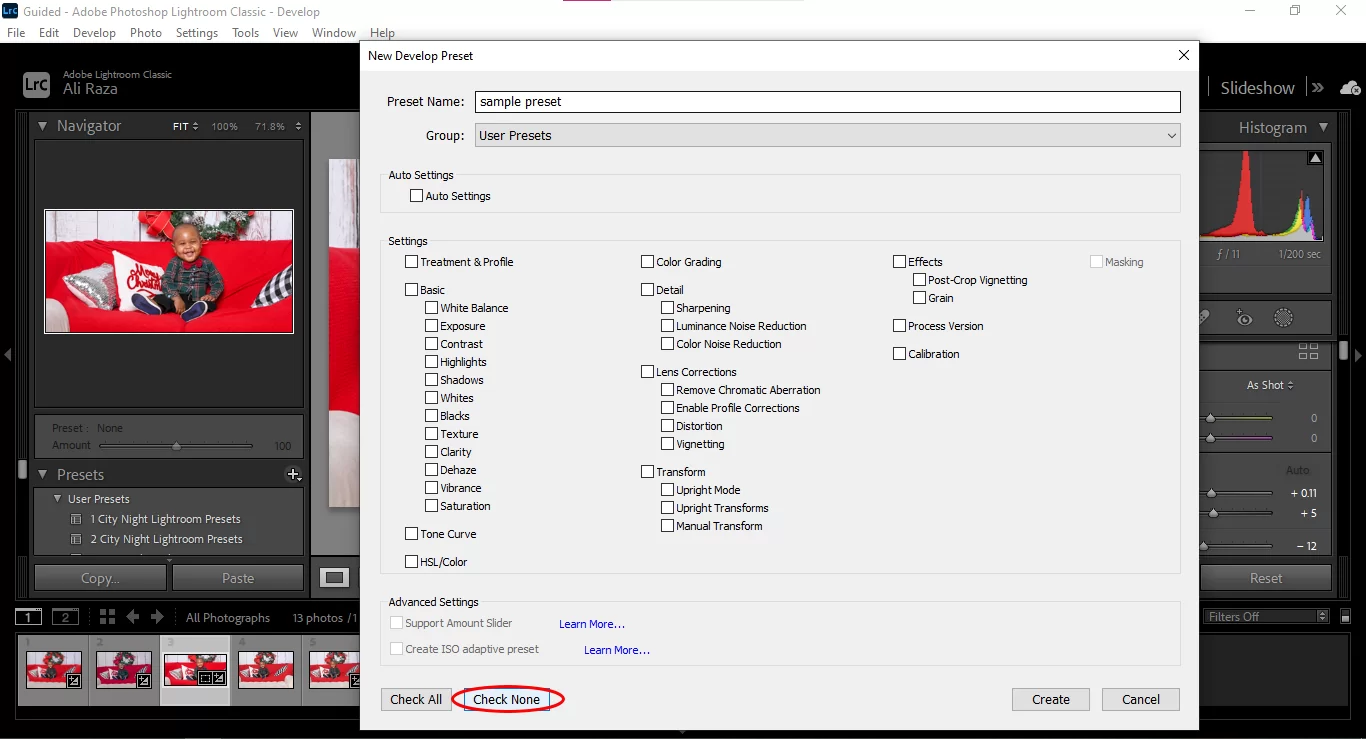
Similarly, check none to deselect all checked options or settings.
Hit Create to save the preset.
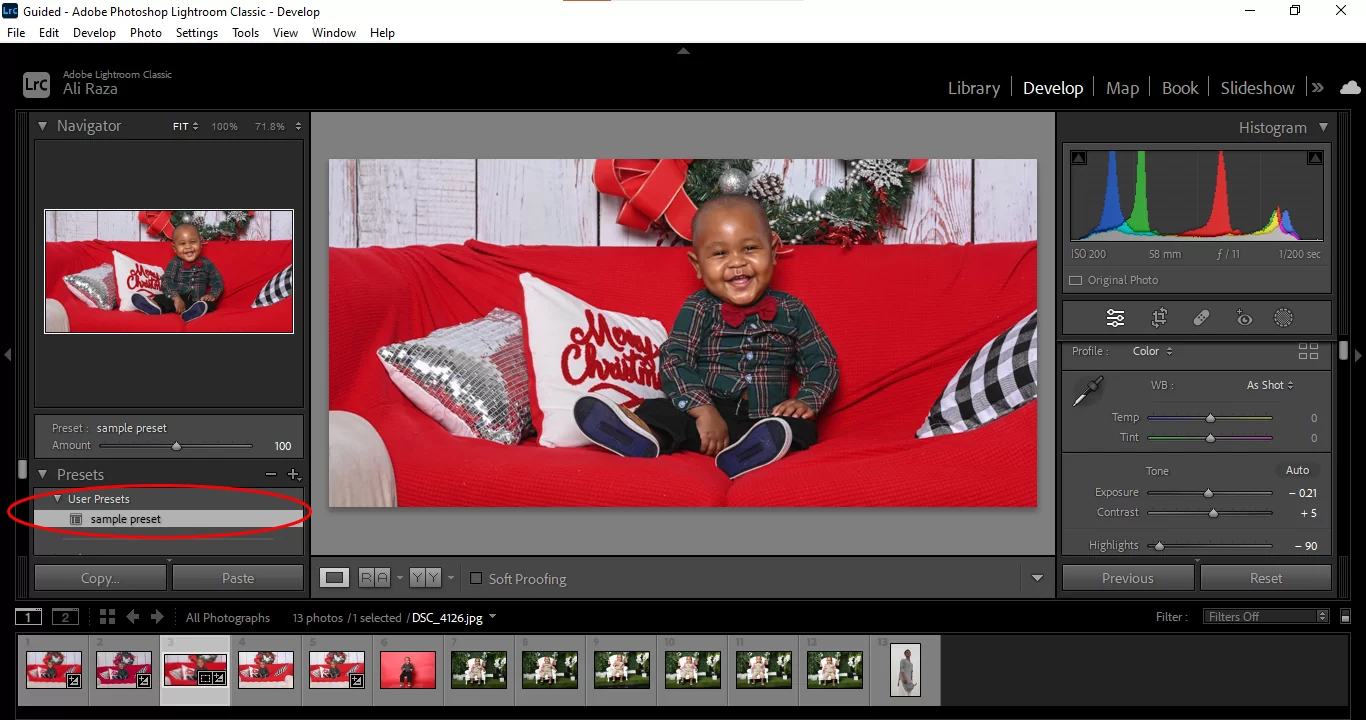
To access your newly created preset, go to the preset tool, and select your preset, which will be identified by the name you have given it. Click on it to automatically apply all the settings to your image.
Conclusion
With Lightroom presets, you can quickly save time and work on multiple images. Creating a preset in Lightroom is straightforward and easy to understand.
Leave a Reply
You must be logged in to post a comment.