Blurring is one of the coolest features of Lightroom. It helps the main concept of your picture pop more and increases the focus on your preferred object or person in the photograph. To improve things, you will achieve a professional result with minimal background distractions.
This is undoubtedly the best step-by-step guide if you struggle to navigate and use Lightroom’s blur feature.
Open Lightroom
There are two innovative versions of Lightroom; Lightroom CC and Lightroom Classic. The difference between these two versions is plausible. Lightroom CC is perfect for beginners who wish to enjoy the thrill of editing pictures without going too technical. It also functions well regardless of the device used and edits pictures while preserving the original format in Adobe cloud for easy access any day and time.
Lightroom Classic, on the other hand, is perfect for professionals who have been in the photography and editing niche for quite a while. It offers many features and packages to make your work pleasing to the eyes, and you can make purchases and work offline.
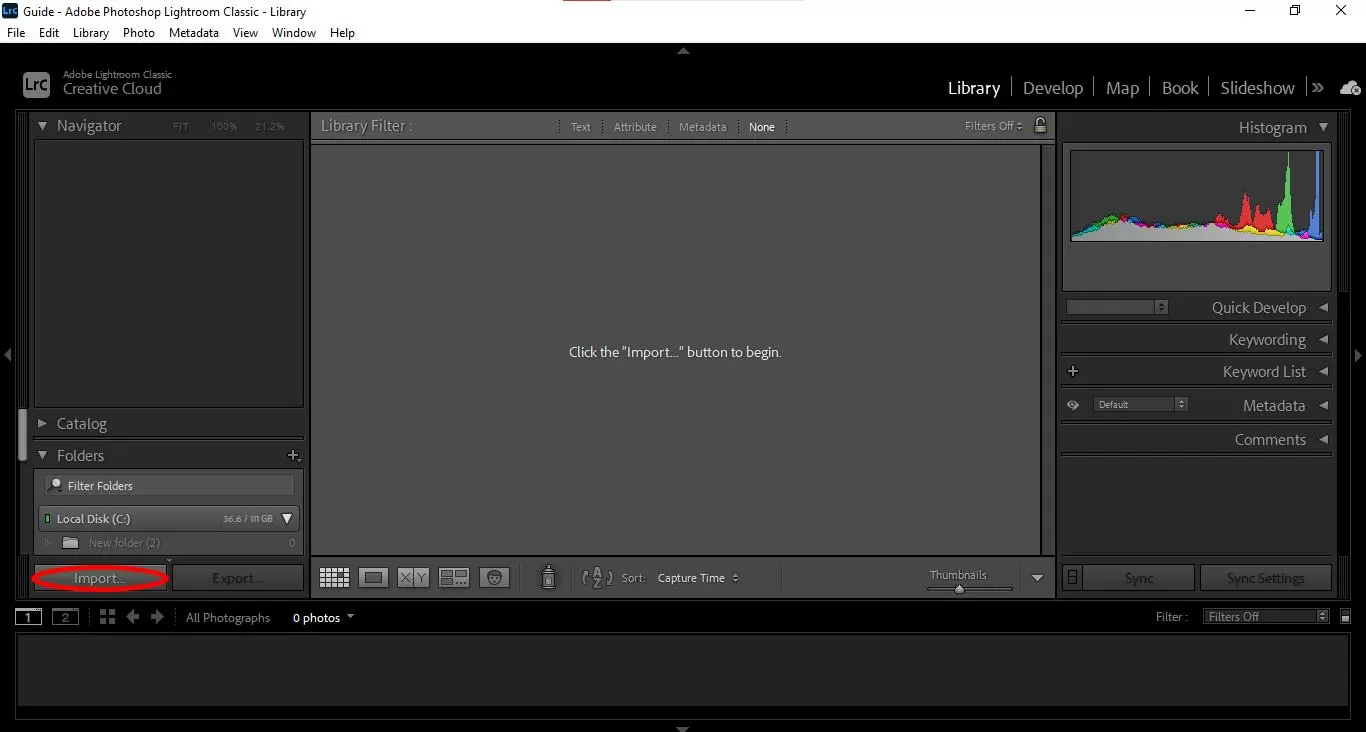
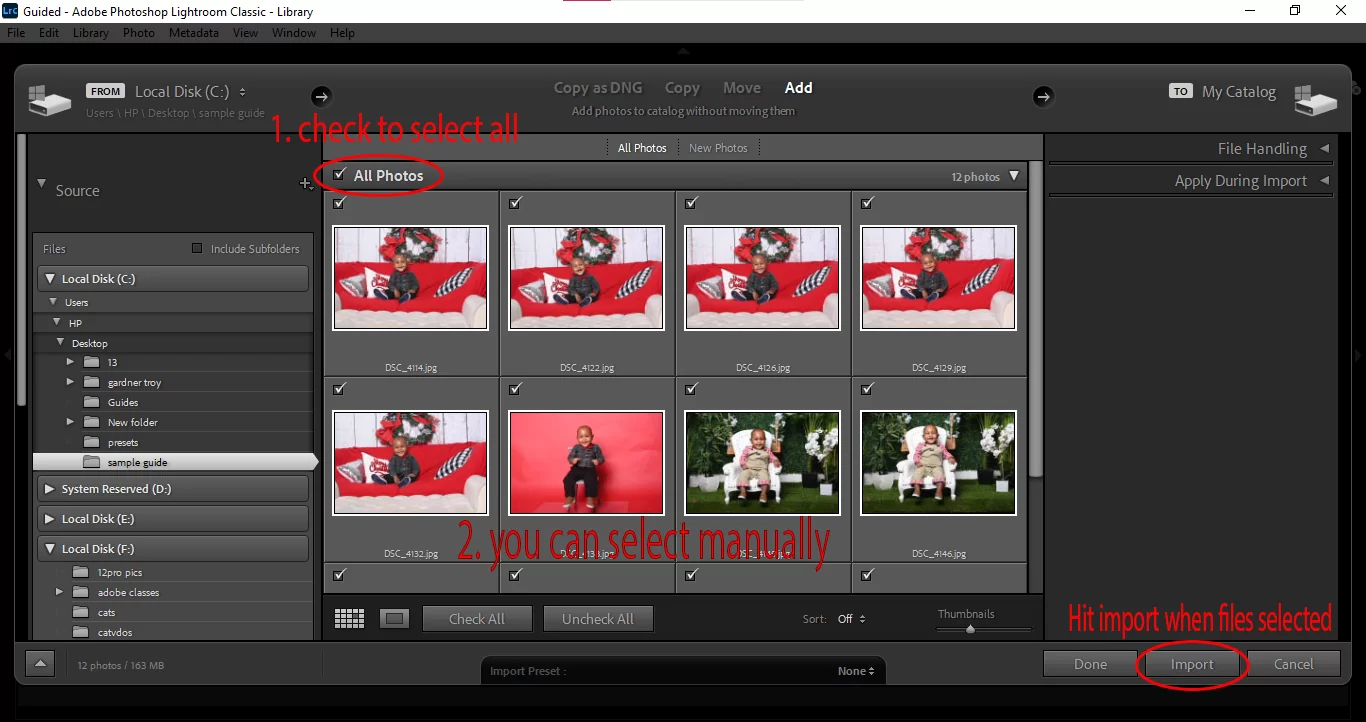
Import Image
Click on “file” in the top left corner of Lightroom’s window. From the drop-down menu, click on import photos and videos. Make sure you have your external device plugged in. Only then would Lightroom automatically open the images on your desktop. Uncheck all the pictures, pick the one you want, and then hit import or copy and paste to your workspace.

Methods of Adding Blur in Lightroom
The blurring process starts with a click on the develop tab, which gives you a wide range of options to blur your background or any unwanted element in your picture. Depending on what works for you, you can use the following options:
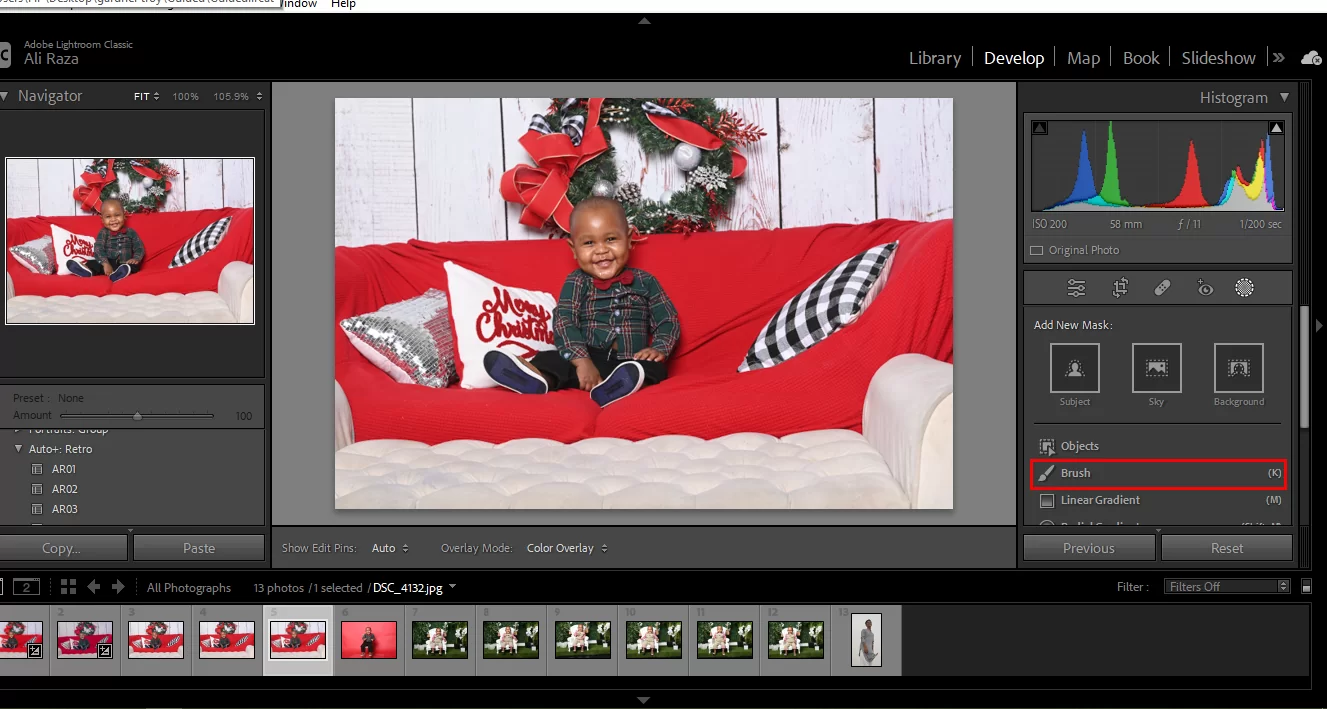
• Brush
This is also the adjustment brush tool used to make intentional and targeted changes to preferred aspects of your image. The brush tool can adjust the exposure, clarity, contrast, white balance, and sharpness.
• Linear Gradient
This tool applies your preferred adjustments to your picture by gradually fading changes in a linear pattern, either from left to right or top to bottom. It is very useful for making changes to landscapes in nature photography.
• Radial Gradient
This option also works like the brush and linear gradient tools. However, radial-gradient tool allows you to change specific areas of your picture in an elliptical or circular manner.

Adding Blur to Background
Step 1: Click on Mask
If you have a subject or photo concept that is easily distinguishable from the background which you want to blur, click on the mask icon. This tool helps you to apply changes or edits to specific points of your picture. You can locate the mask icon between the basics and histogram tabs.

Step 2: Select Background
Once the mask tab opens, you will see masking options beneath “Add New Mask.” You will find the subject icon, which focuses on the easily seen subject in your image. The sky icon helps Lightroom to mask the sky features in your photo smartly, and the background icon focuses on everything around the subject.

To blur the background, select the background icon, as shown above. Lightroom will automatically detect the subject and mask the background in opaque red.

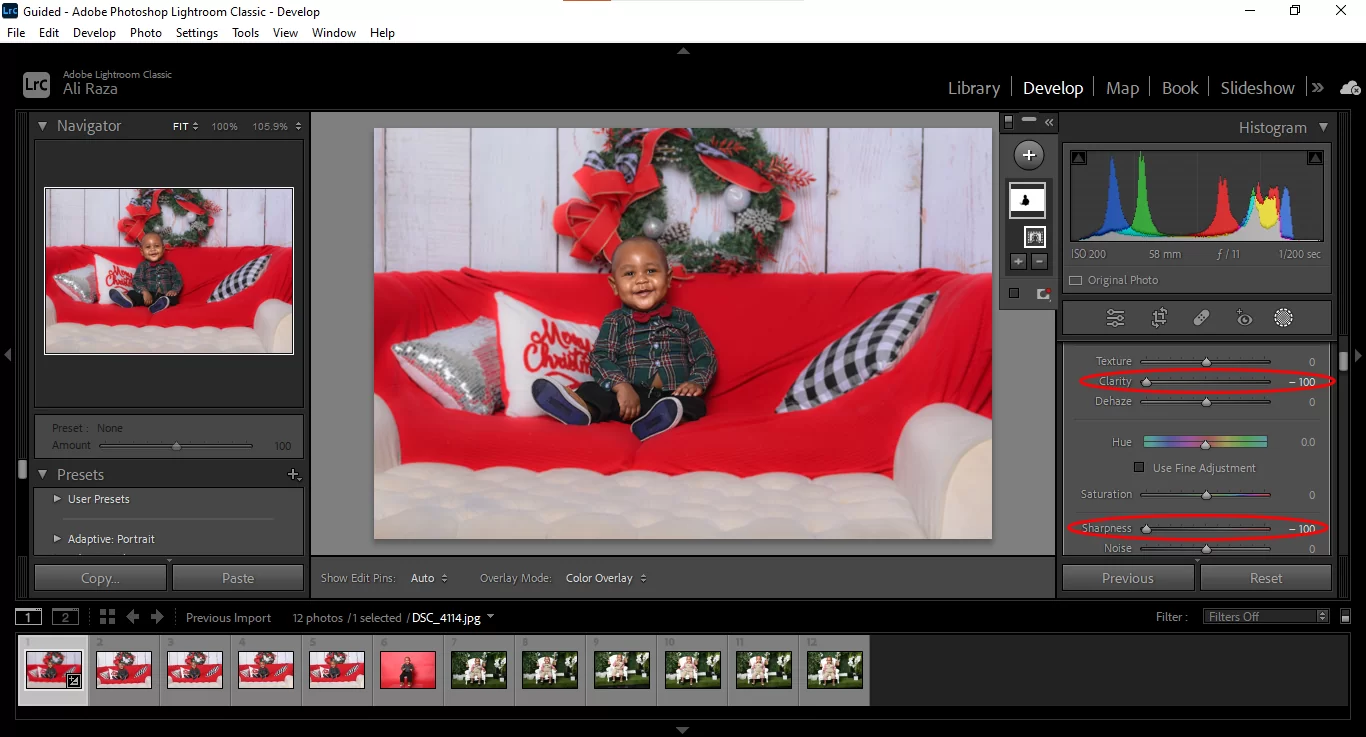
Step 3: Adjust Clarity And Sharpness
Once the background is selected, the next thing to do is to work on clarity and sharpness. Clarity focuses on mid-tone contrast, and a good way to blur the background in this instance is to reduce the clarity of the masked area. I usually move the toggle to the back to produce my desired blur effect.
Working on the sharpness will determine how precise and clear the background elements will become. Reducing the sharpness of the masked background will automatically make the subject of your photo enjoy an increase in focus. Usually, I move the toggle down to produce my desired effect.
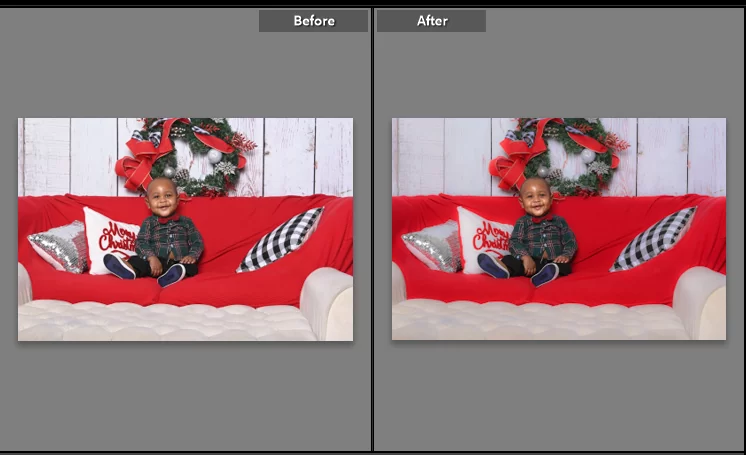
Background is blurred successfully.
Adding Blur to an Unwanted Element in Your Picture
Adding Blur to a picture is not restricted to backgrounds alone. You can decide to blur out unavoidable distractions and noise or even play around with some elements by blurring them. For example, I wish to blur out the pillow beside the baby below. How would I go about that?
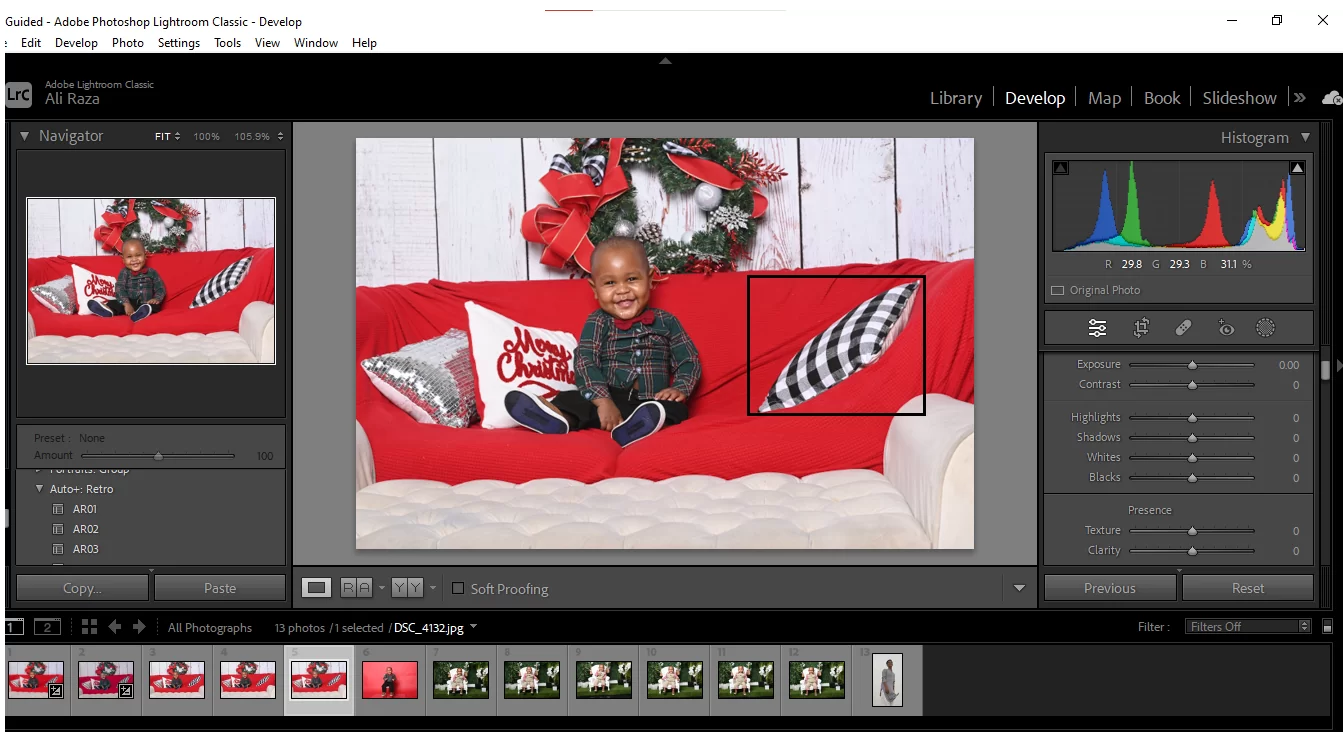
Step 1: Select Brush Tool
In this instance, I will make use of the brush tool. Using the brush tool is ideal for masking small areas or areas that weren’t blurred out when using the background blur method.
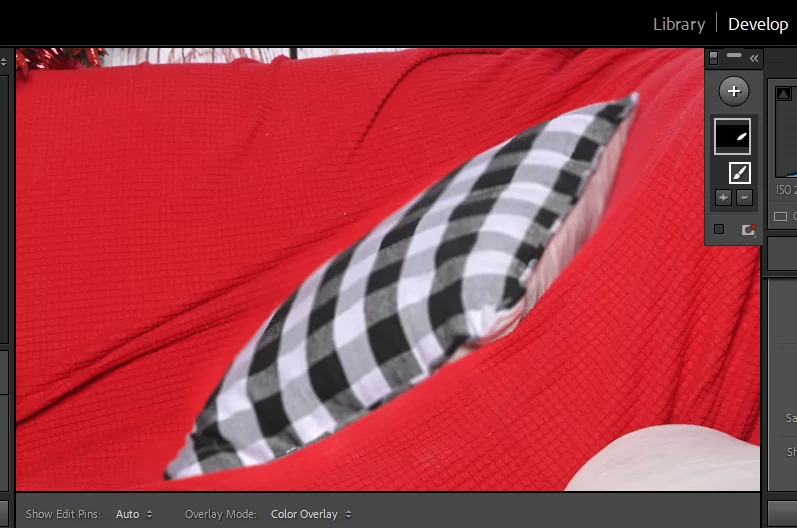
Step 2: Paint The Object.
Before painting the object you wish to blur (in this case, a pillow), make adjustments to your brush’s flow, feather, and size to mask the object easily and make fewer mistakes. It is advisable to use a small brush, especially for small objects.

Step 3: Adjustment Clarity And Sharpness
Once the selection is complete, reduce the clarity and sharpness. Making Adjustments to these features is the same as reducing the focus on the object. Move the toggle of the clarity and sharpness sliders down for a perfect effect.

And just like that, you can blur any unwanted element in your image.
Leave a Reply
You must be logged in to post a comment.