When you are running out of time and you need to speed up your editing process, batch editing is a huge saver. However, if you are new to Lightroom, going about batch editing might be extremely tasking since the process can be somehow technical. This article is just the right guide to using the batch editing tool in Lightroom like a pro.
What is Batch Editing?
Batch editing, also known as bulk editing is a smart way of achieving a consistent and unique workflow by applying the same settings to a group of images. It is ideal for photographers who wish to have uniformity in their images. It also saves an immense amount of time and energy which would have been taken away by editing manually and individually.
How to Batch Edit in Lightroom
Step 1: Open Lightroom
There are two innovative versions of Lightroom; Lightroom CC and Lightroom Classic. The difference between these two versions is plausible. Lightroom CC is perfect for beginners who wish to enjoy the thrill of editing pictures without going too technical. It also functions well regardless of the device used and edits pictures while preserving the original format in Adobe cloud for easy access any day and time.
Lightroom Classic, on the other hand, is perfect for professionals who have been in the photography and editing niche for quite a while. It offers many features and packages to make your work pleasing to the eyes, and you can make purchases and work offline.
Step 2: Import photos you want to edit
Before you can soft-proof a picture, you must make unavoidable enhancements to such a photo. Start by importing any image of your choice; from your digital camera, memory card, external hard drive, or phone.
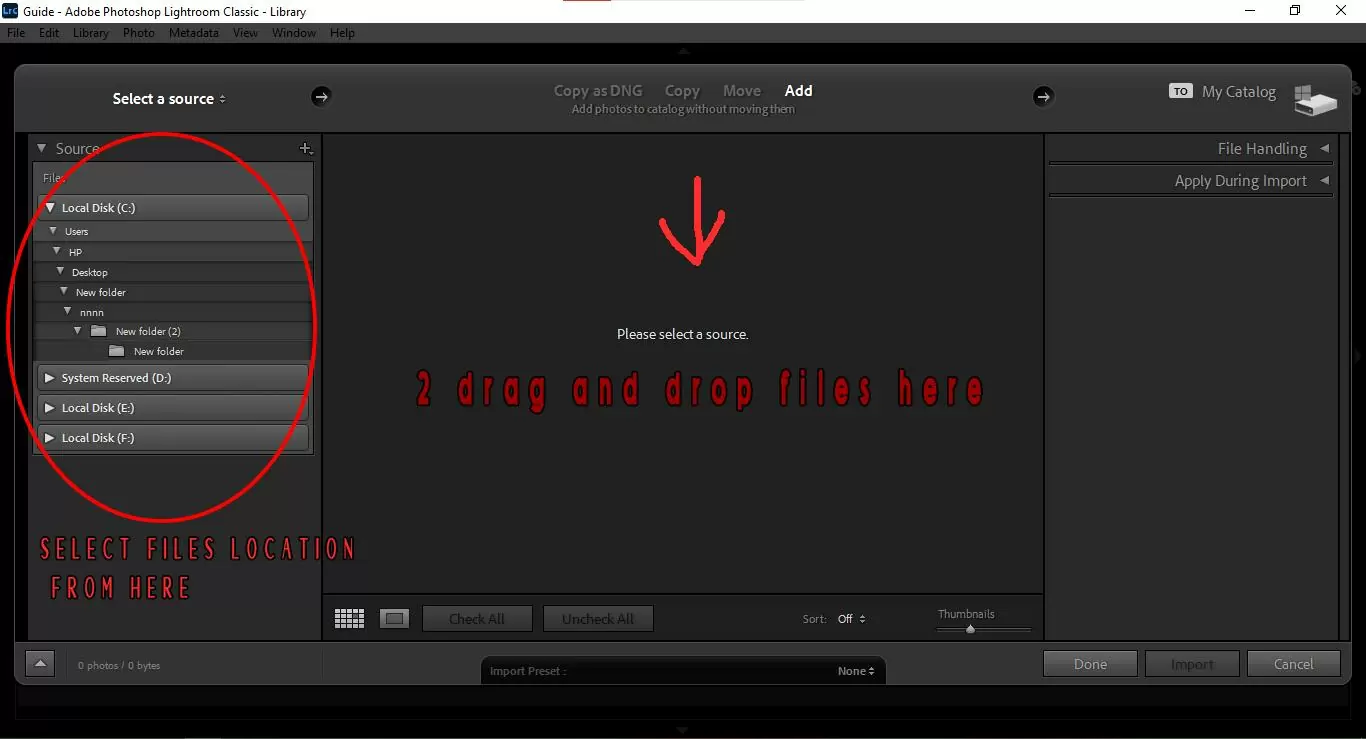
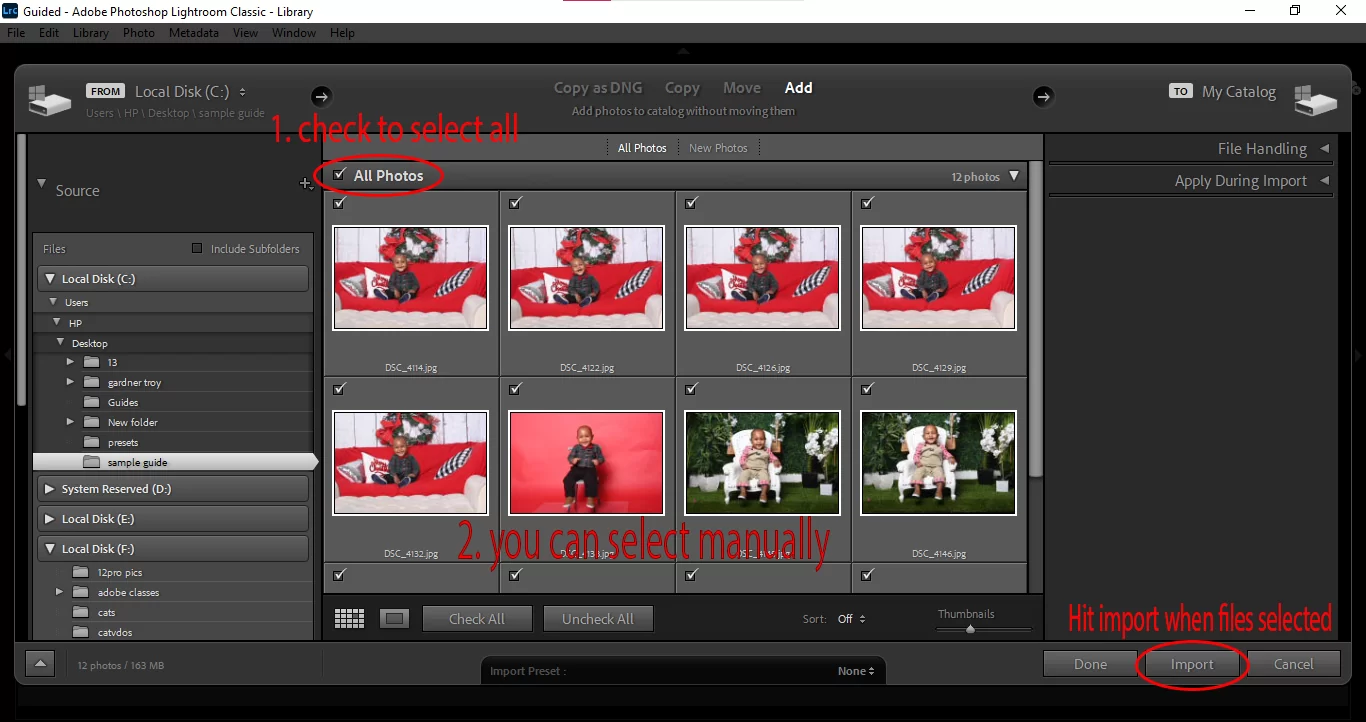
With your device connected to your personal computer, go to Files on the Lightroom window, and click on import images and videos from the drop-down menu. Lightroom should automatically detect and display the pictures on your digital camera or hard drive. Uncheck all the photos, select the one you wish to edit, and then click on import.

If Lightroom does not detect your images and automatically display them for you, you might manually have to go about that process. Survey the different file paths as shown in the area circled in red below. You can also drag and drop your preferred photo on the workspace or select your photo and hit the import button. Remember that in this case, we are going to be importing multiple images.
Step 3
After importing your images, hold Command (on Mac) or Control (on Windows) and click on the images you want to paste the edit settings to. Then hit Command +V (on Mac) or Ctrl + V (on Windows) to paste the edits onto all of the selected images.
Step 4
If step three does not work out for you, you can go the long mile by creating your own settings and saving them as your desired preset.
How to create a Preset!!!
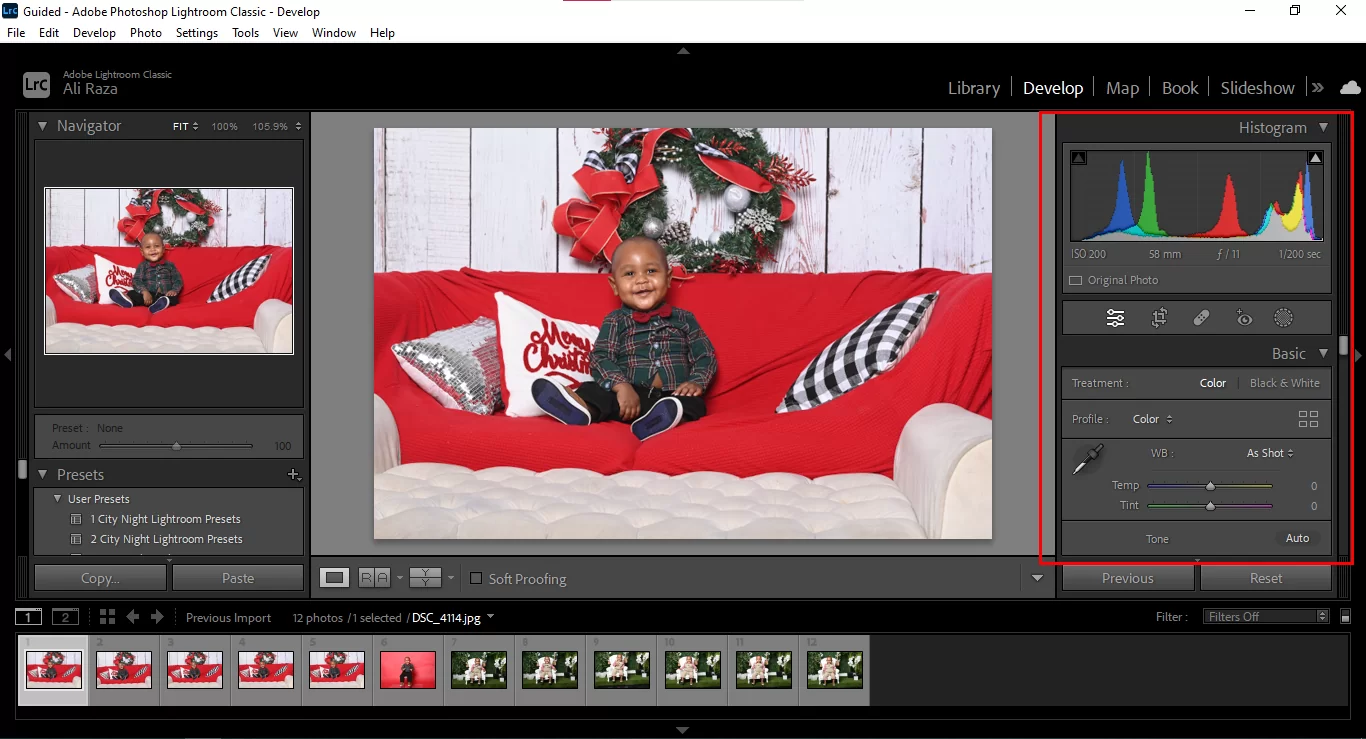
Start by making the necessary modifications to your image by exploring the develop module. Apply the necessary cropping effects and adjust the contrast, highlights, texture, saturation, white balance, etc. Also, make use of the red eye correction tool where necessary.
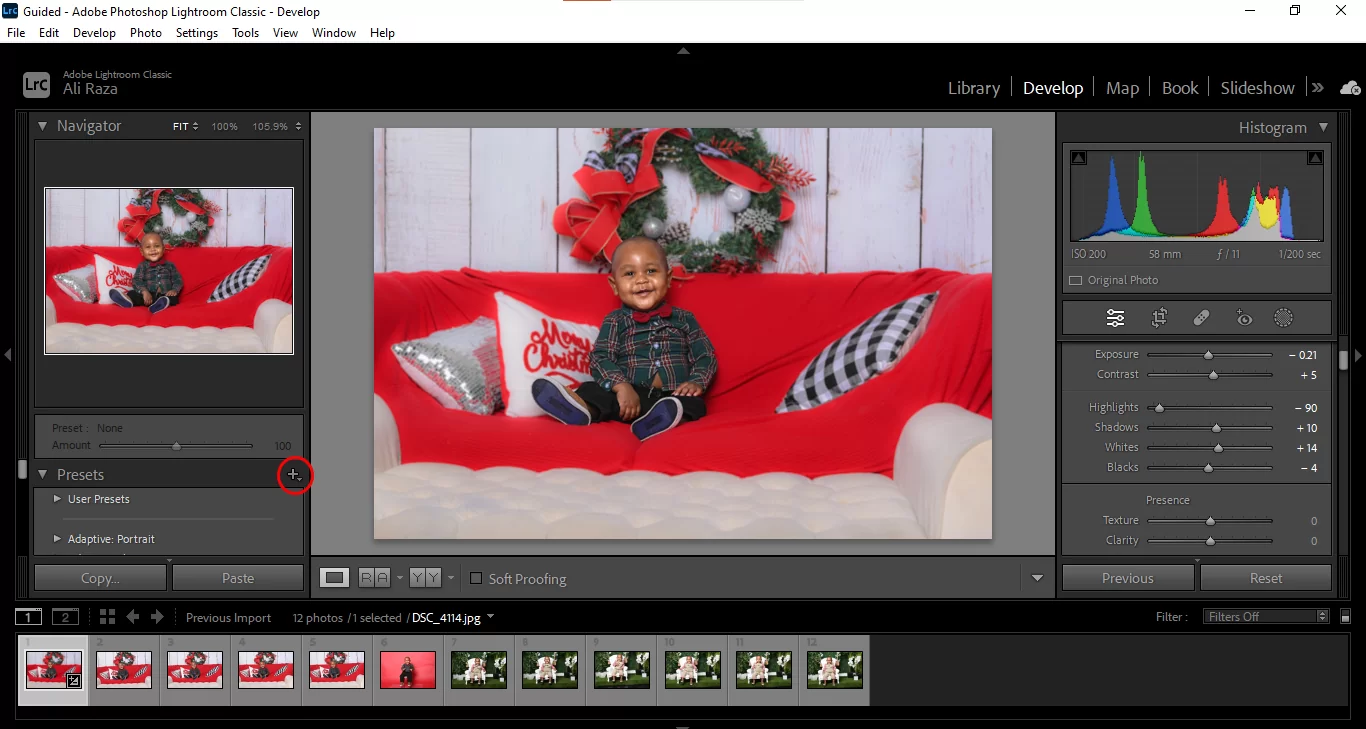
After satisfactorily making your edits on the photo, go to the preset menu and click on the + sign next to it. From the next menu, click on “Create Preset.”
Click on the plus(+) sign in front of presets
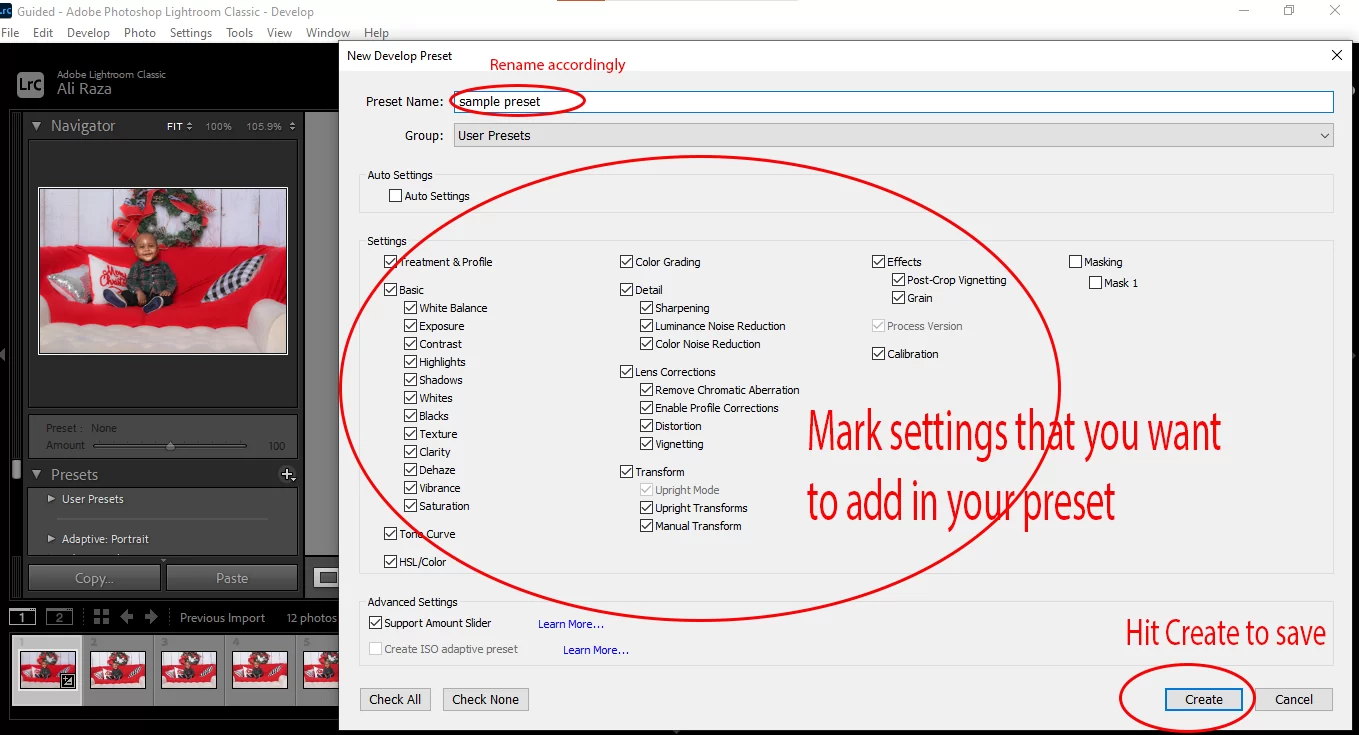
Then go to create preset

Rename your preset for easy identification. After giving your new preset a name, select the changes that you want to save in your preset and then click on the save preset. Your new preset will be saved in USER PRESETS.
Step 5: Time to Batch Edit
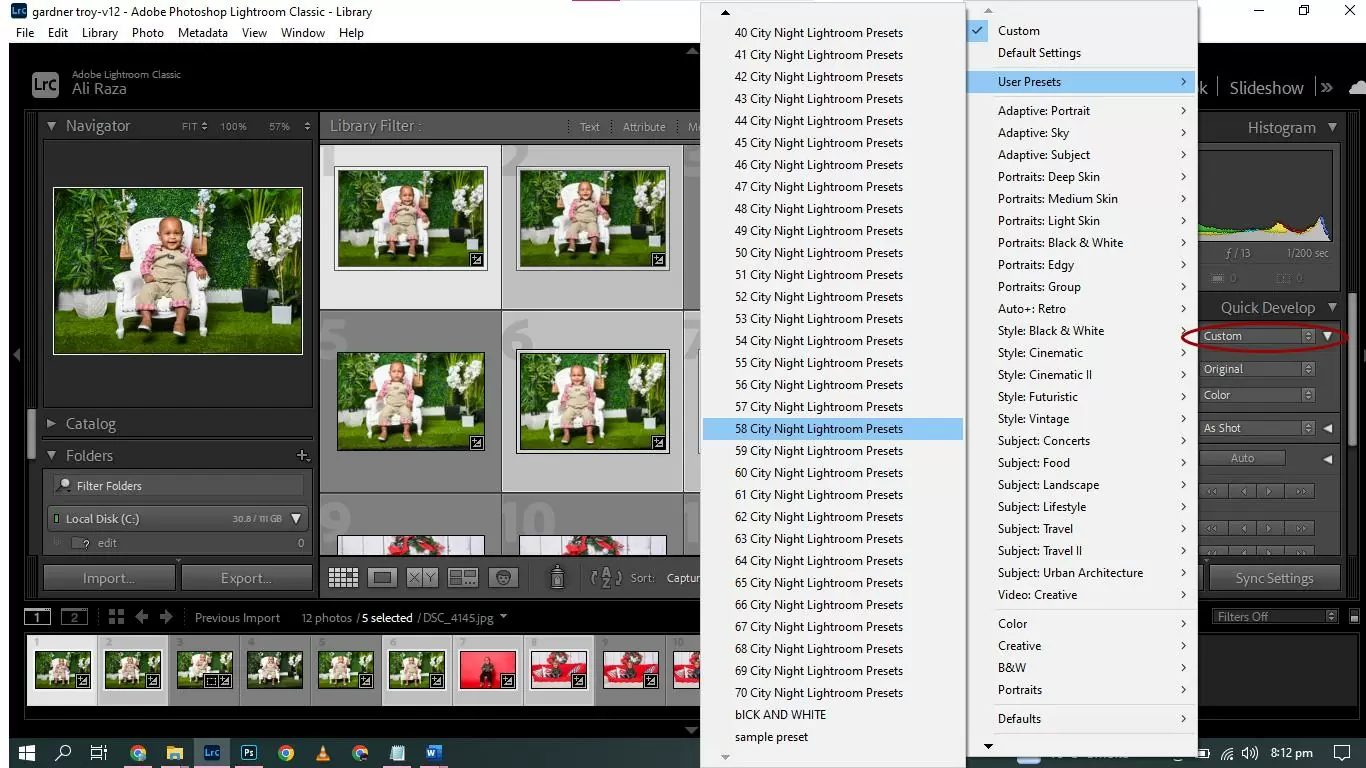
To apply your newly created preset to your batch of images, go to the library module and select the images you want. Then go to the quick develop module, which is located below the histogram on the far right of the library module. Select your new preset from the drop-down menu. The quick develop panel helps you make important adjustments to your photo without moving to the develop module.
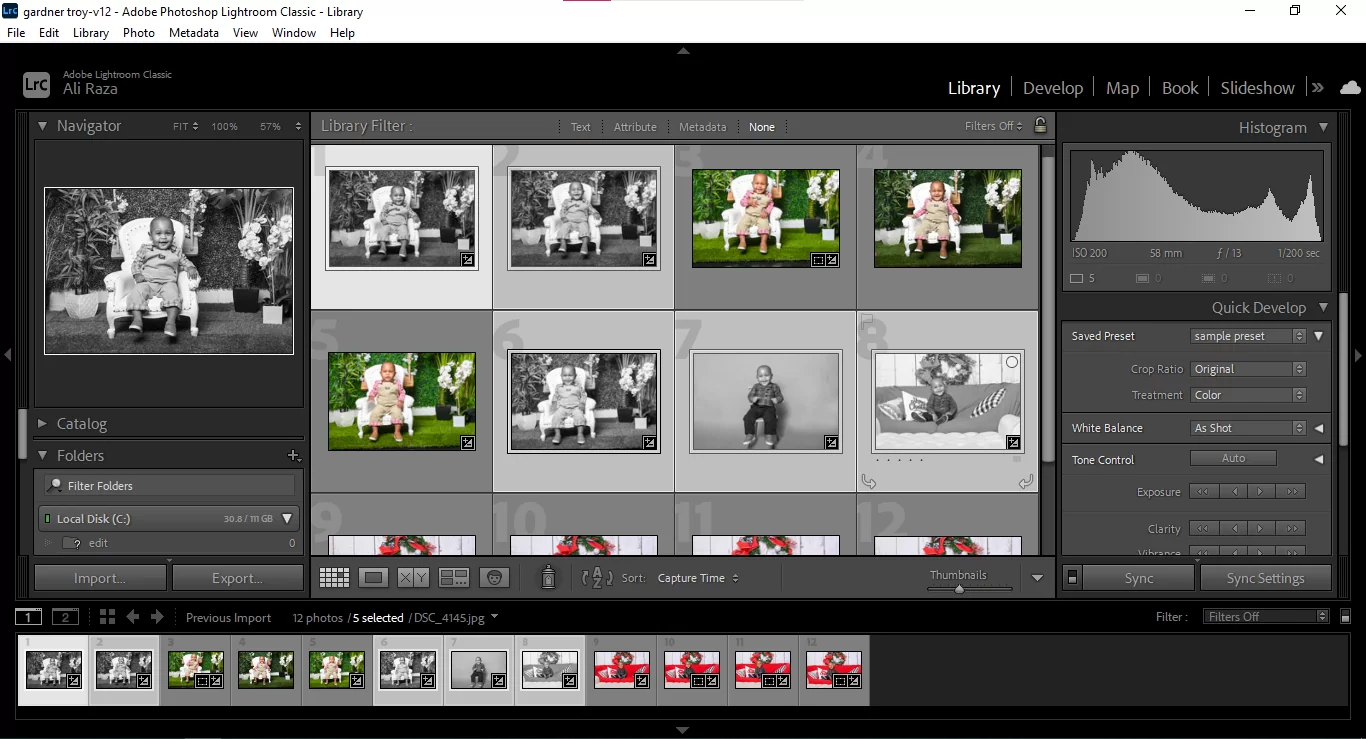
After selecting your preset, Lightroom will automatically apply them to your batch of images uniformly, saving you time and energy. You can apply these presets to as many images as you wish and even make a few adjustments to some important aspects as you go.
If you feel the changes or presets do not suit your style, you can easily access the develop module and make changes to the settings. You can reduce or increase the wide array of sliders. You can also crop and straighten your images.
Final Thoughts
Professional photographers find the feature of batch editing in Lightroom a lifesaver. You don’t not have to worry about missing deadlines; you can keep your images original and unique to you.
Leave a Reply
You must be logged in to post a comment.