This tutorial is similar to creating a movie or animation in CSP. Creating a GIF helps add some life and movement to your digital art. Clip Studio Paint allows you to create stunning animations and export them as GIFs. I will walk you through easy steps to start creating a GIF in Clip Studio Paint.
How to Make a GIF in Clip Studio Paint
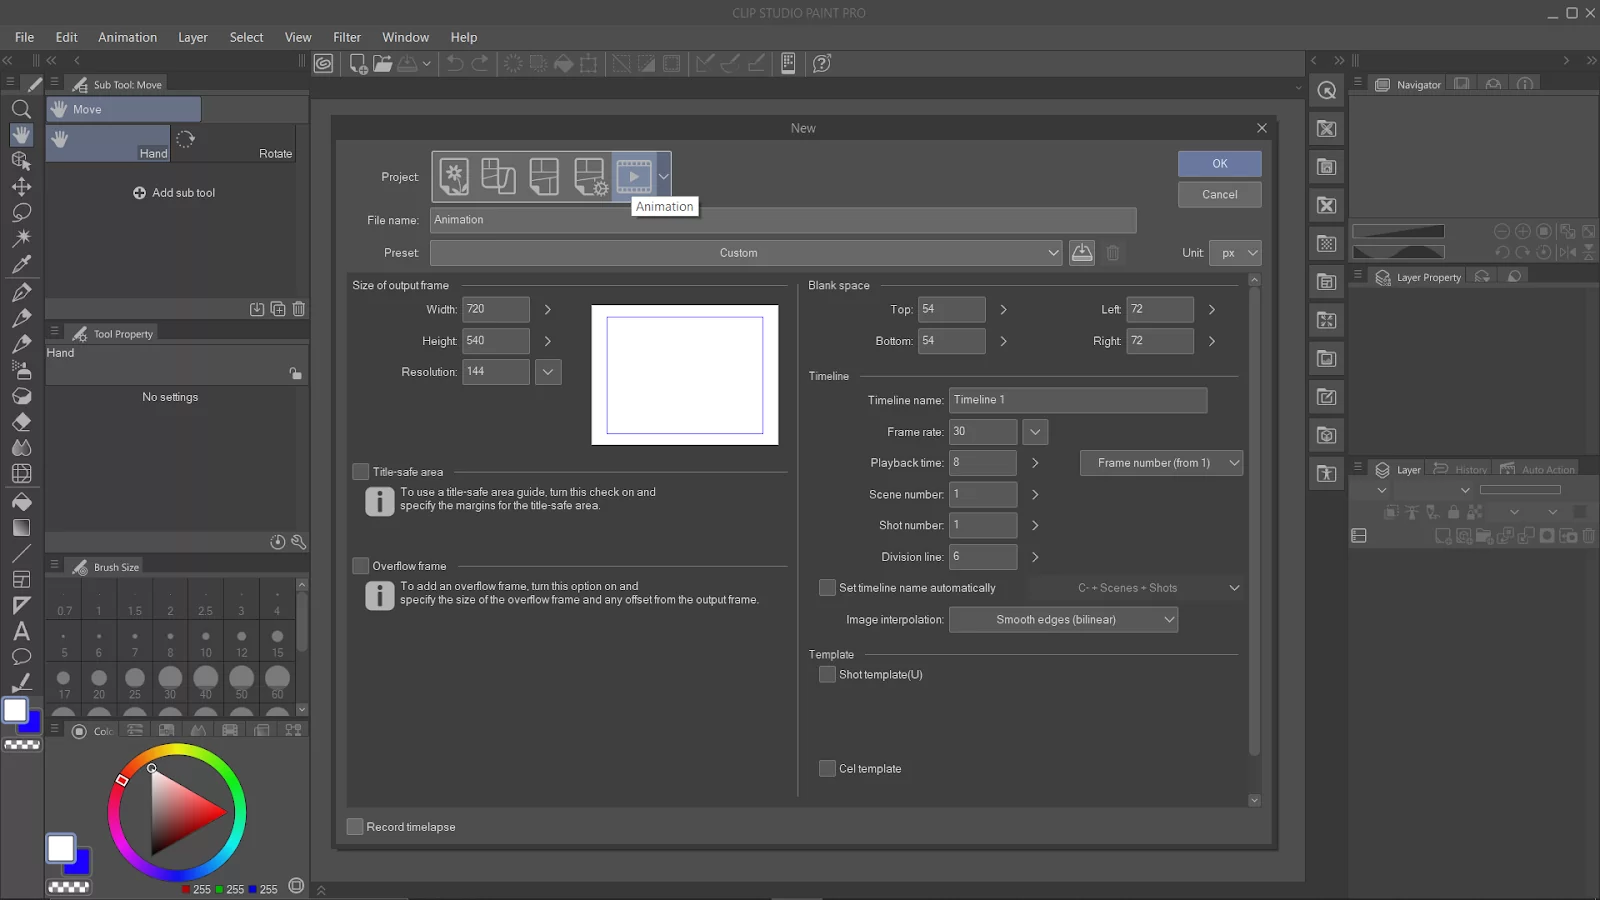
Create a new animation project: To begin animating, you will first need to create a new animation project by clicking on “File” in the menu bar at the top of the screen and then selecting “New” and “Animation.”
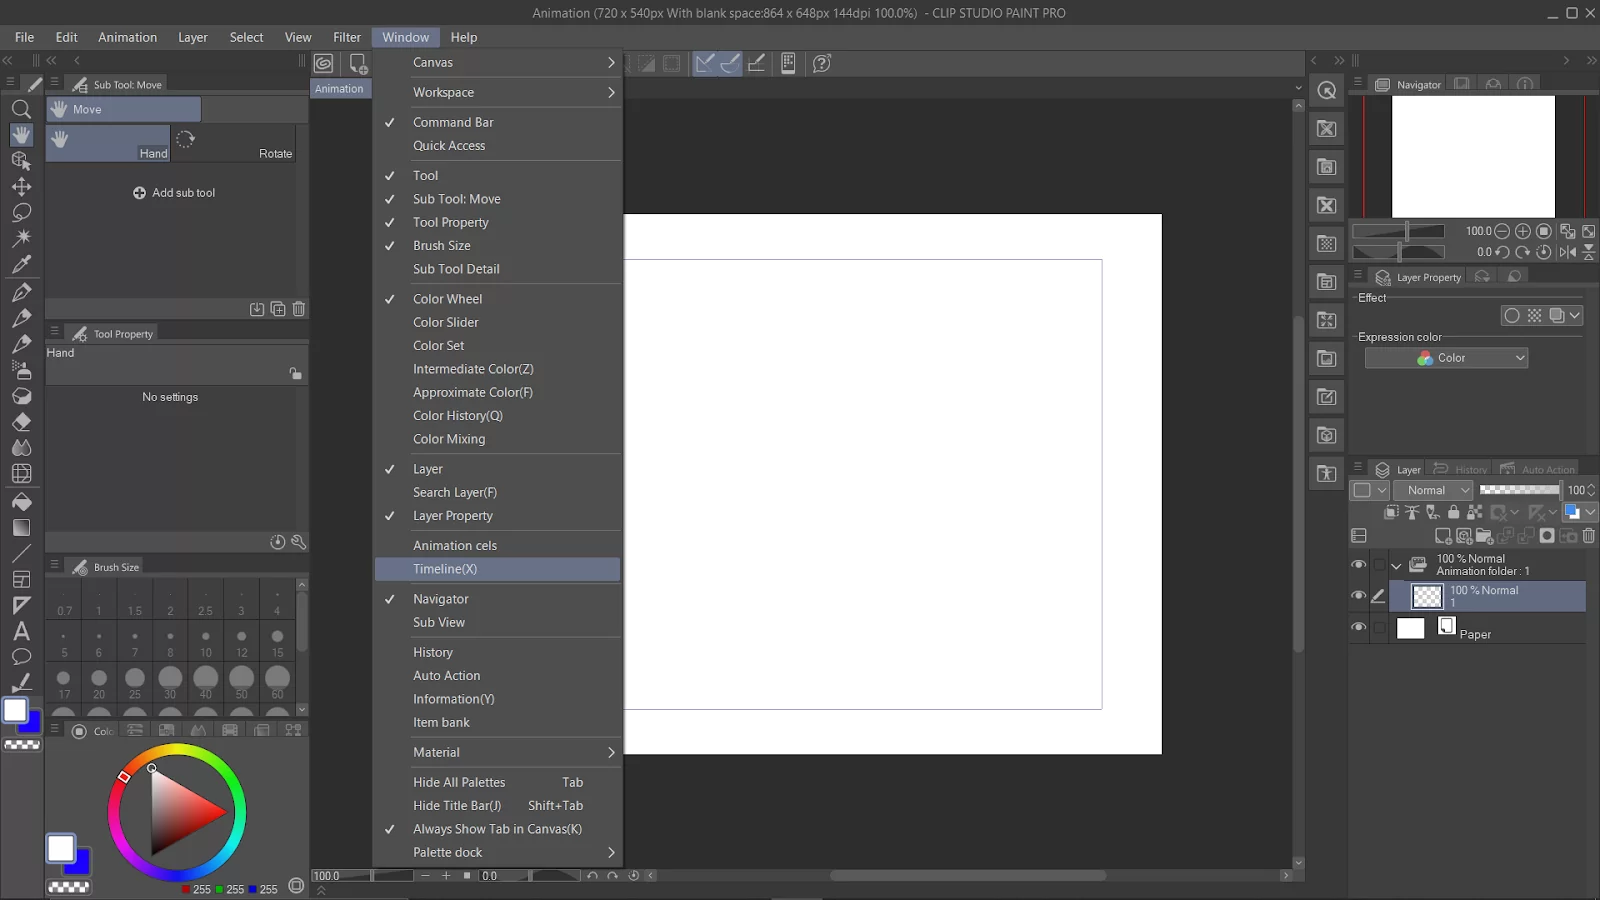
Set up your animation: Before you begin drawing your animation frames, you will need to set up the number of frames per second (FPS) and the total number of frames in your animation. You can adjust these settings by going to “Window” in the menu bar and selecting “Timeline.”
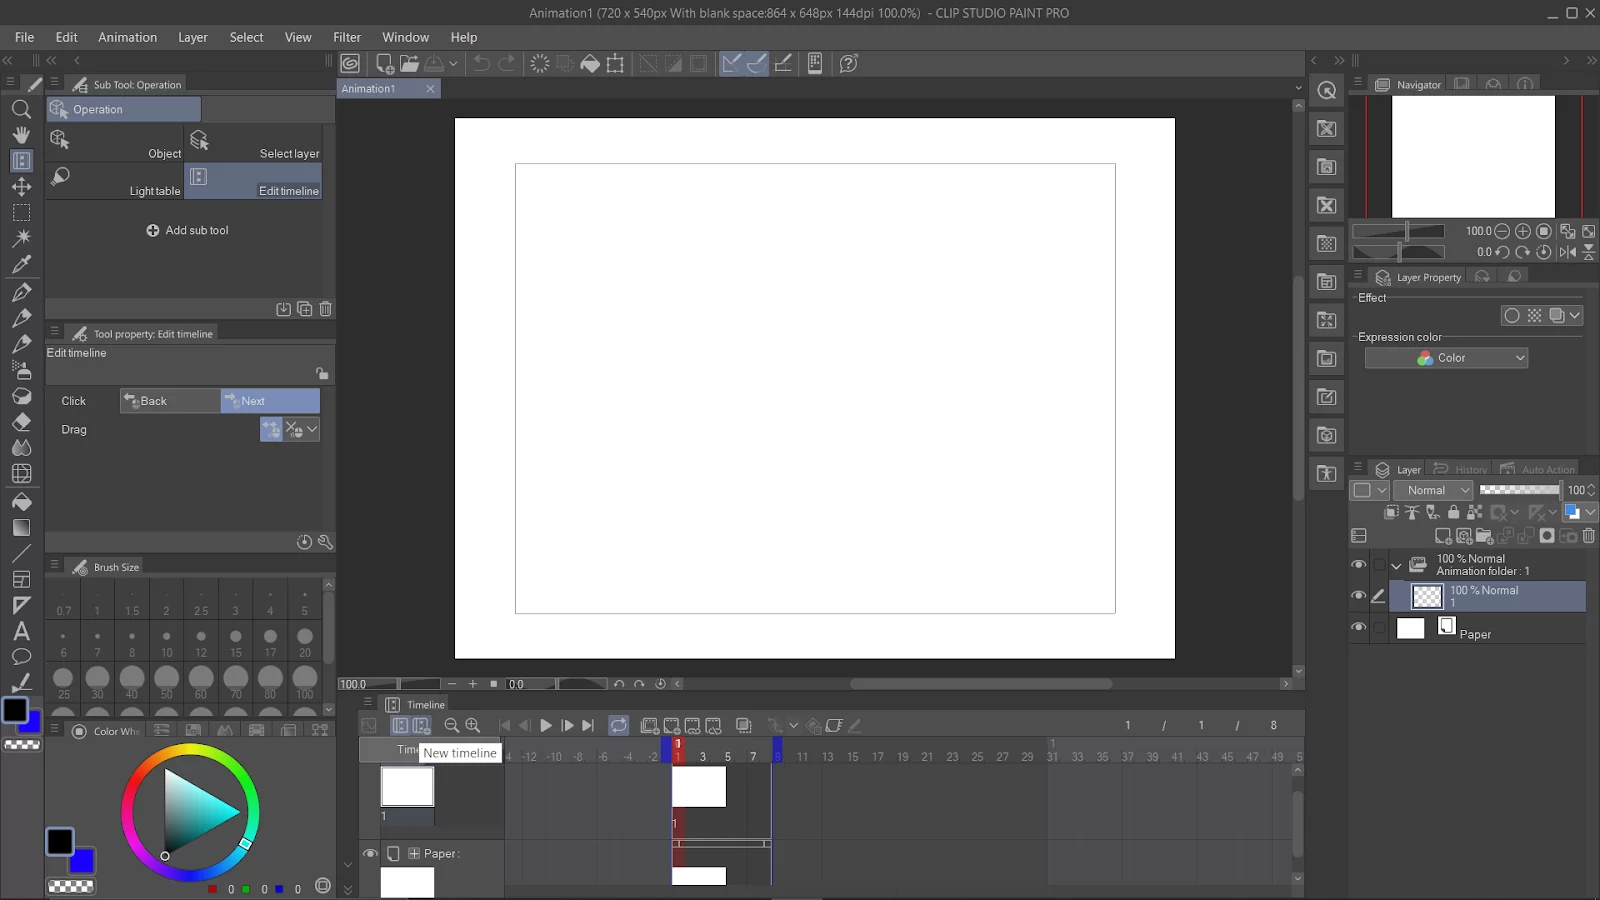
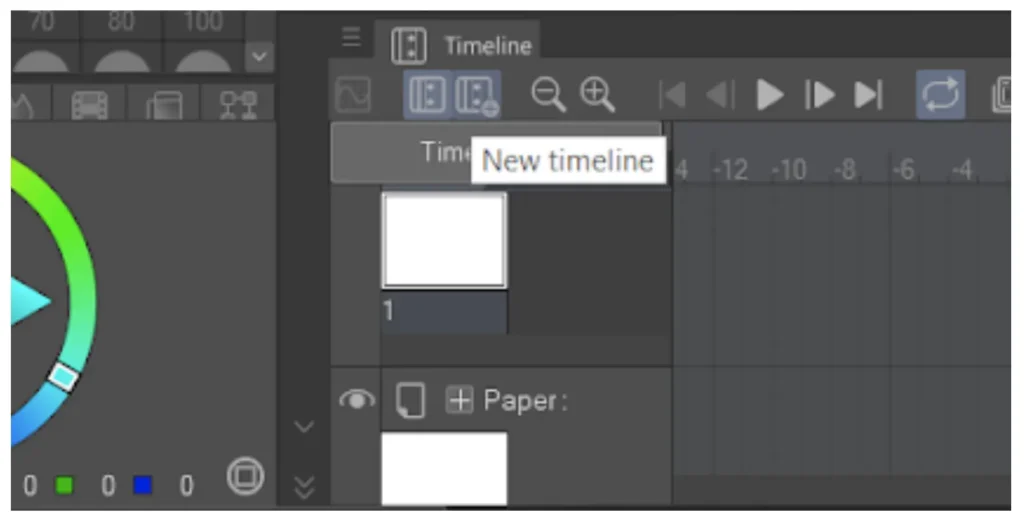
Select ‘New timeline’ and adjust your frame rate.
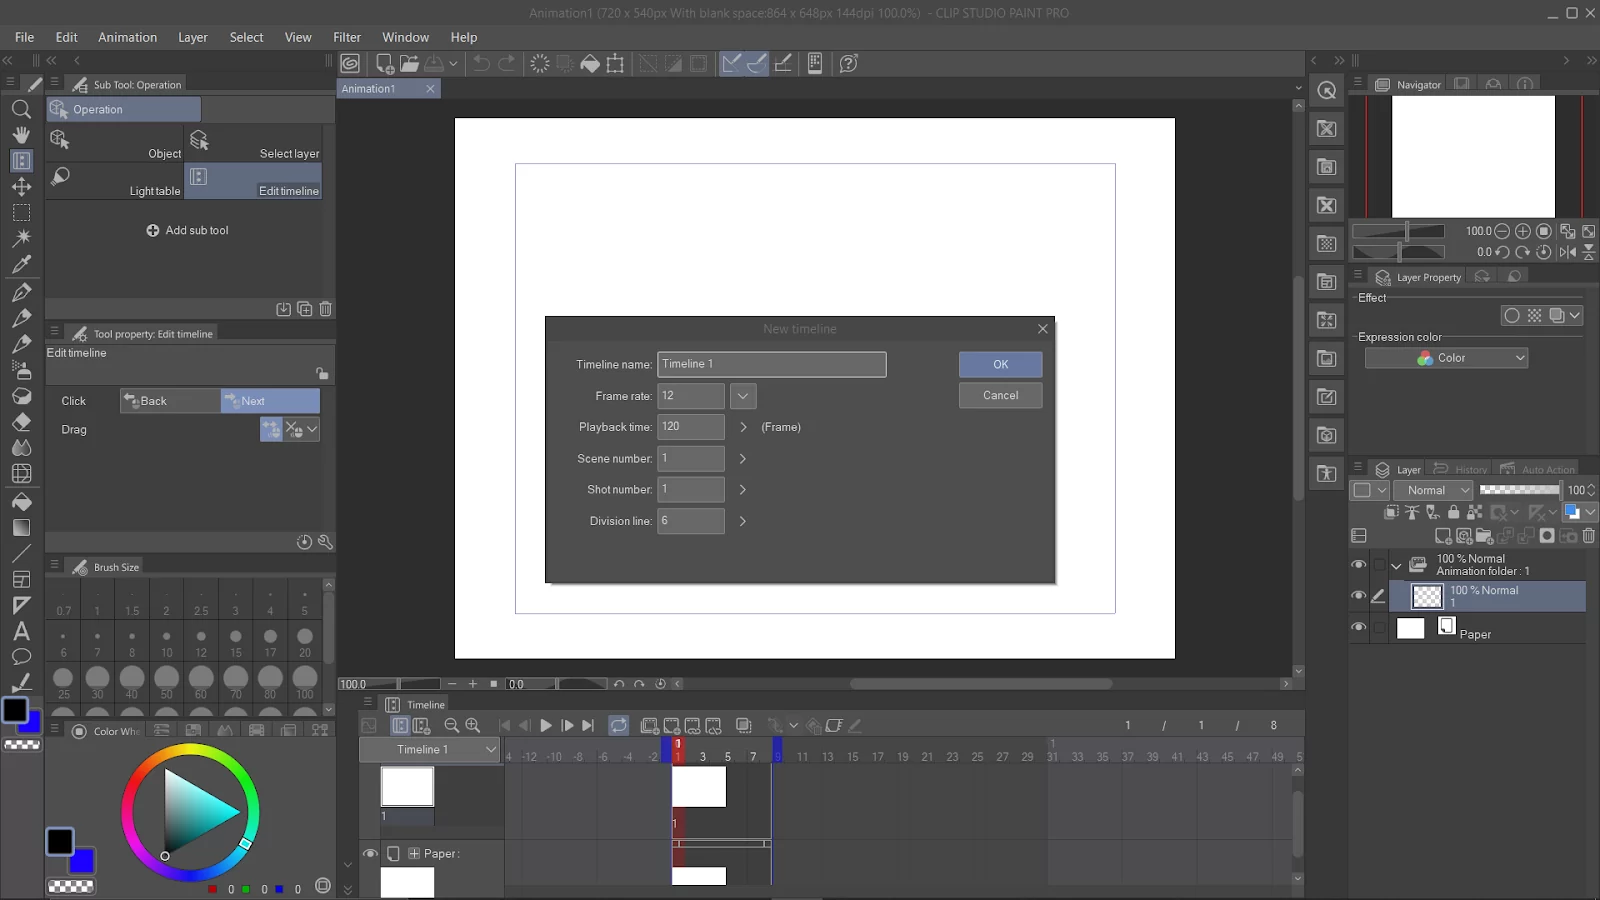
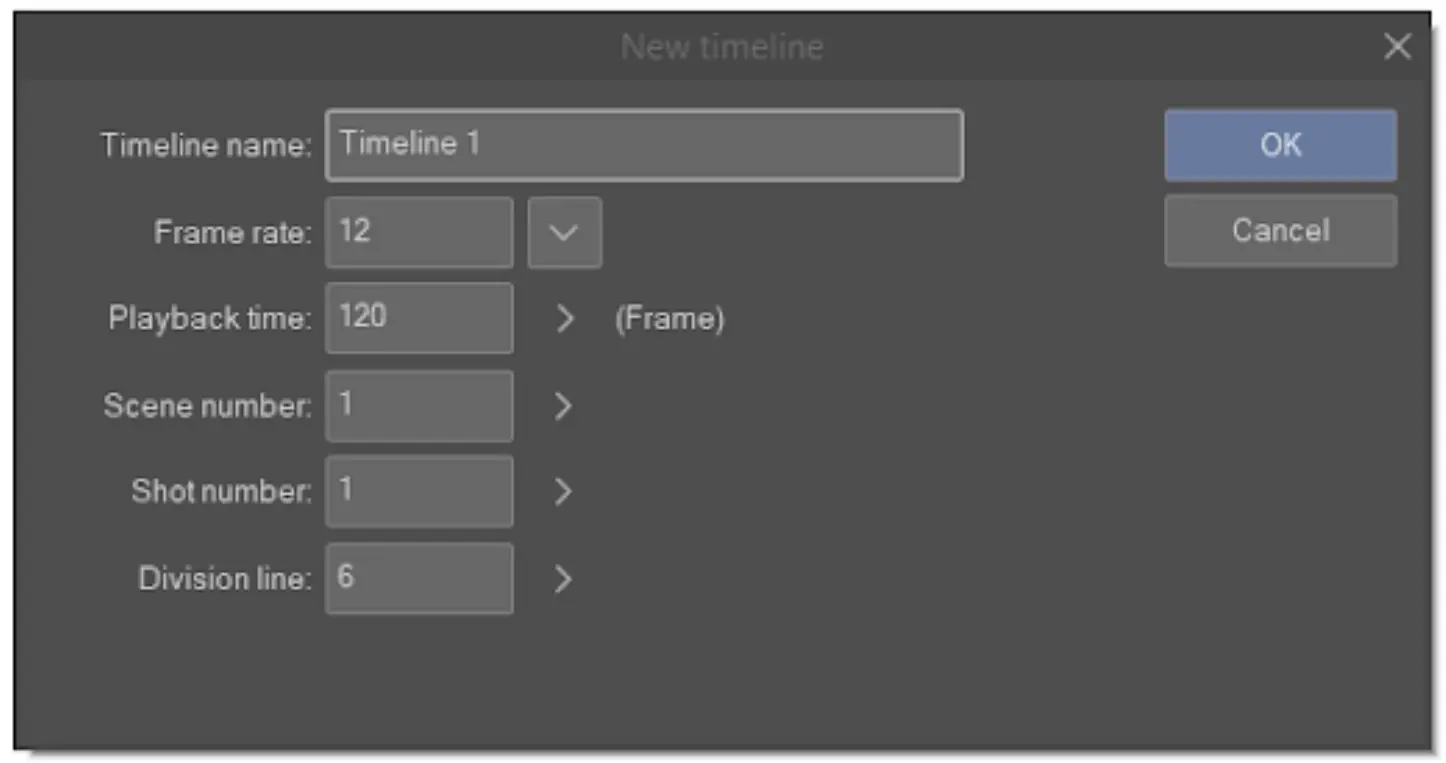
Draw your frames: Once your animation project is set up, you can begin drawing your frames.
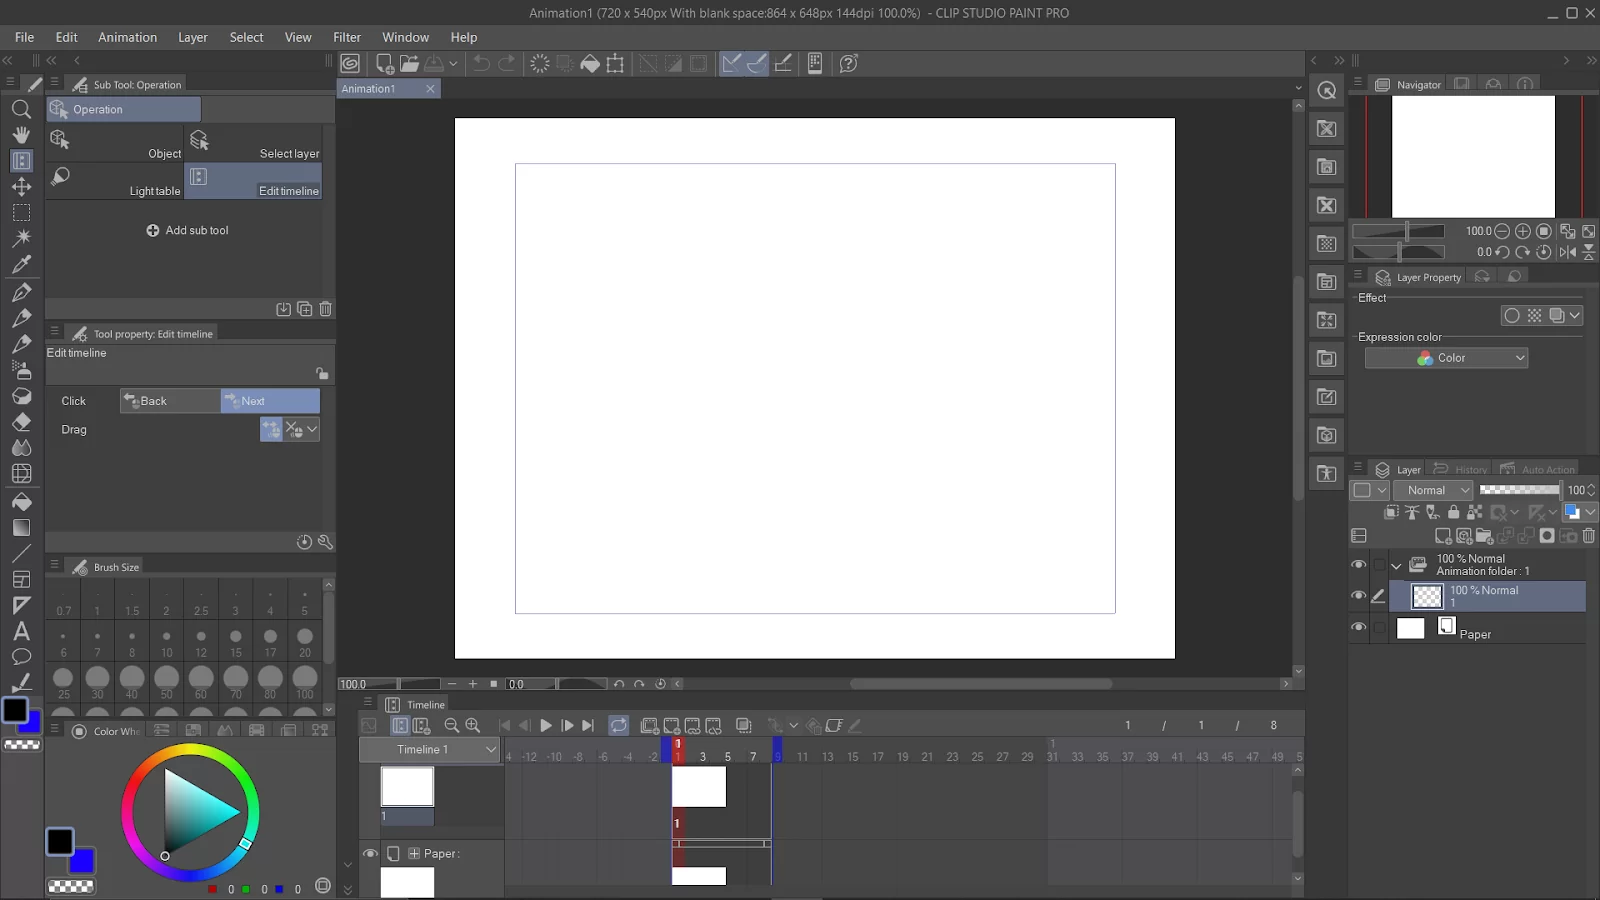
Select the first cell and begin drawing.
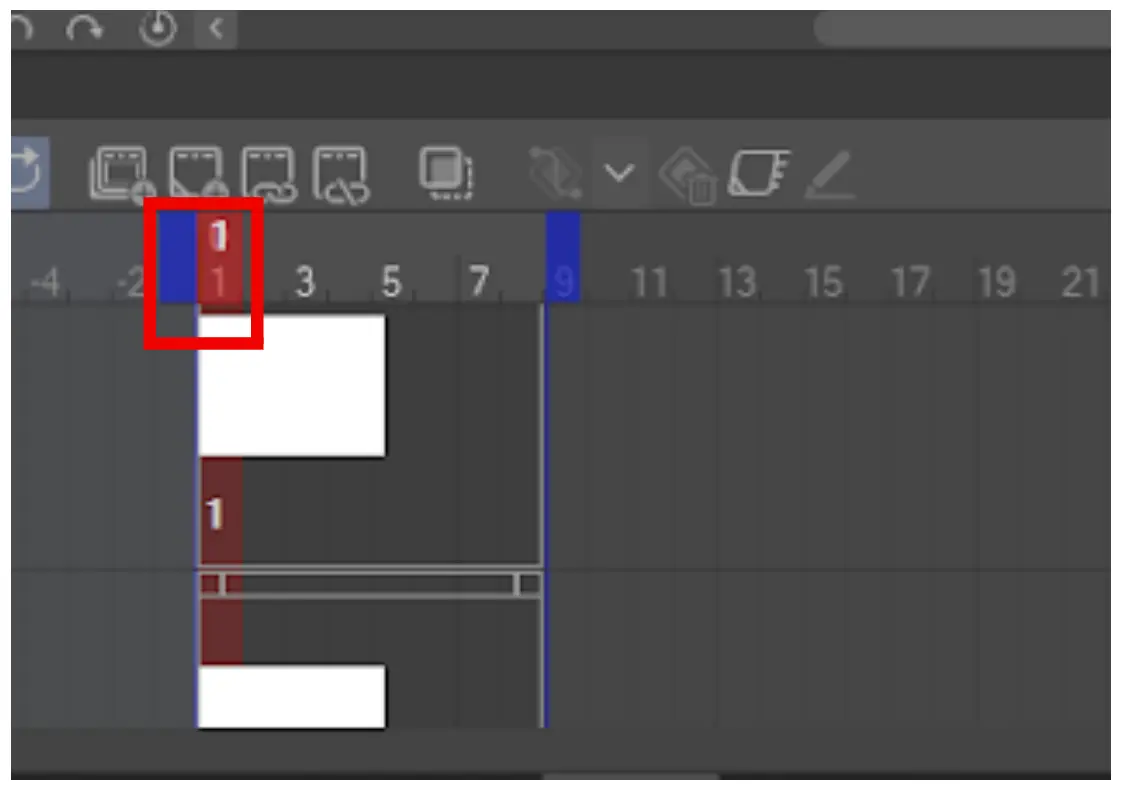
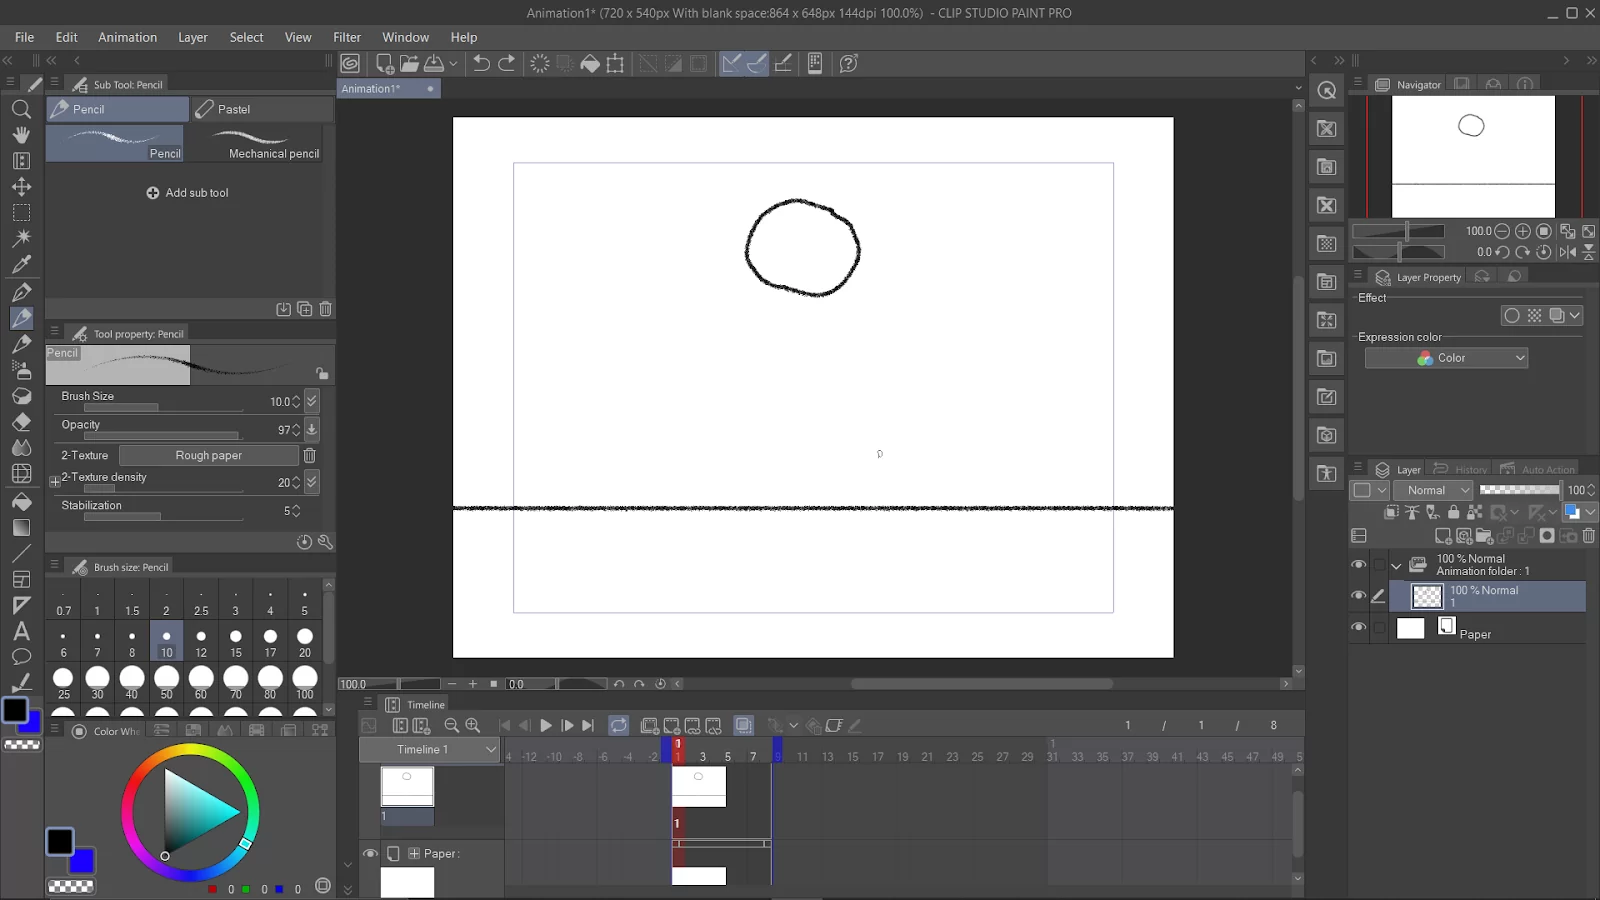
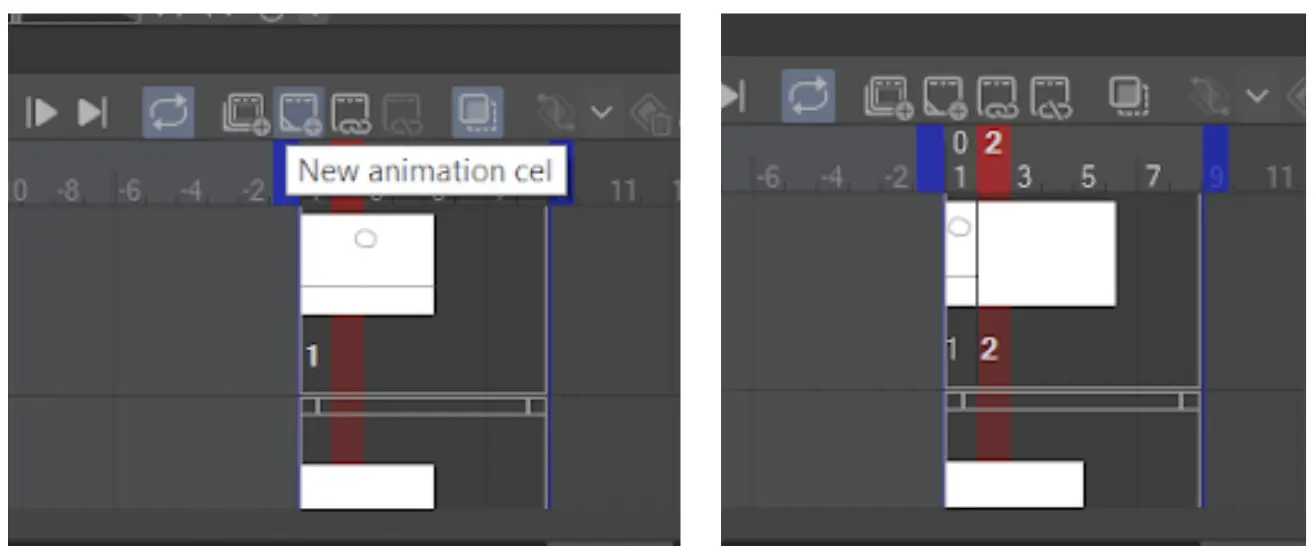
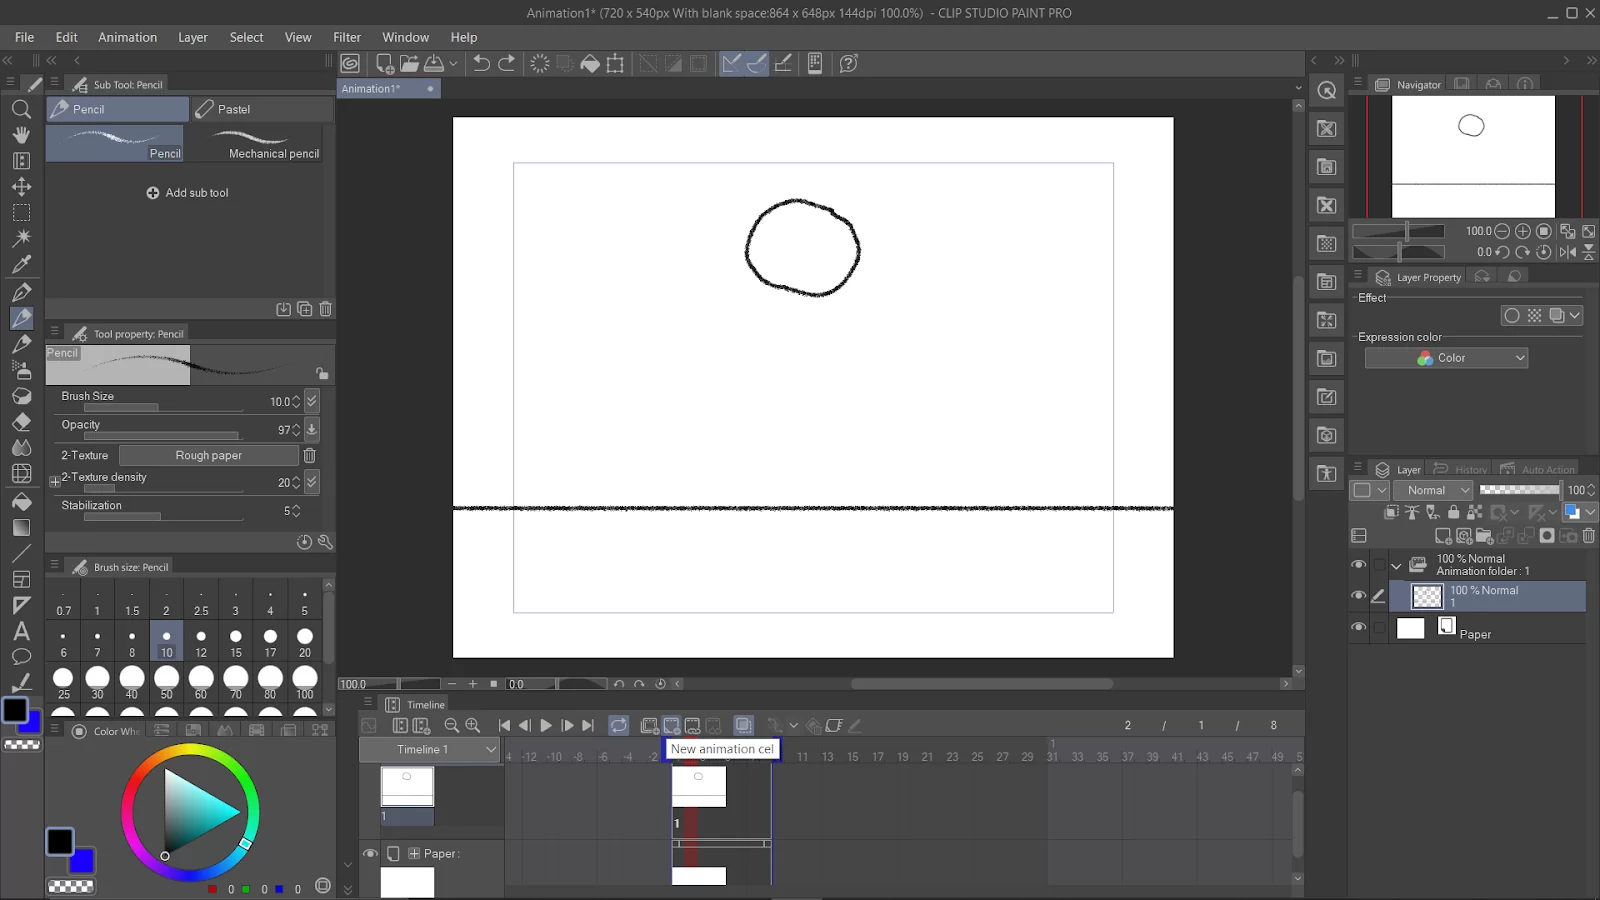
You can create new frame cells by clicking on the “New animation cell” button in the Timeline window.
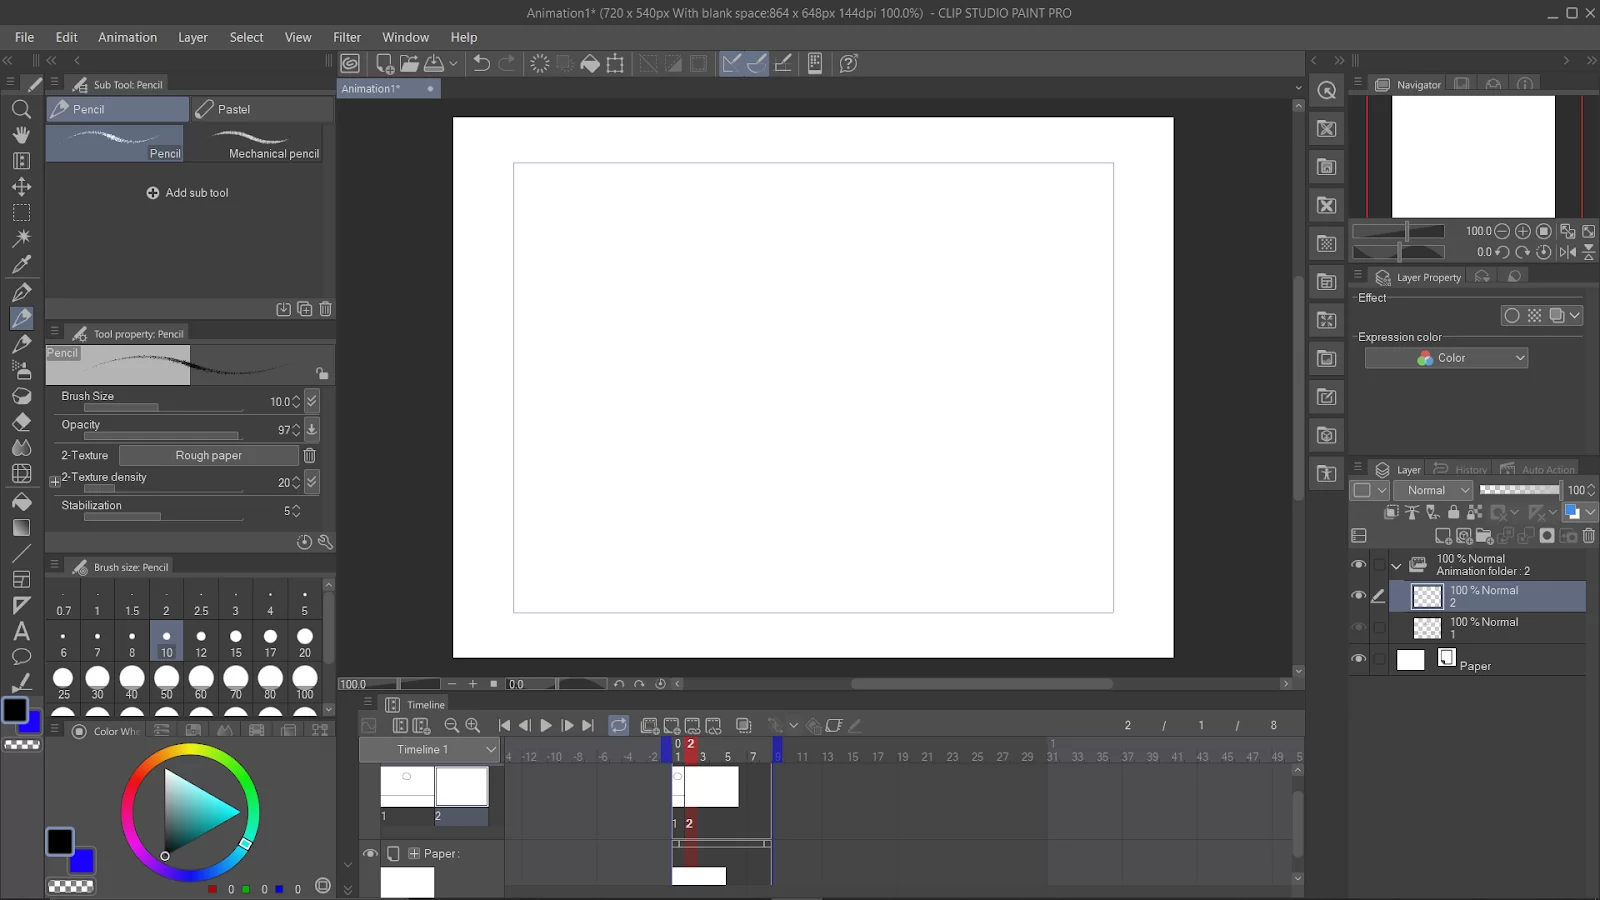
Duplicate the first frame layer by right-clicking the layer in the timeline window.

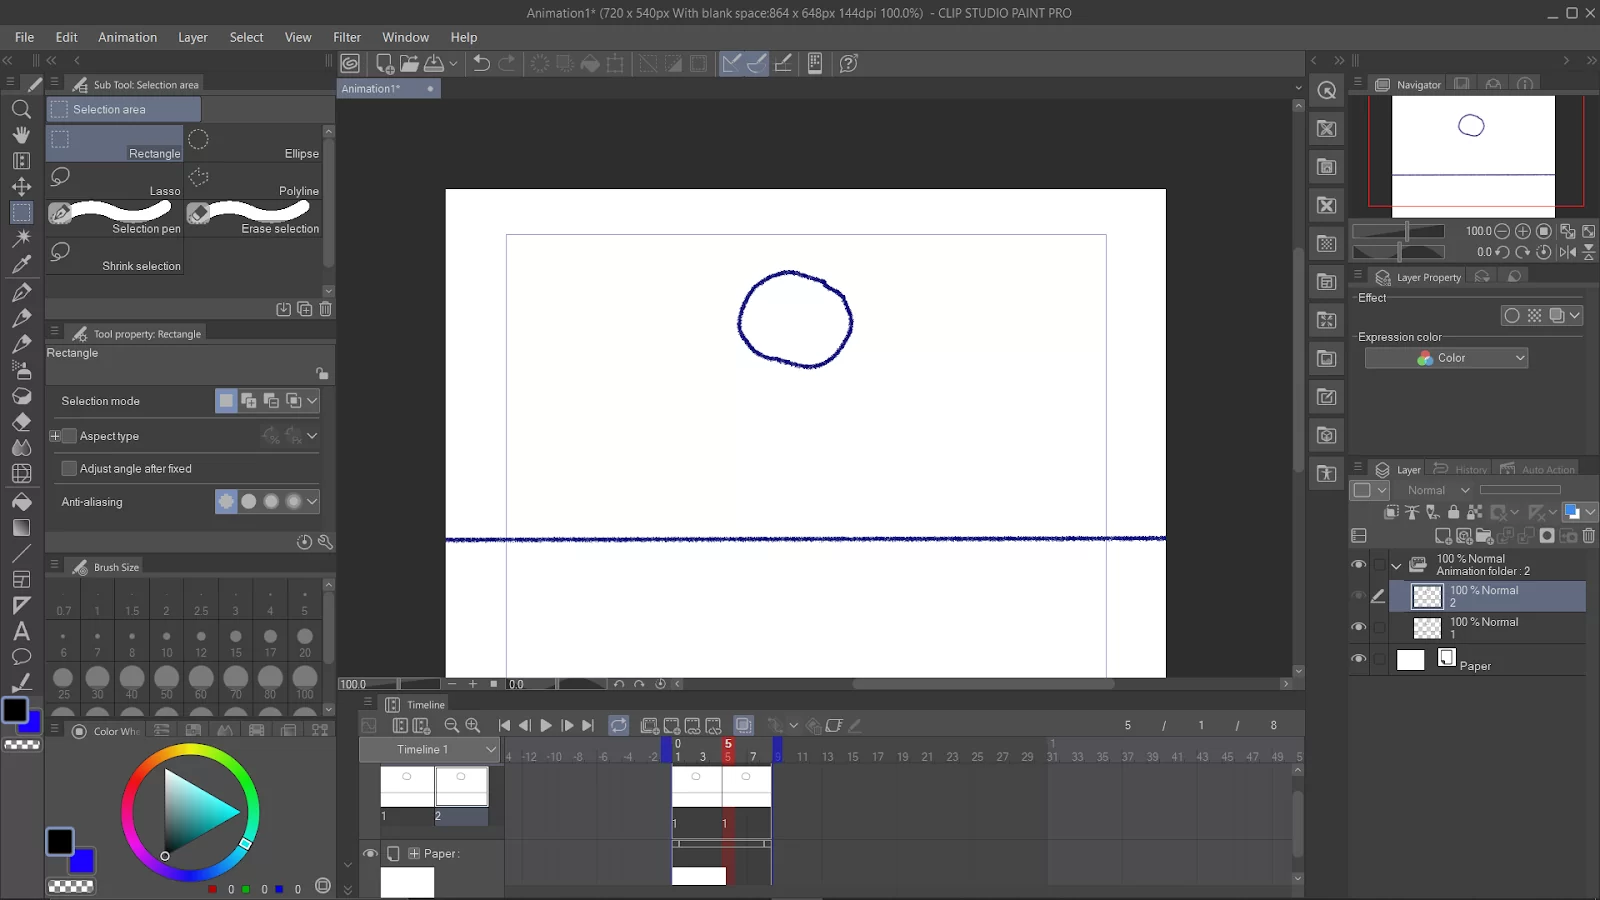
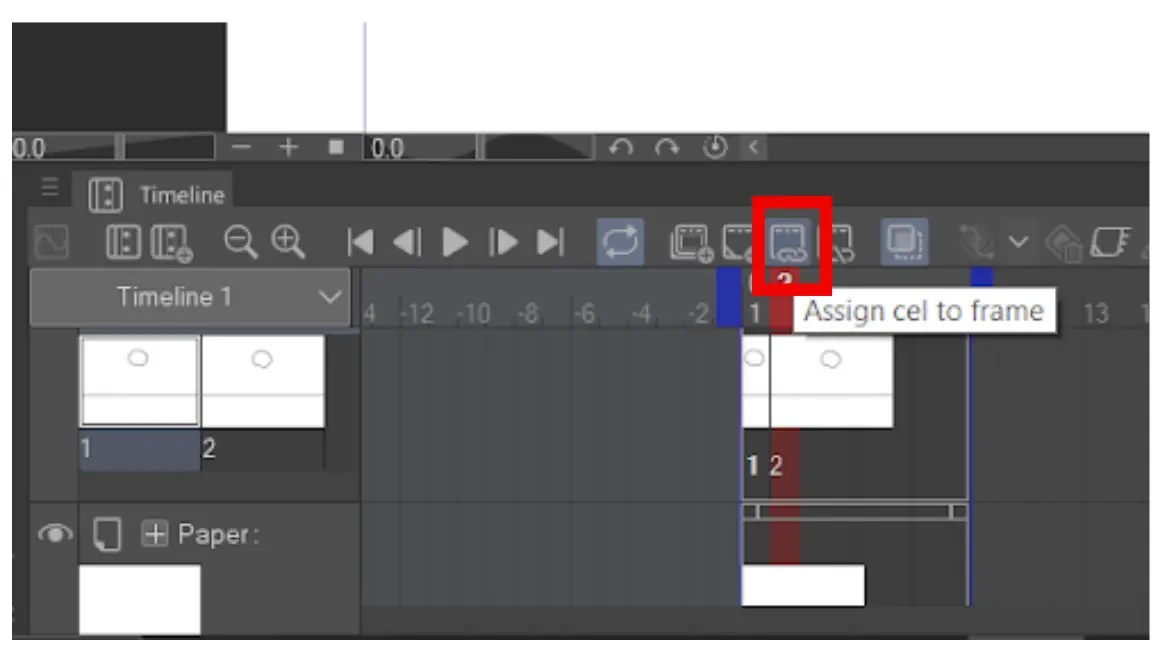
Select the second frame layer and link it with the newly created cell.
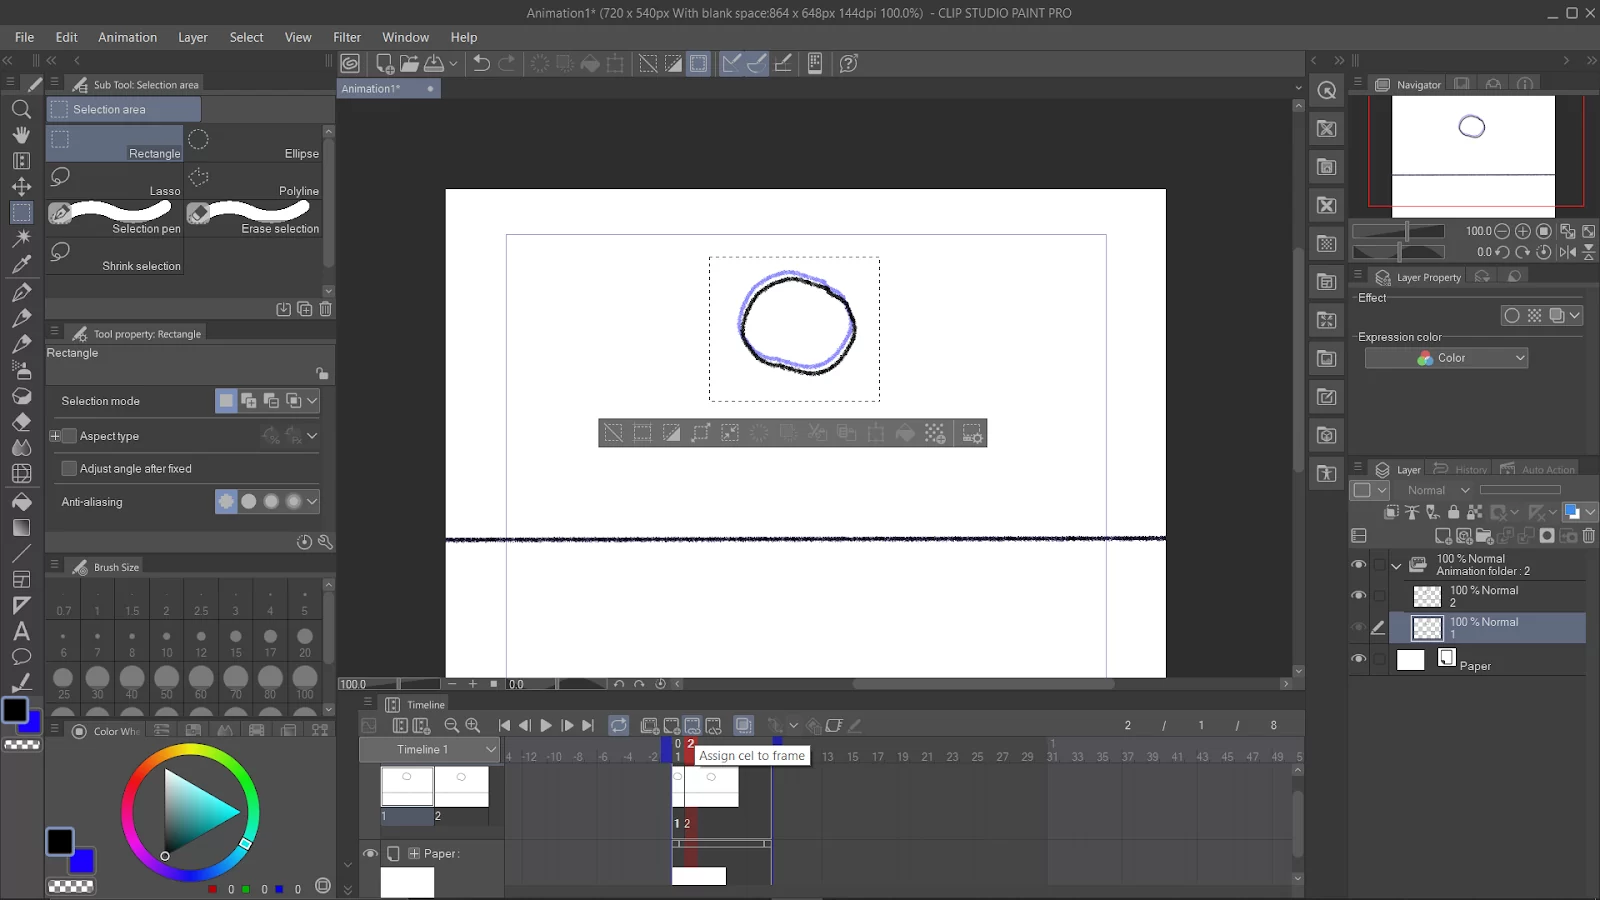
To do this, select ‘Assign cell to frame.’
Enable “onion skin” so you can see the silhouette of your drawing from the previous cell. This is useful as a reference for a smooth transition of drawings in the subsequent frames.
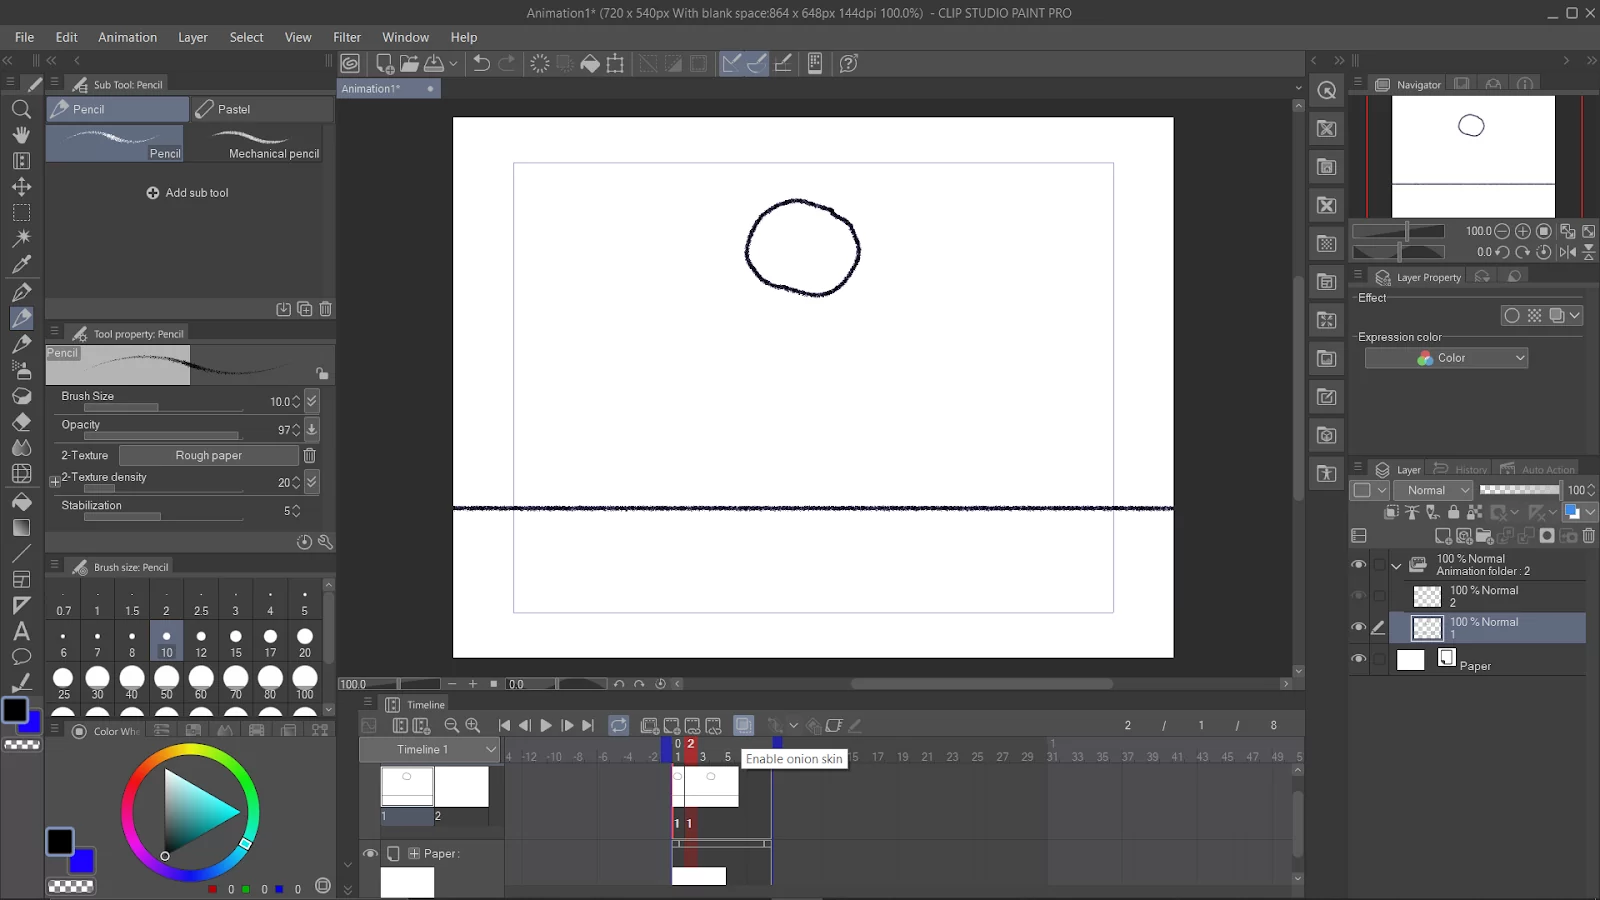
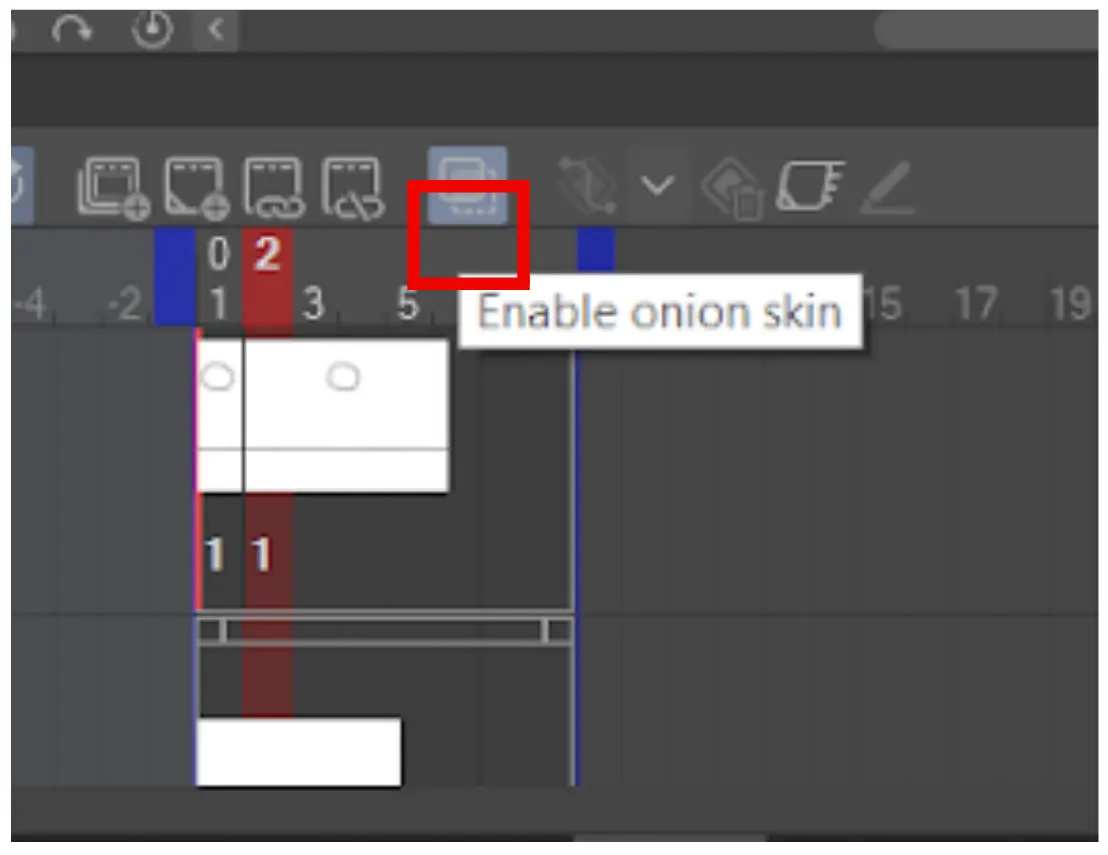
Adjust the drawing slightly to create the illusion of movement.
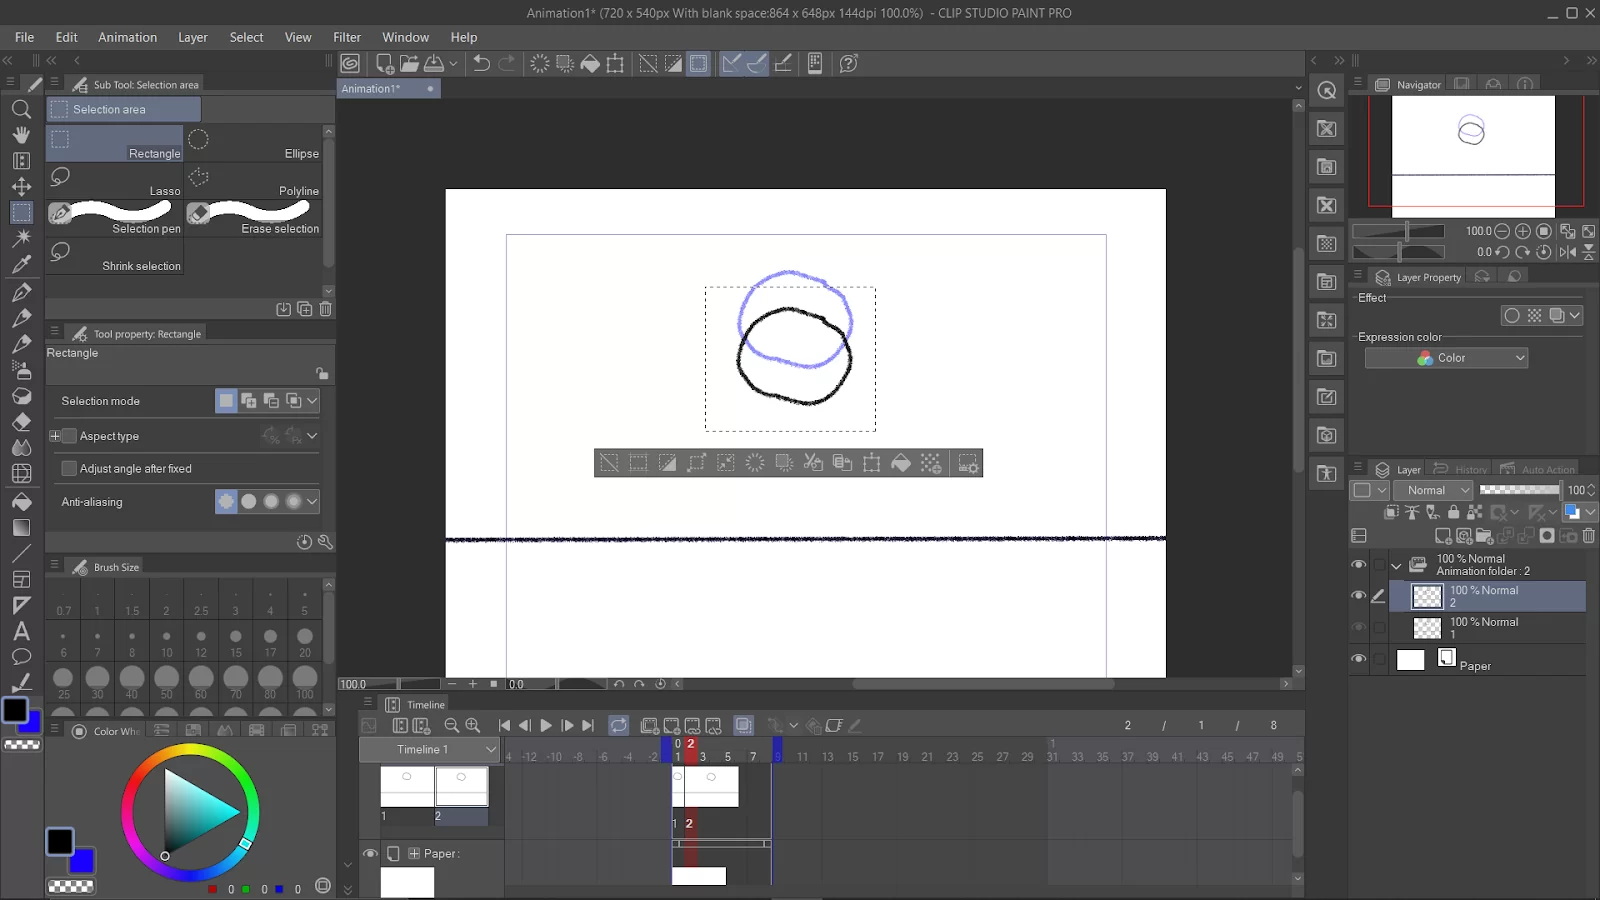
Repeat steps 6,7, and 8 to keep adding scenes to your animation. You can also drag the blue icons on both sides of the scene box to reposition each cells and adjust the frame rate.
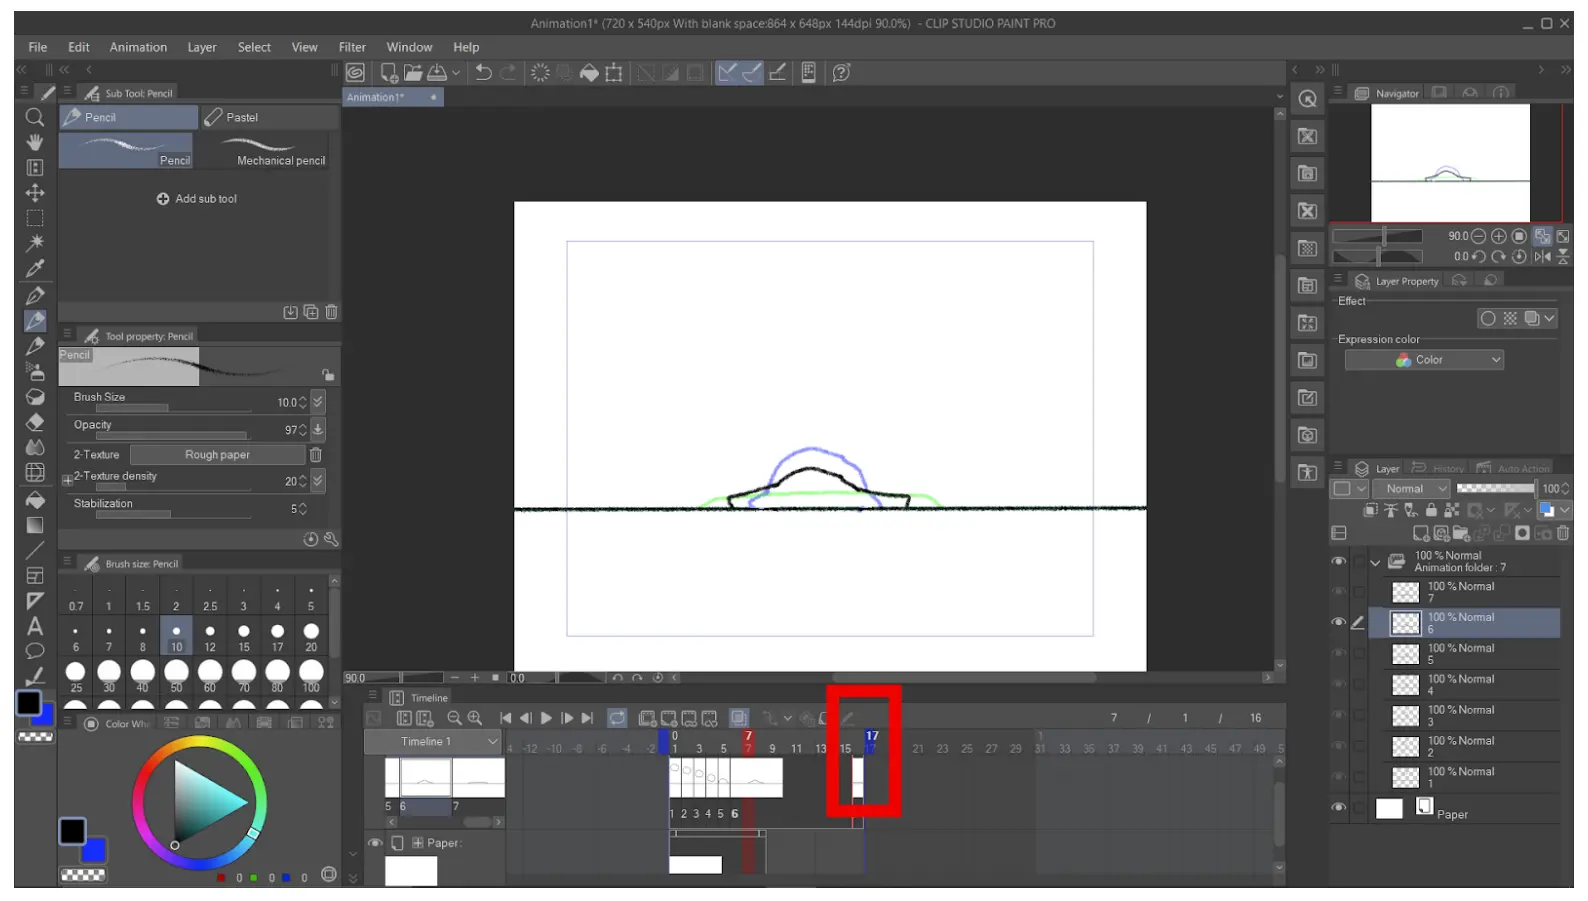
Preview and export your animation: Once you have finished creating your animation frames, you can preview your animation by clicking on the “Play” button in the Timeline window.

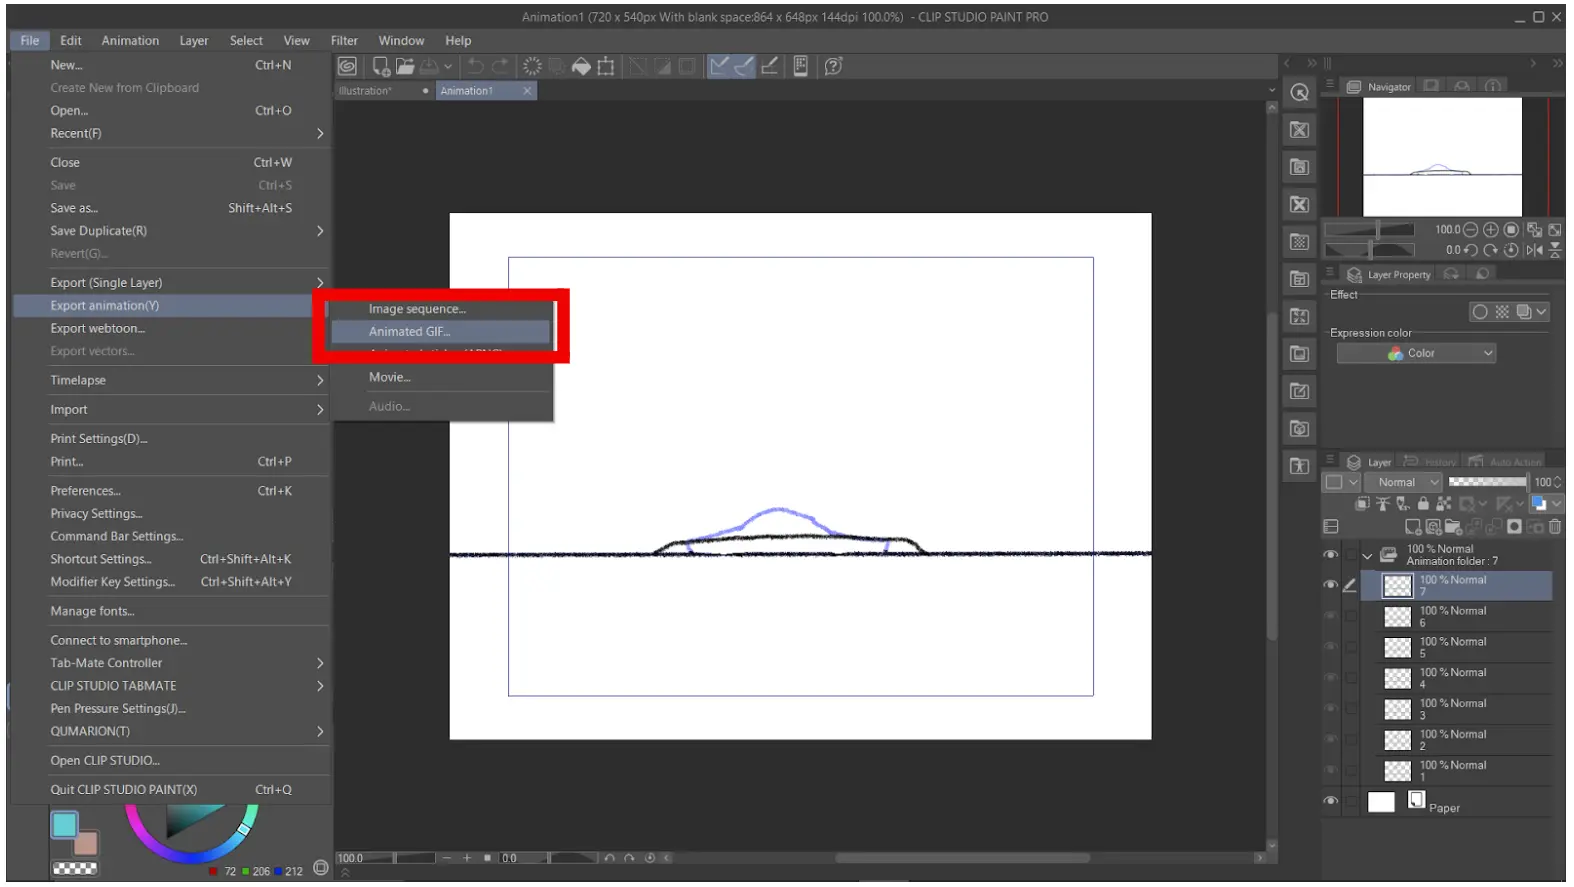
Go to “File” in the menu bar, select “Export,” and then “Animated GIF.”
Tips For Creating The Best Gif
Now you know how to create GIFs using your Clip Studio Paint, and I know that you are just itching to go out there and start making your GIFs. Hold your horse’s champ. There are a few tips you must know before you start creating GIFs.
- Your Gif Should Be Eye-catching
There is no point in creating a GIF if it’s not eye-catching. The point of creating an animated GIF is to engage and attract viewers. This is why your GIF has to be eye-catching and visually appealing to your audience. You can make your GIFs eye-catching by using bright and bold colors in your design.
- The File Size Should Be Low
No one wants to download a GIF that has big size. I mean, the point of a GIF is to create a moving image that can be shared on social media quickly and easily. I’m not about to start downloading GIFs that are worth 15 MB. So, keep the file size of your GIF as low as possible.
When you keep your GIF file size low, you ensure that your emails and web pages will not load slowly. Keeping GIF file sizes low is crucial to ensure your emails and web pages don’t load too slowly. It is best to keep your GIF size below 5 MB for emails.
You can compress your GIF file using free online tools. All you have to do is upload your GIF and choose your compression level. It is important to note that the more you compress, the lower the image quality will be.
- Show Your Personality
When you are creating a GIF, you need to allow your personality to shine through it. GIFs are meant to be fun, so don’t hold back when you are creating one. You can use animated GIFs to show a humorous and fun side of your brand.
GIFs outshine static images because GIFs are more interesting. They are also likely to make your brand stand out amongst the competitors. So, don’t be afraid to let your brand personality shine when creating a GIF.
You can also check out our well-written guide on using 3D models in Clip Studio Paint.