Symmetry can add a beautiful balance to your digital artwork, but knowing how to turn it on in Clip Studio Paint can be a challenge. I’m excited to share with you the tips and tricks I’ve learned along the way.
By turning on symmetry in Clip Studio Paint, you can create perfectly balanced and mirrored images. This feature is particularly useful for creating mandalas, kaleidoscopic patterns, and other intricate designs that require symmetrical elements. You can use symmetry in a wide range of art styles, from traditional to modern, and everything in between.
With my step-by-step instructions, you’ll be able to add symmetry to your artwork with ease.
How to Turn On Symmetry in CSP
In CSP, go to the toolbar, and select “Ruler.”
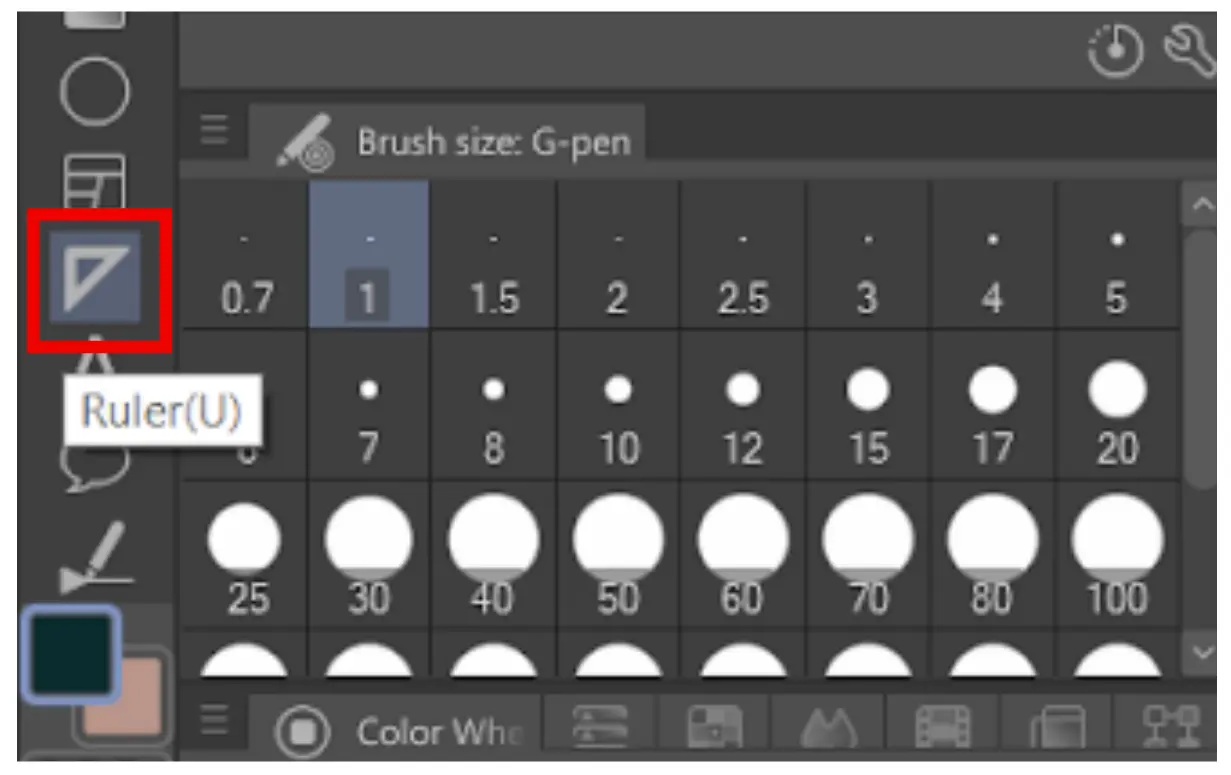
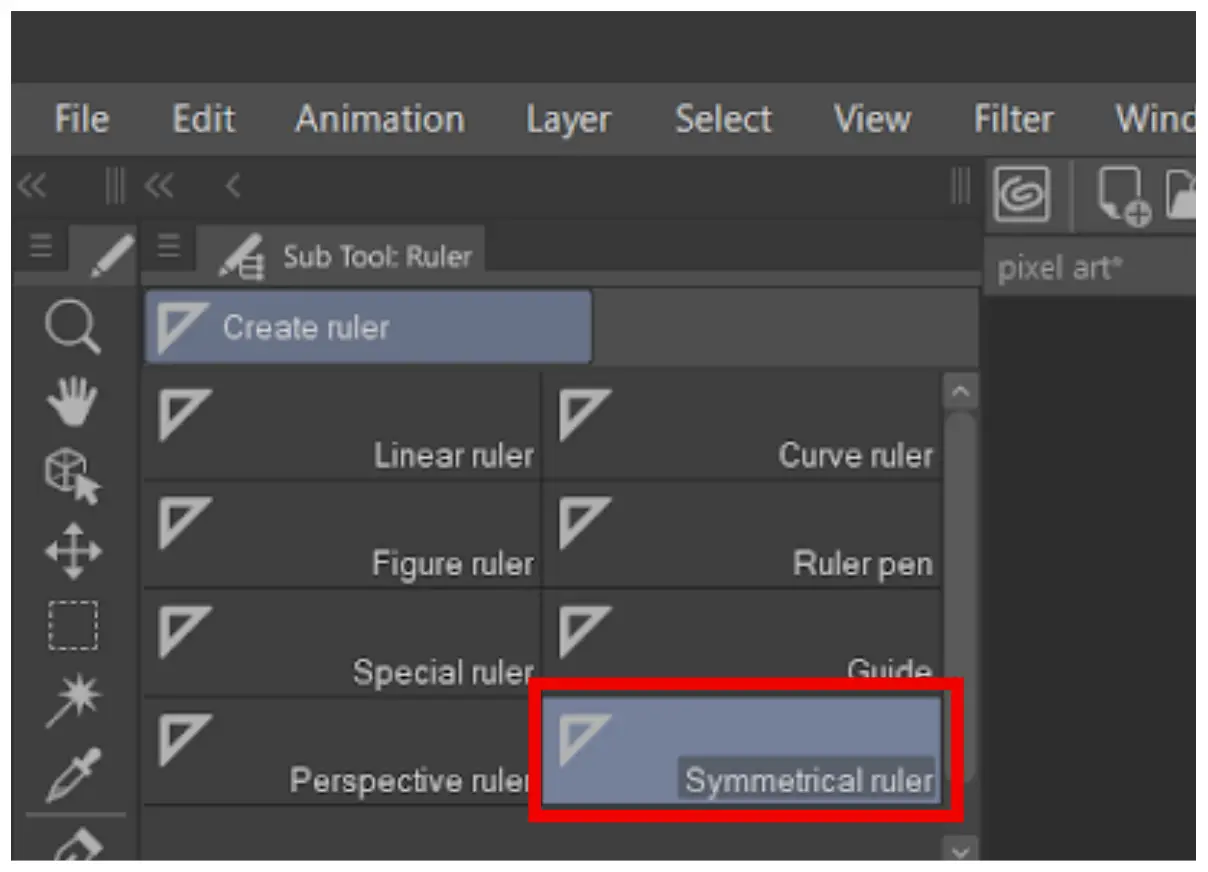
In the sub-tool tab, select “symmetrical ruler.”
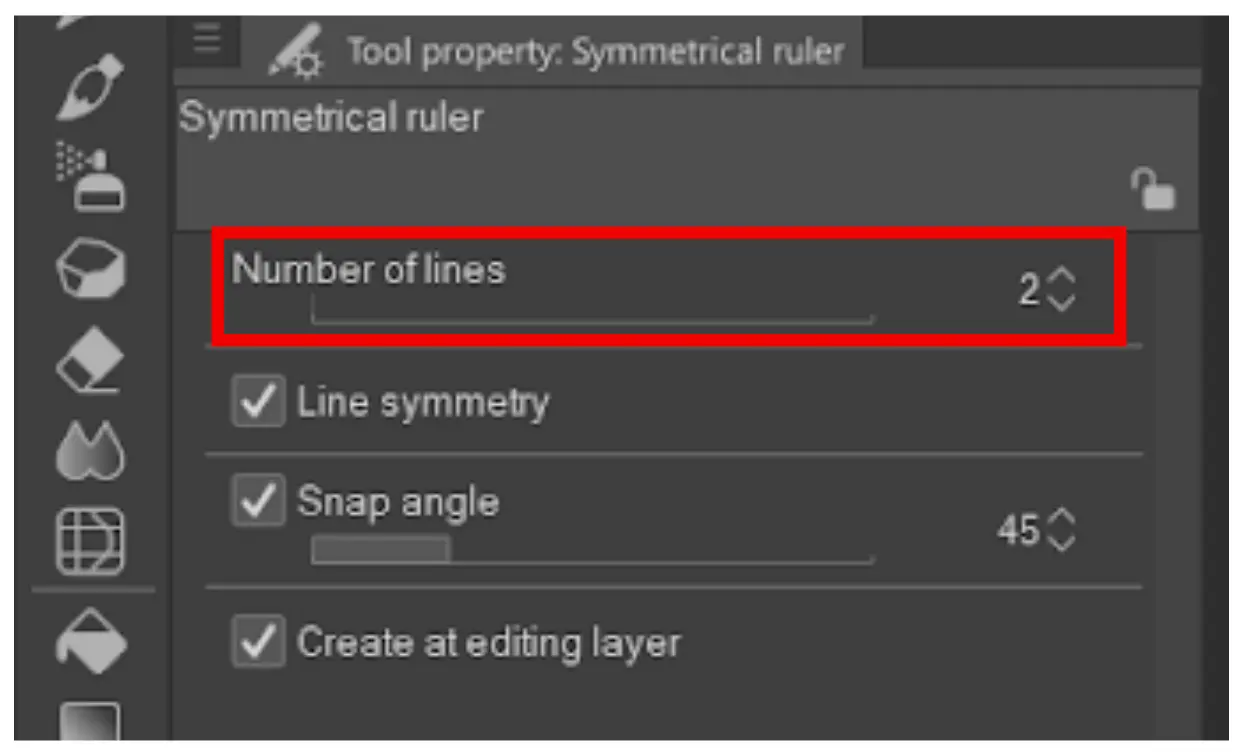
In the tool property, select the number of lines. The lowest is 2, signifying 2 lines forming from the center of the axis.
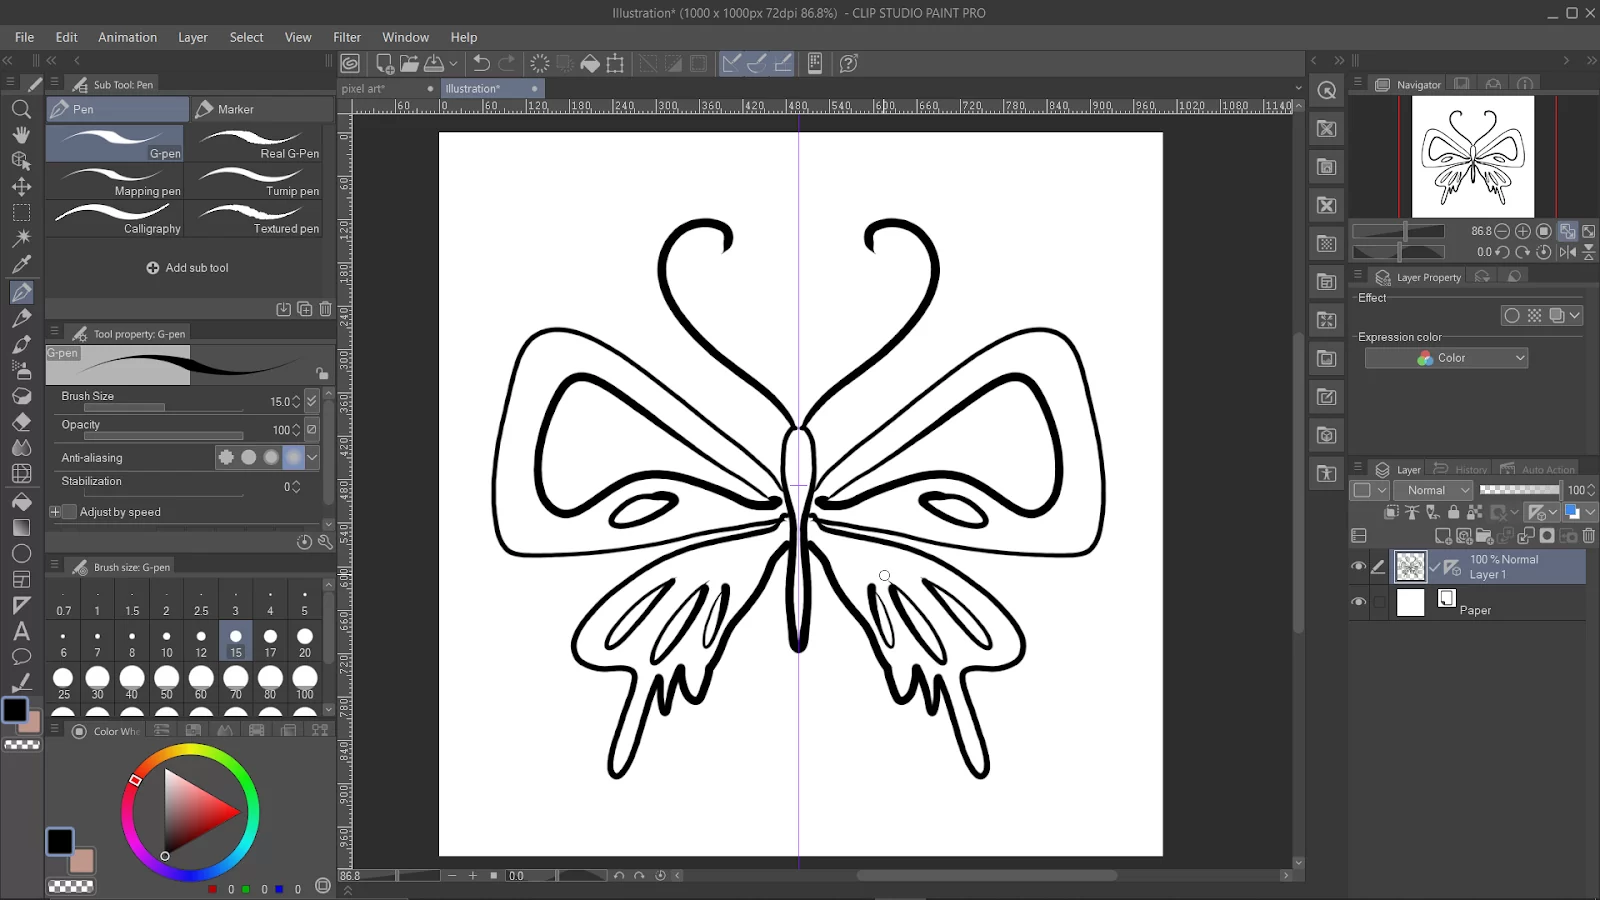
Click and draw the symmetry line on the canvas. You can also press and hold the shift key while drawing the line to make it perfectly horizontal, vertical, or diagonal.

If you are not satisfied with the line position, press and hold CTRL, click and hold the line, and drag it to a new position.

A neat way to place the line exactly in the middle of the canvas, repeat step 5 but while dragging the line, let go of CTRL, and then press and hold the Shift key.
While holding the shift key, slowly drag the line to the center of the canvas until it snaps into place.
You can now select your drawing tool and draw on the canvas.
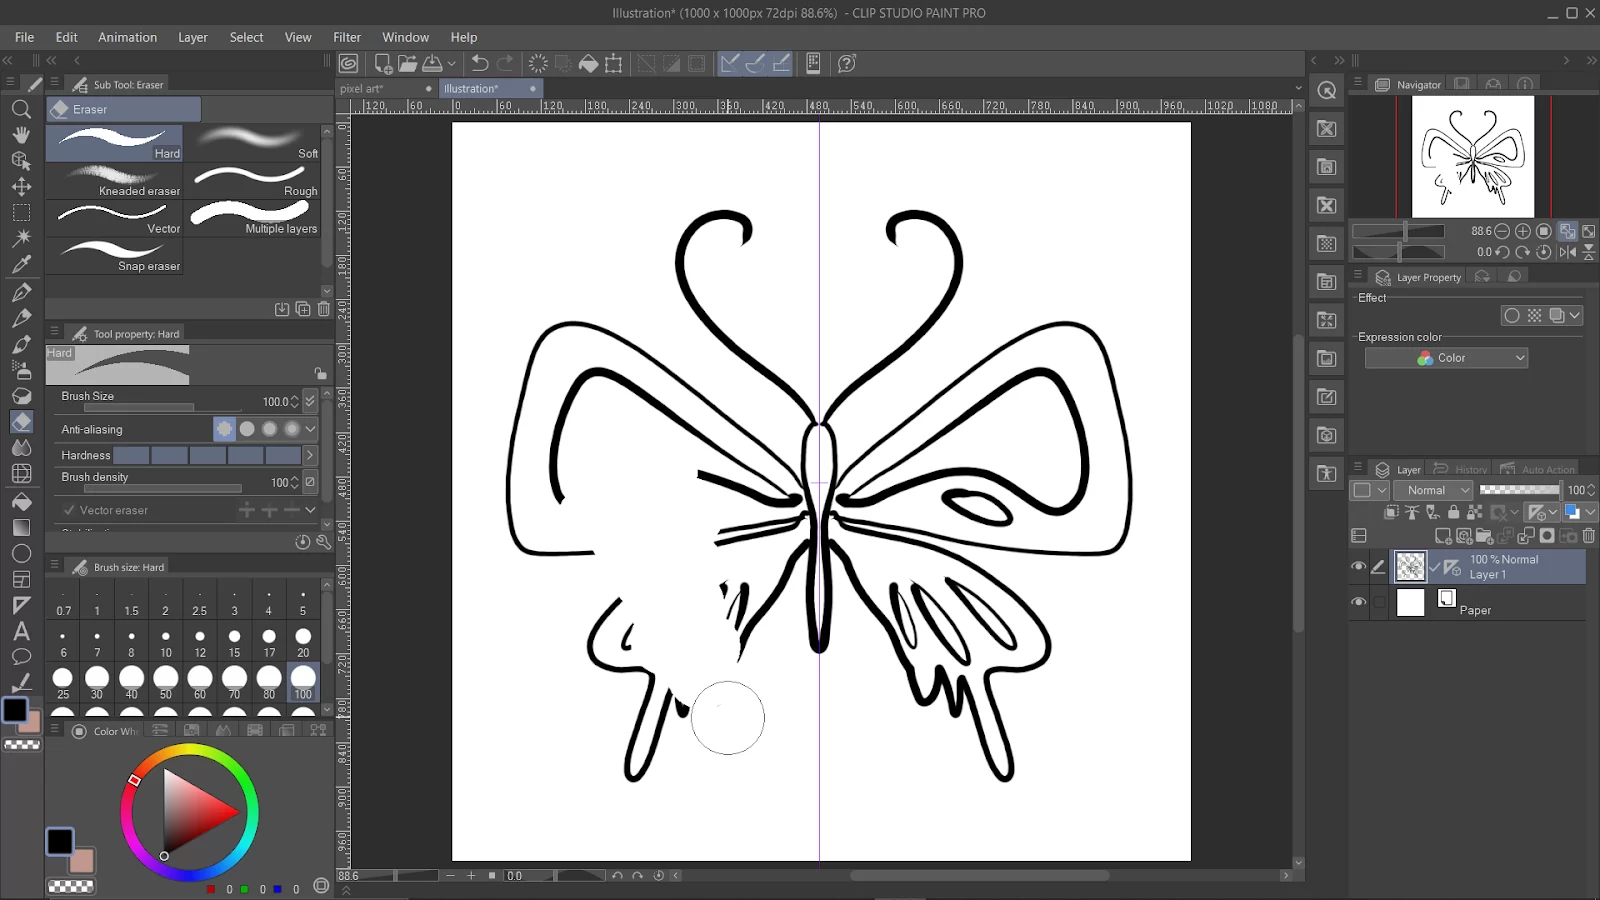
TIP: Check if your eraser works with the symmetrical line. if it doesn’t like shown below, select the wrench icon, go to “correction”, check “enable snapping.”
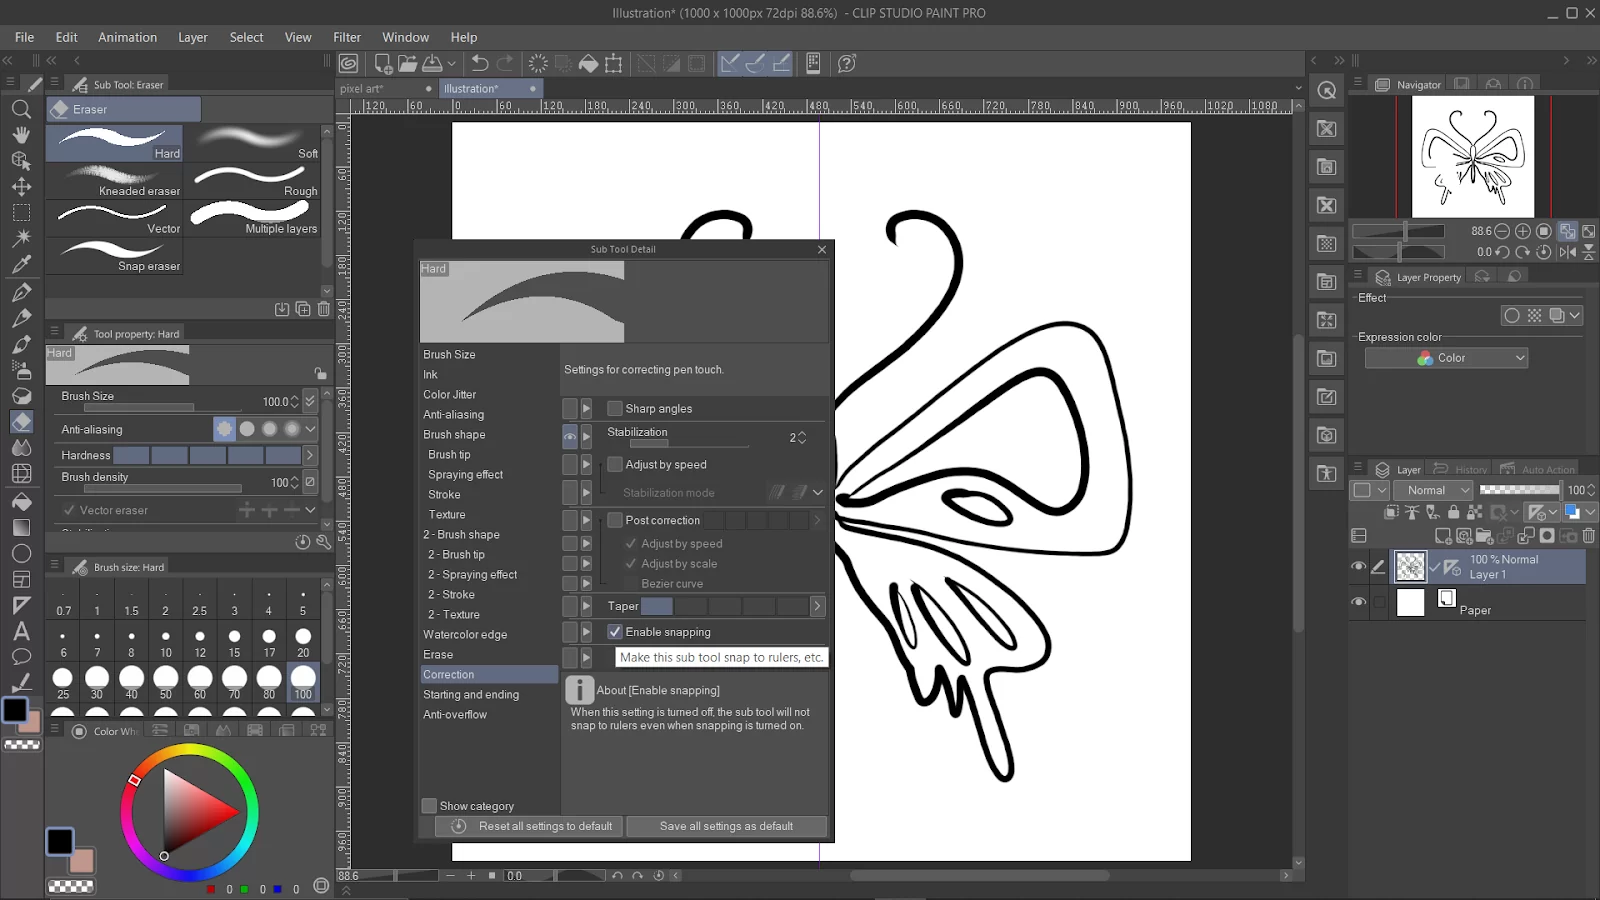
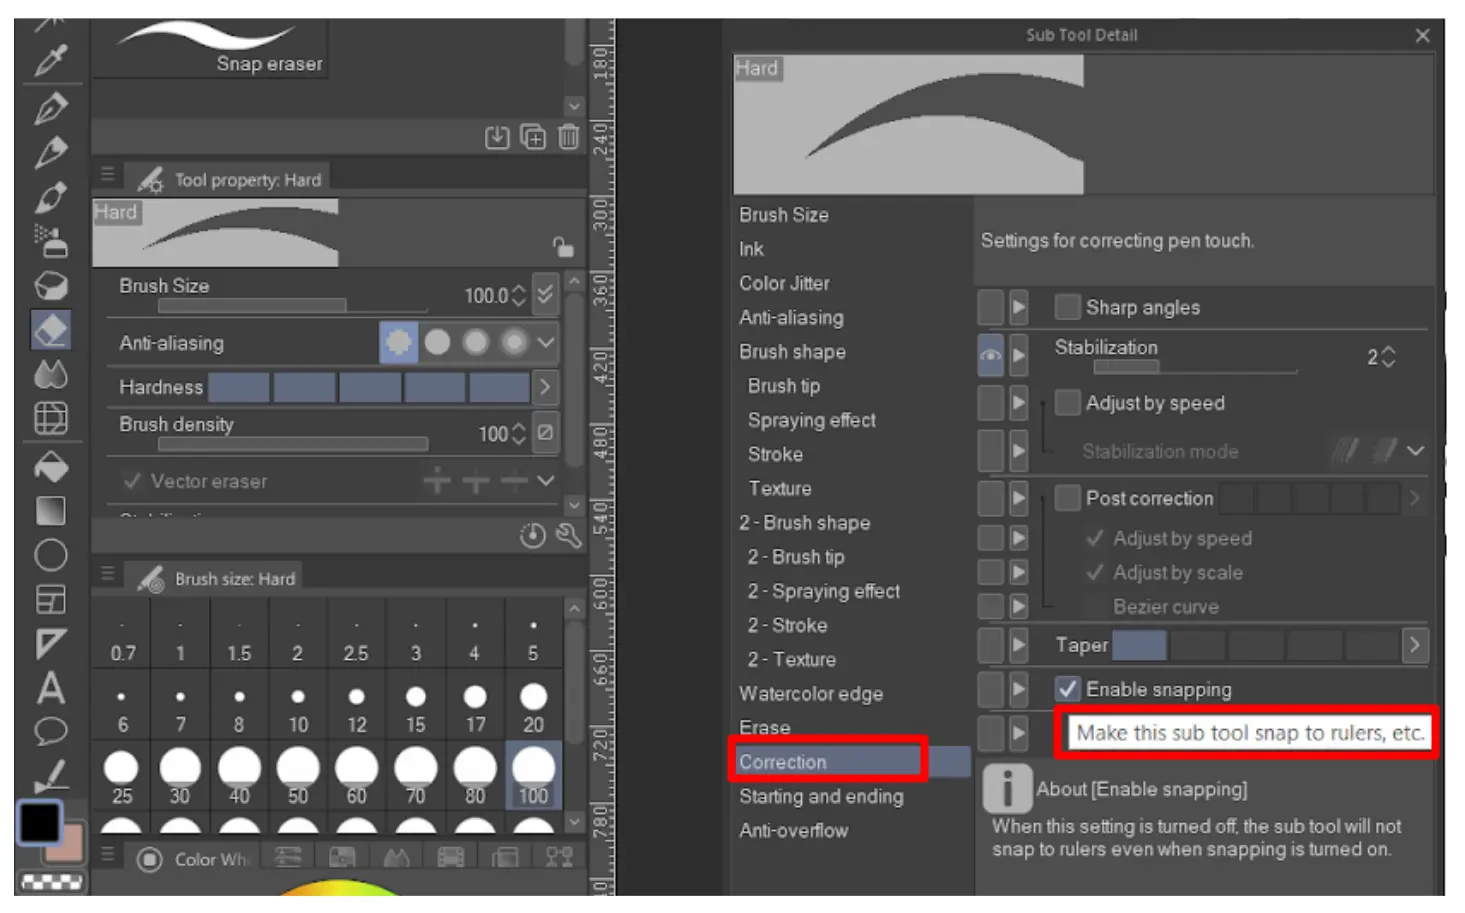
Close the sub-tool detail, and try erasing again.
We also recommend you check our in-depth guide on making pixel art in Clip Studio Paint.

How To Create a Symmetrical Ruler
Follow the simple steps below to create a Symmetrical Ruler in Clip Studio Paint.
Step 1
First, go to the Layer palette. In the layer palette choose the layer where you want to create your ruler.
Step 2
Next, select the ruler tool from the Tool palette.
Step 3
Go ahead to select the Symmetrical Ruler sub tool using the Sub tool palette.
Step 4
Now you need to configure the number of lines of the Symmetrical Ruler in the Tool Property palette.
Step 5
Drag the ruler across the canvas from its starting point to its ending position. Your ruler should be created by now.
You can also check out our in-depth guide putting a picture in Clip Studio Paint.
Symmetry Ruler Settings
Take a quick look at the number of lines slider in the symmetry ruler. What did you notice? They are confusing, right? Yes, at first glance, the number of lines slider in the symmetry ruler settings can seem perplexing. It’s simple to assume that it’s deciding how many symmetry lines will be laid down.
However, you’ll see that only 1 symmetry line emerges if you select 2 lines and lay down your symmetry ruler. You see, the number of symmetry lines in your ruler is NOT determined by the number of lines slider. As an alternative, it’s figuring out how many lines YOU can draw.
Therefore, everything you draw will appear twice if you choose 2 lines. So set up your ruler and begin to draw. In essence, your drawing will be reflected in and appear in two different places. That’s why you can think of this slider as the number of spaces you’d like instead of the number of lines you’d want. However, once you go beyond two lines, it’s possible that the number of symmetry lines and spaces will not match.
What is Line Symmetry Checkbox?
This checkbox determines if your ruler will use rotational symmetry or not. In each of the spaces of your symmetrical ruler, the pattern is mirrored if the checkmark is left on. However, rotational symmetry will be applied if the checkmark is toggled off. Rotational symmetry will rotate your design instead of mirroring it.
If you have chosen only one symmetry line, then the rotational symmetry will make your drawing look as if it’s upside down. Your artwork will appear to be moving around your canvas between your symmetry lines if you use many symmetry lines.
Rotational symmetry is always applied when there are an odd number of lines. The checkbox becomes inaccessible as a result. You can decide whether to utilize rotational symmetry or not if there are an even number of lines.
If you enjoyed reading this guide, you would also enjoy our well-written article on how to change hue in Clip Studio Paint.