Stretching an image entails resizing it while maintaining its aesthetically appealing elements into arbitrary aspect ratios or proportions. Stretching an image could be desirable for aesthetic reasons or to satisfy publishing specifications. Additionally, we’ve all taken pictures that we wish had a wider composition, either because we lacked the appropriate lens or because we realized that post-processing offered new possibilities.
You can learn how to stretch an image’s edges in Photoshop without altering the subject by using this simple technique.
How to Stretch A Photo in Photoshop
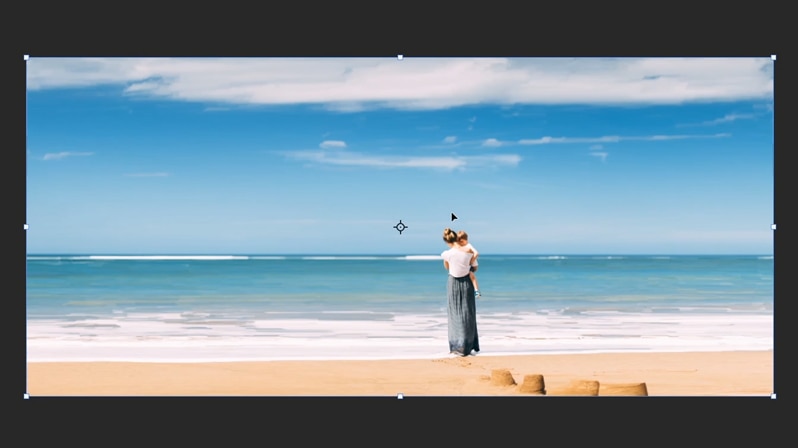
Increase the canvas size to the necessary proportions using the crop tool, choose the content-aware checkbox, and then execute the crop. Samples of the original pictures will be used to fill in the blank places. After that, edit the final image using the healing brush or clone stamp tools.
Step 1
Open photo file
Step 2
Press the C keyboard shortcut to select the crop tool.
To alter the size of your crop, use the crop handles located in the crop box’s corners or sides. In this illustration, we expand the canvas to the necessary new dimensions by holding down the Alt key and dragging the middle crop handle outside the picture.

Step 3
Complete the crop after making sure the content-aware box is checked.
Step 4
As it continues, Photoshop will insert samples from the original image to fill in the voids. The outcome is displayed below.
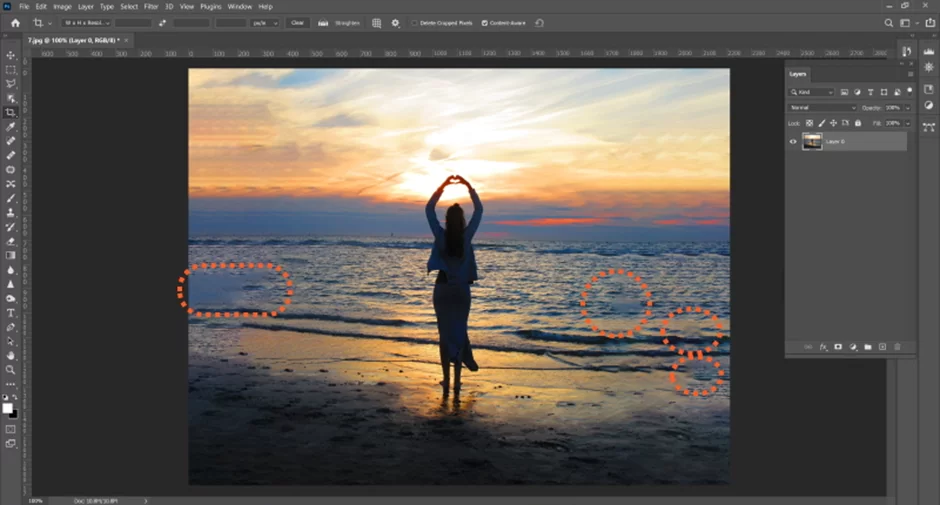
Step 5
As seen in the stretched image below, there are several flaws as well as certain recurring patterns.
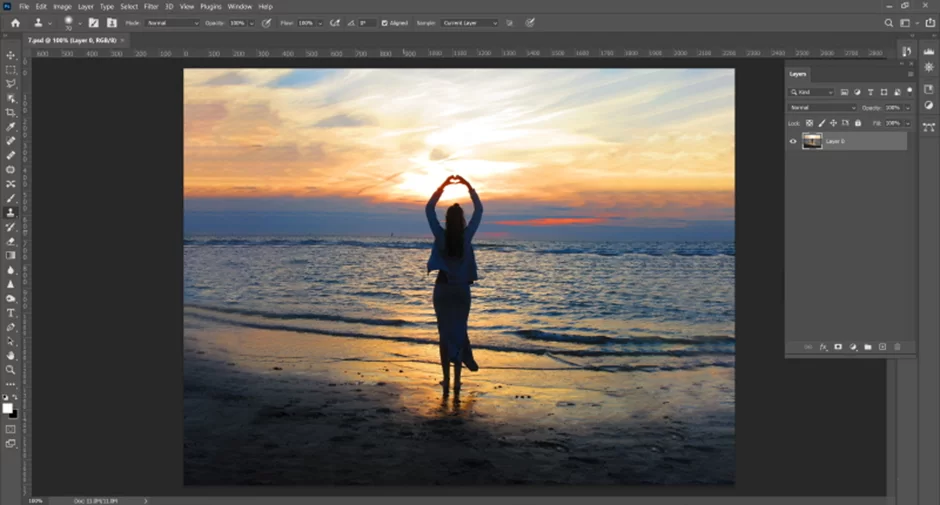
Step 6
To highlight these flaws and get rid of the repetitive patterns, use the clone stamp tool and healing brush tool.
Simple Background Expansion Using Content-Aware Scale
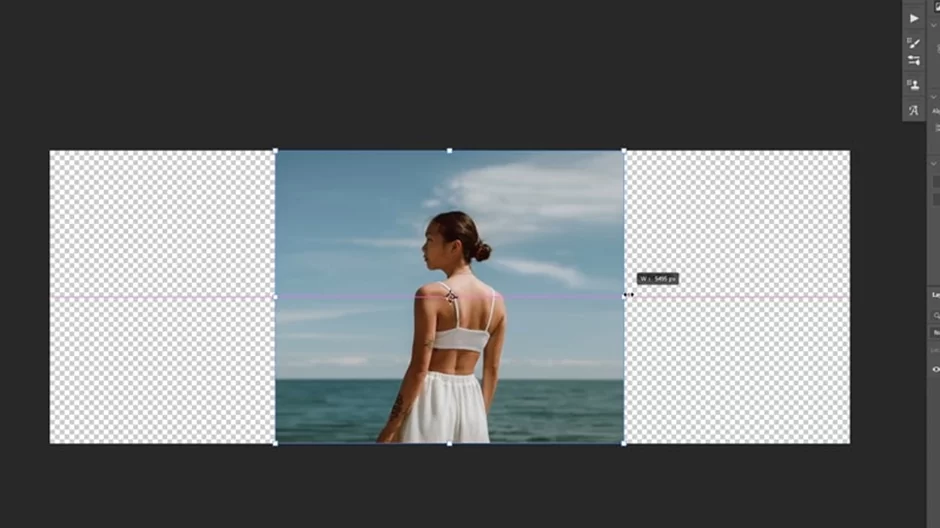
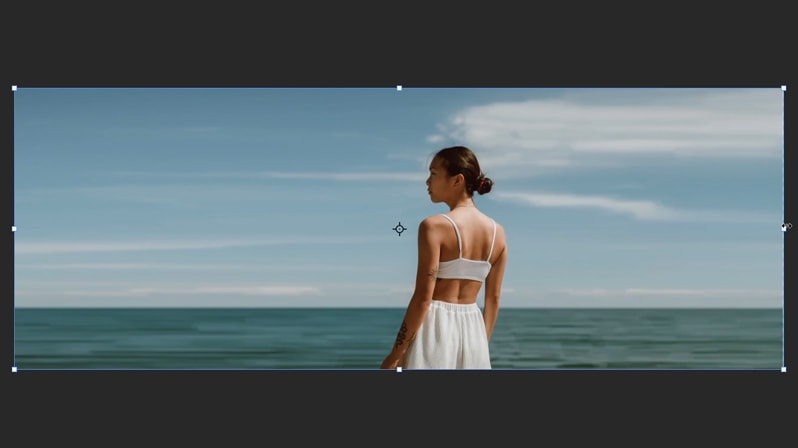
When you want to stretch the backdrop to match the horizontal canvas and you have a vertical portrait image, like the one we have below, this capability is quite helpful.
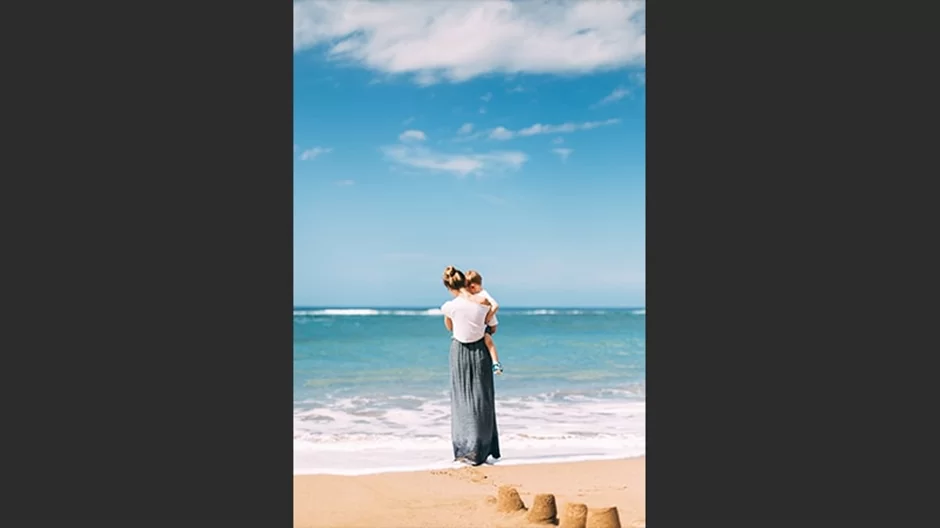
Stretching the background without changing the subject is our aim.
You should be aware that a busy background can prevent this feature from functioning. If your background is straightforward and repeatable, it will function best.
You need to adjust the canvas to the correct size before extending the backdrop.
1. Modify the canvas size
There are two ways to do that.
select “Image” > “Canvas Size”
then either use the crop tool or input the required resolution in the dialogue box

C will bring up the crop tool; If your aspect ratio is locked, you can click the “clear” button to unlock it, which will allow you to freely stretch the canvas. After accepting the adjustments, press Alt or Option to expand the canvas horizontally.

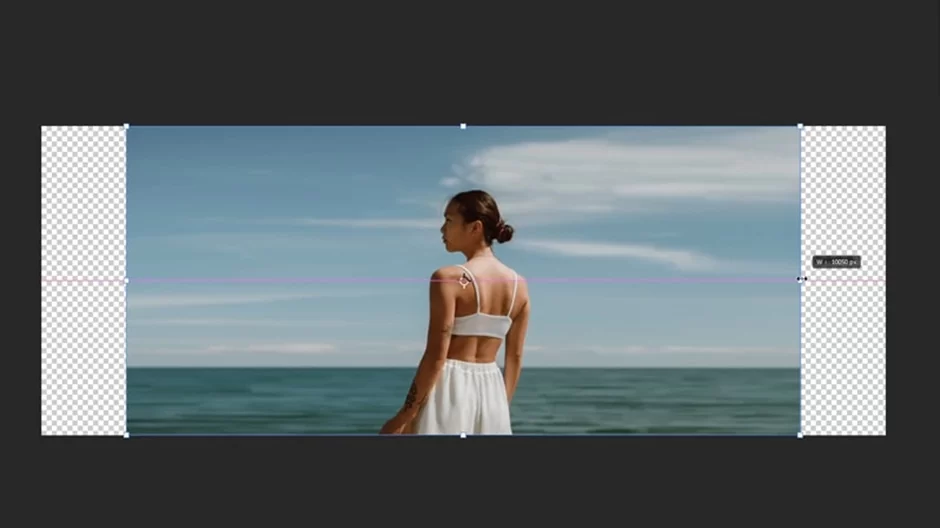
2. Increase Background Size Using Content-Aware Scale
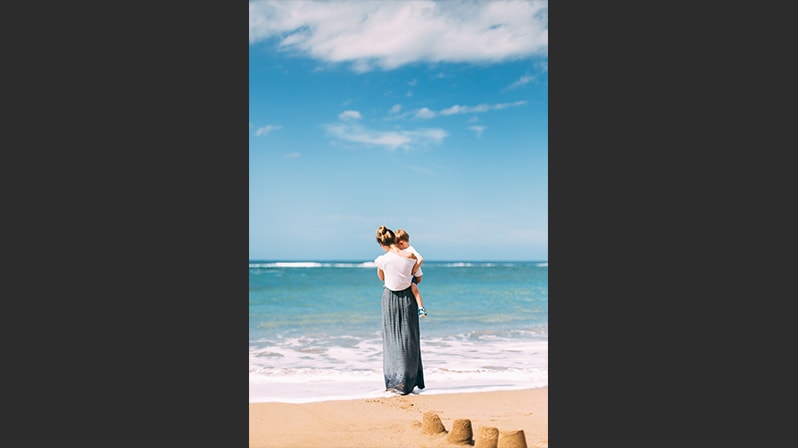
Go to Edit > content-aware scale to now extend the backdrop. If you are using a more recent version of Photoshop, you will see that the image will begin to expand both horizontally and vertically.
In order to extend the canvas simultaneously from the left and right, you must hold SHIFT while concurrently holding ALT or OPTION.
Photoshop will now detect the topic and only extend the backdrop after it has detected the subject.
As you can see, the subject was not affected by our ability to stretch the background to match the canvas.

This tool performed admirably on this image, however, in some circumstances, Photoshop may fail to accurately identify your subject, in which case it will scale with the background.
Let us now demonstrate how to prevent the subject from scaling along with the background if it does occur to you.
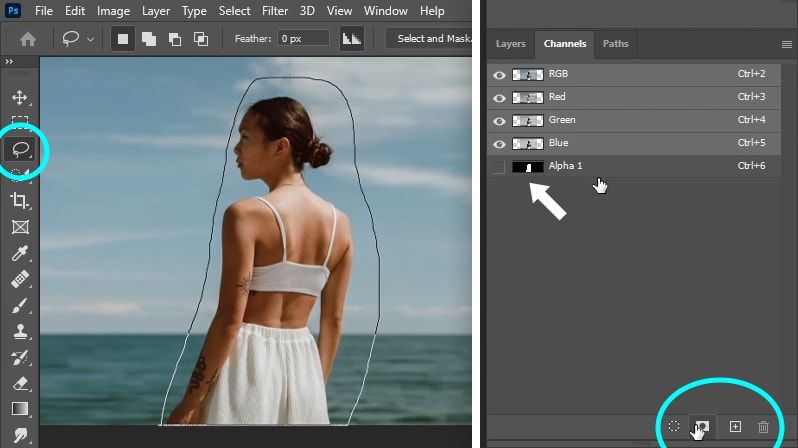
3 – Use Channels to Protect the Subject
Let’s try to extend the backdrop in the following example. Let’s move on to editing and then scale the content for our audience. Hold ALT and SHIFT while extending horizontally once more to see how well Photoshop does.
However, if we continue, you will notice that it will begin to affect the subject, particularly on her left hand.
Here’s how to tell Photoshop what region we need to secure in order to safeguard the subject:
First, choose the area you want to work with using the lasso tool. Next, navigate to the channels tab and, while the selection is still active, click the layer mask icon to add a new channel.

As you can see, our new channel is labeled alpha 1. You can now return to the layers tab and select the content-aware scale option once more by pressing CTRL/CMD + D.
We must now instruct Photoshop to safeguard that area, which is the channel we previously defined named alpha 1, before scaling the background.
Decide on it, you can see that Photoshop is now safeguarding the subject when you extend the background because it doesn’t matter how much the backdrop is scaled.

As you can see, the backdrop matches the entirety of the canvas at this point. This is a terrific tool to use to quickly extend your background, and you may customize it further. You may not stretch your image as much as we did in this example, and it varies from image to image.
Conclusion
Stretching an image in Photoshop doesn’t have to be a complicated task. By following the simple steps outlined above, you’ll find that resizing your photos is quick and easy. With just a few clicks of the mouse and some minor adjustments with the Transform tool, you can effortlessly move and stretch images within Photoshop to get them looking exactly how you want. Now go ahead and get creative!
Leave a Reply
You must be logged in to post a comment.