Creating a silhouette effect in Photoshop is an excellent way to make your photos stand out while emphasizing the shape and form of the subjects. If you’re adding a stylistic touch to your vacation pics or just trying to improve upon existing imagery, creating silhouettes can be a great way to create drama and focus attention on what matters most—the subject’s inherent beauty. Making a silhouette in Photoshop is a simple process that can be accomplished with just a few steps.
Making a Silhouette In Photoshop
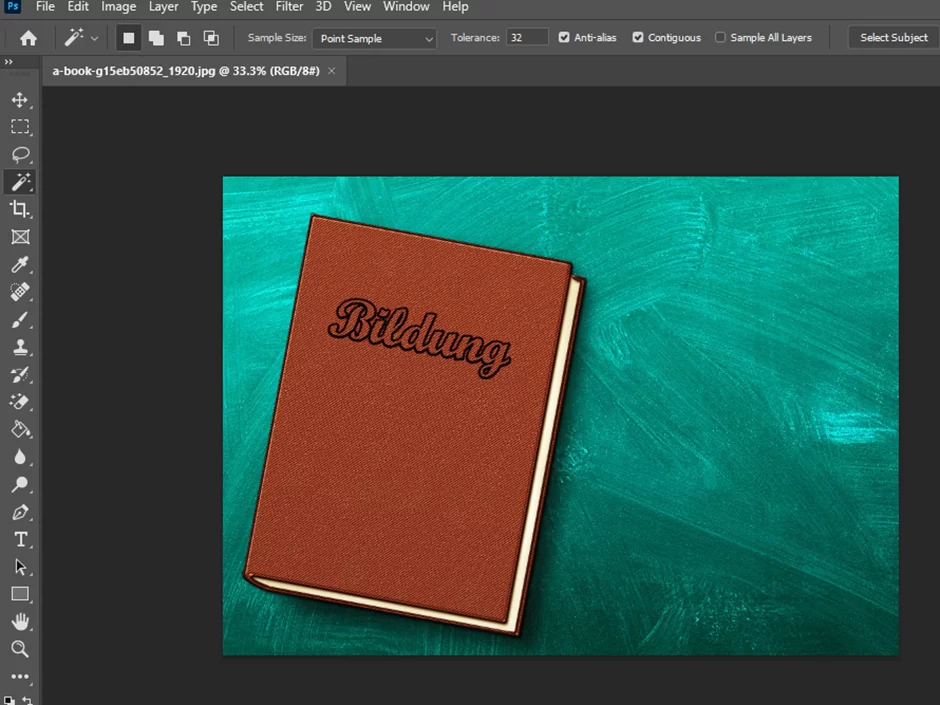
First, open the image you want to create a silhouette of in Photoshop. This can be any image, but the best results will come from images that have a clear subject and a simple background.
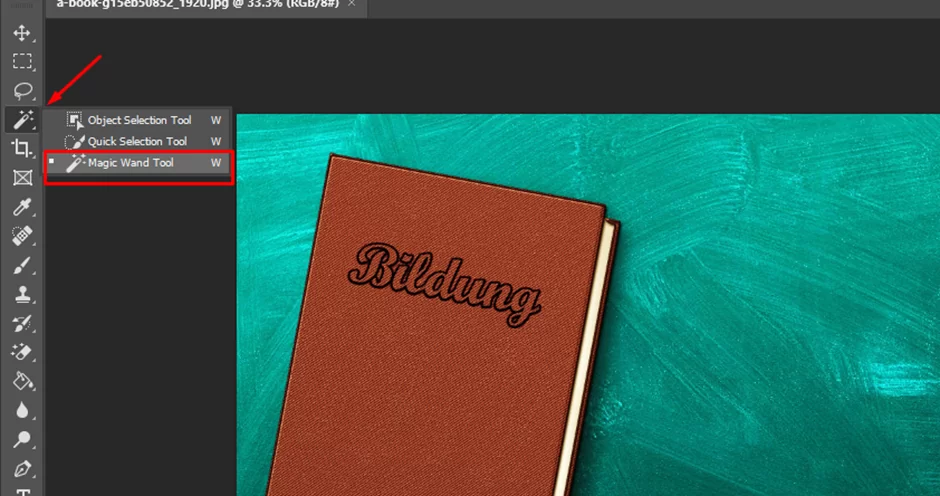
Next, use the Magic Wand tool to select the background of the image. This can be found in the Tools panel on the left side of the screen. Click on the Magic Wand tool, then click on the background of the image to select it.
Once the background is selected, hit the delete key on your keyboard to remove it. This will leave just the subject of the image against a transparent background. In our case, we replaced the transparency with a white background.

Adding a solid color: Next, use the Paint Bucket tool to fill the subject of the image with a solid color. This can be found in the Tools panel, just below the Magic Wand tool.
Click on the Paint Bucket tool, then click on the subject of the image to fill it with the chosen color. Our Chosen color is white, which makes the background completely white.

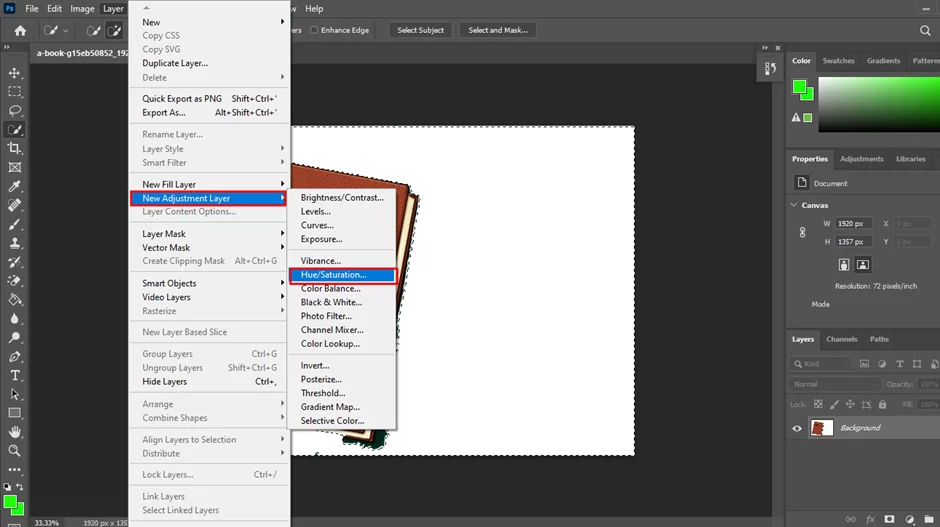
Now that the subject of the image is filled with a solid color, it’s time to create the silhouette. To do this, go to the Layer menu at the top of the screen and select “New Adjustment Layer” > “Hue/Saturation.”
In the Hue/Saturation window that appears, move the Saturation slider all the way to the left to remove the color from the subject of the image. This will create a black-and-white silhouette.
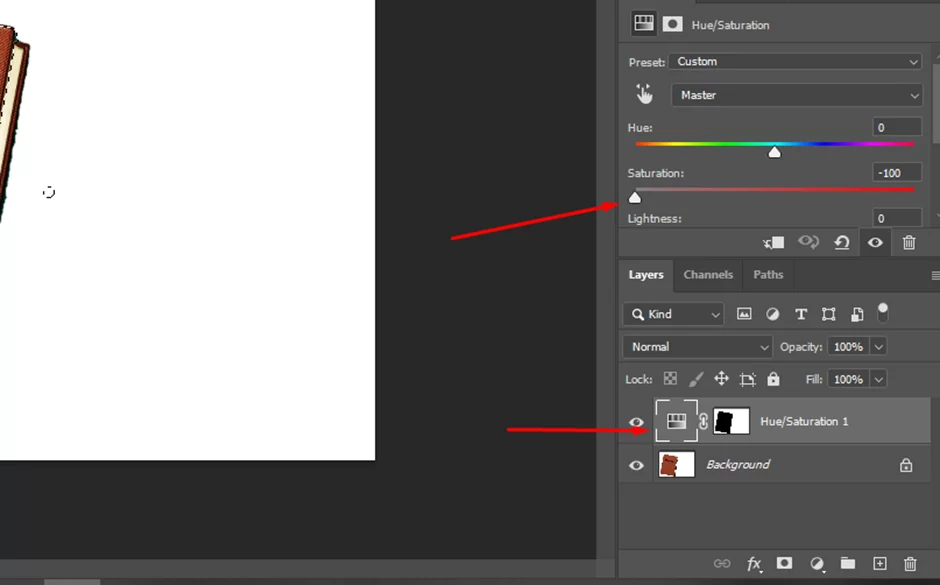
You can further adjust the silhouette by moving the Lightness slider to make the silhouette darker or lighter. When you’re happy with the silhouette, hit “OK” to apply the changes.
Your silhouette is now complete! You can save the image by going to the File menu at the top of the screen and selecting “Save As.” Choose a file format and location to save the image, and you’re done.
Benefits of Making Silhouette In Photoshop
There are several benefits to creating a silhouette in Photoshop.
- One benefit is that it allows you to isolate the subject of an image and remove any distracting elements from the background. This can help to draw attention to the subject and create a more visually appealing image.
- Another benefit is that creating a silhouette can give an image a unique and artistic look. Silhouettes can be used to create mood and atmosphere in an image, and can also add an element of mystery or intrigue.
- Additionally, creating a silhouette in Photoshop allows you to make precise adjustments to the subject of the image. By using the Magic Wand and Paint Bucket tools, you can easily select and fill the subject with a solid color. This allows you to fine-tune the silhouette and get the exact look you want.
Finally, creating a silhouette in Photoshop is a relatively simple process that can be learned quickly. With just a few steps, you can create professional-looking silhouettes that can be used in a variety of applications, such as graphic design, photography, and more.
Potential Issues with Making Silhouettes in Photoshop and Solutions
There are a few potential issues that you may encounter when creating a silhouette in Photoshop, and some possible solutions to these issues.
Issue 1
One potential issue is that the Magic Wand tool may not accurately select the background of the image. This can be caused by a variety of factors, such as a busy or complex background, or a subject that blends in with the background.
Solution
To fix this issue, you can try adjusting the Magic Wand tool’s tolerance settings. This can be done by right-clicking on the image and selecting “Magic Wand Tool Options” from the menu. In the Magic Wand Tool Options window, you can adjust the tolerance settings to fine-tune the selection.
Issue 2
Another potential issue is that the silhouette may not be as smooth or defined as desired. This can be caused by a variety of factors, such as a low-resolution image or a subject with fine details.
Solution
To fix this issue, you can try using the Lasso tool to make a more precise selection of the subject. This can be done by selecting the Lasso tool from the Tools panel, then carefully tracing around the subject to create a custom selection. Once the subject is selected, you can follow the steps above to create the silhouette.
Additionally, you can try using the Refine Edge tool to smooth out the edges of the silhouette. This can be done by going to the Select menu at the top of the screen and selecting “Refine Edge.” In the Refine Edge window, you can adjust the settings to smooth and refine the edges of the silhouette.
Overall, the potential issues with creating a silhouette in Photoshop can be overcome by carefully selecting the subject, adjusting the Magic Wand tool’s tolerance settings, and using the Lasso and Refine Edge tools to fine-tune the silhouette.
Conclusion
Creating a silhouette in Photoshop is a quick and easy process that can be accomplished with just a few simple steps. By using the Magic Wand and Paint Bucket tools to remove the background and fill the subject with a solid color, and then using the Hue/Saturation adjustment layer to remove the color and create the silhouette, you can create professional-looking silhouettes in no time.