If you use Clip Studio Paint often, you might find that you need to reset it to fix minor bugs. You may experience issues or errors with the software, or simply want to start with a clean slate. In such cases, resetting Clip Studio Paint to its default settings can be a useful solution. I’ll show you how to reset Clip Studio Paint, so you can troubleshoot any issues and get back to creating digital art.
How to Reset Clip Studio Paint
Close the program if you use the Clip Studio Paint Pro version.
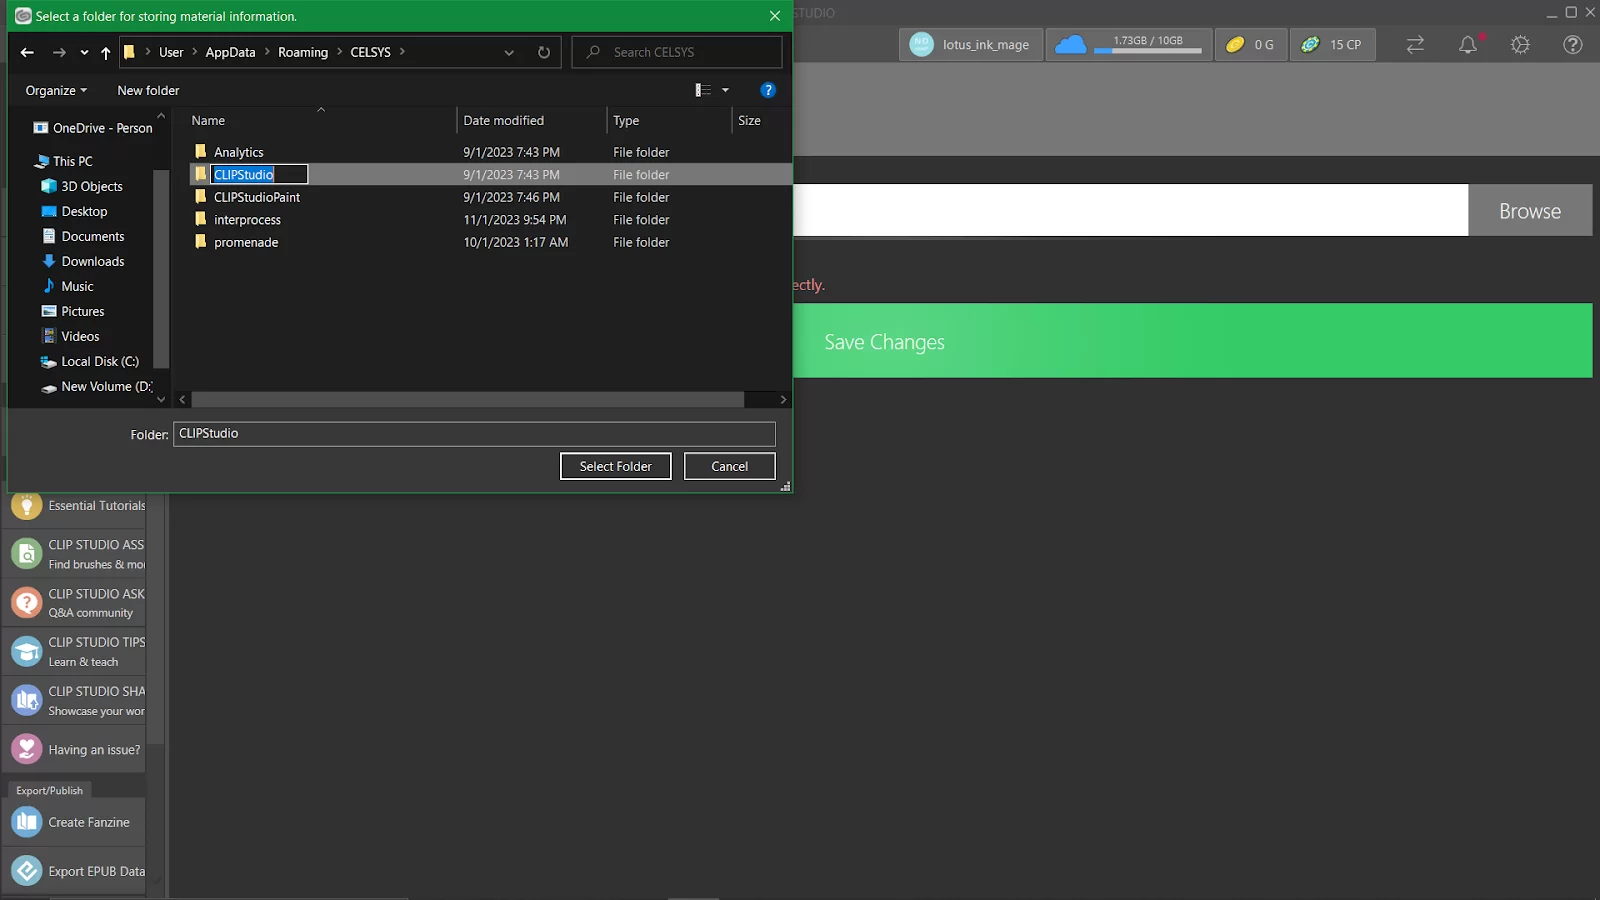
Go to the location where the program is installed on your computer. Look for the ‘CELSYS’ folder.
Locate the “ClipStudio” folder and rename it to something else (e.g. “ClipStudio_old”).
Re-launch the program. This will create a new default “ClipStudio” folder with the default settings. Remember that this method will delete all your custom brushes, tools, and preferences, so make sure to back up your custom settings before proceeding.
To reset certain tools settings in Clip Studio Paint, Start Clip Studio and then click on ‘PAINT’ in the upper left corner while holding down the Shift key until the ‘Reset to original defaults’ dialog box appears.

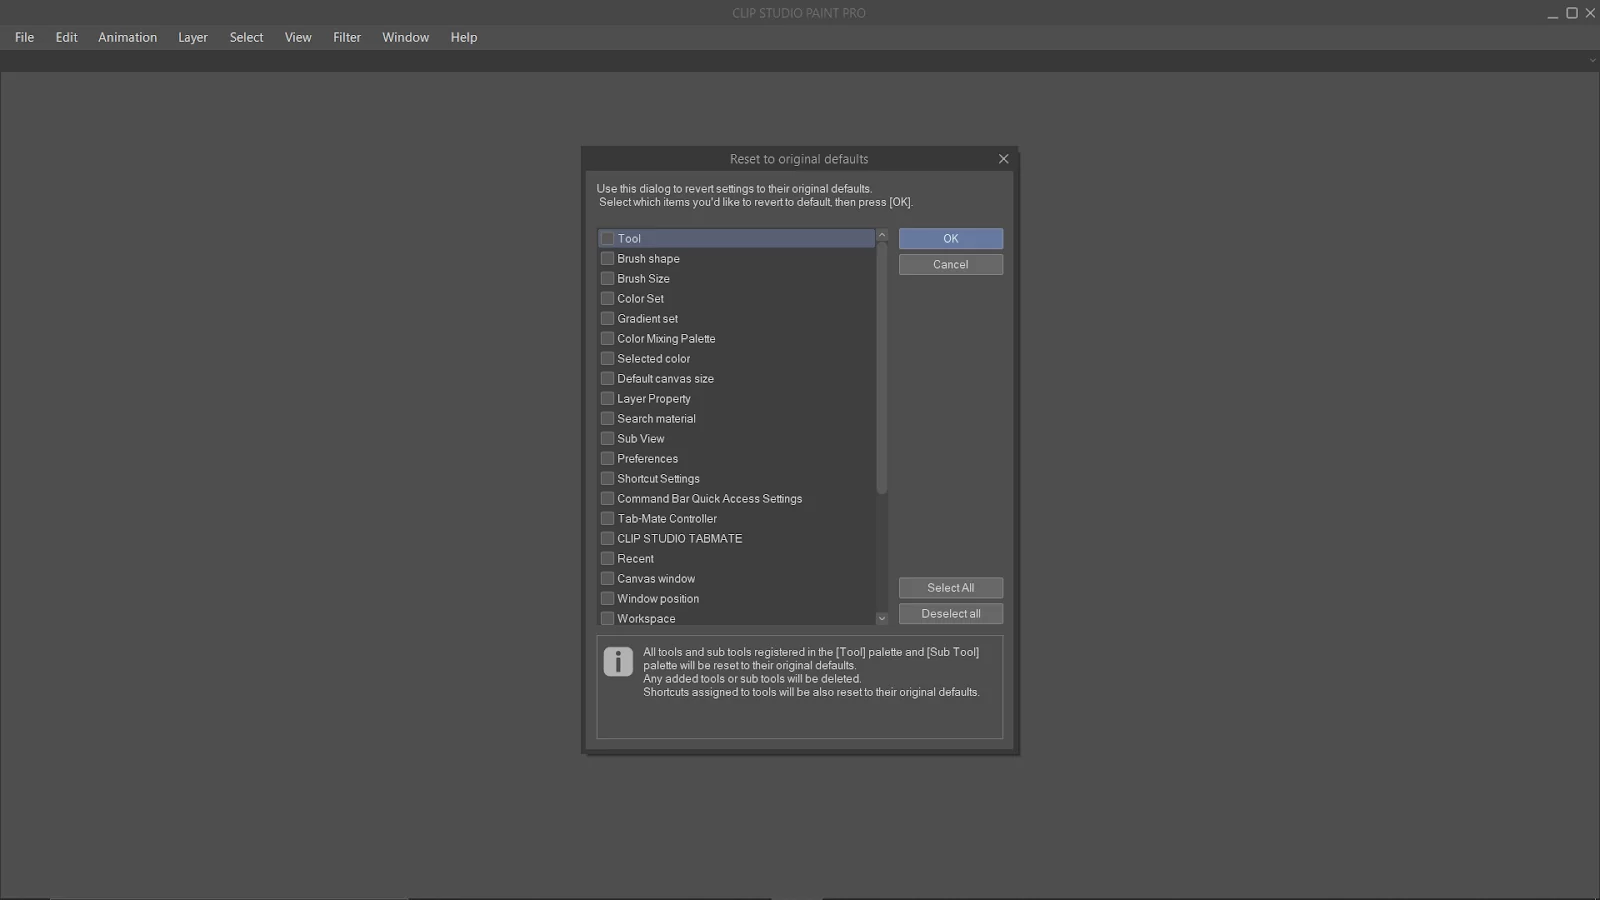
Select the items to be reset in the Reset to the original defaults dialog box and click OK.
Clicking OK on the confirmation dialog box will reset the selected item(s).
You can also check out our detailed article on how to animate using Clip Studio Paint.

How To Reset Clip Studio Paint on iPad
Follow the steps below to rest clip studio paint if you are using an iPad.
Step 1
Start by closing Clip Studio Paint.
Step 2
Next, launch the settings app.
Step 3
Now you need to select the clip studio from the left side. Next, turn on the initialization start-up.
Step 4
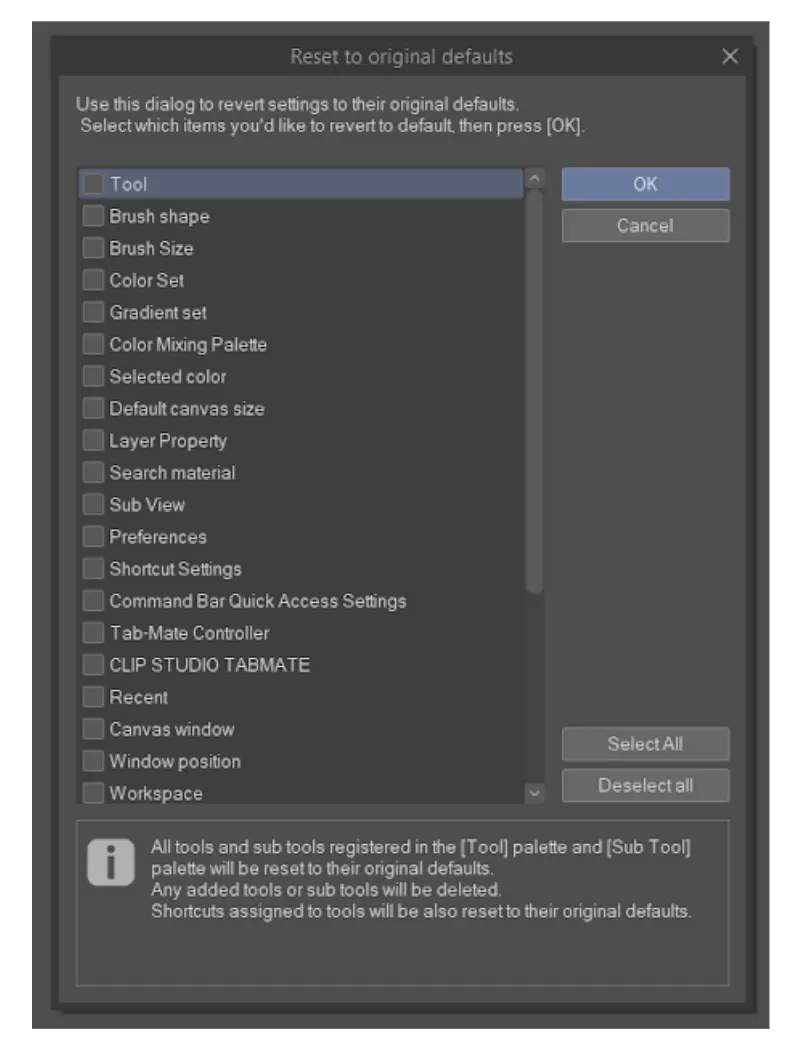
For this step, you have to select the items to be reset by going to the Reset to original default dialog box. When you are done, click Ok. Tapping OK on the confirmation dialog box will reset the selected item.
Also, check out our in-depth guide on how using 3D models on Clip Studio Paint.
How To Recover Clip Studio Paint Files That Were unsaved
Clip Studio has an automatic backup feature that will allow you to recover your work in case it wasn’t saved. The first thing you want to do is to check the backup folder. Follow this: Start Clip Studio Paint > click the Settings icon on the toolbar > Maintenance Menu.
Now choose the open folder with the clip studio paint backup data option. It will take you to the Clip Studio Paint backup folder. You will also need to check the InitialBackup folder. This is important if you have never saved the work. However, you’ll need to check the DocumentBackup folder if you have clicked save.
The second way you can recover your work in Clip Studio is via canvas recovery. In Clip Studio Paint, there is an auto-recovery tool. However, it needs to be enabled beforehand by users.
The Enable canvas recovery option will store your data every X minutes in the Clip Studio Paint AutoSave folder if it is enabled. You may be wondering why I used “X” minutes. This is because when you use this method, you’ll be allowed to set how long you want to work before your file is automatically saved. This built-in functionality functions similarly to Word, Excel, and other Microsoft programs’ AutoSave features. The previously saved canvas will be automatically restored when Clip Studio Paint is restarted after a crash.
If you liked reading this piece, you can also see our guide on how to flip a layer in Clip Studio Paint.