Pixel art is a popular form of digital art that involves creating images with a limited color palette and using individual pixels as the building blocks for the design. CSP tool can be used to create pixel art since it offers a range of features. In this guide, I’ll walk you through the steps of making pixel art in Clip Studio Paint, including setting up your canvas and using tools to create your artwork. With a little practice and patience, you’ll be able to create amazing pixel art designs in no time.
How to Make Pixel Art in Clip Studio Paint
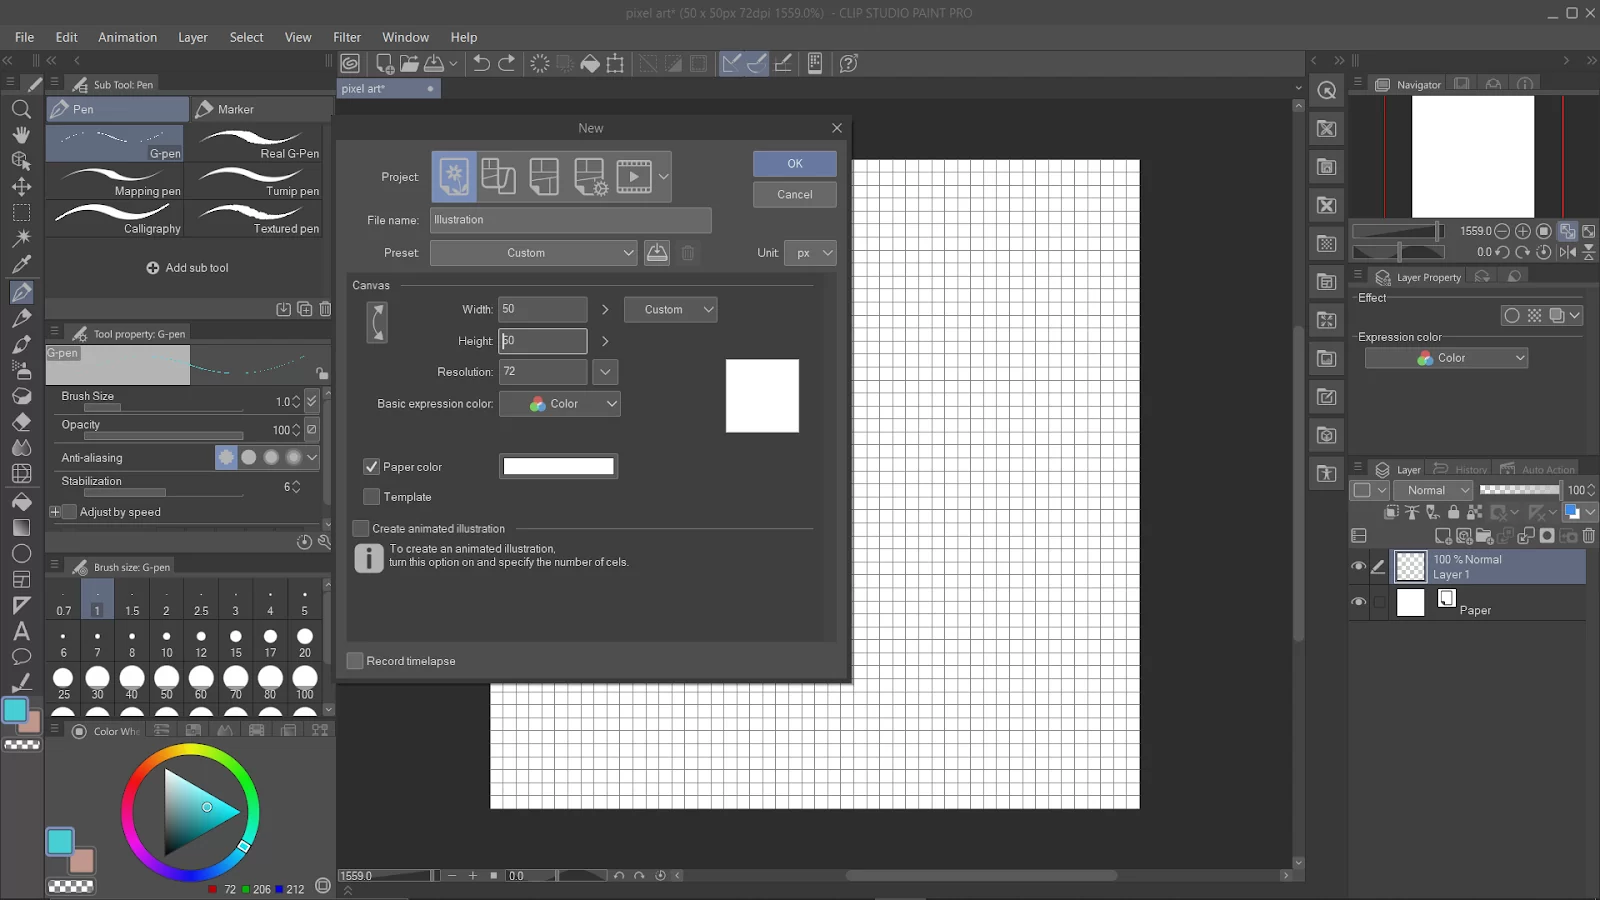
IN CSP, go to “file” and “new” to create a canvas.
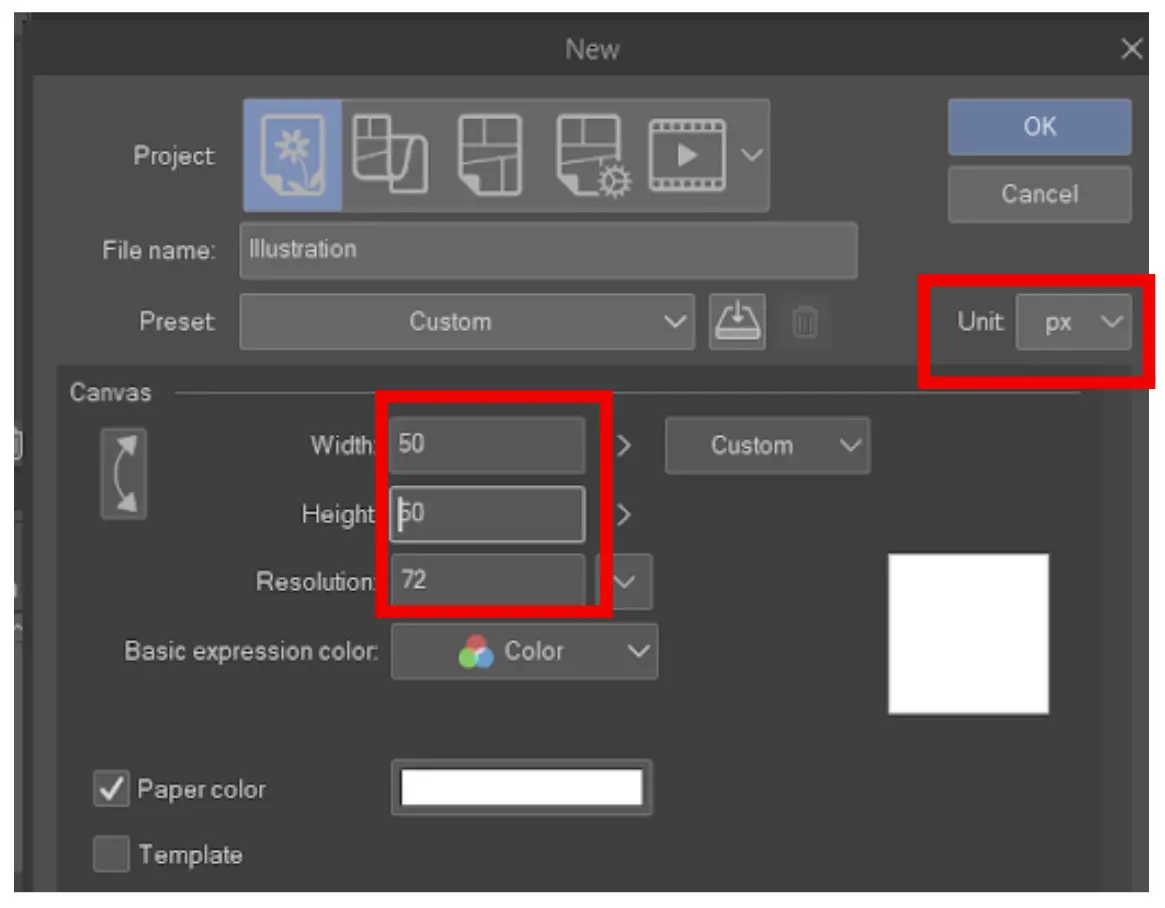
For pixel art, it is recommended to have a very small canvas size and resolution, and the unit is set in pixels.
In this example, I will use a canvas size of 50 px by 50 px with resolutions of 72 px.
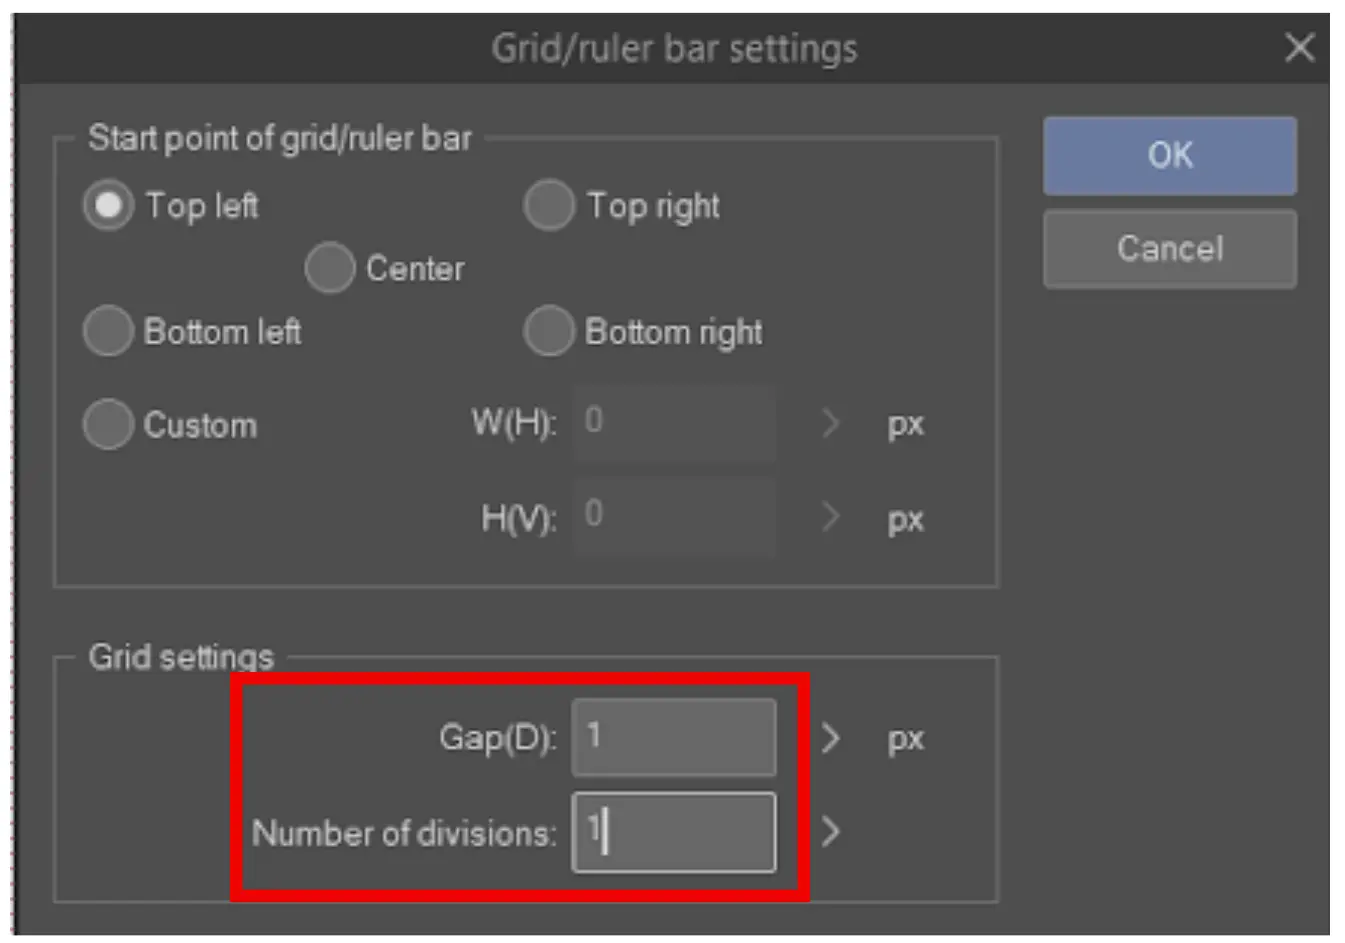
A blank canvas will be opened. Go to “view”, and select “Grid/ruler bar setting.”
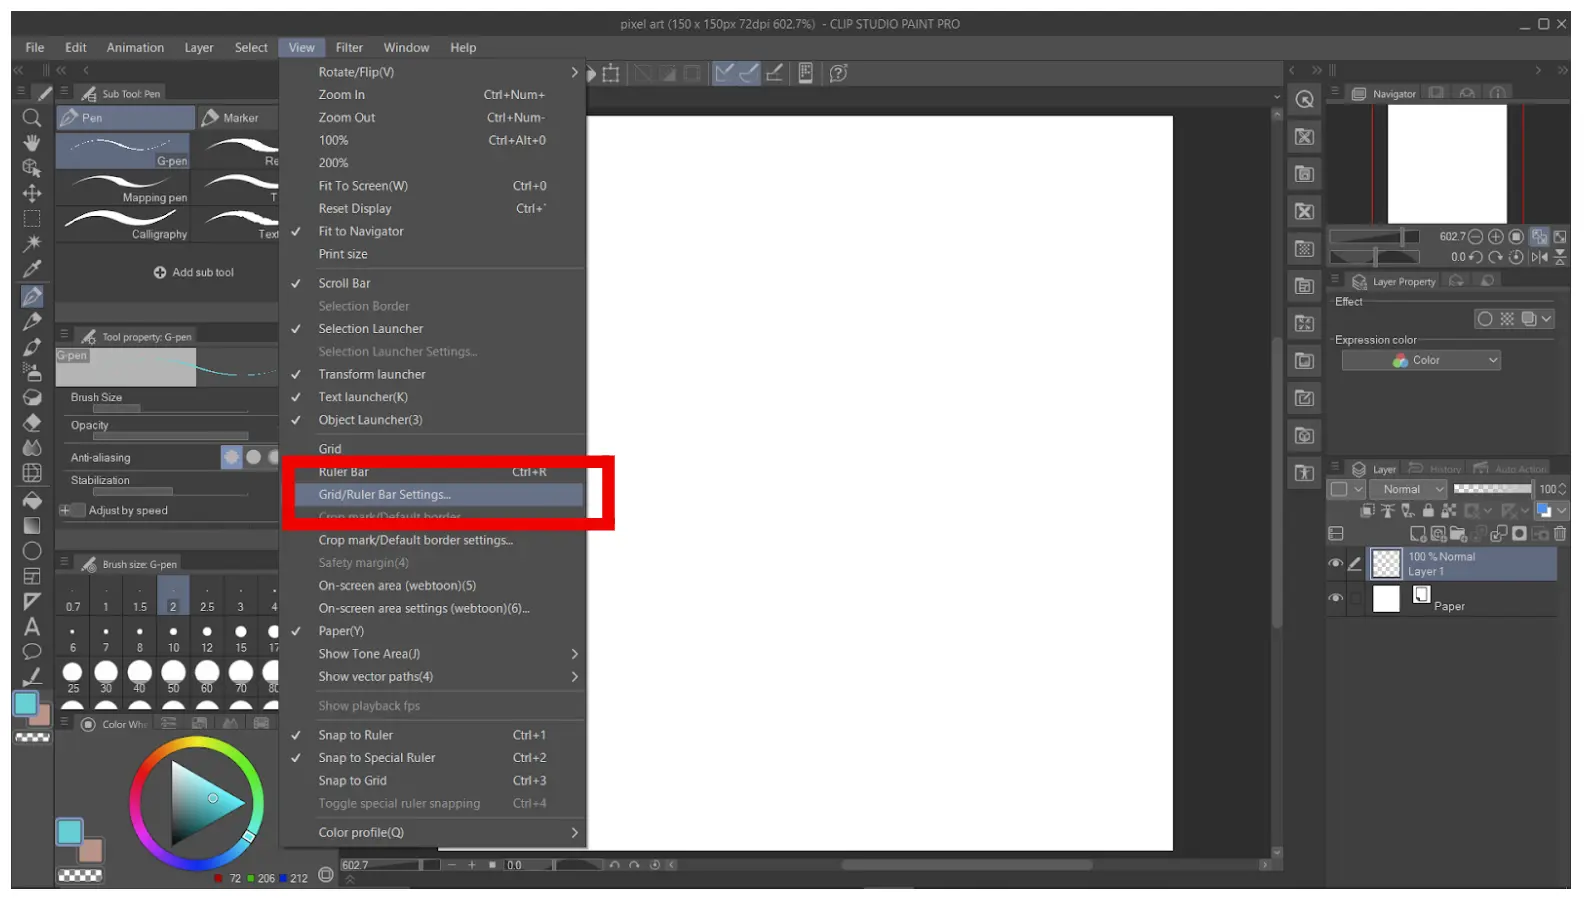
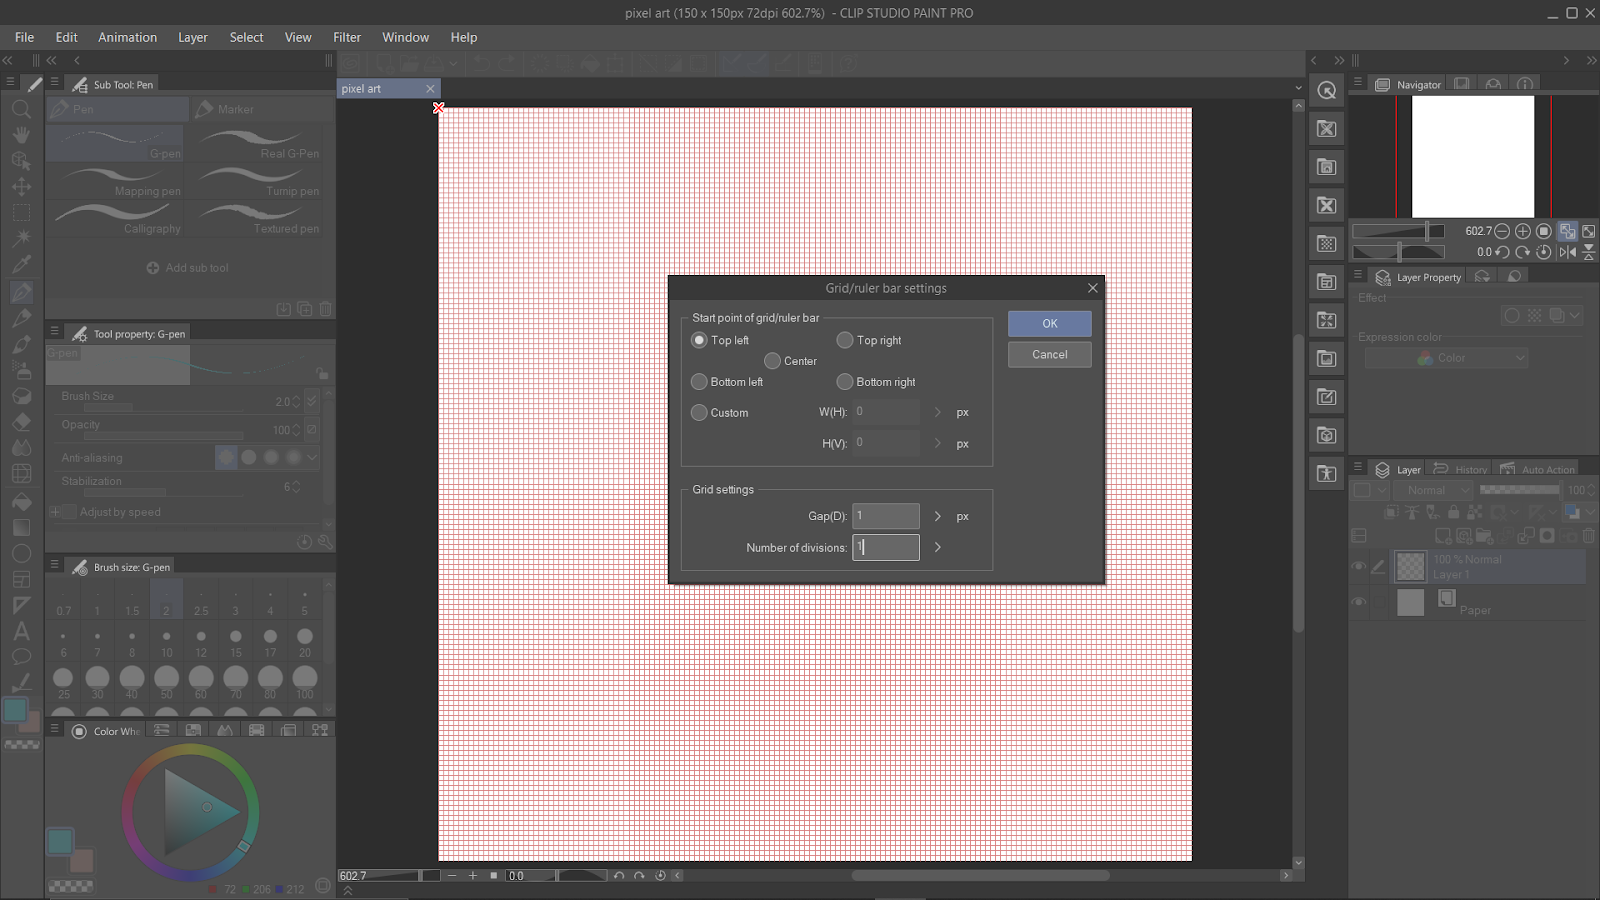
Set both the “Gap” and “number of divisions” to 1 px. Select “okay.”
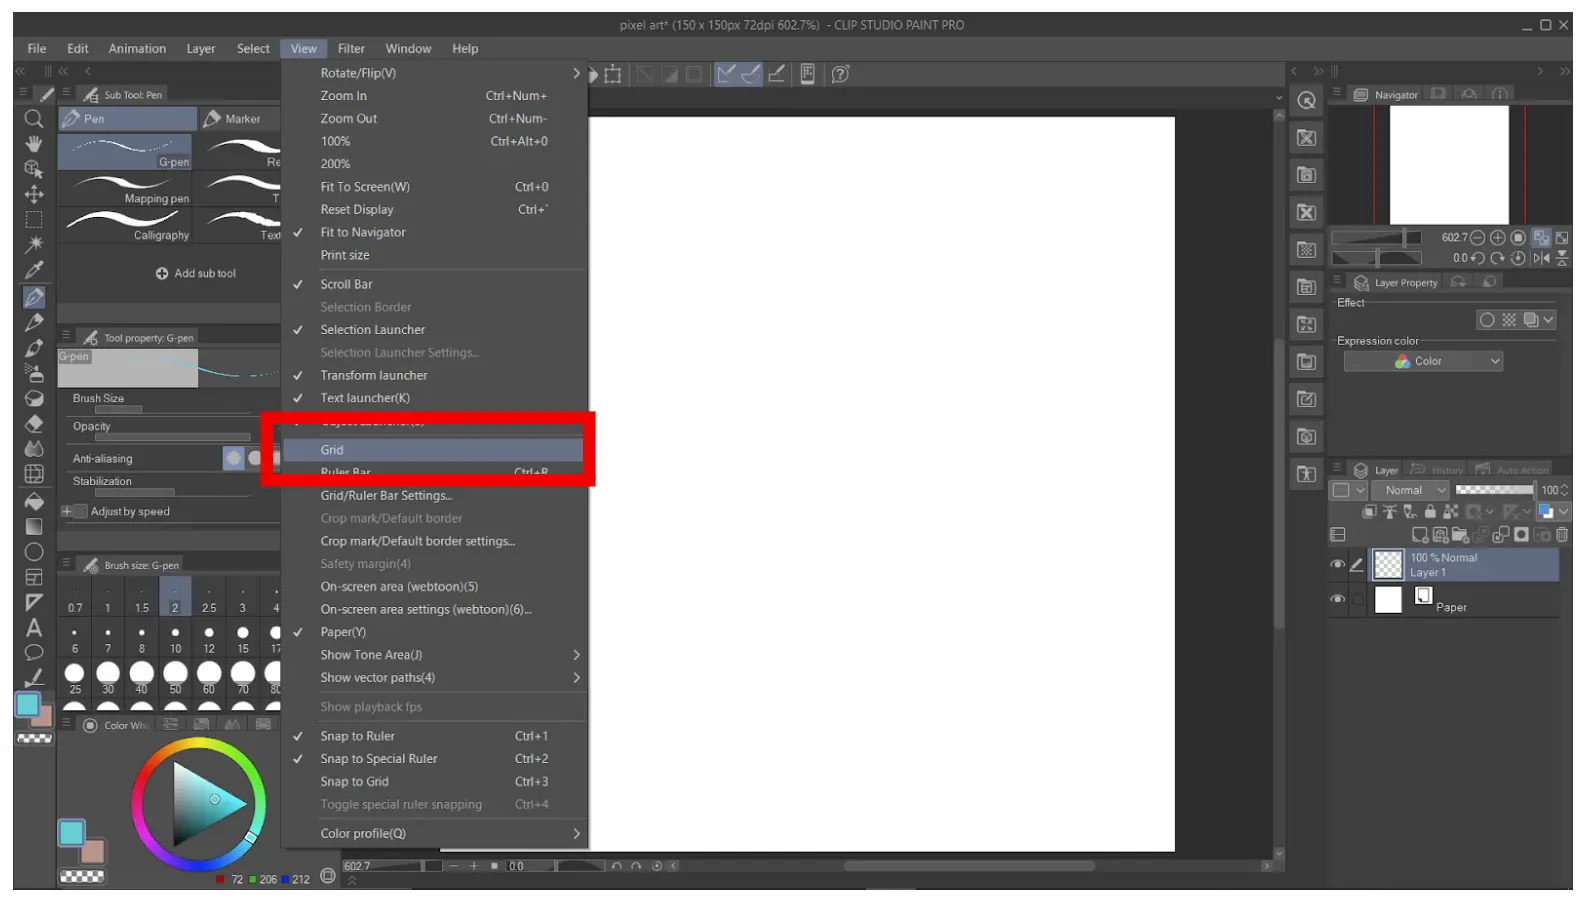
Go to “View” again, select “Grid” to enable grid.
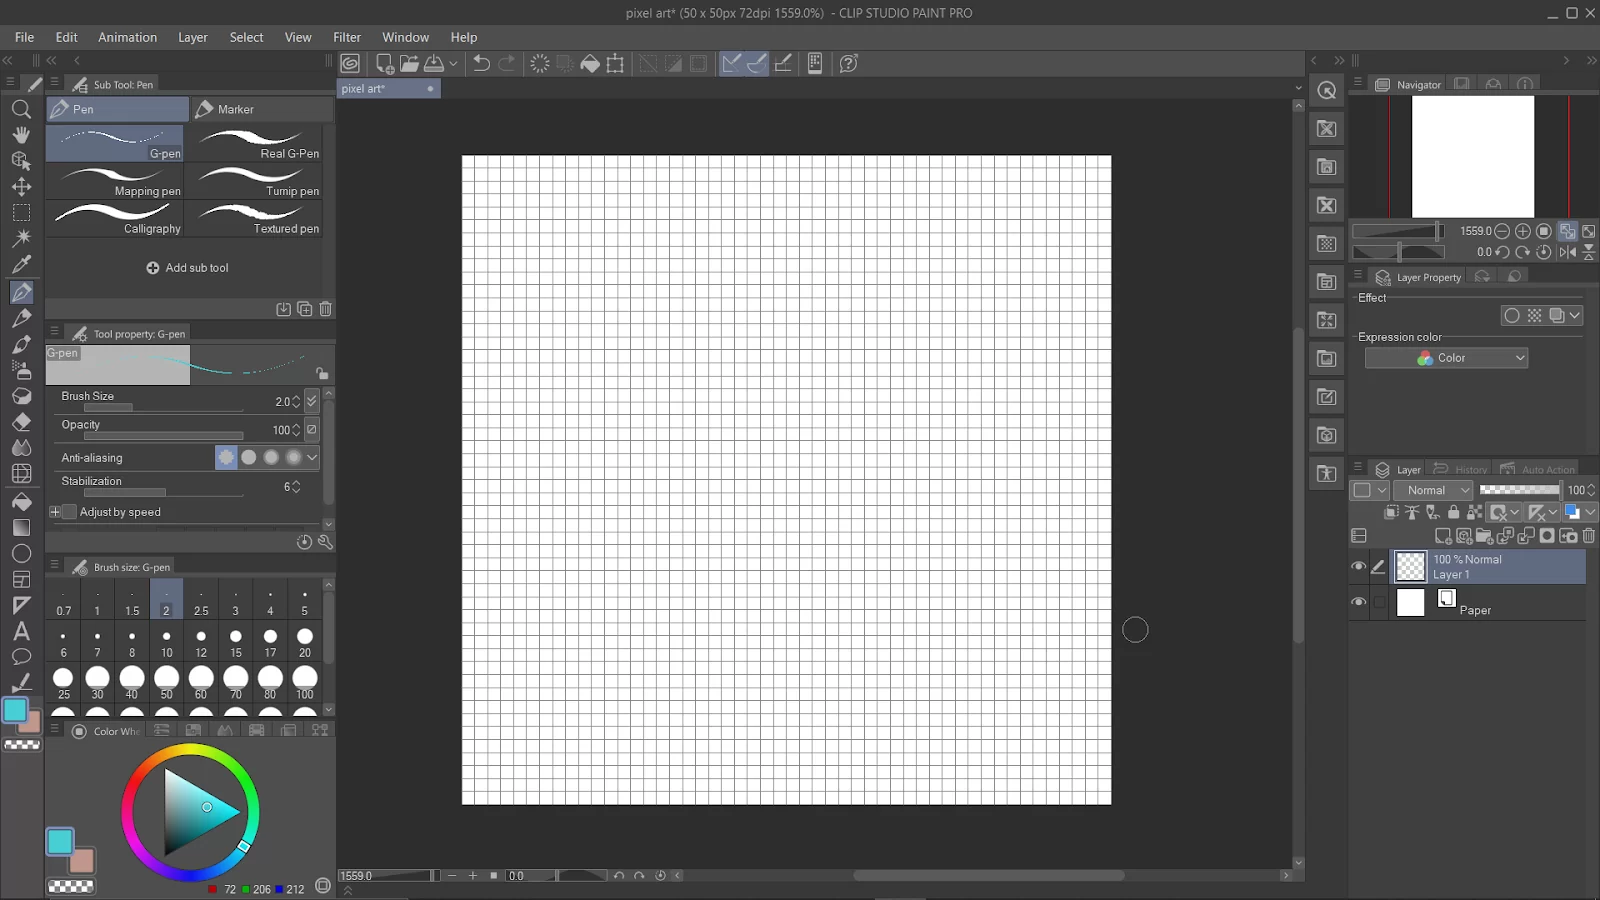
The best tool to draw pixel art is the pen tool with a size of 1 pixel.

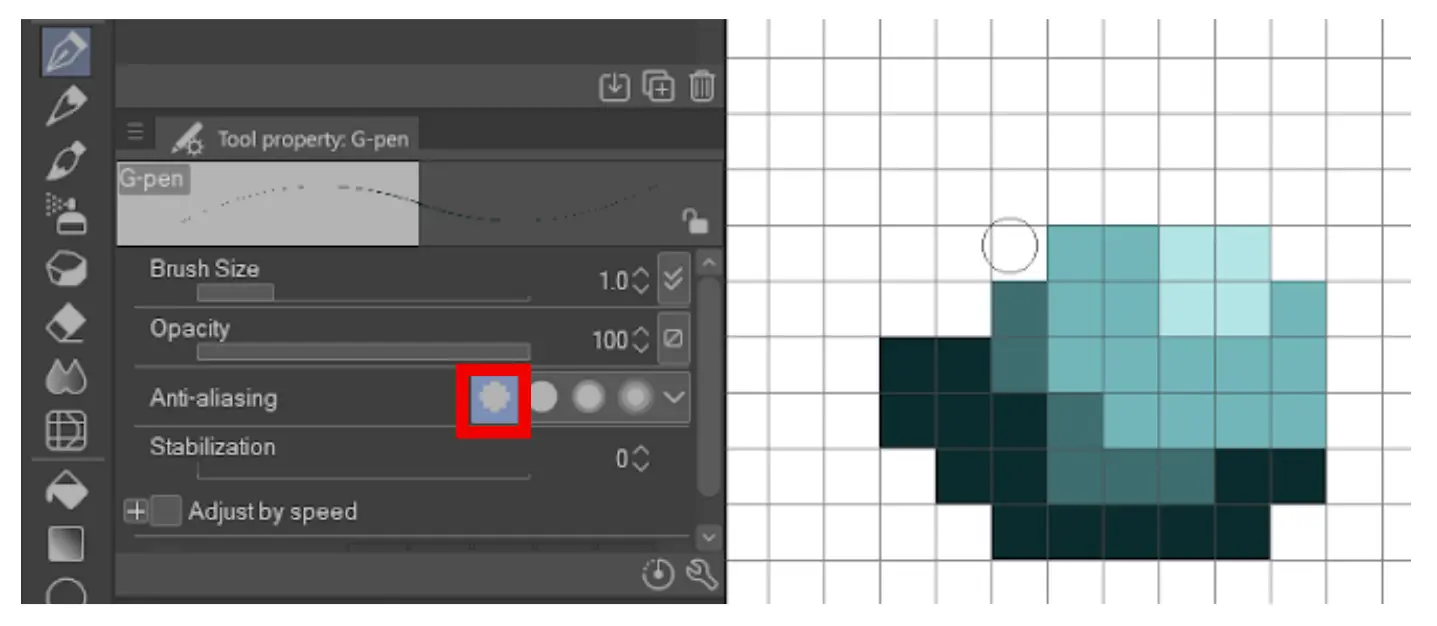
Note that the pixel style depends on the “anti-aliasing” setting shown here. The leftmost setting (none) will give a crisp and jagged look with contrasting colors, while the rightmost setting (strong) gives a smooth color gradient. This trick is useful when it comes to drawing objects with no anti-aliasing and landscapes with strong anti-aliasing.
We also recommend that you see our step-by-step guide on how to use 3D models in Clip Studio Paint.

Anti-Aliasing settings


Setting Up Your Clip Studio Paint For Pixel Art
You might need to set up your Clip Studio Paint for using Pixel art. Follow the simple steps below.
Step 1
Start by creating a new illustration and then proceed to set the canvas size to 256 x 128 pixels, 72 dpi resolution. You need to note that Pixel Art resolution varies. It varies from higher resolution images such as 600 x 400 px down to much smaller pieces.
Step 2
Now you have to set the grid size. The grid size should be set to 1 by 1. Keep in mind that this will come in handy when you have to zoom in on details during the polishing stage. Next, go to View > Grid Settings. Under Settings of the grid, set the gap and number of divisions to 1 pixel each.
Step 3
Now you have to customize the brush. The brush has to be customized next. We require a brush without anti-aliasing and with sharp edges. To be able to control the color of each pixel you draw, you must do this. To do this, select the fill-in mono pen from the markers area of the Pen Sub Tool panel. Then confirm that this Sub Tool has anti-aliasing turned off.
Step 4
In terms of anti-aliasing and brushes, there are no strict guidelines. Gradations in color and soft edges are by no means prohibited. Everything depends on the kind of painting you are doing and the style you want to accomplish. Just choose the hard eraser and ensure that it has anti-aliasing turned off.
Step 5
Now that we are in the fifth step, we need to create a custom textured brush. We will create this brush for some specific areas of the pixel art painting. To create the brush, you need to first create a new document with a size of 200 by 200 pixels. Then, add an organic texture shape. It is also okay to paste a texture you took from somewhere else.
Now, set the expression mode to “Gray” using the properties panel. This is important for the custom brush to work as expected. Go to Edit > Register as material > Image when you are done.
Still, on this step, check the Use for Brush Tip Shape box in the Material Properties pop-up dialog box. To save this texture as a material in the Material Library, click OK after saving it. Afterward, return to your Pen Sub Tool menu and select your fill-in mono pen. Then select the duplicate sub tool from the context menu by performing a right-click on it.
Step 6
Go to the newly created sub-tool and edit its parameters. You can do this by clicking the small wrench icon at the panel’s bottom. Next, go to the Sub Tool Detail panel and go to Brush Tip. Now, choose Material as the Tip Shape and click add brush tip shape.
Step 7
You may customize the spray characteristics of your brush on the Sub Tool Detail tab. The objective is to produce something that will appear somewhat haphazard to be used in our Pixel Art environment to build terrain, rocks, and other elements.
Now go ahead to prepare your selection tools. Set to the polyline and lasso and set the Pen selection tools to no anti-aliasing. Now you have completed your setup of Clip Studio Paint for Pixel Art.
You can also check out our detailed articles on how to draw lineart and how to make Gif using Clip Studio Paint.