Digital artists like myself, highly appreciate the technique of Inverting Colors in Clip Studio Paint. In just a few clicks, I can transform an artwork into a bold and unique masterpiece, break away from the traditional color scheme and experiment with new and exciting hues. I will guide you through the process of Inverting Colors in Clip Studio Paint.
How to Invert Colors in Clip Studio Paint
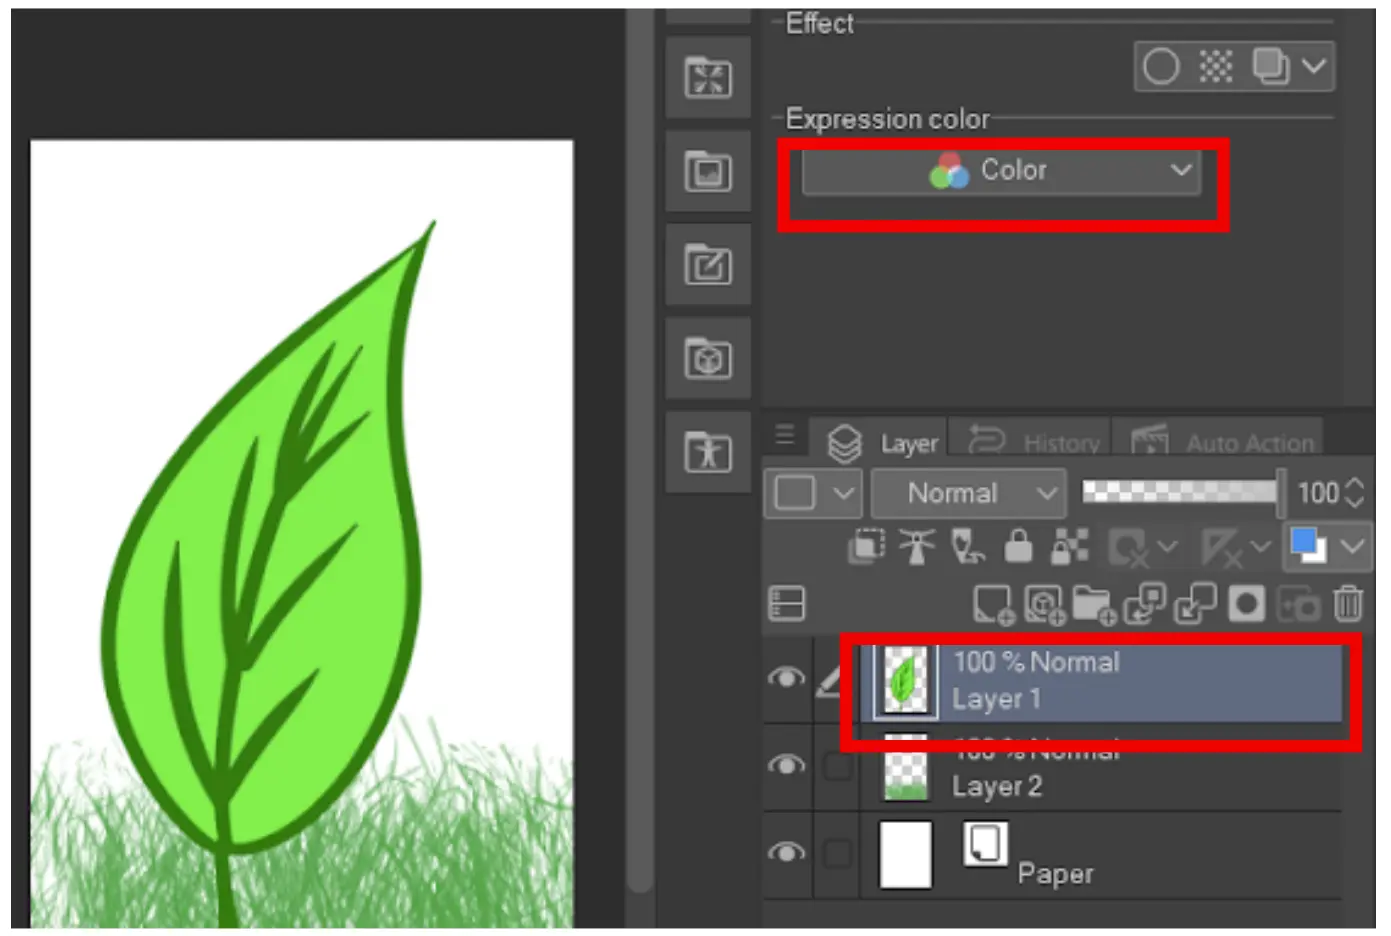
First, select the layer that needs to be color-inverted.
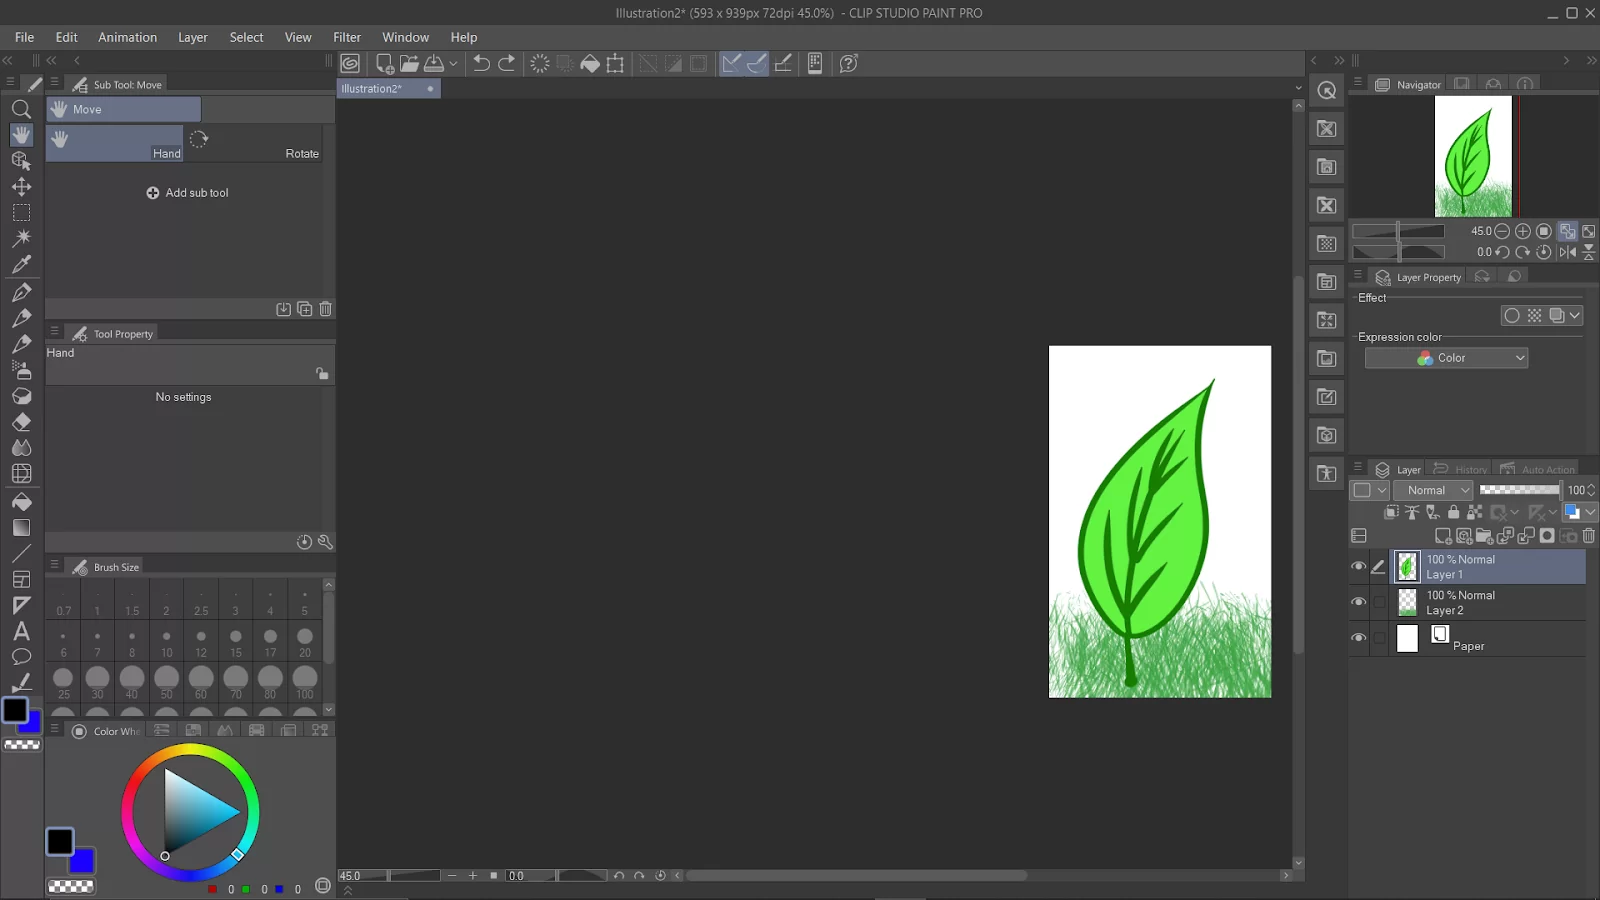
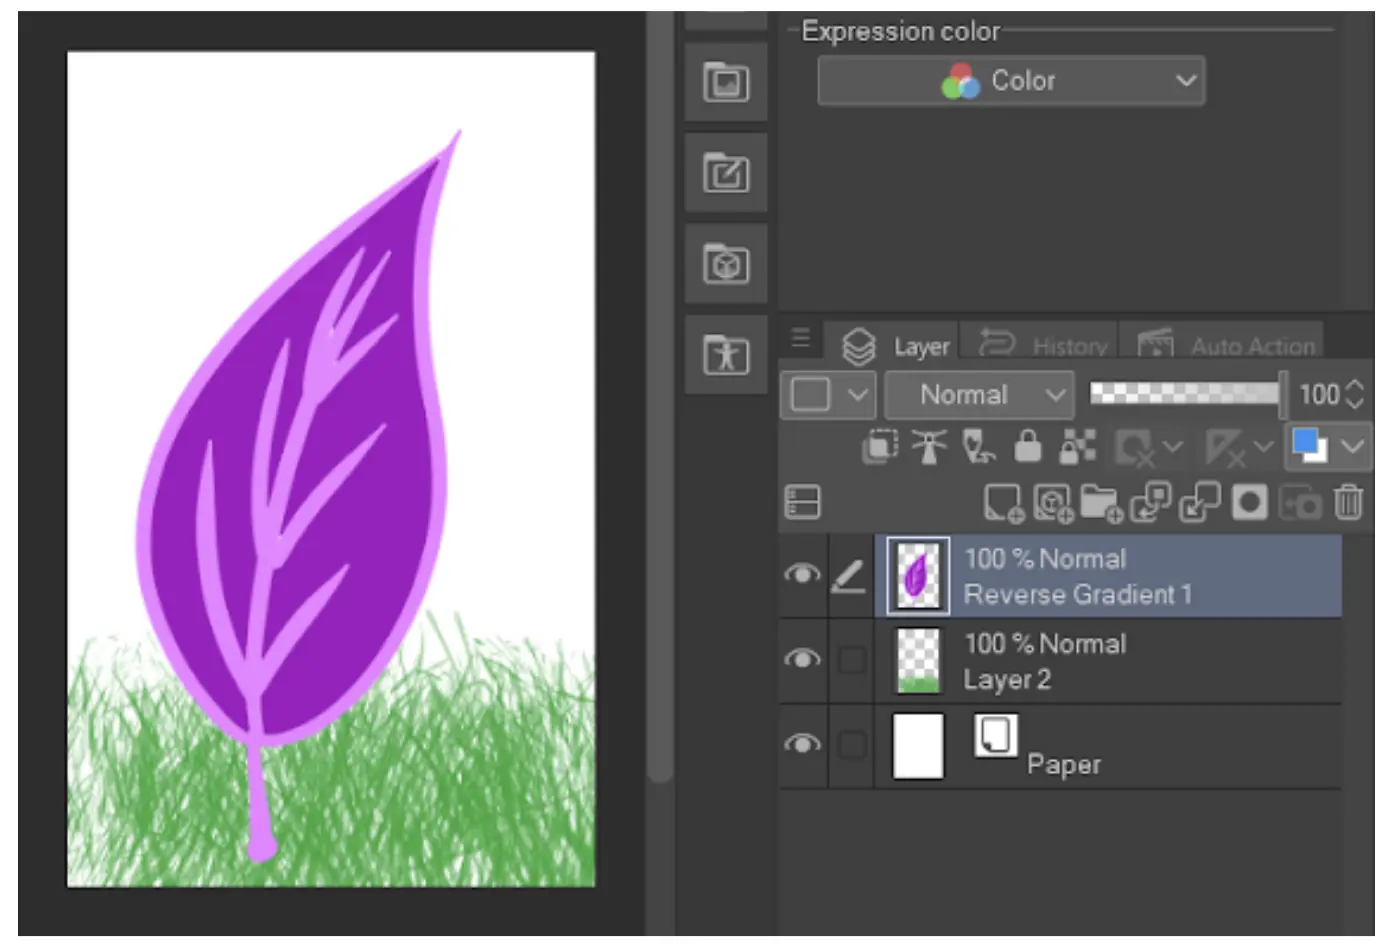
Make sure that the “expression color” is selected as the color.
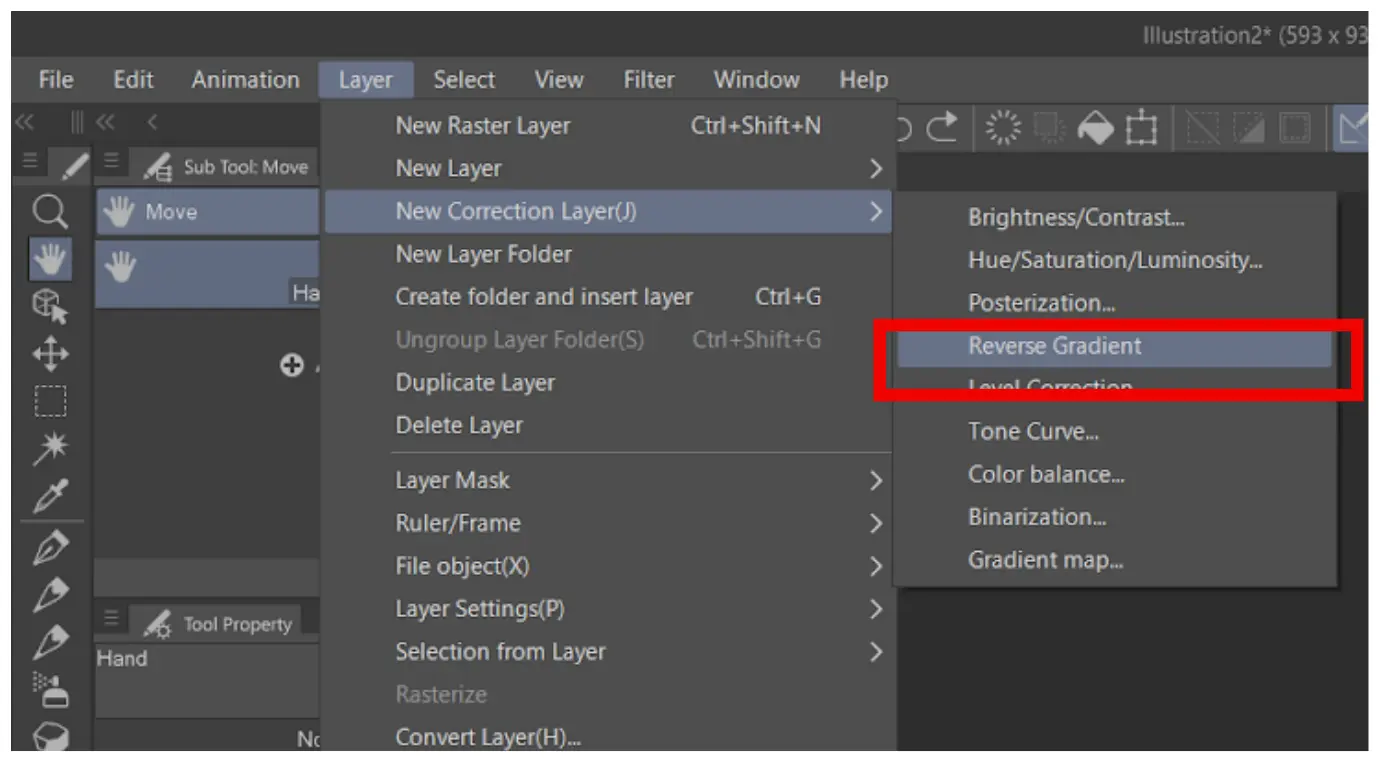
Go to “Layer,” “New correction layer,” and select “Reverse gradient.”

A new layer, “reverse gradient,” will appear above the layer. Note that this layer will invert the colors of all layers below it.
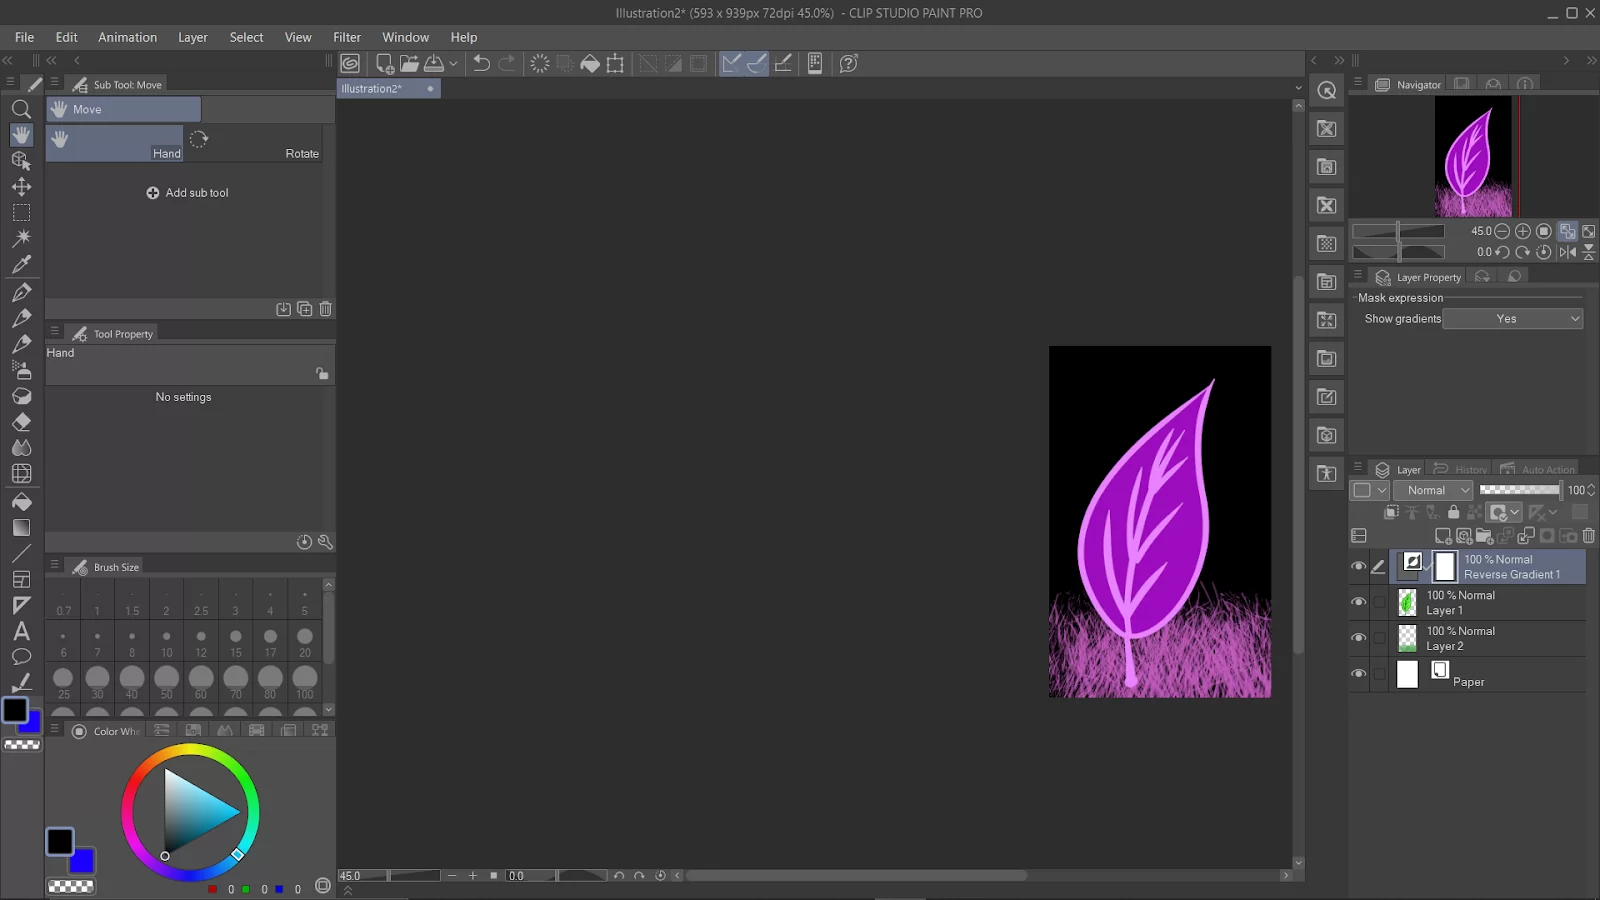
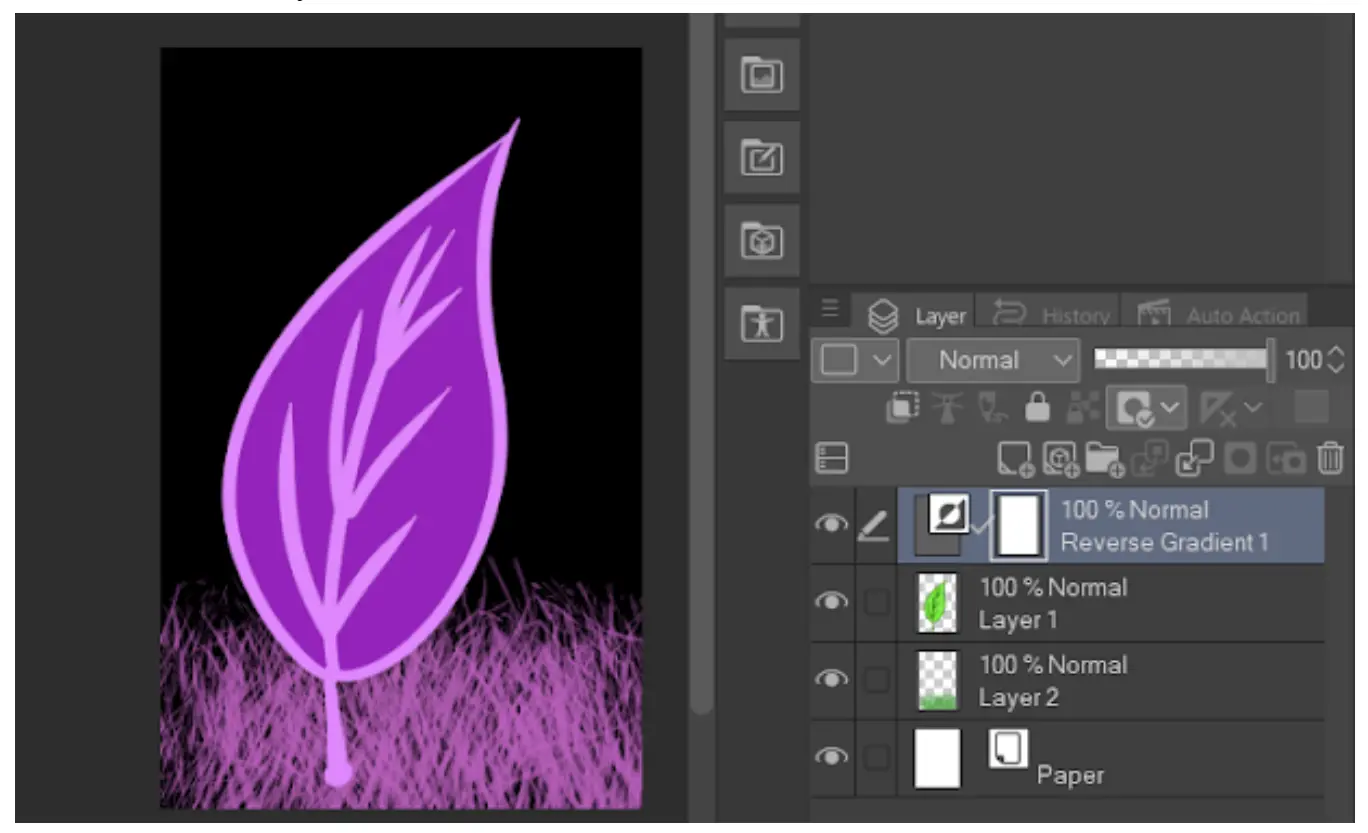
If you intend to invert only one specific layer, first make sure the reverse gradient layer is positioned above the target layer (shown in red box).

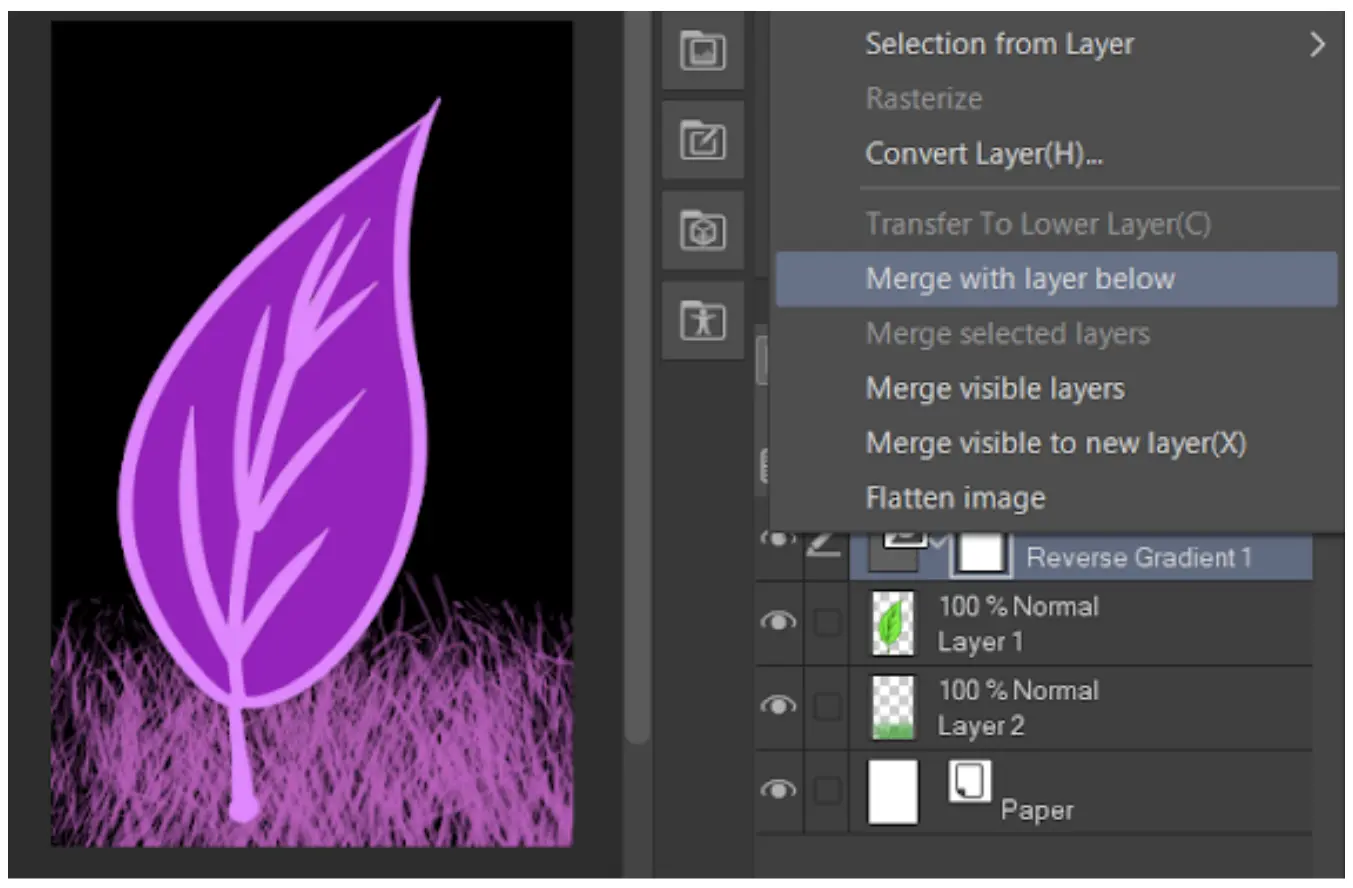
Simply merge the “reverse gradient” layer with the target layer below by right-clicking the layer, and select “merge with the layer below.”

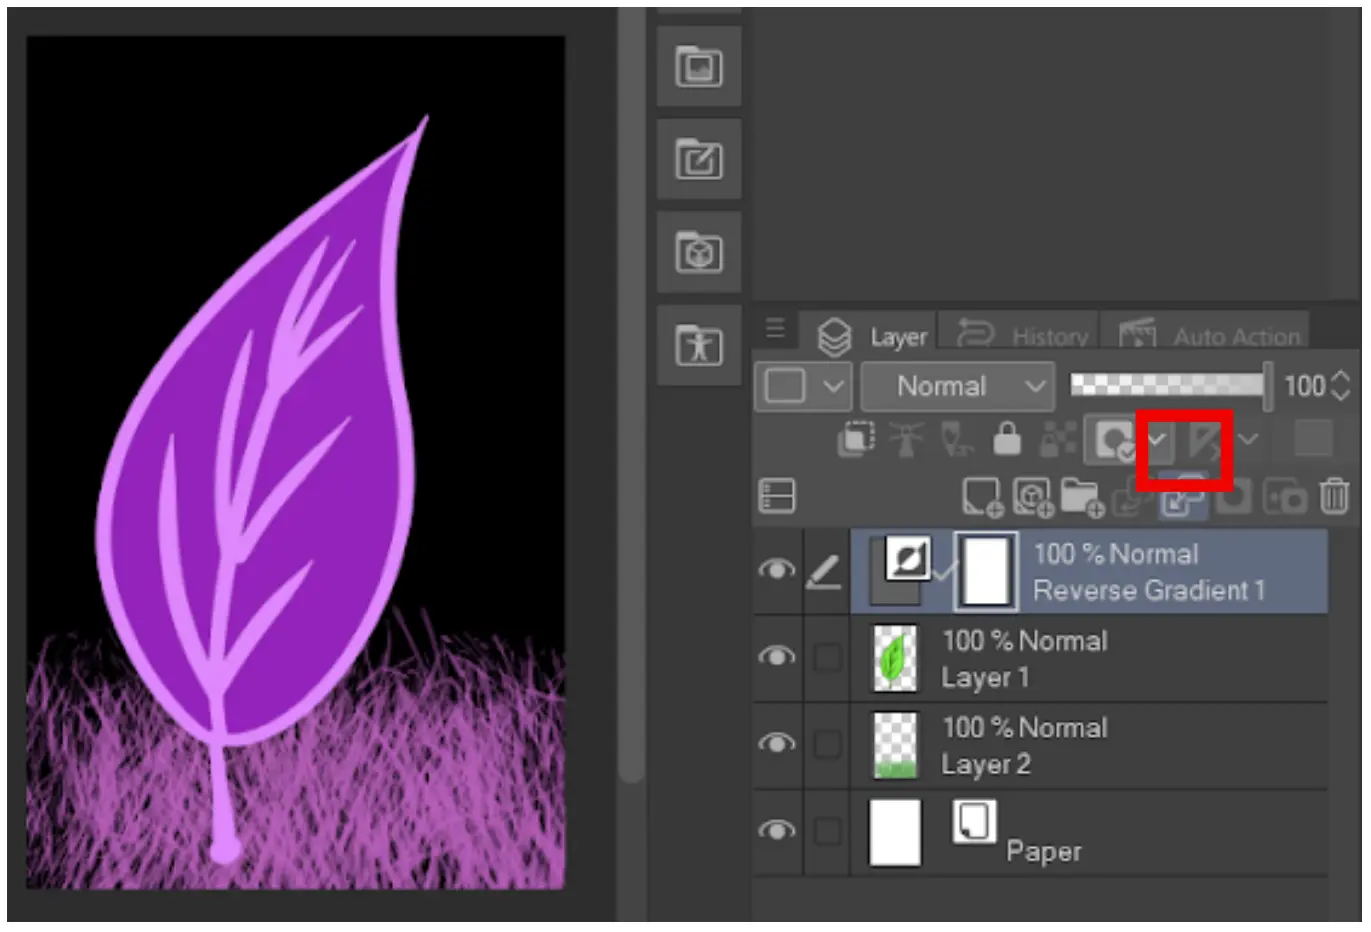
Alternatively, you can immediately click on the icon below to merge with the lower layer.
Color Inversion: What is It?
When the colors in a picture are inverted, they are turned to face their opposites on the color wheel. Red will turn blue, yellow will turn violet, and green will change to magenta. Each pixel’s brightness will be converted to its appropriate value as well.
The purpose of the color wheel was to illustrate how colors relate to one another. The color wheel was first discovered by Isaac Newton for his optical research. It has since been revised to serve better the requirements of scientists, designers, artists, photographers, videographers, and other professionals.
Since black and white photographs lack color, you might be curious if it is possible to perform a color inversion on them. Yes, you can. But, color inversion in a black-and-white instance implies that light parts turn dark and dark areas turn light. In colored images, the colors are inverted to their complementaries. No color saturation or brightness is lost when you invert black and white.
Why is Color Inversion Needed?
You may be wondering why anyone will need to invert the color of an image. You might want to invert colors on your images for various reasons. Some are only for aesthetic reasons. Simply put, people enjoy and find pleasure in images with reversed hues. However, those with different color visions might also benefit from color inversion.
Color inversion is helpful to those who are color-blind as well. A person who is color blind does not necessarily perceive everything in black and white. Color blindness comes in various forms, and those who have it frequently perceive colors differently.
They might be able to perceive colors where they previously believed none existed by inverting the colors. An image’s colors aren’t the only thing that is altered by color inversion; contrast and detail are also improved. Those with vision impairments might find this helpful. By removing blue light, it can lessen eye strain because it also darkens the light areas.
Did you like reading this piece? Then, check out our in-depth guide on how to shade in Clip Studio Paint.