The great thing about the world of digital art is that creativity knows no bounds and there are easily accessible tools that allow us to bring our imagination to life. One such tool is Clip Studio Paint, a digital painting software that offers a multitude of features to enhance our artwork. Today, we will delve into one of its lesser-known but incredibly useful functions – flipping selected areas.
By the end of this tutorial, you’ll have mastered the art of flipping and be able to create dynamic compositions with ease. So, let’s unleash the full potential of Clip Studio Paint.
How to Flip Selected Area in Clip Studio Paint
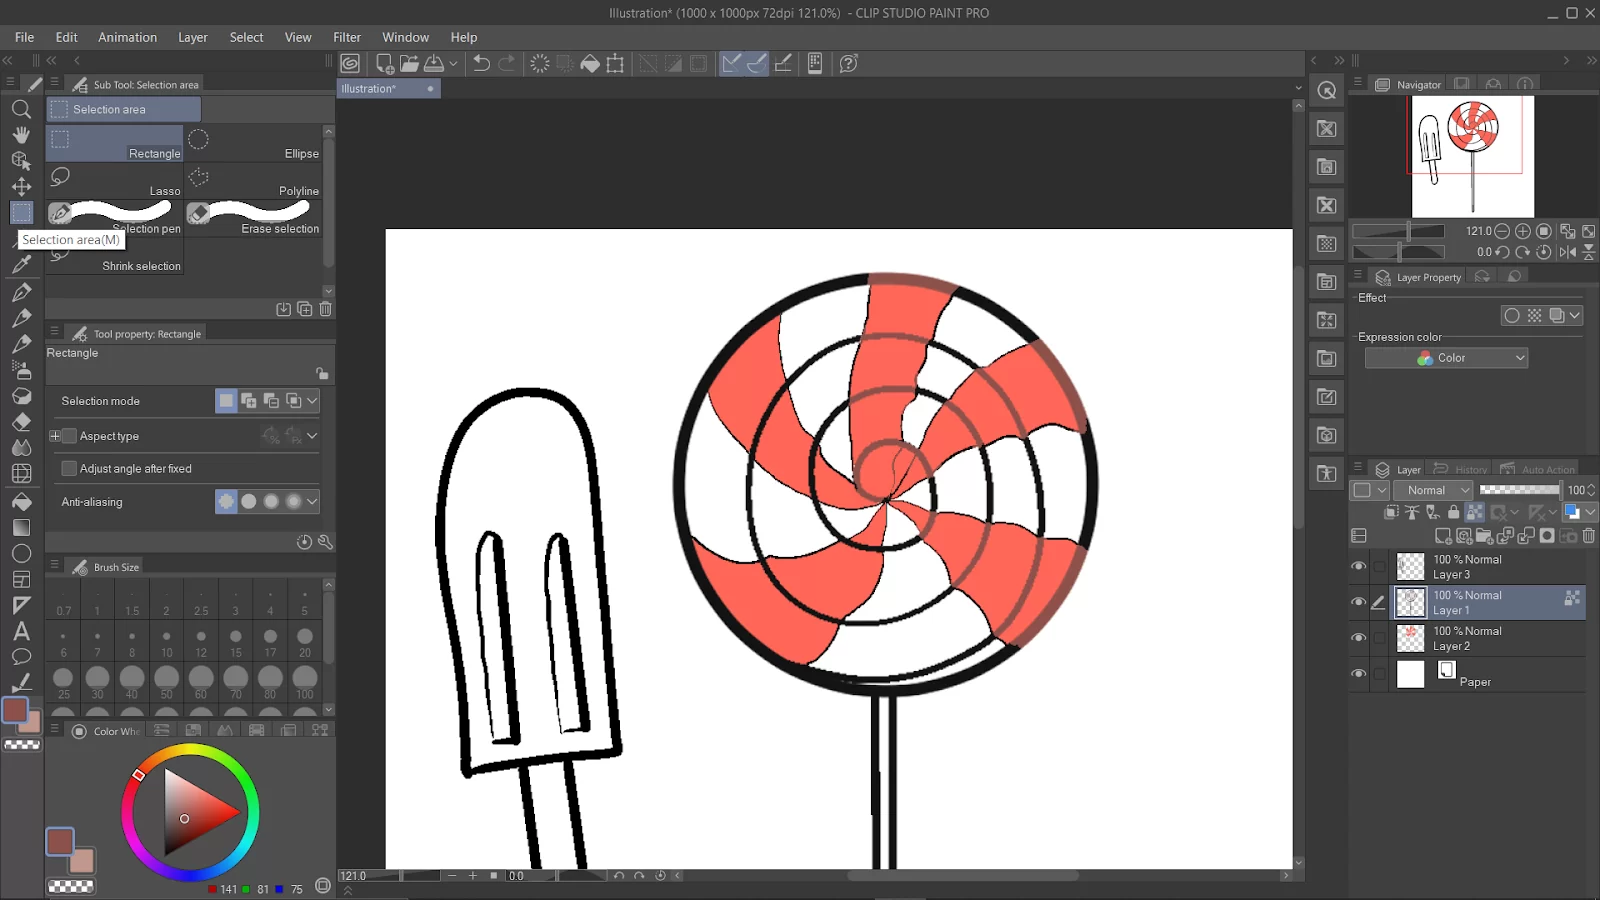
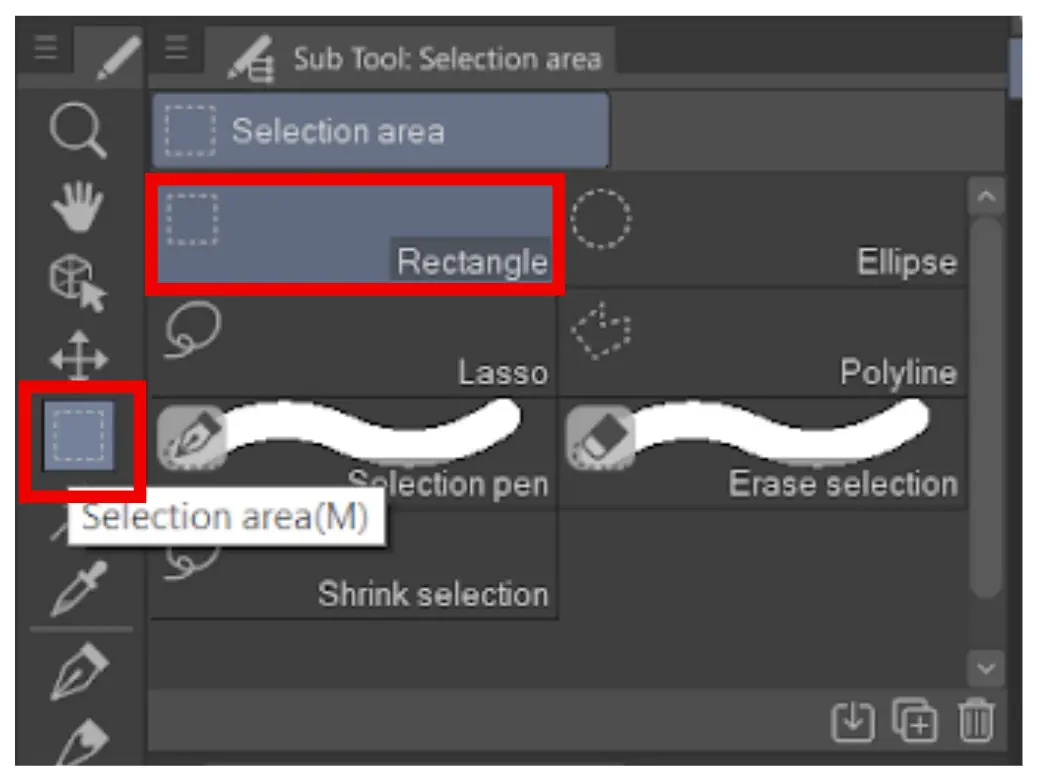
In clip studio paint, select the “selection area” tool. Choose your shape depending on the shape of the area that you want to flip.
Click and drag on the area of the layer.

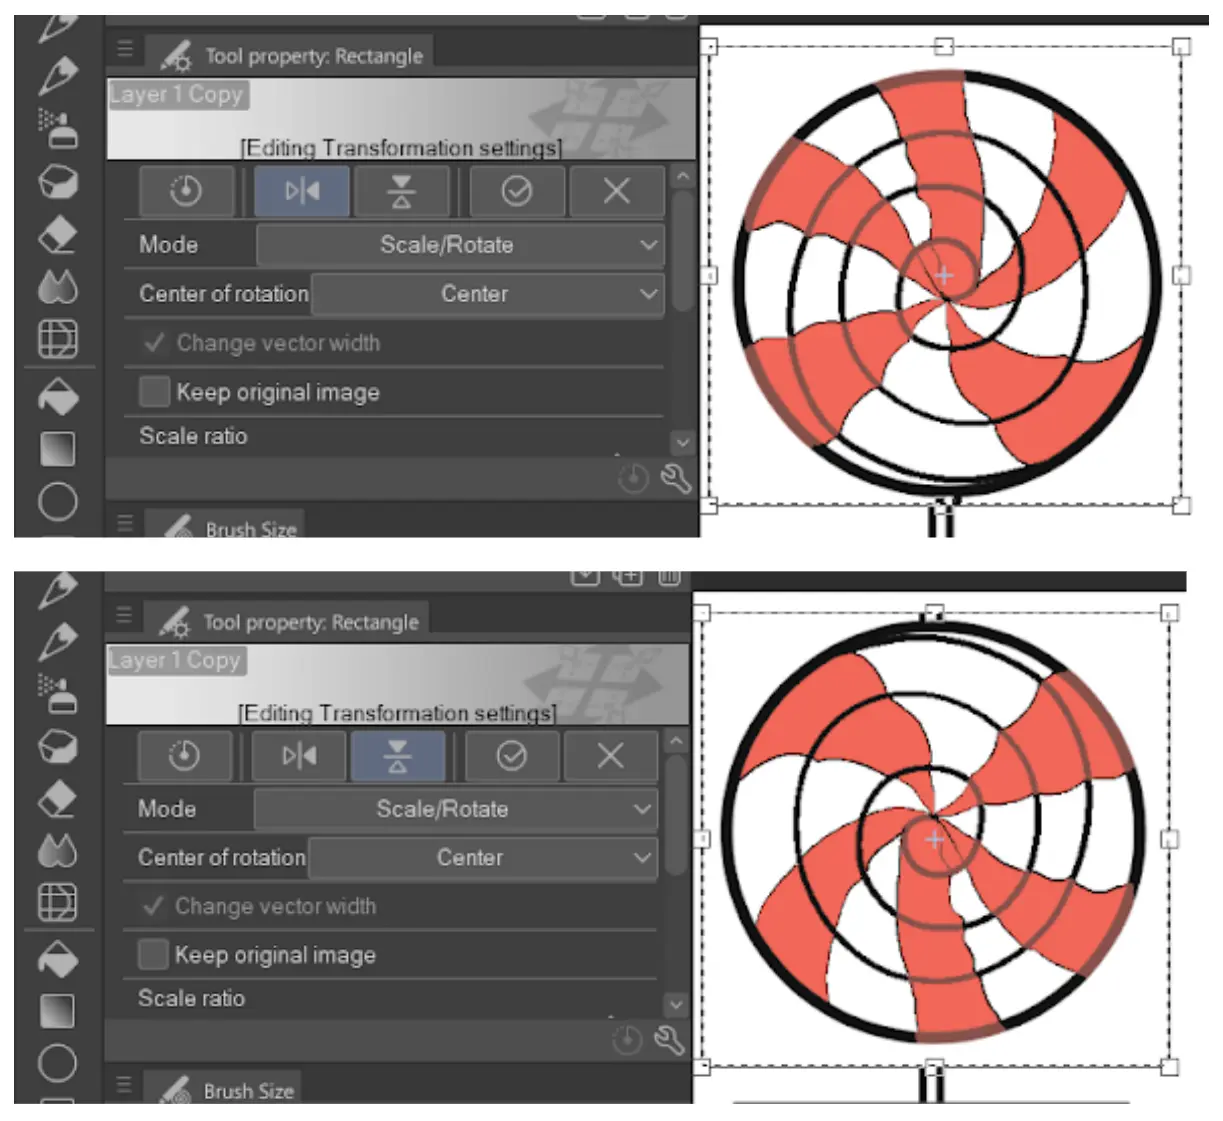
On the toolbar that appears below the highlighted area, select “ Scale/Rotate.”

On the Tool property, click on these icons to flip. The left one flips the area horizontally, while the right one flips it vertically.

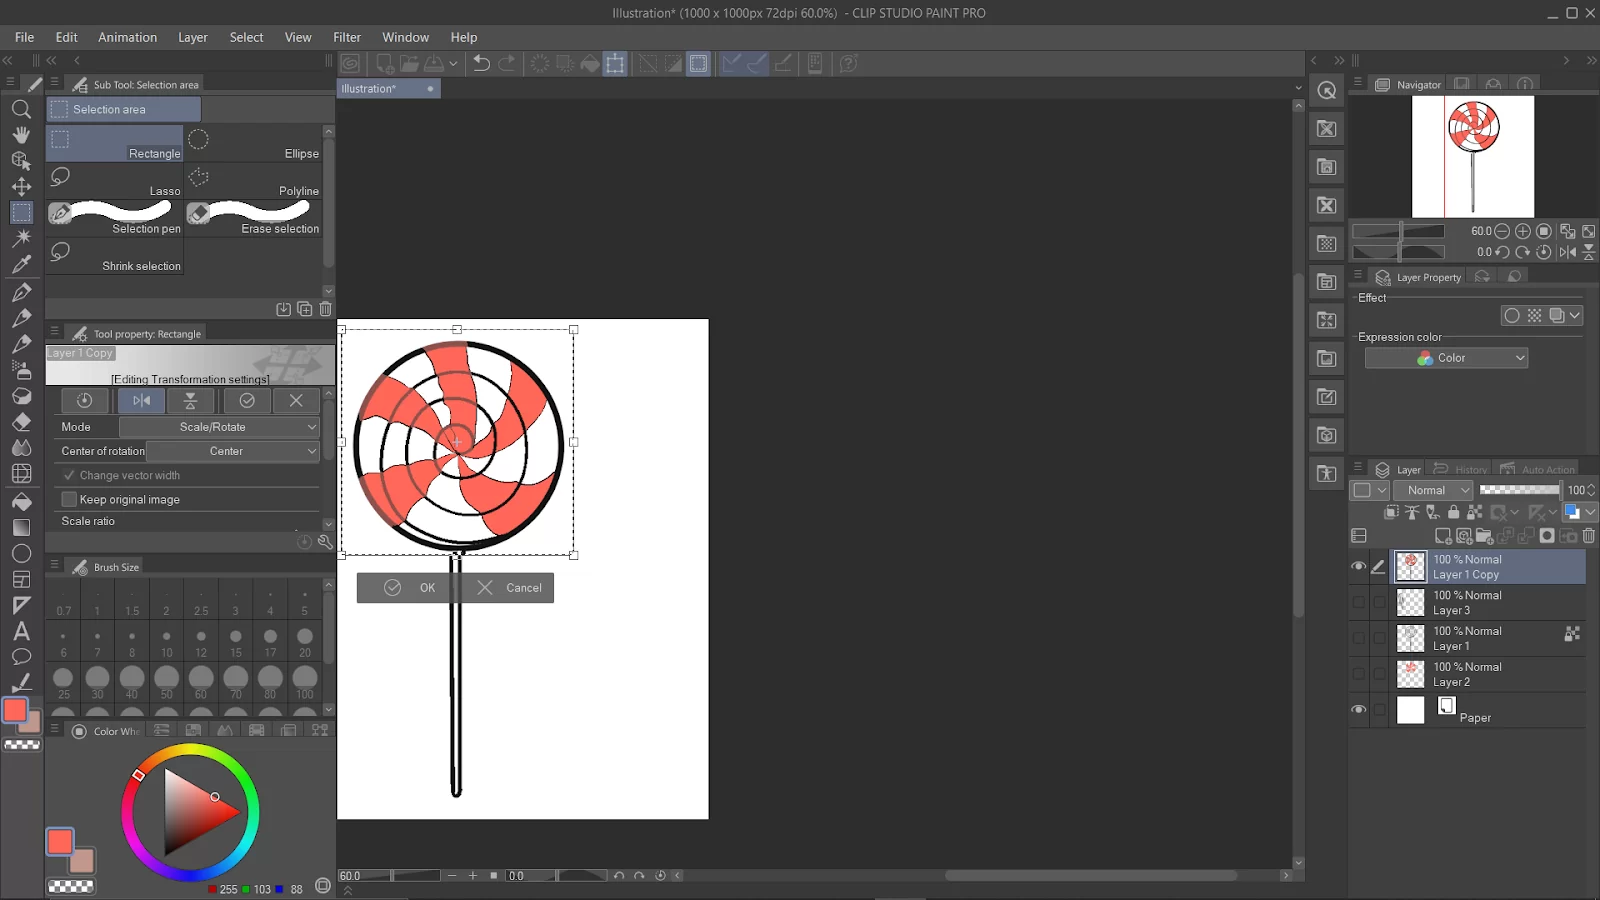

After flipping the area, Select “confirm” or “okay.”

How to Flip Horizontally in Clip Studio Paint
Follow the steps below to flip horizontally in Clip Studio Paint.
Step 1
Start by dragging the center to move the position of the center. Also, hold down Alt while clicking the canvas to move the center point to anywhere you click. Ensure that you allow the layer to flip horizontally before you click OK.
Step 2
Alternatively, you can also use the Tool Property by going to Palette>Transform.
How to Flip a Layer in Clip Studio Paint
If you want to flip a layer in Clip Studio Paint, you need to select the layer by going to your layers panel. Now click on the Transform tool and choose the option that will allow you to flip horizontally or vertically.
In Clip Studio Paint, turning a selection is identical to flipping an entire layer. This is far easier than flipping a selection because you don’t need to go through the stress of selecting an individual layer. It takes less time, but the other processes are similar to flipping a selection.
Step 1
Start by navigating to the layers list. Now select the layer that you want to flip. You can also flip multiple layers at the same time. You need to choose all the layers you want to flip by check-marking each. You can hold down the command button and click on the layers that you want.
Step 2
Once you’ve made your decision, select the Transformation tool. In the Transformation tool, you will find two options. You can open the Edit menu and select the Transformation option.
Alternatively, you can click on the Transformation icon which is located in the top toolbar and then open the Tool Property menu. When you see the square icon that has the scale/rotate label, that is your Transformation tool. The Tool Property menu will include the needed Transform settings when you click the button.
Step 3
If you accessed the Transform button from the Edit menu, you must click on the relevant button to flip your layer vertically or horizontally.
Have you clicked on the Transformation icon? If you have, find the flip vertically or horizontally buttons in the Tool Property menu. The button that has an icon of two triangles placed side by side is the flip horizontally button. The button with the icon of two triangles stacked one on top of the other is the flip vertically button.
If you enjoyed reading this piece, you can also check out our in-depth guide on using the color tool in Clip Studio Paint.