Are you looking to improve your drawing skills in Photoshop? One of the most basic, yet essential, skills to master is drawing straight lines. Whether you’re creating precise designs or just want to add a clean edge to your artwork, knowing how to draw straight lines in Photoshop can be a game-changer.
Tools for Drawing Straight Lines in Photoshop
In Photoshop, you can use the Line Tool or the Pen Tool to draw straight lines.
The Line Tool
The Line Tool is a simple drawing tool that allows you to draw straight lines by clicking and dragging from the starting point to the ending point of the line. You can adjust the thickness and color of the line using the options in the Properties panel on the right side of the screen.
The Pen Tool
The Pen Tool is a more advanced drawing tool that allows you to create precise paths and shapes. To draw a straight line with the Pen Tool, you can click on the starting point of the line to create a new anchor point and then click on the ending point of the line to create a second anchor point. You can then apply a brush stroke to the path to draw the line. The Pen Tool also allows you to draw lines with curves by clicking and dragging to create additional anchor points along the path.
Both of these tools can be used to draw straight lines in Photoshop, and which one you choose will depend on your needs and preferences.
Drawing A Straight Line Using The Line Tool
To draw a straight line in Photoshop, you can use the Line Tool. Here is a step-by-step guide on how to do it:
Open Photoshop and create a new document or open an existing image.

Select the Line Tool from the toolbar on the left side of the screen, or use the shortcut key “U” to activate it.

Click and hold on the starting point of the line, then drag the cursor to the ending point of the line. You will see a preview of the line as you drag. Release the mouse button to complete the line.

If you want to adjust the thickness or color of the line, you can do so using the options in the Properties panel on the right side of the screen.
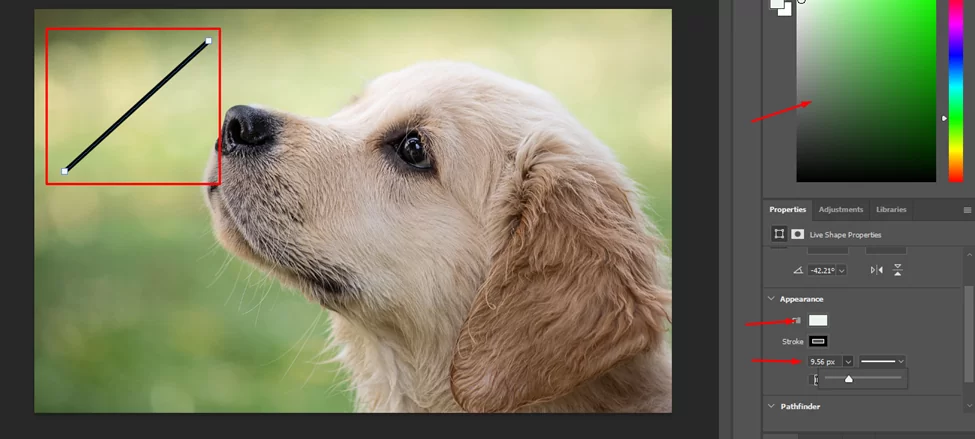
You can also use the Shift key to constrain the line to a perfect horizontal, vertical, or diagonal angle. Simply hold down the Shift key as you draw the line to lock it to one of these angles.

If you want to draw multiple straight lines, simply repeat the process for each line. You can also use the Line Tool to draw straight lines with curves by clicking and dragging to create anchor points along the line.
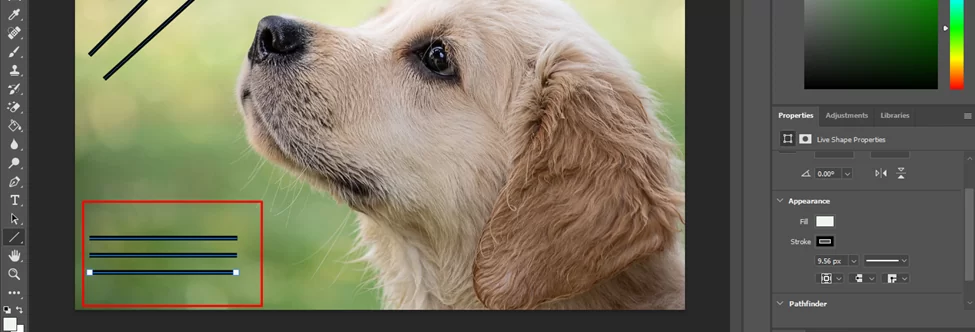
When you are finished drawing your lines, you can save your image or continue working on it as needed.
Drawing A Straight Line Using The Pen Tool
You can also use the Pen Tool to achieve this. Here is a step-by-step guide on how to do it:
Open Photoshop and create a new document or open an existing image.
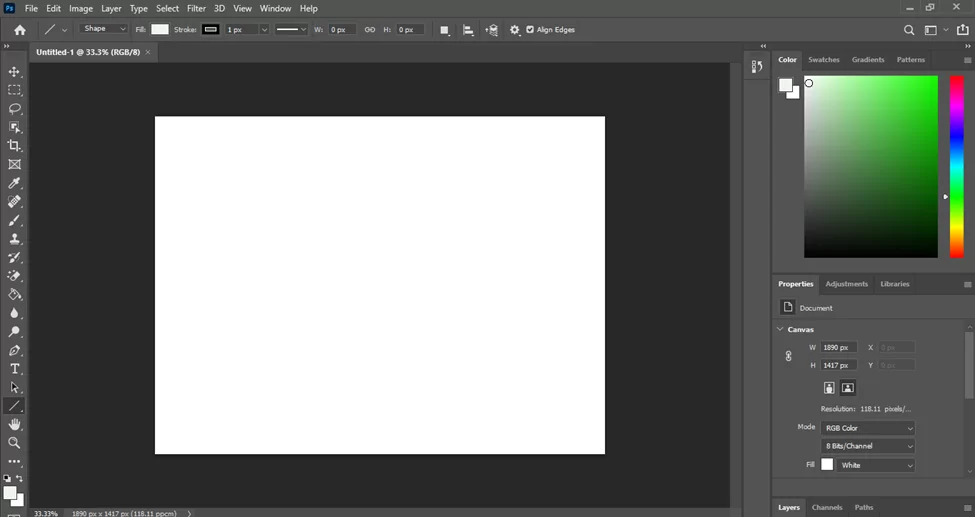
Select the Pen Tool from the toolbar on the left side of the screen, or use the shortcut key “P” to activate it.
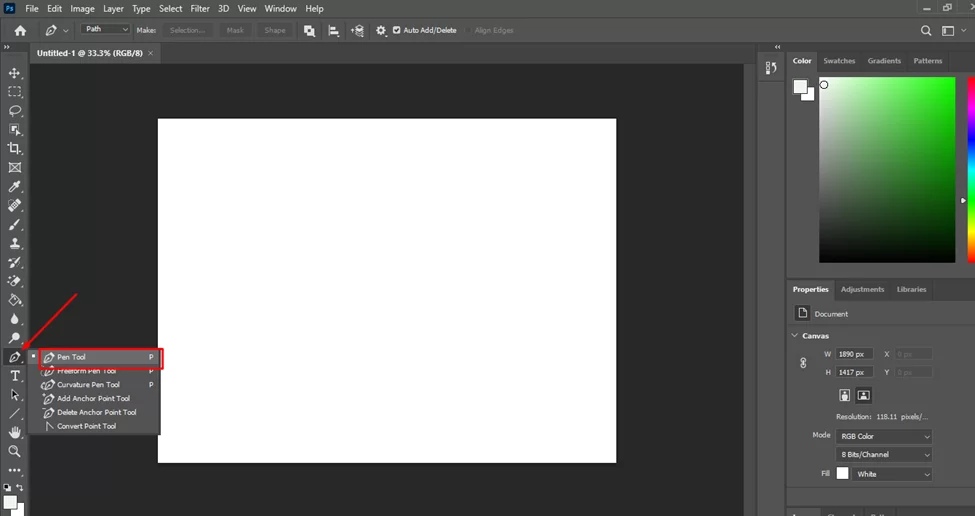
Click on the starting point of the line to create a new anchor point.

Click on the ending point of the line to create a second anchor point.
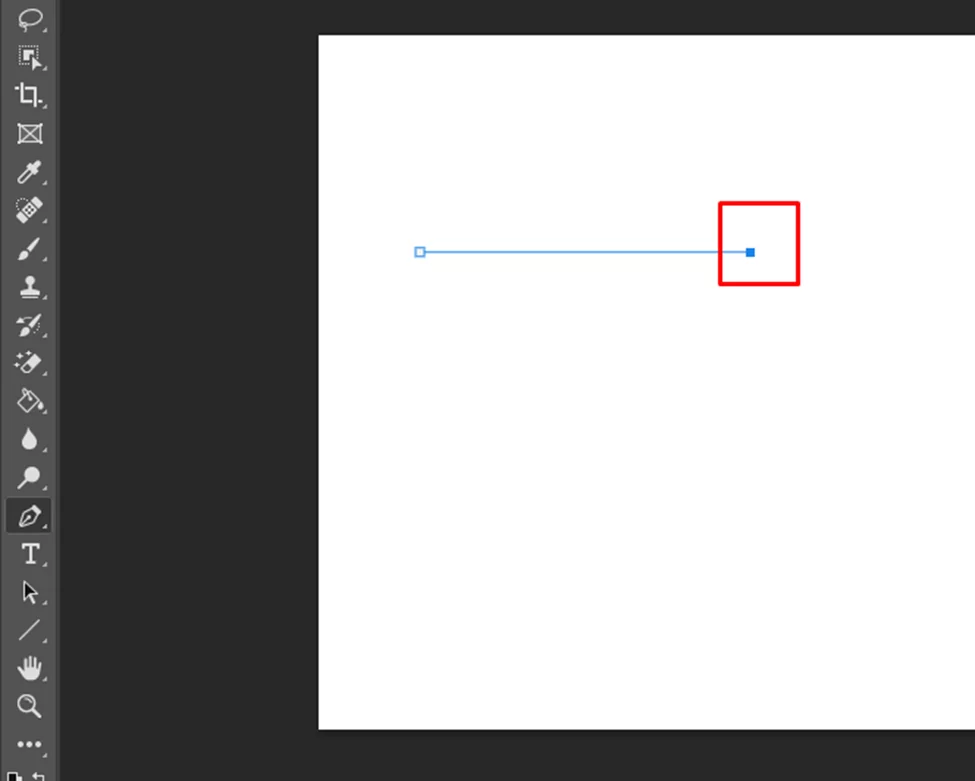
With both anchor points selected, right-click and choose “Stroke Path” from the context menu.
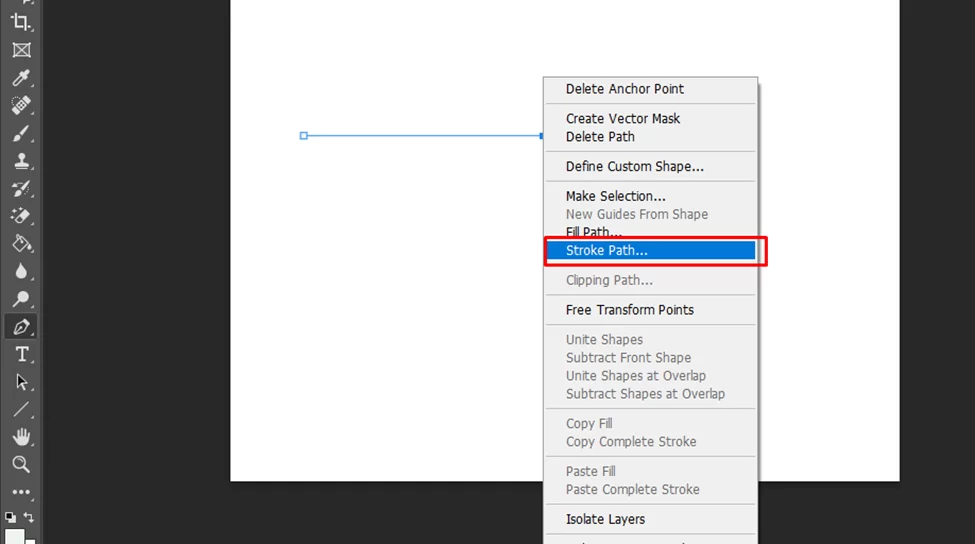
In the Stroke Path dialogue box, choose the brush tool from the “Tool” dropdown menu.

Choose any additional options you want, such as the brush size and color (which can be seen on the right panel of the screen), and click “OK” to apply the brush stroke to the path.

The line will be drawn using the brush tool, with the brush size and color you selected.
If you want to adjust the brush size or color after drawing the line, you can do so by selecting the line with the Path Selection Tool and then adjusting the brush size or color in the Properties panel on the right side of the screen.
You can also use the Pen Tool to draw straight lines with curves by clicking and dragging to create additional anchor points along the line. When you are finished drawing your lines, you can save your image or continue working on it as needed.
Tips & Tricks For Drawing Straight Lines In Photoshop
Here are some quick tips & tricks for getting even better results when drawing straight lines inside Adobe Photoshop:
- If possible, use reference points such as rulers & grids already present within Photoshop’s interface rather than relying solely upon eyeballing it every time -this not only makes things easier but also helps ensure greater levels of consistency across multiple drawings or projects.
- Utilizing snap-to guides may also help reduce inaccuracies by providing additional physical markers for aligning objects against known edges/points etc…
- If very precise measurements must be taken try employing Photoshop’s ruler & pen tools together as this offers far greater control than either alone would otherwise allow
- Lastly don’t forget about keyboard shortcuts such as pressing ALT+SHIFT+drag (mac) / CTRL+SHIFT+drag(windows) whilst dragging outlines which allows them to remain perpendicular no matter how long their length grows thus saving lots of valuable time spent adjusting angles manually.
Conclusion
Drawing perfect straight lines in Adobe Photoshop does not require extensive knowledge or skill – anybody can do it with just a few basic steps outlined above plus a couple of extra specialized techniques thrown into the mix too.
With the right amount of practice, soon enough, becoming a pro at creating beautiful vectors graphics-filled geometric shapes accurate layouts shall come naturally. Who knows maybe someday even become a digital artist capable of producing amazing artworks worthy of being hung in museums worldwide. Until then, however, why not start off by mastering the art and drawing straight lines?
Leave a Reply
You must be logged in to post a comment.