I have come to rely on the versatility and robust features that the Clip Studio Paint software offers. One of the techniques that I have found particularly useful in my workflow is using clipping masks. Clipping masks in Clip Studio Paint allow you to mask an image or vector layer, revealing only the parts that are inside the mask.
This technique can be used for a variety of purposes, such as isolating an object or creating interesting compositions. In my experience, using clipping masks in Clip Studio Paint has allowed me to elevate my artwork and bring a greater level of detail and creativity to my illustrations.
In this guide, I will share my knowledge and experience on how to effectively use clipping masks in Clip Studio Paint, providing tips and tricks to help you bring your artwork to the next level.
How To Make A Clipping Mask In Clip Studio Paint
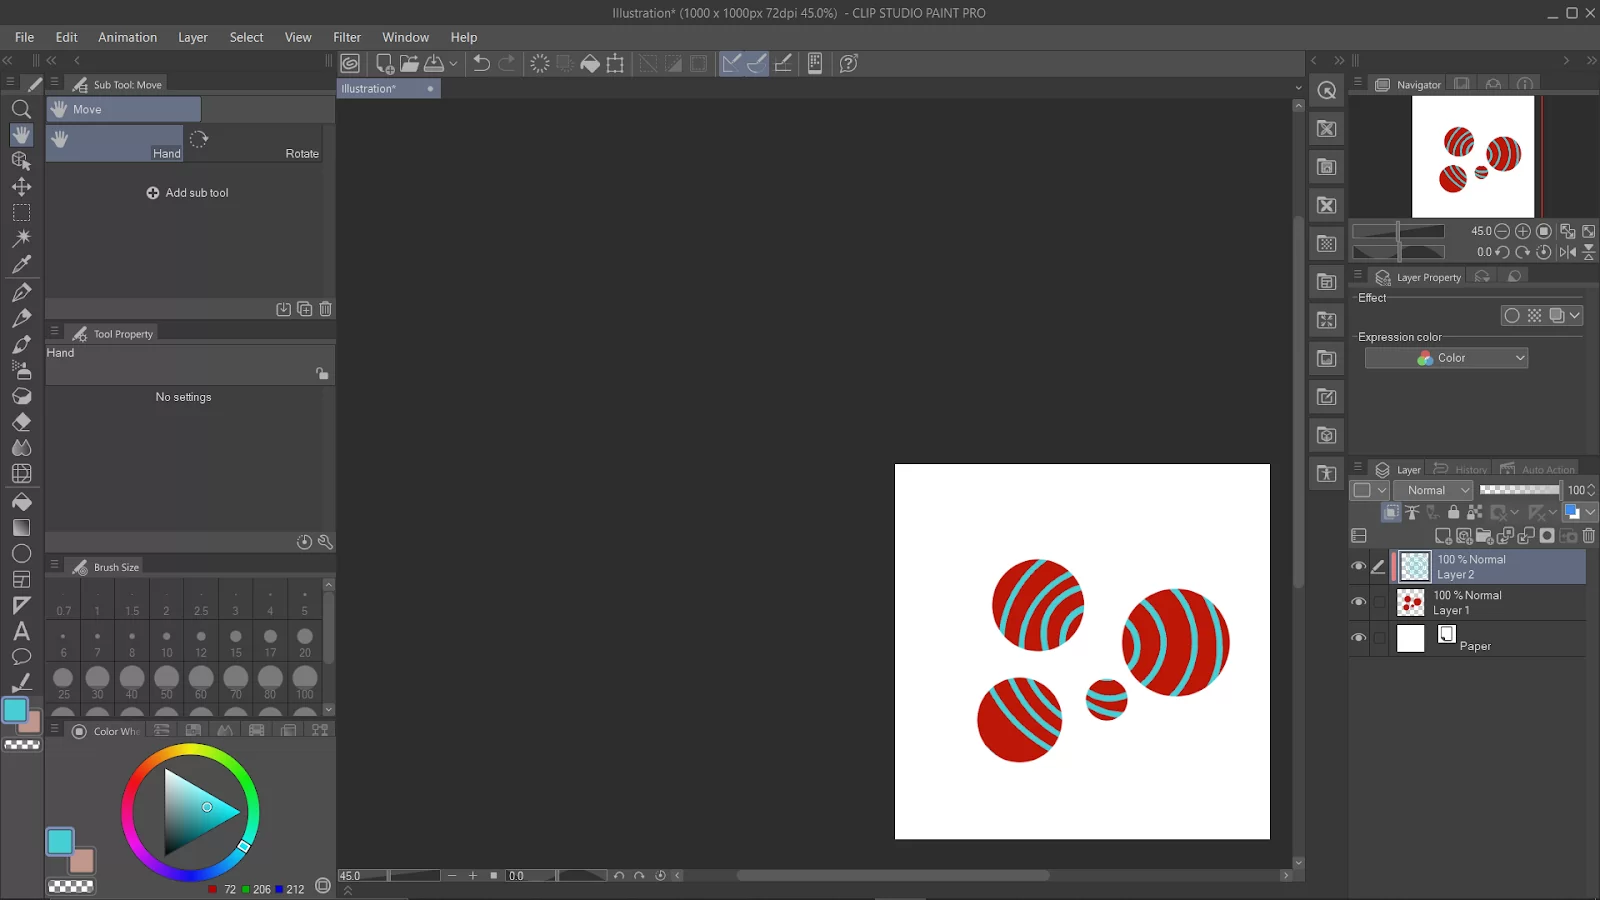
First, position the mask layer above your target layer. In this example, the blue spiral (layer 2) will be masked by the red circles (layer 1).

Select layer 2, and then select ”clip to layer below.”
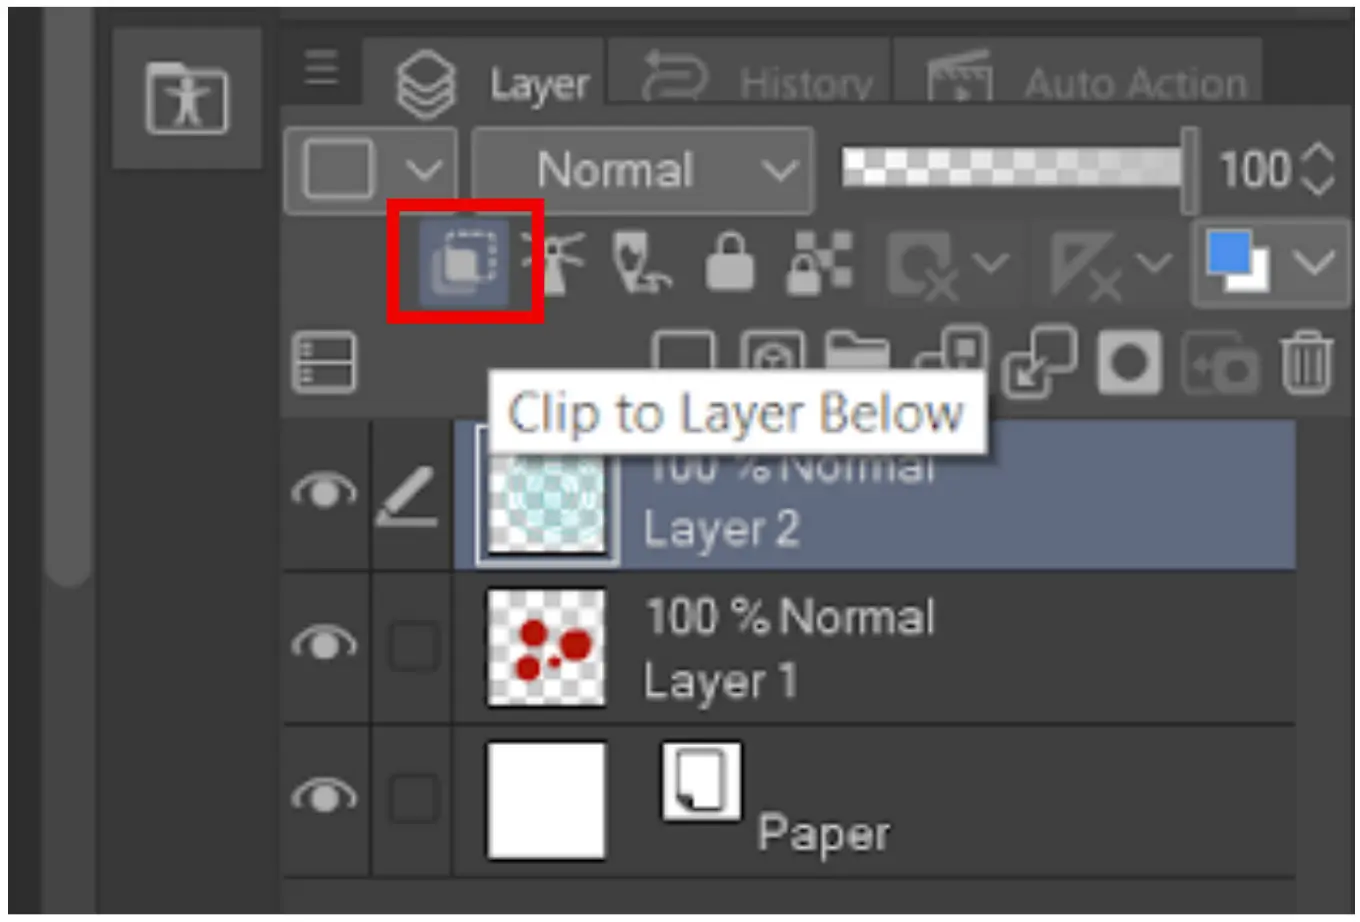
The regions of the blue spiral layer that are on top of the red circles will mask the circles. A red bar appears on the left side of layer 2 to indicate clip masking.
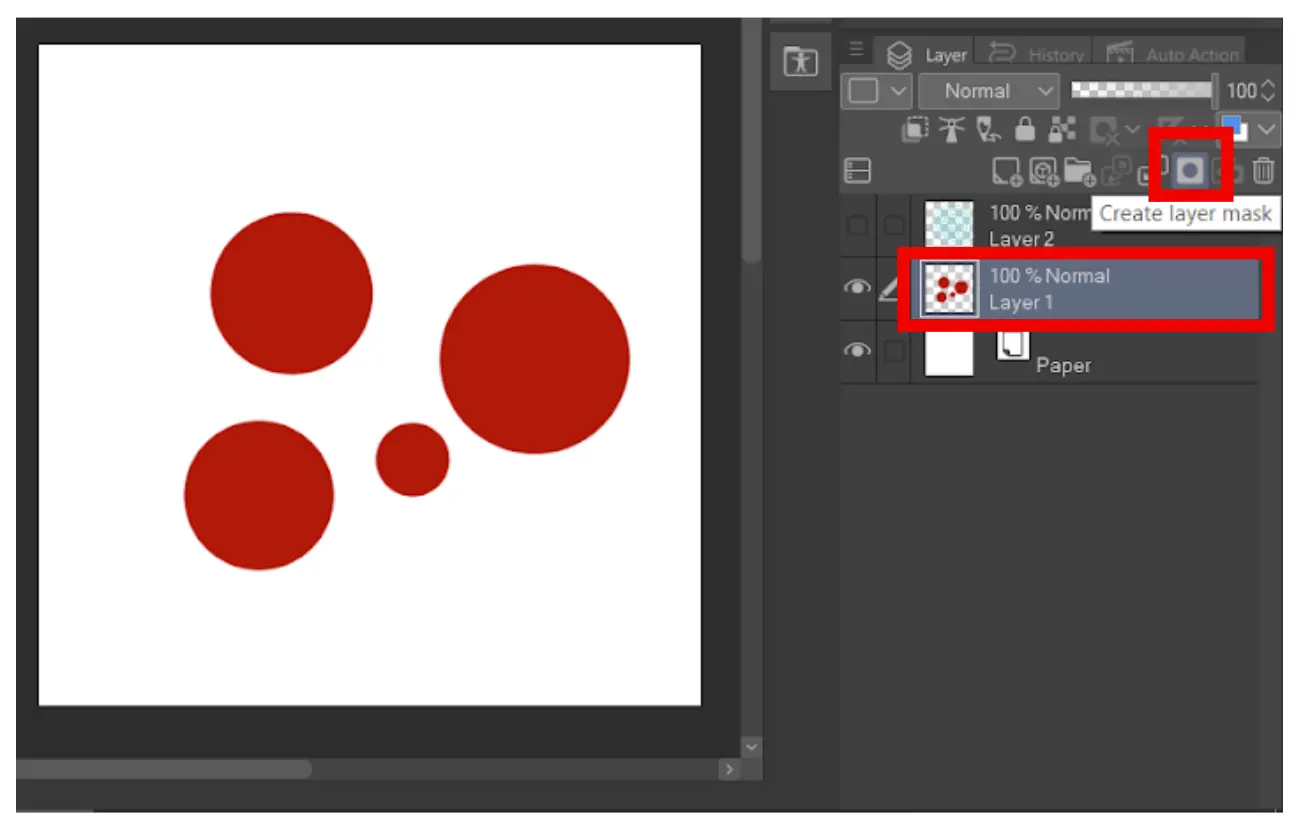
Another trick to masking layers is creating an independent layer within the same layer, called a “layer mask” function.
To do this, first, select the layer that needs masking. Click “create a layer mask.”
A separate white box appears right to the current layer. Click on the white box.
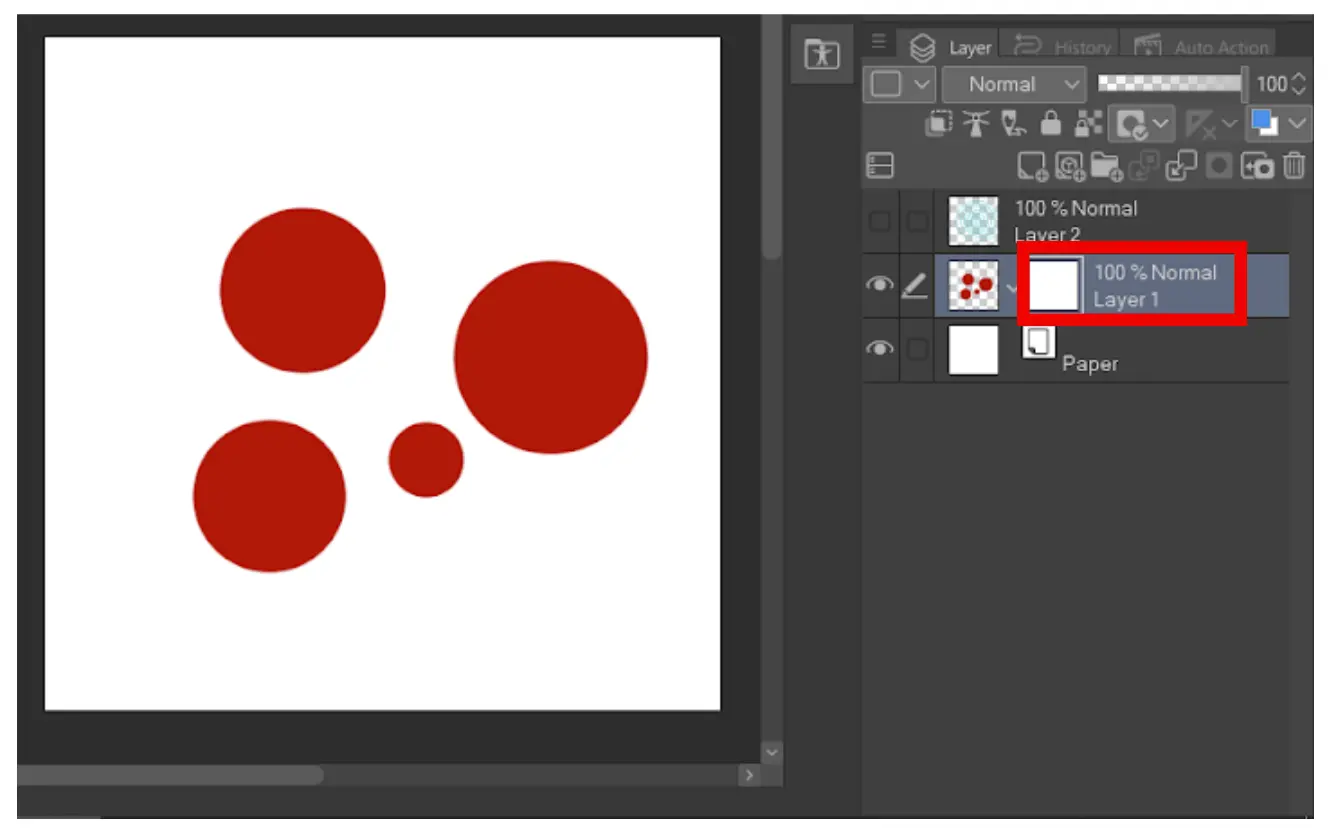
This masking method follows black-and-white settings, meaning using the eraser tool will remove part of the layer, while any drawing tools (pen, pencil, brush) will add to the layer regardless of the color you selected.

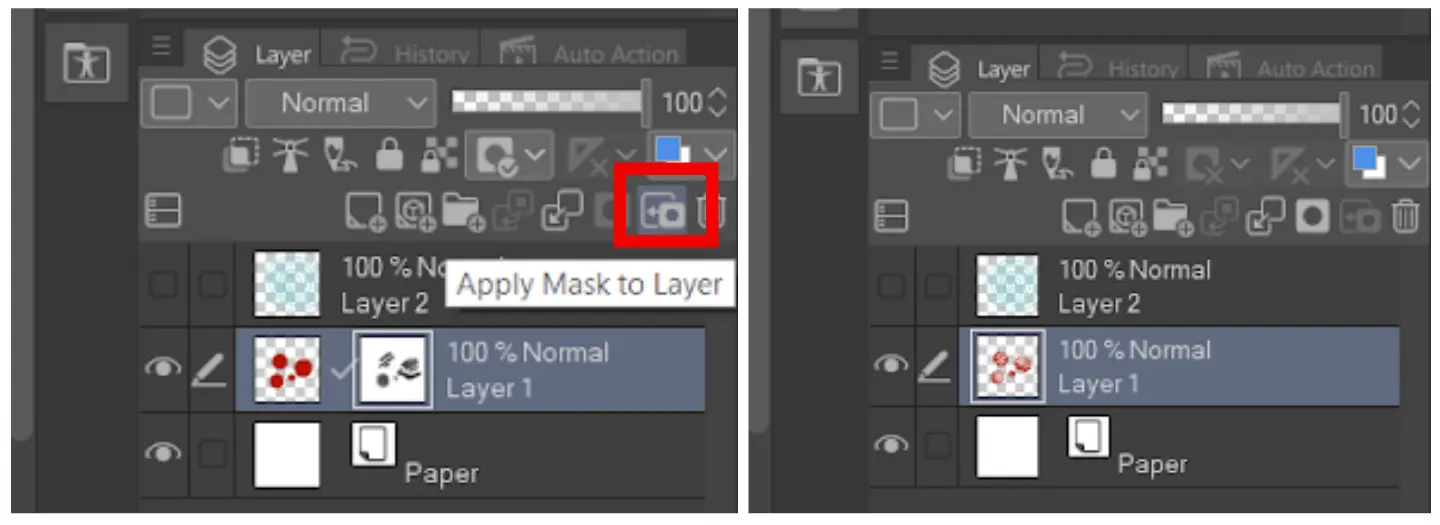
If you are satisfied with the mask, click “apply mask to layer.”
We also recommend our informative guide on installing brushes in Clip Studio Paint.
Clipping Mask: What is It?
A clipping mask is used in connecting multiple layers. The clipping mask connects multiple layers, creating a shared mask based on the shape of the bottommost layer. The bottom layer determines the clipped layer’s visibility. These masks come in handy when applying adjustment to a specific layer. They are also useful for altering the shape of an image.
For example, if you have a piece of text on one layer and an image on the other, you can use a clipping mask to fill the text with the image. After the image is clipped to the text, the image will be visible only in the shape of the text. This is because the clipping mask does it so that the above layers are restricted to the bottommost layer. You can mix as many layers as you want in a clipping mask. As the layers mix, they will create a kind of chain in which all links to the bottommost layer.
Although far more versatile, a rectangular clipping mask can accomplish the same result as a crop tool. It can take on any shape and be applied to numerous objects spread across canvas layers. Additionally, even after the mask has been placed, you can still change the mask and the things it covers.
You can also check out our guide on how to import brushes in Clip Studio Paint.
Editing a Clipping Mask
Editing a clipping mask is quite simple if you have been using a clipping path. To edit a clipping mask you can modify the clipping path using the Pen Tool, Selection Tool, and Lasso tool. If you want to outline the visible parts of the mask object, you can apply a stroke to the clipping path.
Find and select the masked object in the Layers panel if you want to edit it. To access the objects inside the selected ClipGroup, you must first open it. Once the ClipGroup is discernible, the masked object can be changed using standard procedures and tools.
If you enjoyed reading this article, you can also check out our detailed guide on how to transfer clip studio paint to another computer.