The digital pen in Clip Studio Paint offers the option to adjust pen pressure, you can unleash your inner artist and bring your illustrations to life with fluid, expressive lines. You can control the thickness of your lines with just a few settings and infuse your artwork with energy and emotion. We show you exactly how to adjust the pen pressure in Clip Studio Paint for various purposes.
How to Adjust Pen Pressure in Clip Studio Paint
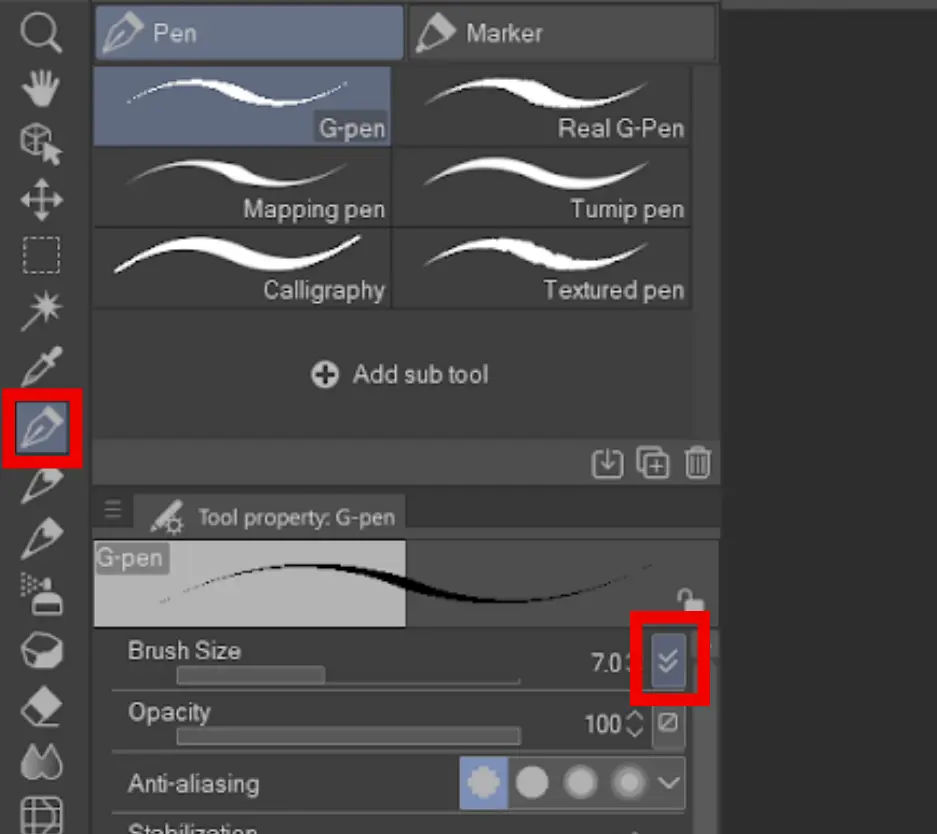
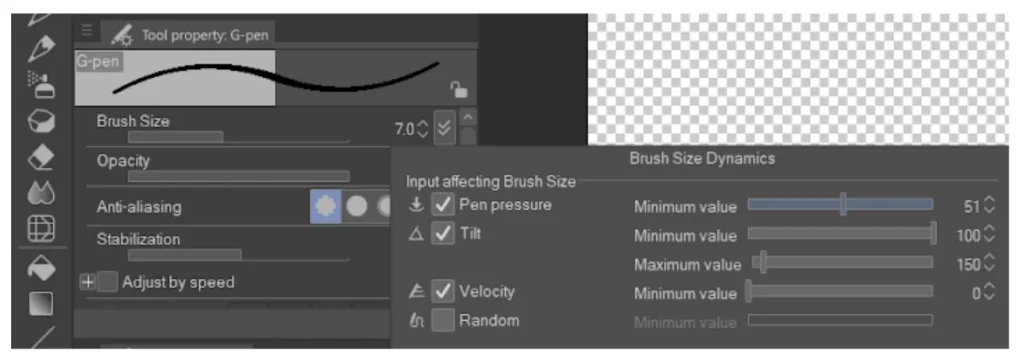
First, select the pen tool. In this case, we’ll be adjusting the G-pen pressure settings.

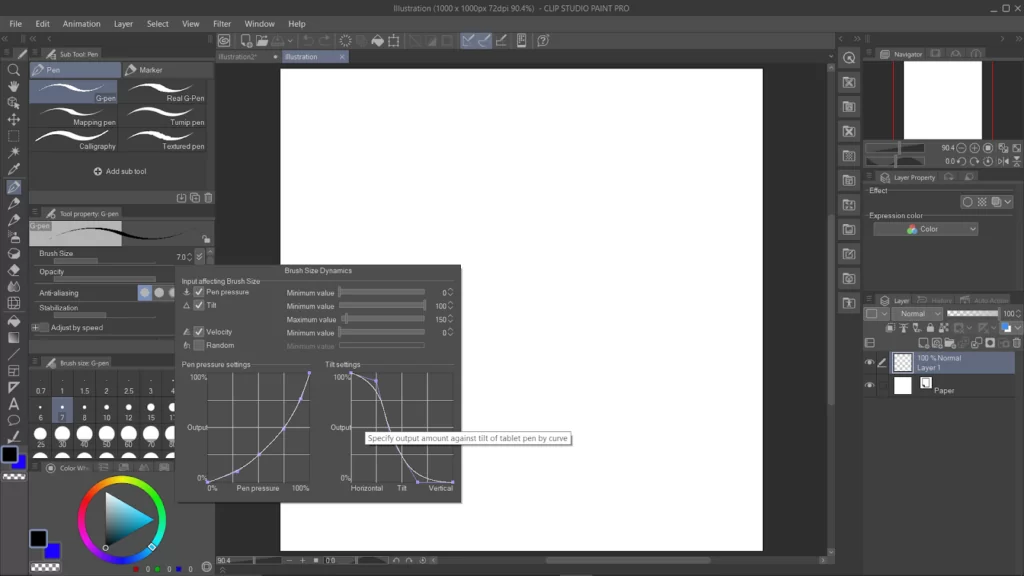
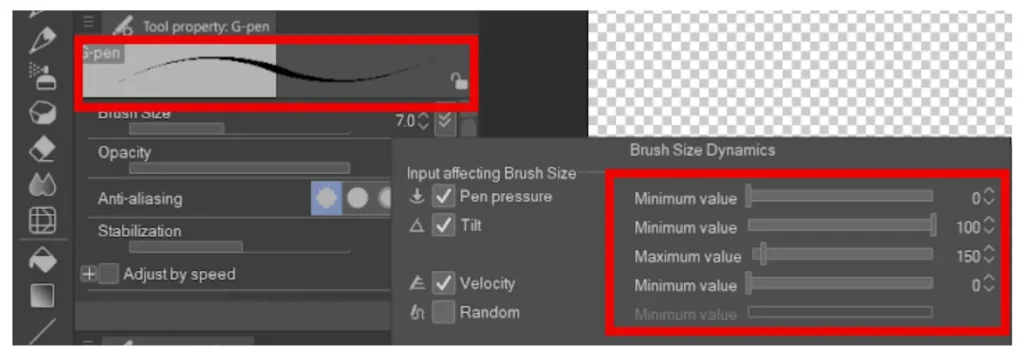
Select the tick icon next to the “brush size” bar to open the “brush size dynamics” menu.
In this menu, checking these boxes will allow changing the pen size depending on the;
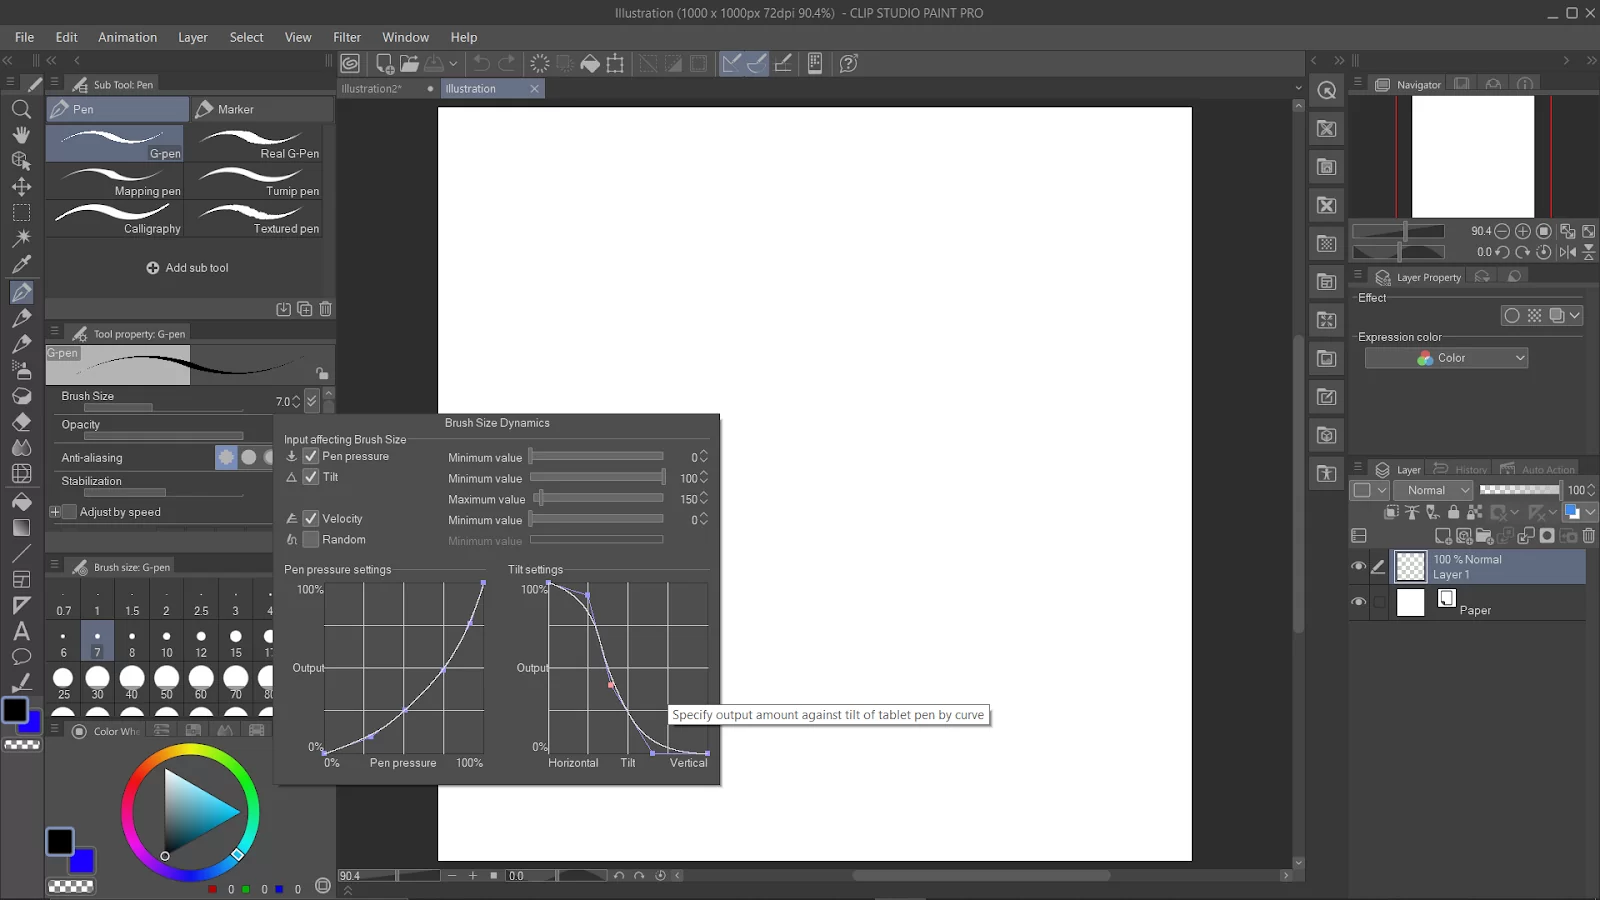
- Pen pressure – the pressure applied onto your tablet screen
- Tilt – the tilting/orientation of your pen
- Velocity – the speed of your pen strokes
For random, it will randomize the size regardless of the applied pressure. This tip is useful for abstract art
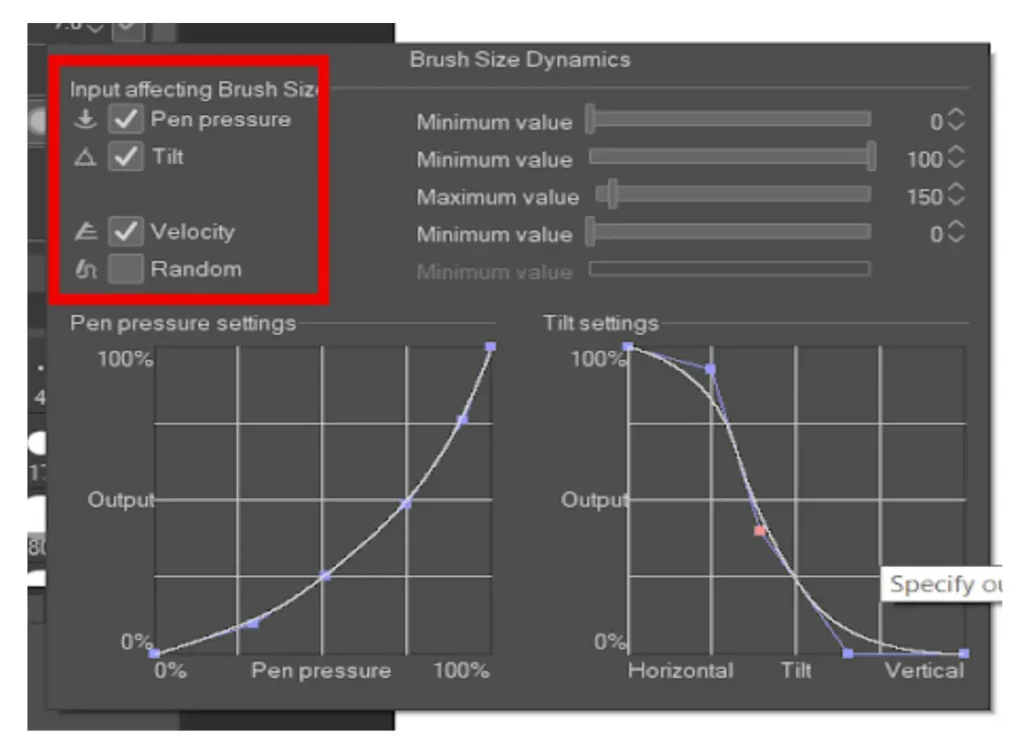
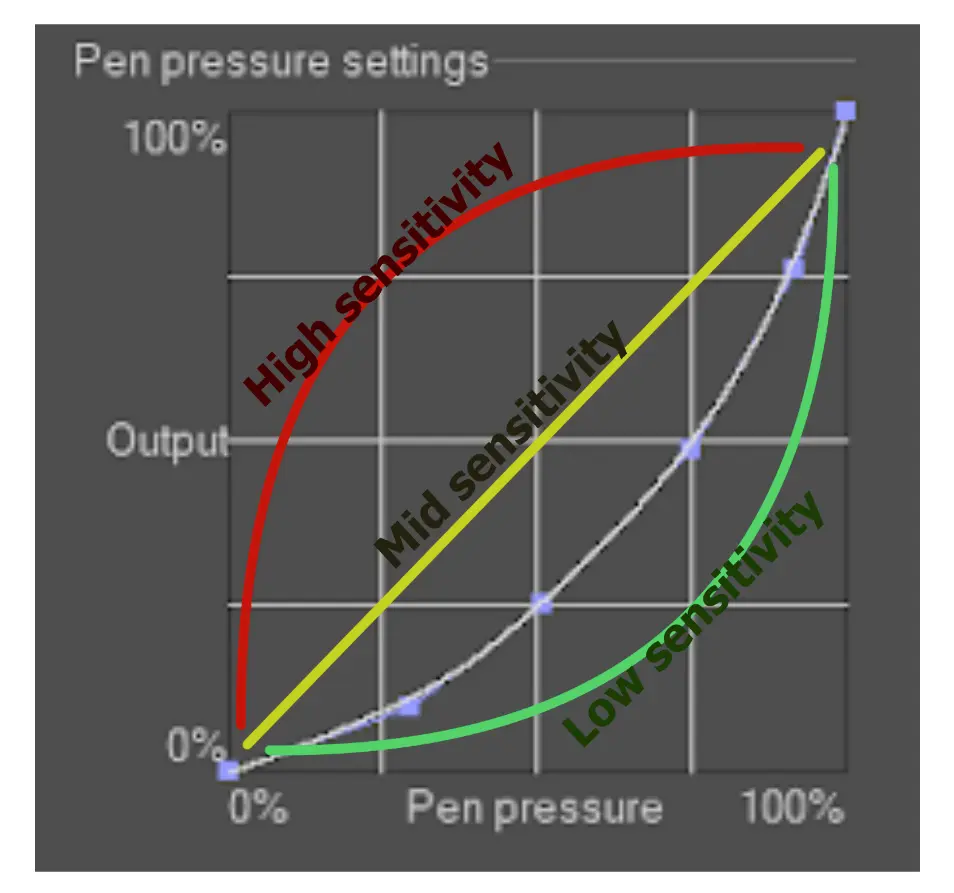
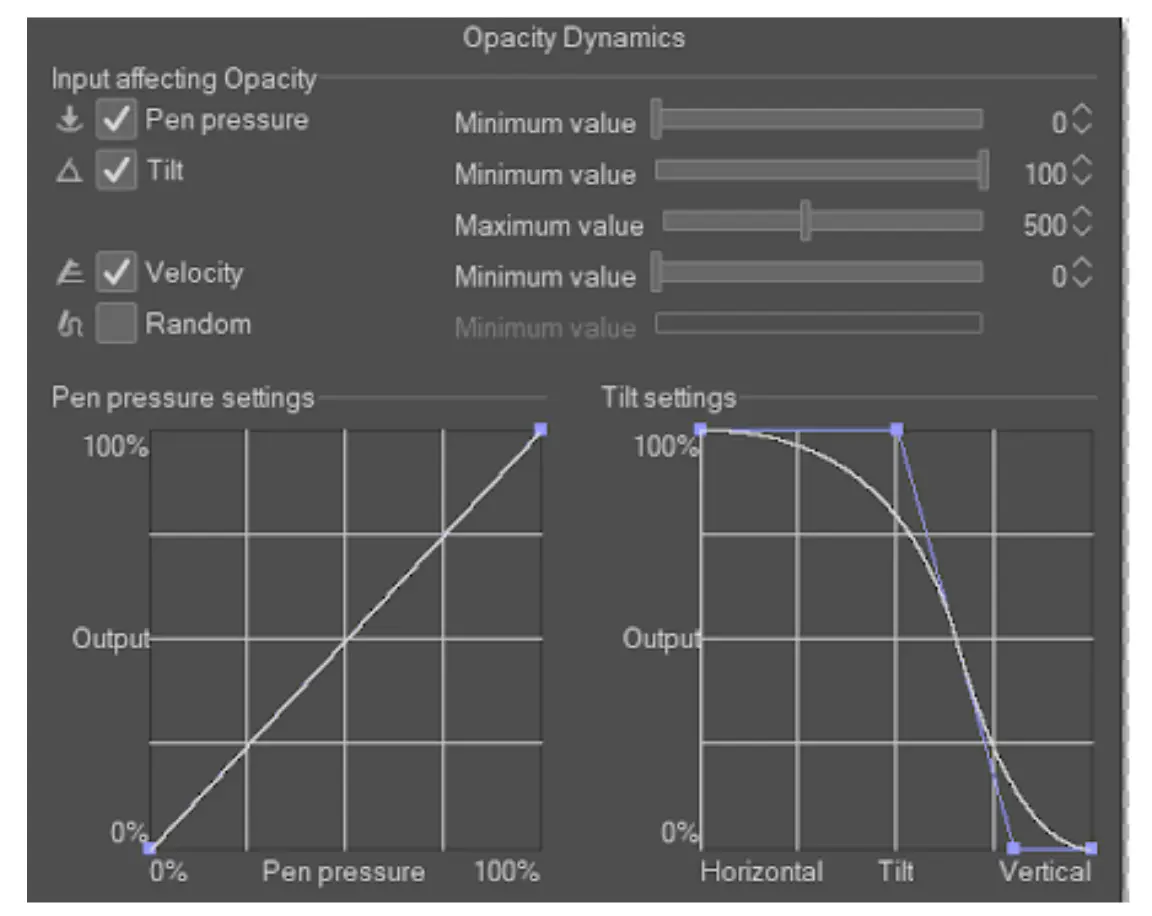
Also, in the same menu, you can adjust the sensitivity of the pen size by adjusting the graph curve.
By default, the pen-pressure curve is at low sensitivity, which means size increases fairly as pressure applied increases. If the default setting is not sensitive enough for you, you can adjust the curve according to the guide below.
- Tip: you can experiment with this curve by customizing it to suit your style better. Clicking the curve will add a point while dragging a point out of the curve will delete it.
For the tilt settings, the default is a mirrored “S” shape curve (vertical tilt gives smaller pen size, horizontal tilt gives larger pen size)
To customize this setting, follow the curve guide below or experiment it yourself to suit your style
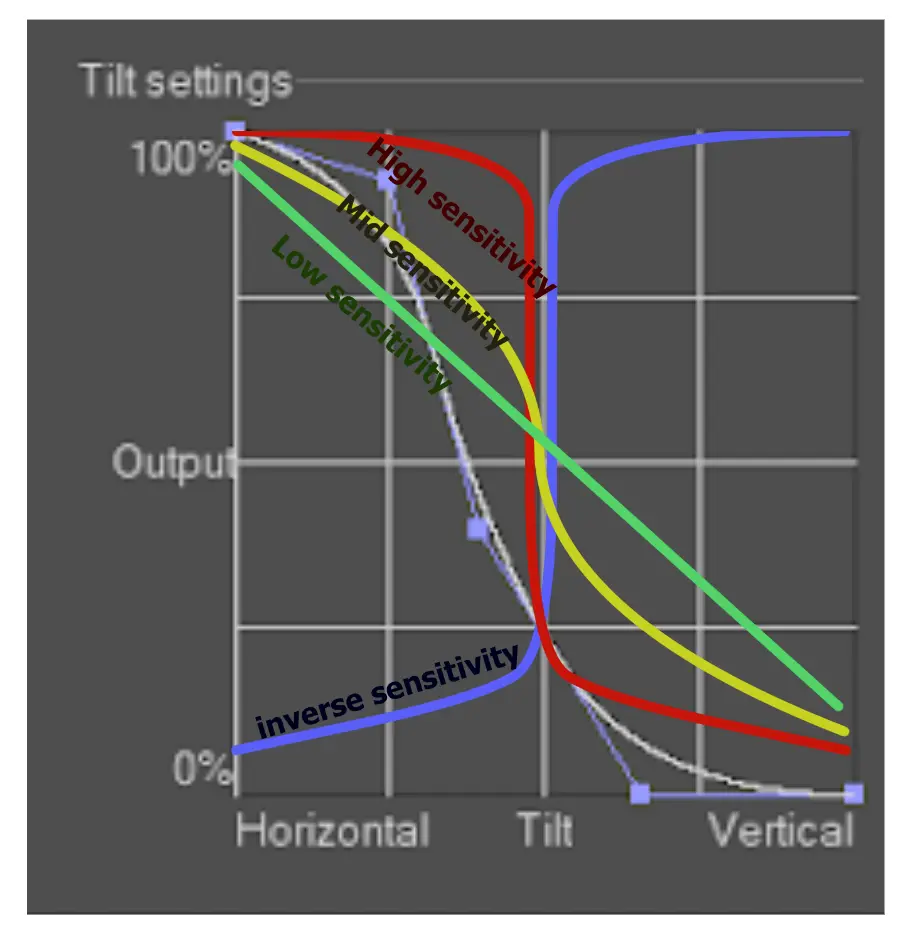
- Tip: “inverse sensitivity” reverses the pen size change (vertical tilt gives larger pen size, horizontal tilt gives smaller pen size)
You can also adjust the slider values for each parameter. To visualize how it will affect the pen size, refer to the shape of the stroke as you slide the values.
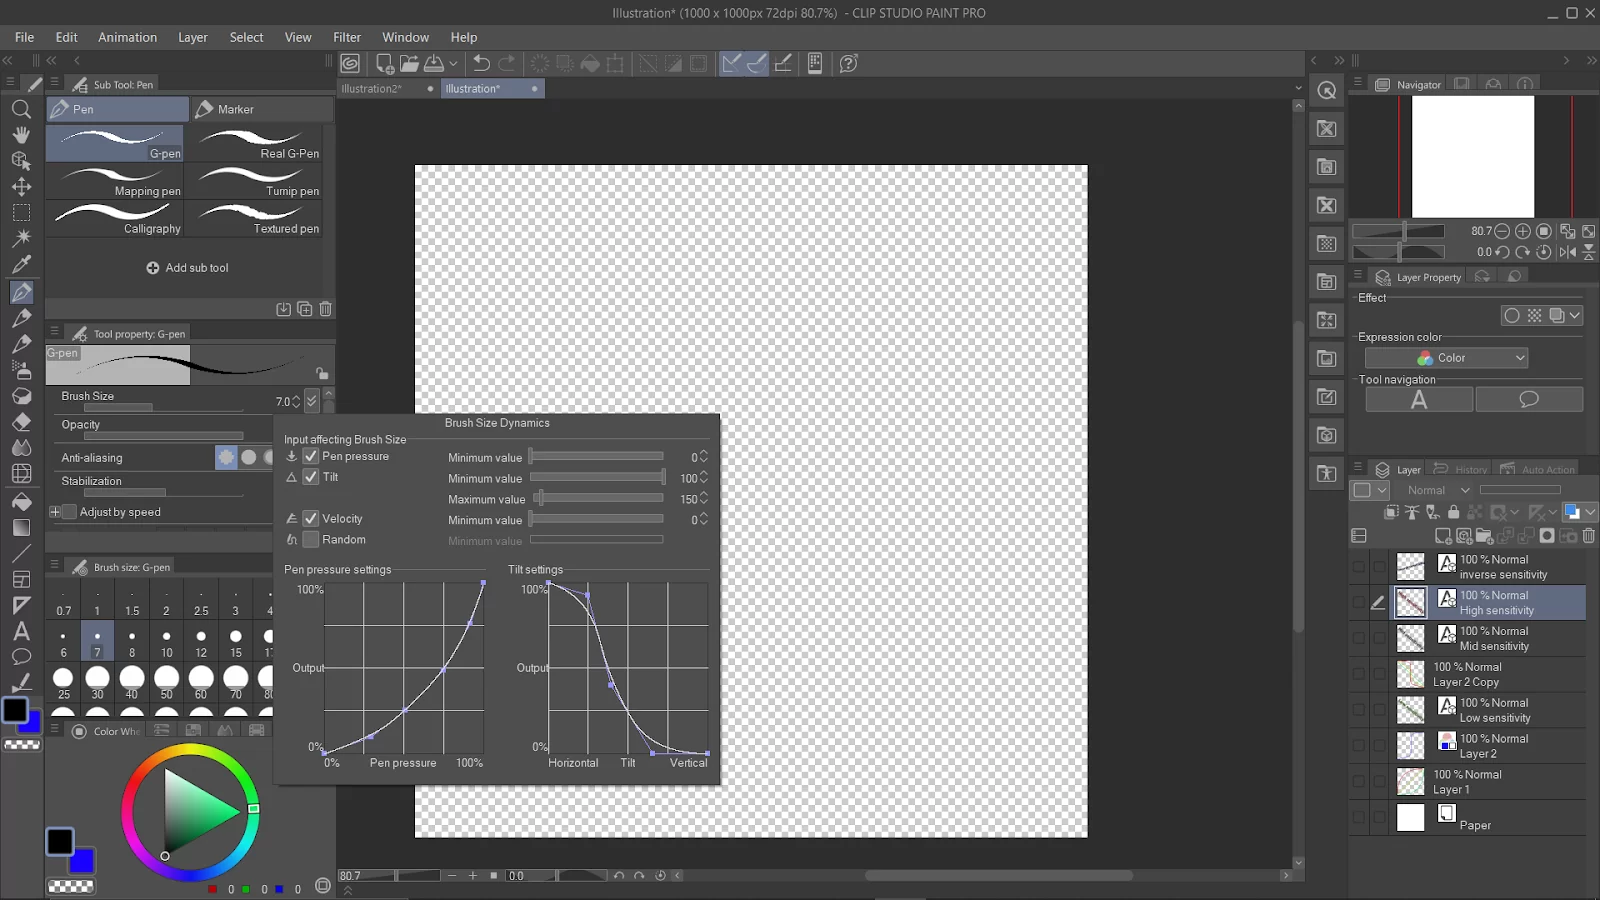
Once you are satisfied with your settings, click anywhere outside of the menu.
You can repeat steps 1 through 6 to adjust pen pressure for opacity

Same as before but this time, opacity of the pen ink depends on:
- Pen pressure – the pressure applied onto your tablet screen
- Tilt – the tilting/orientation of your pen
- Velocity – the speed of your pen strokes
For random, it will randomize the opacity regardless of the applied pressure, also useful for abstract art
The opacity curves also follow the same rules as pen size curves. You may adjust them to suit your style.
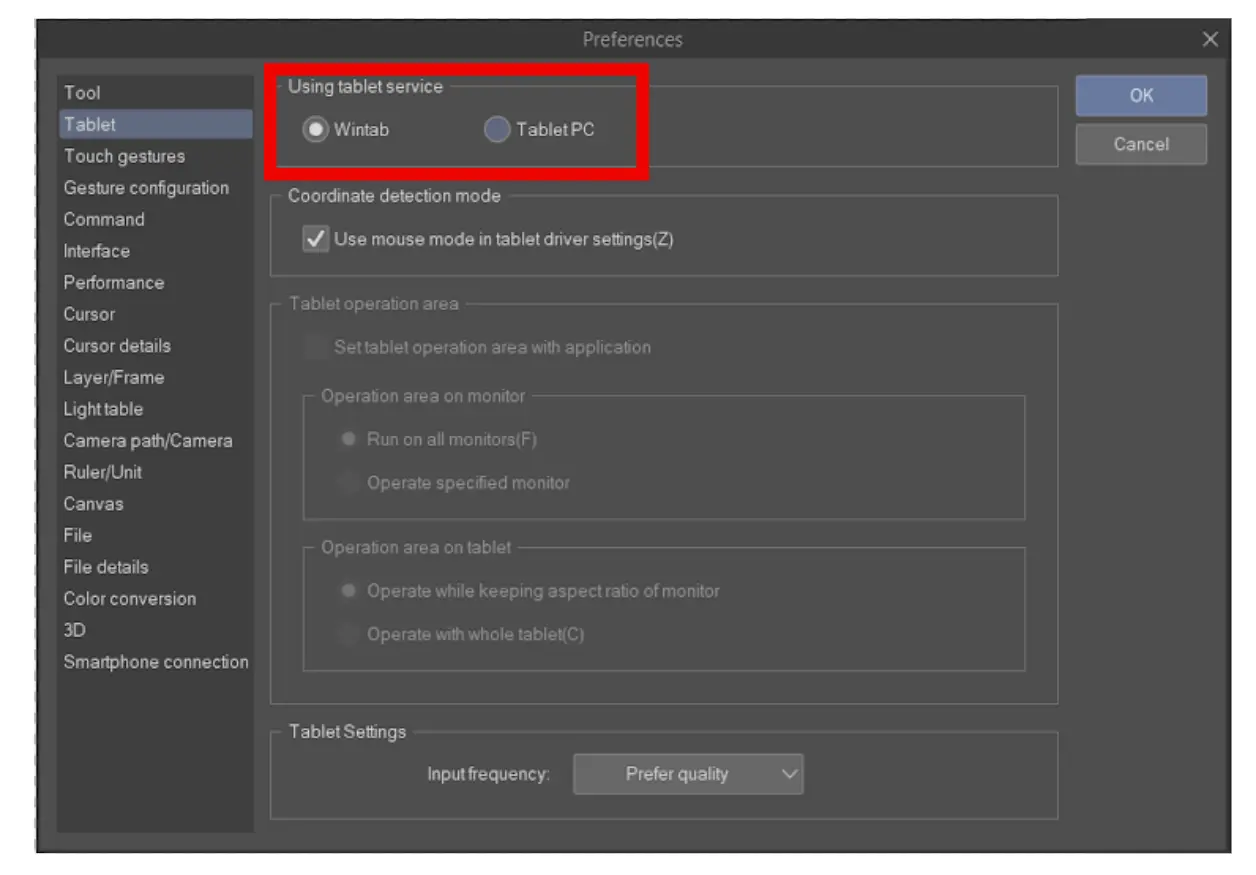
(OPTIONAL) If your pen pressure settings does not work, go to “File”, “preferences”, and select “Tablet”
In the “using tablet service” section, choose between Wintab or Tablet PC, and select “okay”
How To Fix Pen Pressure Not Working in Clip Studio Paint
If your pen pressure isn’t working, there are a few things you can do to remedy it. Start by checking to see if it’s a hardware or software problem.
You can also check if you need to update your Clip Studio Paint app.
You can download other software such as Krita or Medibang to check if the Pen Pressure is working fine on it. The use of any of the aforementioned apps indicates that the issue is not a hardware one with your pen tablet or pen display. The next thing you can do to fix issues with your pen pressure is by changing the preferences for WinTab.
To do this, go to menu>file>Preferences to open the preferences box. From there choose Tablet from the list of tabs. Now you need to go to Using tablet service and toggle between the two options Wintab and Tablet PC, then test for pen pressure. By now your pen pressure should be working. You don’t need to change other settings further down the dialog box.
You can also check out our guide on how to import brushes in Clip Studio Paint.
So, what is WinTab? WinTab is meant for pen tablets and pen displays that connect to a computer. On the other hand, Windows tablets are meant for Windows tablets or laptops that are convertible. There are many times when windows won’t know which driver to use so it will use the wrong driver. If you toggle between Wintab and Tablet PC, you can get pressure to work.
Finally, you can check window ink. You can try toggling windows links on and off. If you toggle the windows link on and off, toggle between Wintab and Tablet PC again. The Windows Ink option under Pen Settings should be present in the majority of drivers for pen tablets and pen displays. Drivers from companies like Huion, XP-Pen, Gaomon, Veikk, Artisul, Ugee, Parblo, Bosto, and others also have the windows ink option.
If you enjoyed reading this article, you will also like our in-depth guide on how to import a picture in Clip Studio Paint.