Clip Studio Paint makes it easy to incorporate your own images into your work. As an art enthusiast myself, I’m excited to share with you my tips and tricks for adding pictures to CSP creations. I’ll guide you through the process step by step so that you can achieve a beautifully customized digital art piece. So let’s dive in and unleash your creativity.
How to Put a Picture in CSP
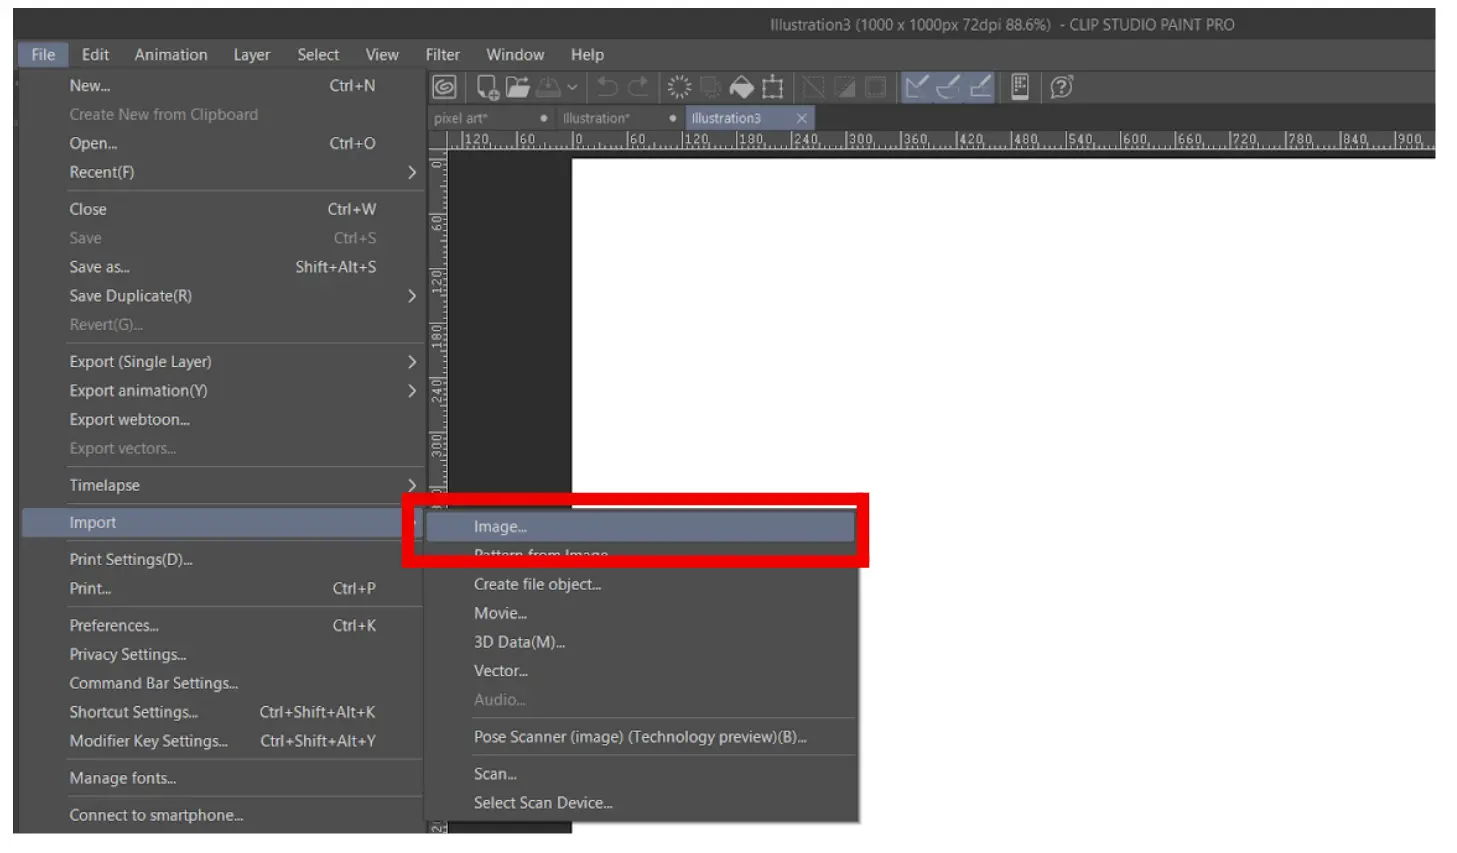
Go to “file,” ‘Import,” and click “image.”
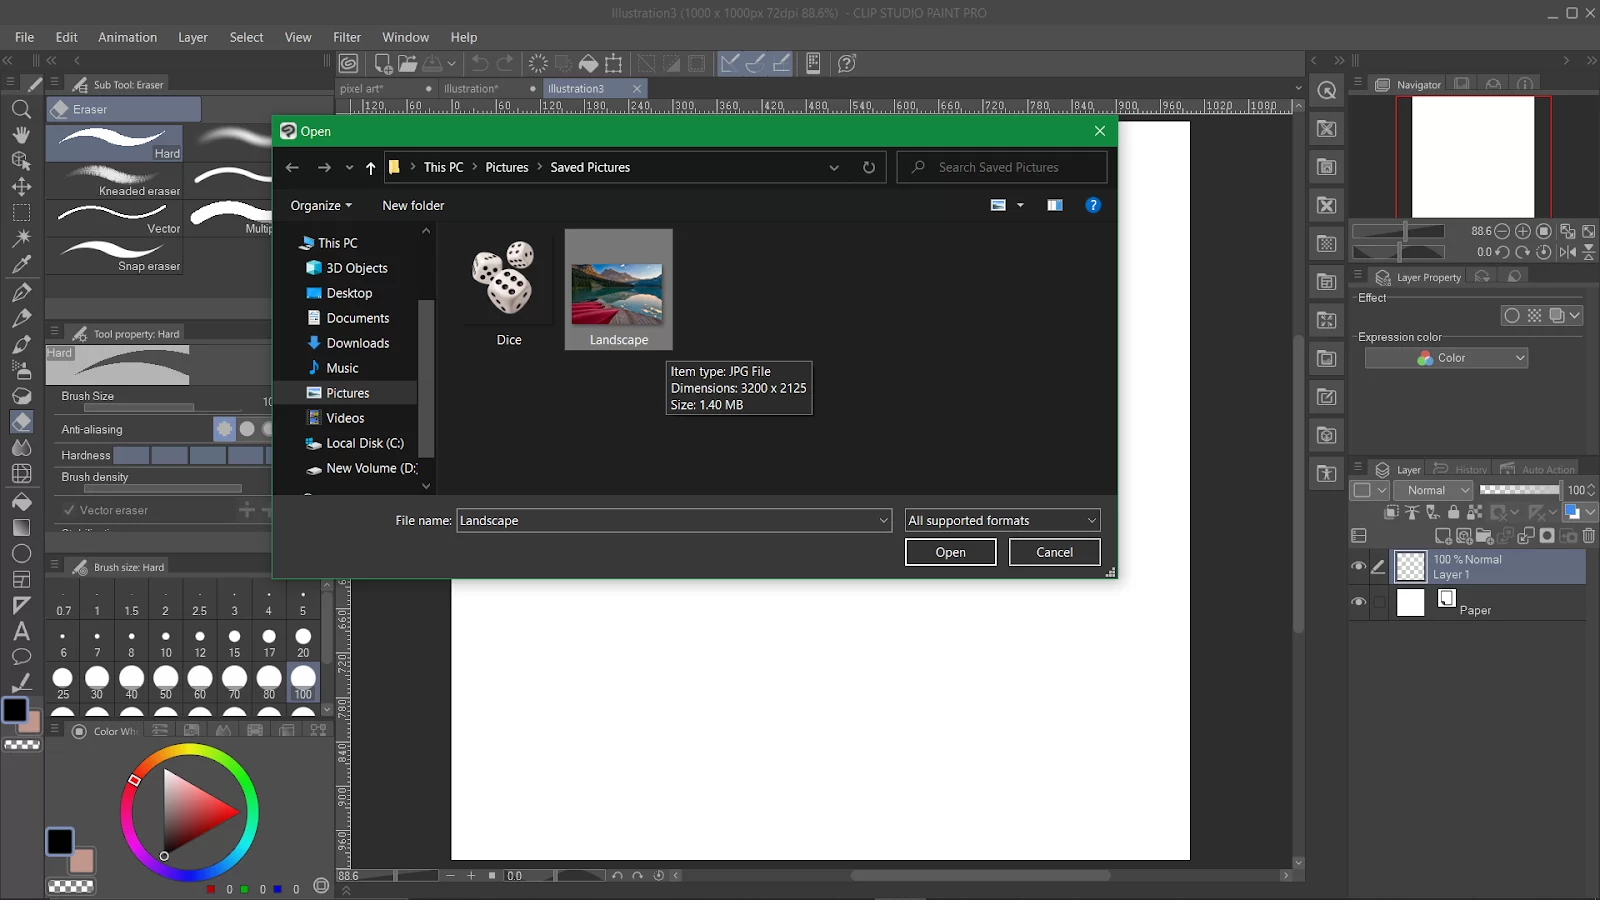
Go to the folder of the picture. Select the picture and click “open.”
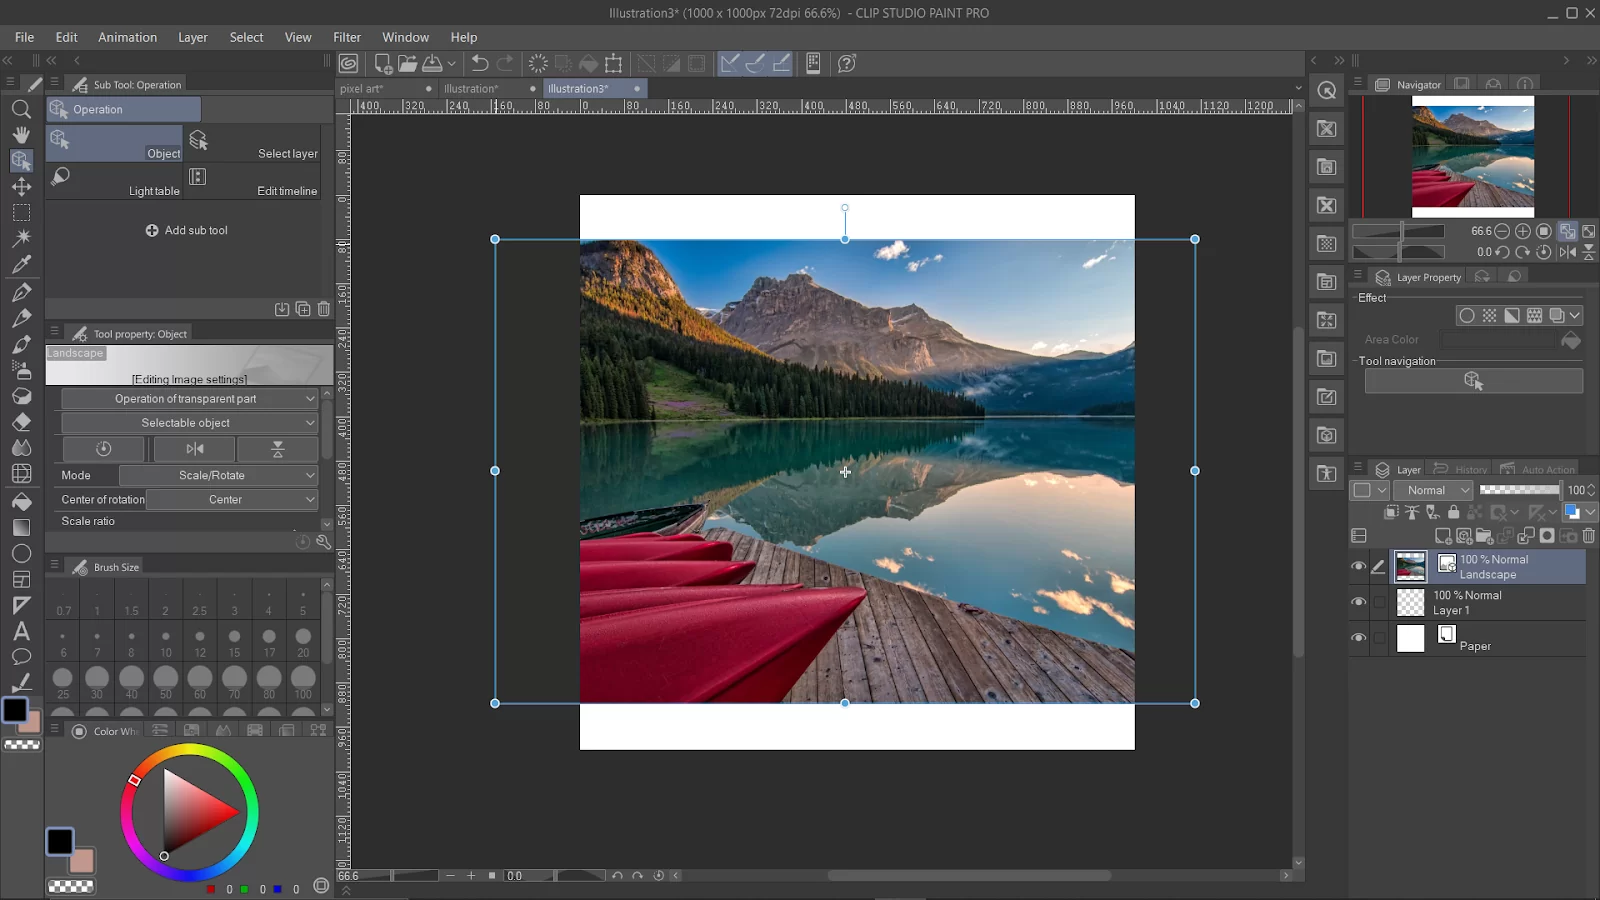
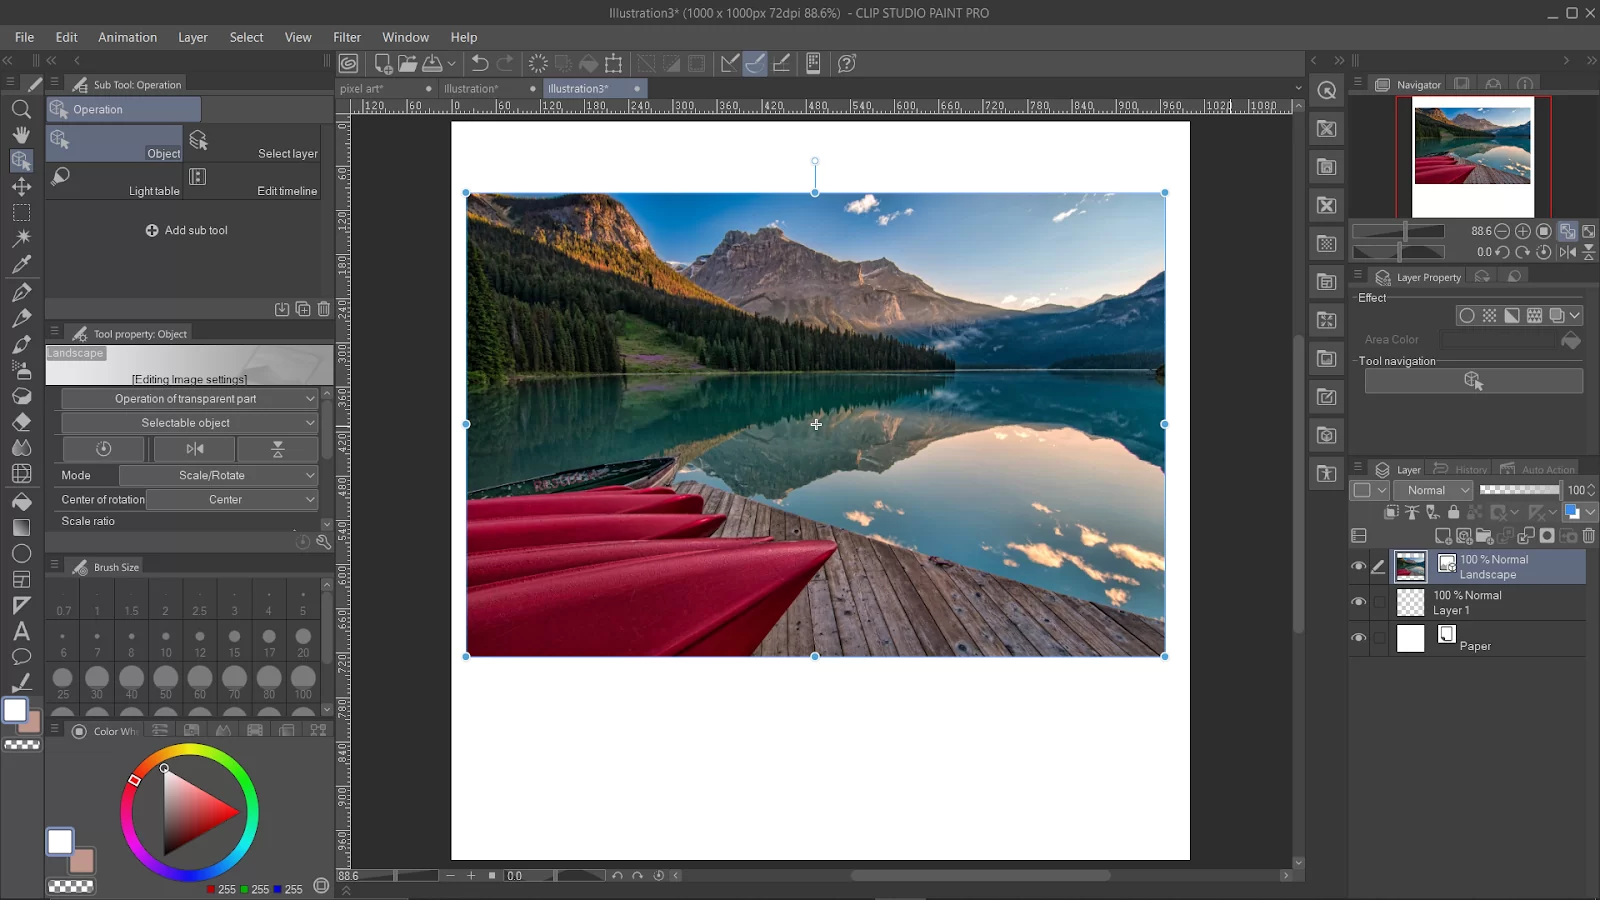
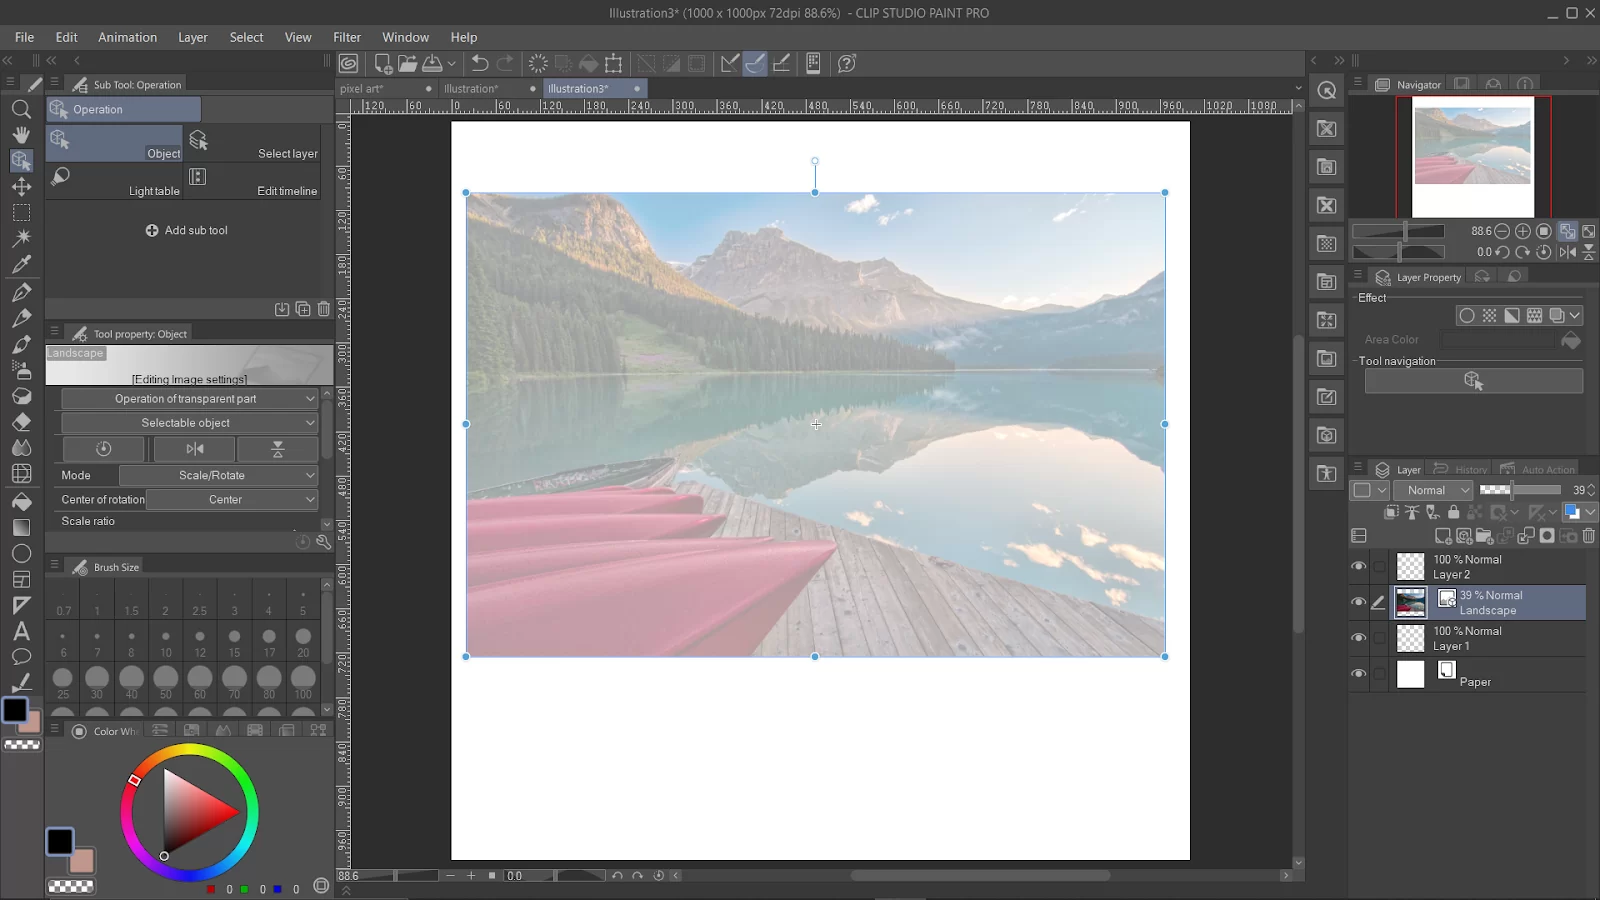
The picture will be inserted as a vector layer, and the size may be larger or smaller than your canvas size. To fit into the canvas without changing its proportions, press and hold the shift key, and drag the corner of the picture.
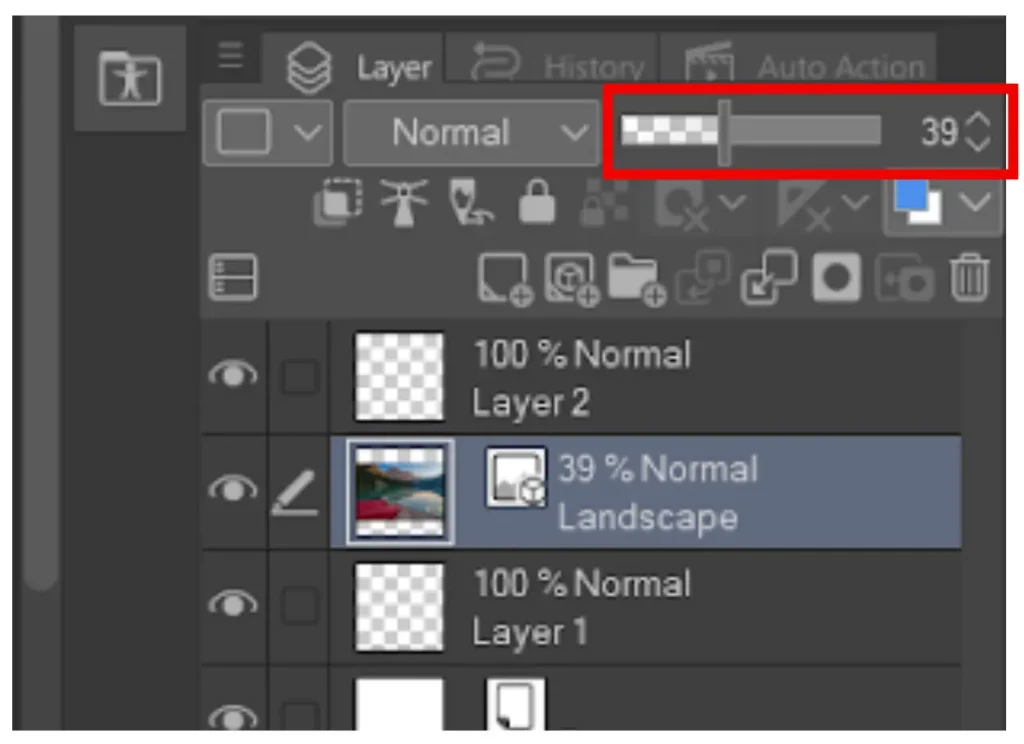
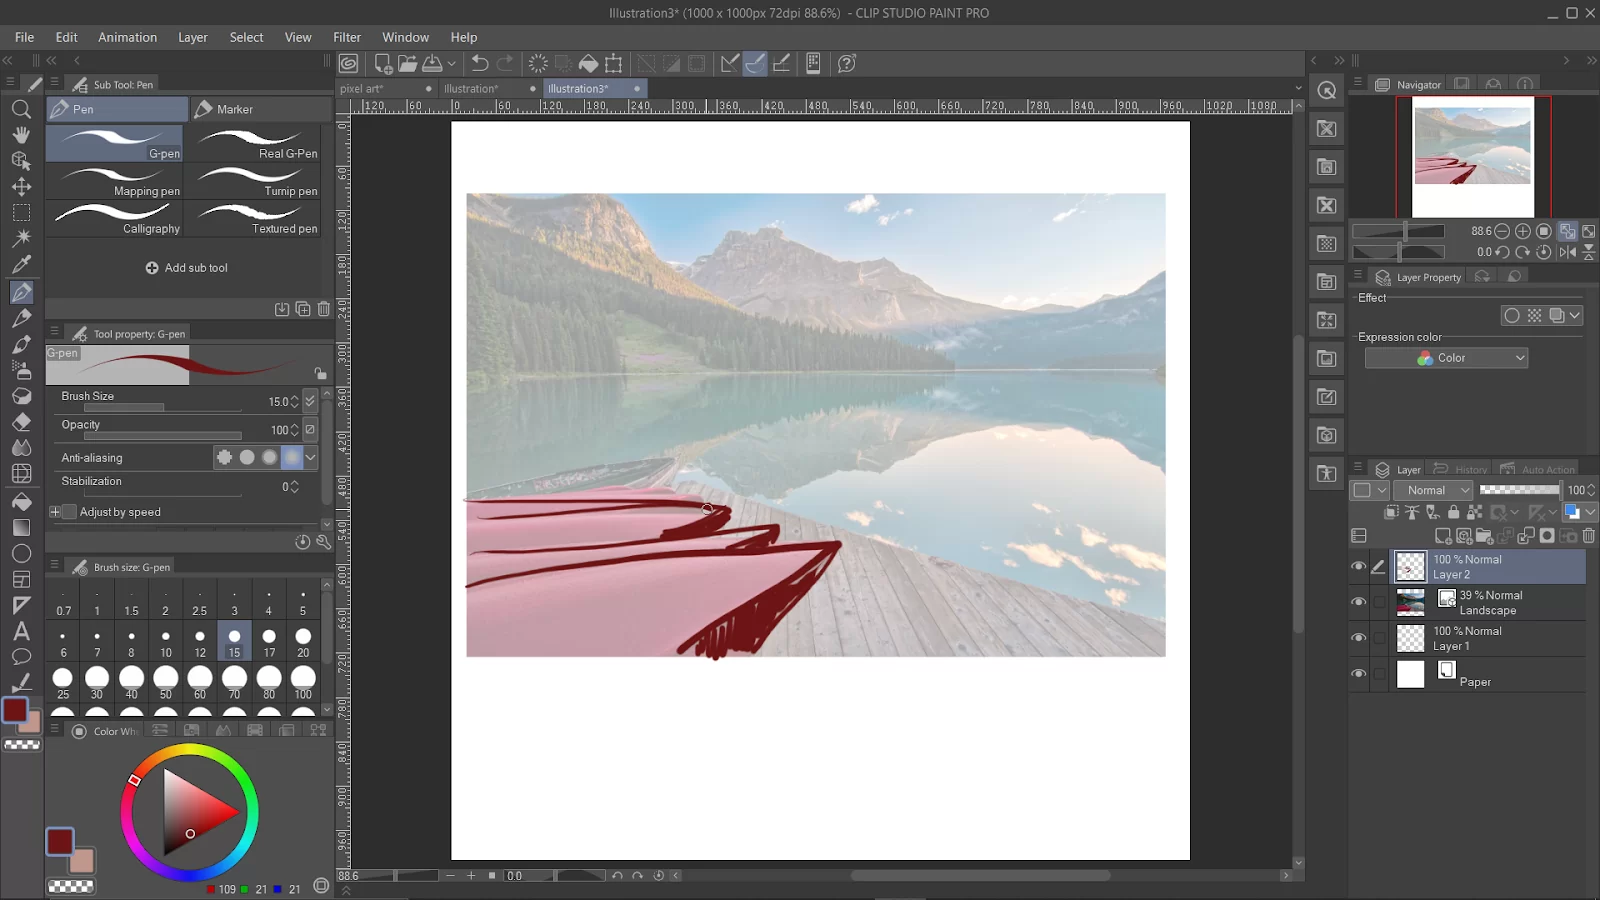
If you are using the picture as a reference, you can tone down the opacity, create a new layer and draw on it.
You can also check out our in-depth article on how to make pixel art in Clip Studio Paint.
All done!
How to Import Images Using iPad
Follow these steps to import images into Clip Studio Paint using an iPad.
Step 1
Start by opening up the Clip Studio Paint app. Make sure that you aren’t creating any canvas, then exit to the home screen of the iPad. Ensure that the photo library icon is in the app launcher.
Step 2
Now double-tap the home button. After that, hold and drag the photos library icon over the Clip Studio Paint app. Next, hold the icon until the screen blinks, and then place the photo app opposite the Clip Studio Paint app.
Step 3
Using the photo app, drag any photo that you want to open and drop it on the Pallete.
You can also read our guide on how to turn on symmetry lines in Clip Studio Paint.
How to Import Reference Images
Start by choosing a good image from the web and proceed to save the image to my files. Next, go into clip studio paint and go to File > Import > image. Now choose the image you want to use for your reference and open it. It should open up on your canvas.
When the image is on the page, move it around and make it your preferred size. You are also allowed to lower the opacity of the image layer.
Allow me to show you a second method. You may be wondering why there is a second method. This is because the first method can often lead to an overcrowded canvas. However, using this method, you can separate the references and the canvas so that you can have as much room as possible. Just go to windows>sub view.
You can now use your subview! You are allowed to move and resize it wherever you see fit. Simply click on the little file icon and select the image you want to import into it. You can switch between references by clicking the tiny arrows if you import many references.
If you liked reading this guide, we recommend seeing our step-by-step guide on changing hue in Clip Studio Paint.