As an intermediate user of Clip Studio Paint, I can attest to the versatility and robustness of this digital art software. It has become my go-to tool for creating dynamic illustrations and animations. One of the features that sets Clip Studio Paint apart from other digital art software is its support for 3D models.
Using 3D models in Clip Studio Paint can add an extra level of depth and realism to your illustrations and animations, bringing your characters and scenes to life. In my experience, incorporating 3D models into my projects has allowed me to create more dynamic compositions and add a greater level of detail to my illustrations.
In this guide, I will share my experience and knowledge on how to effectively use 3D models in Clip Studio Paint, providing tips and tricks to help you bring your artwork to the next level.
How To Use 3D Models in Clip Studio Paint
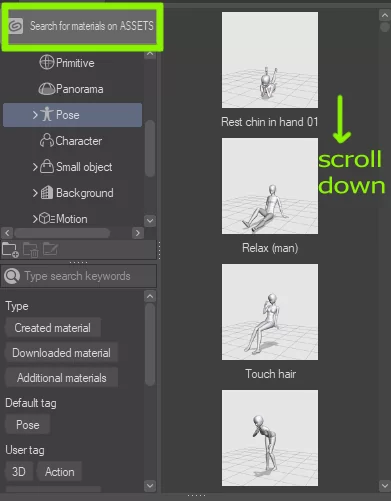
- Select [Material], and click [3D]. Drop the 3D model on the canvas. For example, I use the basic standing pose of females.
![click [3D] à Drop the 3D model](https://techloungesp.com/wp-content/webp-express/webp-images/doc-root/wp-content/uploads/2023/01/image-40.png.webp)
- You can scroll down for another pose or download another pose on Clip Studio Assets.

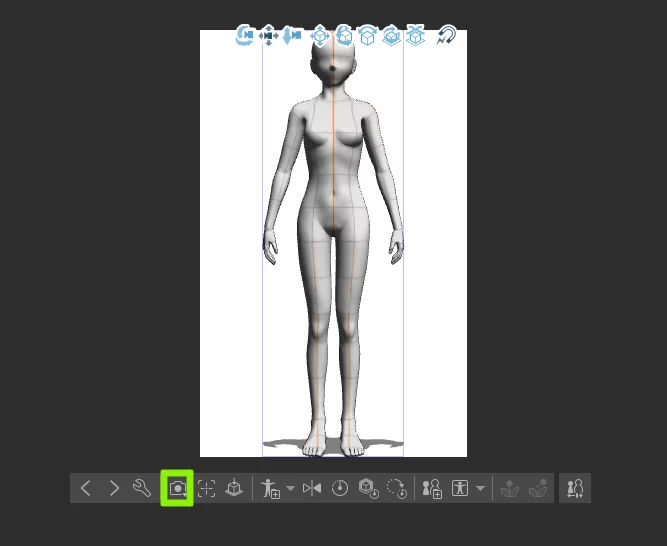
- The 3D model on canvas. Many tools to change the pose of the model. You can use [Specifiy camera angel from present].

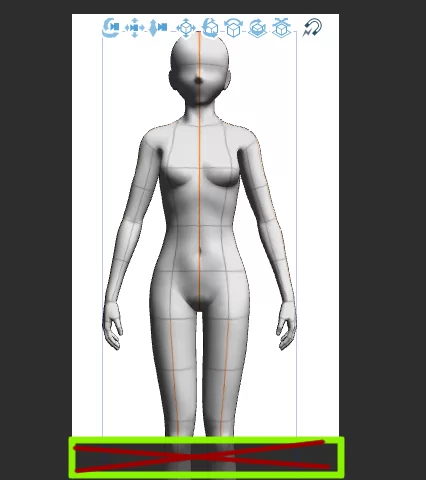
- For example, I use a 3D model that poses up to the knees. You can explore and be creative about this. You can use the camera tool to zoom in, zoom out, move, change angle position, and many more. To match the perspective with the background, you can check the grid underneath when you click the camera tool.

- The other part of the 3D model body willn’t look on the canvas.

- Click the offending limbs and use the color of the 3D line to move and change their position of them. Each line color corresponds to a different direction of movement. You can also change the other position.

- If you want to explore the detail of the 3D model, you can click [Display object list]. For example, I change [3D drawing figure] to get specific height, head-to-body ratio, and other detail of limbs.

- After getting the pose that you want, you can change the layer opacity to lower.

- Create a new layer and draw your characters! Make the sketch, line, base color, etc.

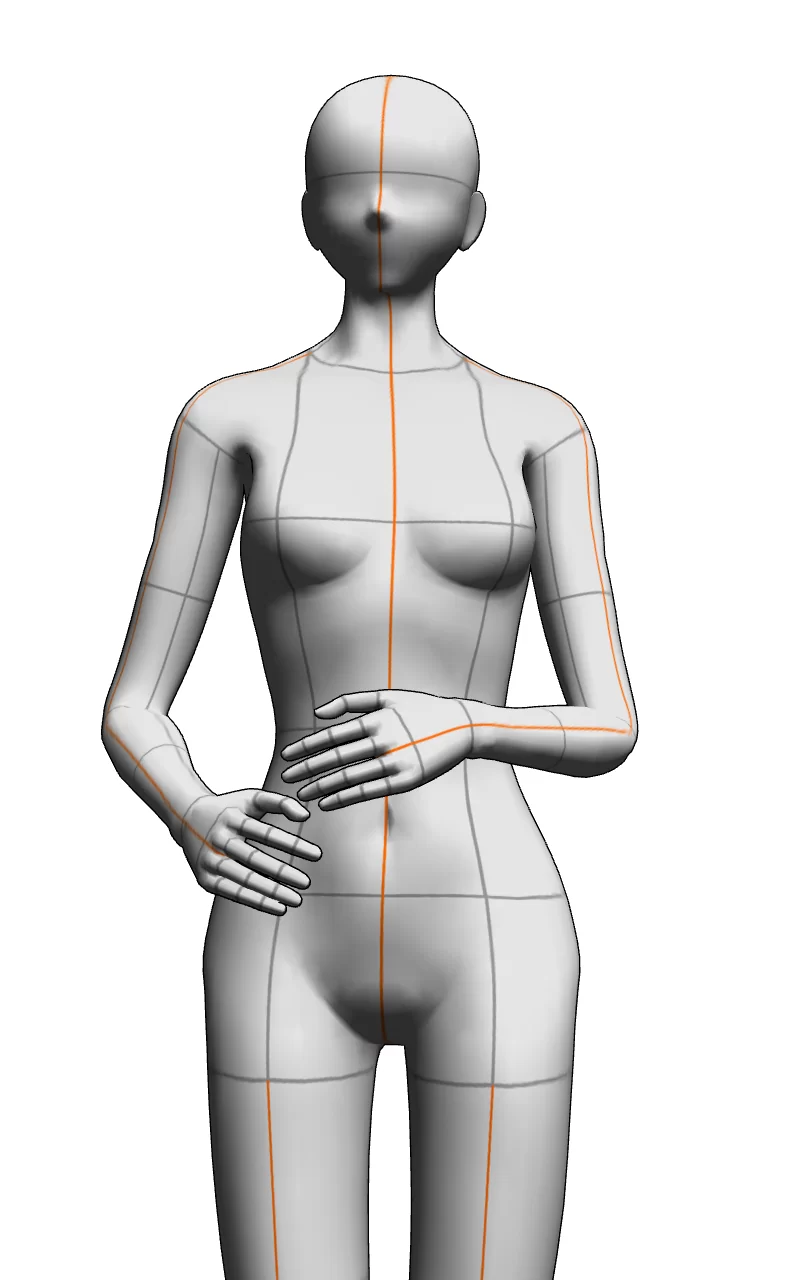
- And this! Maybe it’s a little bit different cause of this progress. I change the position of the hand.


How to Import 3D Materials in Clip Studio Paint
Follow the steps below to import 3D material in Clip Studio Paint.
Step 1
Start by going to Select [File] menu > [Import] > [3D data.
Step 2
Now go to the displayed dialog box and select the 3D file to be added. When you are done, click Open.
Step 3
By this third step, the 3D file is imported to the Canvas, and a 3D layer should be added to the Layer palette.
We also recommend that you check our in-depth guide on how to crop in Clip Studio Paint.
What is Clip Studio Modeler?
If you wish to put up 3D materials that you will use in Clip Studio Paint, then you need to use Clip Studio Modeler. 3D models created using other programs can be imported and set up as materials in Clip Studio Paint. The Clip Studio Modeler must be used to transform 3D models into materials before they can be published for usage with Clip Studio Paint on Clip Studio Assets.
Why is 3D Modeling Important?
3D modeling comes with a lot of benefits. 3D modeling has become a very big part of art all over the world. Below are some of the best things about 3D modeling.
- Detail and Accuracy
People can build any shape they can imagine using 3D models. 3D models allow people to build these shapes while still maintaining production capabilities, which makes it easier to realize visions. Modern 3D modeling offers a level of design depth that is impossible with rough sketches or 2D designs. Additionally, it enables engineers to investigate the physical elements of a design without giving in to physical constraints.
In terms of teamwork, minute details make it simpler to communicate the nuances of a certain design across the teams. Design teams no longer work in isolation as they have no trouble interacting with other teams and key stakeholders. To successfully defend a design, all necessary components must be present in the schematic. Teams can add additional information to 3D models, which keeps everyone on the same page.
- Ease of Use
A click, pick, or toggle is typically all that is needed to quickly apply a variety of modifications to each iteration in 3D design. The user can see these modifications from all angles thanks to the enhanced visualization provided by 3D modeling. This makes it simple to confirm physical changes and functional adjustments and improve aesthetics. While making traditional designs is laborious and takes longer, 3D modeling enables the creation of more modern designs in a quick time. Leading 3D design platforms such as Clip Studio Paint provide outstanding user-friendliness, lowering the learning curve.
If you liked reading this article, you will also enjoy our step-by-step guide on how to change hue in Clip Studio Paint.